React Native で Matter.js を使って物理演算 その2
前回の続きです。
もう少し軽くしたい
前回のサンプルでは Animated 等は使用せずにひたすらリフレッシュを繰り返すような表示を行っていたこともあり、20個くらいの View を表示したあたりから徐々に動作が重くなっていきました。
一番重いのは Matter.js による物理演算なのですがそれに関してはどうしようもないので、それ以外の観点で View の数を減らしてレンダリングの軽量化を目指したいと思います。
Matter の Body を Skia + Reanimated で表示する
View の数を減らすために表示に Skia を使用してみたいと思います。また物理演算後の View の更新処理は Reanimated を使用します。
npx expo install @shopify/react-native-skia
npx expo install react-native-reanimated
Matter.js の初期化
前回とは少し異なり物理演算結果の反映は Reanimated にお任せする予定なので、ボールが追加もしくは削除された時のみ画面を更新します。
import { useCallback, useEffect, useState } from 'react';
import { Dimensions } from 'react-native';
import { Canvas } from '@shopify/react-native-skia';
import Matter from 'matter-js';

const width = Dimensions.get('window').width;
const height = Dimensions.get('window').height;

// 物理演算エンジン
const engine = Matter.Engine.create();
// 更新処理
const runner = Matter.Runner.create();
// オブジェクト管理用コンテナ
const ballComposite = Matter.Composite.create();
Matter.Composite.add(engine.world, ballComposite);
// 辺り判定用オブジェクト
Matter.Composite.add(engine.world, [
  // 床オブジェクト
  Matter.Bodies.rectangle(width / 2, height - 50, width, 50, { isStatic: true }),
  // 領域外判定用オブジェクト
  Matter.Bodies.rectangle(width / 2, height + 100, width * 10, 10, { isStatic: true, label: 'outarea' }),
]);

export default function App() {
  const [balls, setBalls] = useState();

  // ボールを1つ ballComposite に追加する
  const addCircle = useCallback(() => {
    const x = width / 2 + (Math.random() - 0.5);
    const y = height / 4;
    const radius = 20;
    const circle = Matter.Bodies.circle(x, y, radius);
    Matter.Composite.add(ballComposite, circle);
  }, []);

  // ballComposite 内のボールを取得し表示する
  const updateBody = useCallback(() => {
    // TODO ボール更新
    // setBalls(...)
  }, []);

  useEffect(() => {
    // ボールが追加された、もしくは削除(後ほど実装)された場合更新
    Matter.Events.on(ballComposite, 'afterAdd', updateBody);
    Matter.Events.on(ballComposite, 'afterRemove', updateBody);
    Matter.Runner.run(runner, engine);
    return () => {
      Matter.Runner.stop(runner);
      Matter.Events.off(ballComposite, 'afterRemove', updateBody);
      Matter.Events.off(ballComposite, 'afterAdd', updateBody);
    };
  }, []);

  return (
    <View style={styles.container}>
      <Canvas style={styles.canvas}>
        {balls}
      </Canvas>
      <Button onPress={addCircle} title="addCircle" />
    </View>
  );
}
Skia 上にボールを表示
Body の情報を元に Skia 上に Circle を表示していきます。
Matter の Body は表示に関する情報を render に格納しているため、表示する View を render.component に持たせます。(サンプルでコード書く時このJSのゆるい感じに助けられています)
- import { Canvas } from '@shopify/react-native-skia';
+ import { Canvas, Circle, Group, Line, vec } from '@shopify/react-native-skia';
+ import { useDerivedValue, useSharedValue } from 'react-native-reanimated';

export default function App() {
    ・・・
    const addCircle = useCallback(() => {
      ・・・
      const circle = Matter.Bodies.circle(x, y, radius);
+     circle.render.component = <Ball key={body.id} body={circle} />
      Matter.Composite.add(ballComposite, circle);
    }, []);

    const updateBody = useCallback(() => {
-     // TODO ボール更新
-     // setBalls(...)
+     setBalls(Matter.Composite.allBodies(ballComposite).map(ball => ball.render.component))
    }, []);
    ・・・
}

+ const Ball = ({ body }) => {
+   const part = body.parts[0];
+   const x = part.position.x;
+   const y = part.position.y;
+   const angle = part.angle;
+   const size = part.circleRadius;
+   const color = part.render.fillStyle;
+
+   const pos = useSharedValue({ x, y, angle });
+
+   const transform = useDerivedValue(() => {
+     return [
+       { translateX: pos.value.x },
+       { translateY: pos.value.y },
+       { rotateZ: pos.value.angle }
+     ]
+   });
+
+   return (
+     <Group transform={transform}>
+       <Circle r={size} color={color} />
+       <Line p1={vec(0, 0)} p2={vec(size, 0)} color="#888" style="stroke" strokeWidth={1} />
+     </Group>
+   )
+ }
表示・アニメーション対応
現状まだ画面上に丸が固定で表示されるだけなので、物理演算の計算結果を画面上に反映されるようにリフレッシュの処理を追加していきます。
物理エンジンの更新イベント afterUpdate が発生したら、各ボールオブジェクトに対して独自のイベント renderUpdate を送信します。
ボールの方も renderUpdate イベントを受信するようにしておきます。イベントを受け取ったら現在の位置情報で Reanimated の SharedValue を更新します。
export default function App() {
    ・・・
+   const renderUpdater = useCallback(() => {
+     Matter.Composite.allBodies(ballComposite).forEach(ball => {
+       Matter.Events.trigger(ball, "renderUpdate", {});
+     });
+   }, []);
    ・・・
    useEffect(() => {
+     Matter.Events.on(engine, 'afterUpdate', renderUpdater);
      return () => {
+       Matter.Events.off(engine, 'afterUpdate', renderUpdater);
      };
    }, []);
    ・・・
}

const Ball = ({ body }) => {
    ・・・
+  const updater = useCallback(() => {
+    const part = body.parts[0];
+    pos.value = {
+      x: part.position.x,
+      y: part.position.y,
+      angle: part.angle
+    };
+  }, []);
+
+  useEffect(() => {
+    Matter.Events.on(body, "renderUpdate", updater);
+    return () => Matter.Events.off(body, "renderUpdate", updater);
+  }, []);
    ・・・
}
領域外になったオブジェクトを削除
前回同様に領域外になったオブジェクトを削除していきます。
export default function App() {
    ・・・
+   const collision = useCallback((event) => {
+     if (!event.pairs) {
+       return
+     }
+     event.pairs.forEach(pair => {
+       if (pair.bodyA.label == 'outarea') {
+         Matter.Composite.remove(ballComposite, pair.bodyB)
+       }
+     })
+   }, []);
    ・・・
    useEffect(() => {
+     Matter.Events.on(engine, 'collisionStart', collision);
      return () => {
+       Matter.Events.off(engine, 'collisionStart', collision);
      };
    }, []);
    ・・・
}
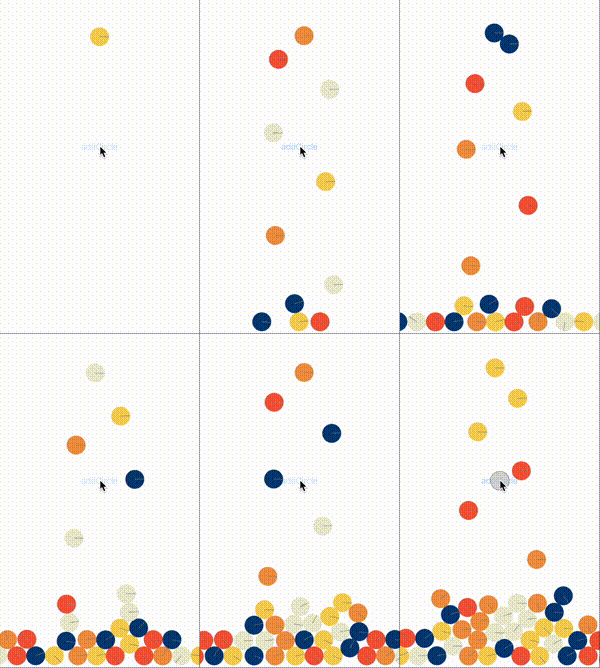
無事 Skia でも表示することができました😃
物理エンジンの処理負荷はありますが、前回のバージョンよりもボールの数を増やした時のカクツキがだいぶ軽減されたように感じます。

タップ操作に対応させてみる
今のままだとボールを追加したら後は物理演算に任せっぱなしで転がるボールを眺めることしかできないため画面上でボールを動かせるようにしていきたいと思います。
Matter.js には Mouse というモジュールがあり、これを使用することでブラウザ上のマウスイベントを物理エンジン内に反映させることができるようです。
しかし Mouse の実装はブラウザ環境に依存しているため React Native 環境内では使用できなさそうなので、独自の Mouse を作成していきたいと思います。
Matter.js の Mouse のコードを確認していきますが
どちらかというと Mouse のイベントを読み取る MouseConstraint.js の方から必要なプロパティを洗い出します。
ざっくり確認したところ以下の値があれば動かせそうです。
const mouse = {
  // イベントが発生している現在の座標
  position: {
    x: 0,
    y: 0,
  },
  // ボタンの種類(-1:無し、0〜:押されているボタンの種類)
  // https://developer.mozilla.org/ja/docs/Web/API/MouseEvent/button
  button: -1,
  // マウスイベントコールバック用のイベントオブジェクト
  sourceEvents: {
    mousemove: null,
    mousedown: null,
    mouseup: null
  }
}
タップイベントを処理するために react-native-gesture-handler を追加します。
npx expo install react-native-gesture-handler
独自の Mouse を実装していきます。Gesture Handler のイベントをひたすら mouse に上書きしていくというシンプルな実装です。
更新された mouse の読み取りは MouseConstraint 内で定期的に行ってくれているようです。
- import { useCallback, useEffect, useState } from 'react';
+ import { useCallback, useEffect, useMemo, useState } from 'react';
+ import { Gesture } from 'react-native-gesture-handler';

export default function App() {
+  const [mouse, onDown, onUp, onMove] = useMemo(() => {
+    const mouse = {
+      position: {
+        x: 0, y: 0,
+      },
+      button: -1,
+      sourceEvents: {
+        mousemove: null,
+        mousedown: null,
+        mouseup: null
+      }
+    };
+    const onDown = (e) => {
+      mouse.position.x = e.changedTouches[0].x
+      mouse.position.y = e.changedTouches[0].y
+      mouse.button = 0
+      mouse.sourceEvents.mousedown = e.changedTouches[0];
+    };
+    const onUp = (e) => {
+      mouse.position.x = e.changedTouches[0].x
+      mouse.position.y = e.changedTouches[0].y
+      mouse.button = -1
+      mouse.sourceEvents.mouseup = e.changedTouches[0];
+    }
+    const onMove = (e) => {
+      mouse.position.x = e.changedTouches[0].x
+      mouse.position.y = e.changedTouches[0].y
+      mouse.button = 0
+      mouse.sourceEvents.mousemove = e.changedTouches[0];
+    }
+    return [mouse, onDown, onUp, onMove]
+  }, []);
+  const mouseConstraint = Matter.MouseConstraint.create(engine, { mouse });
+  Matter.Composite.add(engine.world, mouseConstraint);
+
+  const gesture = Gesture.Pan()
+    .onTouchesDown(onDown)
+    .onTouchesUp(onUp)
+    .onTouchesMove(onMove);
    ・・・
}
あとは gesture を GestureDetector に登録します。Gesture Hnadler の使い方の説明は割愛します。
- import { Gesture } from 'react-native-gesture-handler';
+ import { Gesture, GestureDetector, GestureHandlerRootView } from 'react-native-gesture-handler';

export default function App() {
    ・・・
  return (
-   <View style={styles.container}>
+   <GestureHandlerRootView style={styles.container}>
+     <GestureDetector gesture={gesture}>
        <Canvas style={styles.canvas}>
          {balls}
        </Canvas>
+     </GestureDetector>
      <Button onPress={addCircle} title="addCircle" />
-   </View>
+   </GestureHandlerRootView>
  );
}
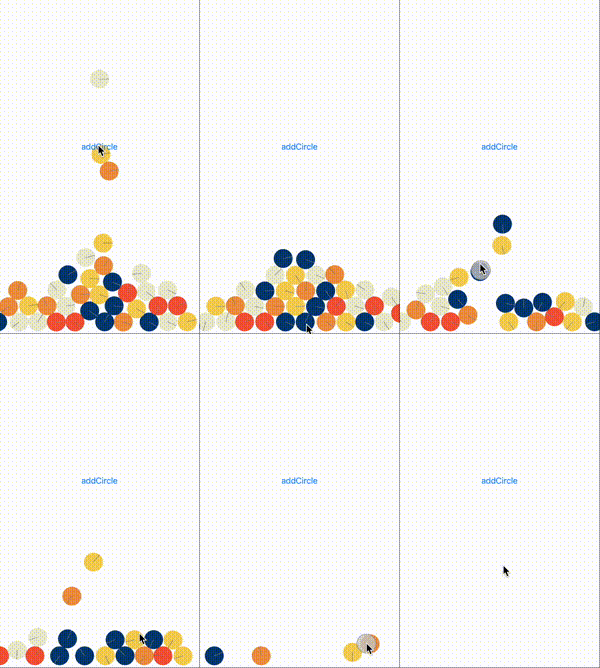
タップでボールを操作することができました🎉
タップされた状態を渡しているだけですが MouseConstraint が良い感じで処理してくれています。


Discussion