webアプリに3Dアバター(VRoid)を表示する方法
経緯
現在、対話型のAI webアプリを開発しているのですが、チャット形式のやり取りでは人間味がなく、話す気になれないとのフィードバックを多く寄せられました...
そこで、何かしら動くアバターを用意することで改善されないかということで、チャレンジしてみました!
今回使用するツールはVRoid Studioです。
目標
- アバターを表示すること
- アバターに発話させて、発話に合わせて口を動かす
環境および、使用ツール
- アバター作成:VRoid Studio
- 公開されたアバターダウンロード:VRoid hub
- webアプリケーション:Next.js
- アバターの音声:VOICEVOX(今回は説明しません)
手順
- アバターモデルの作成 or ダウンロード
- アバターモデルの表示
- 表示位置やポーズの調整
- 発話内容と口の動きのリンク
1. アバターモデルの作成 or ダウンロード
まずは、アバターモデルを用意します。
Vr\Roid Studioの公式サイトからアプリをインストールします。
VRoid Studioを自分のアバターを作成することができるツールです。自分でわざわざ作らなくてもいいという人はVroid hubでダウンロードするのでいいと思います。(自分はどんな感じで作れるのかちょっと興味があったので、試してみました)
直感的に操作が可能で、プリセットも豊富に用意されているのであまり3Dモデルとかについて詳しくなくても簡単に作成できます!
作成ができたらVRMモデルとしてエクスポートします。

誰かが作成したモデルで試してみたいという方はVRoid hubでモデルをダウンロードしましょう。
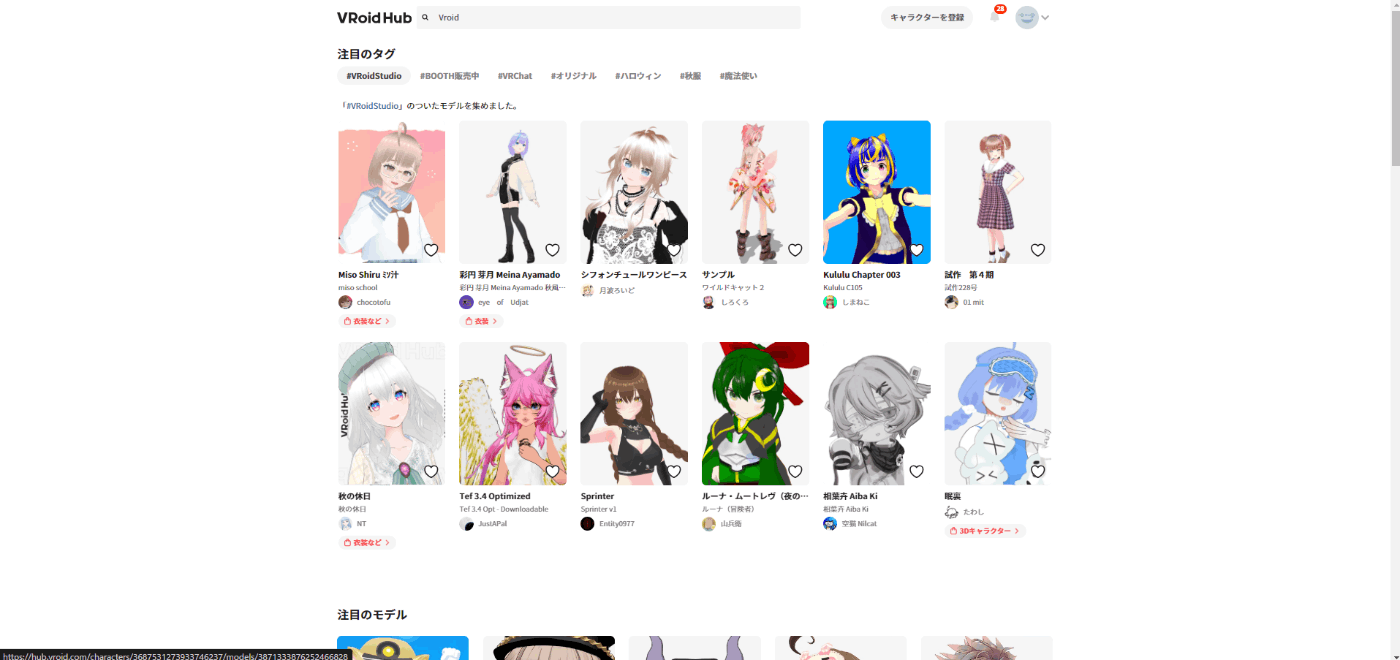
ただし、モデル毎によって利用条件が異なるので、しっかりと確認してから利用しましょう。
2. Next.jsアプリでのアバターモデルの表示
とりあえず、簡単な表示だけ実装
'use client';

import { useEffect, useRef } from 'react';
import * as THREE from 'three';
import { GLTFLoader } from 'three/examples/jsm/loaders/GLTFLoader.js';
// @ts-ignore
import { VRMLoaderPlugin } from '@pixiv/three-vrm';

export default function TestPage() {
  const containerRef = useRef<HTMLDivElement>(null);

  // 画面サイズを定数として定義
  const SCREEN_WIDTH = 800;
  const SCREEN_HEIGHT = 600;

  useEffect(() => {
    if (!containerRef.current) return;

    // Three.jsレンダラーの初期化
    // - antialiasを有効にして、エッジのギザギザを軽減
    // - alphaを有効にして、背景を透明に設定可能に
    const renderer = new THREE.WebGLRenderer({
      antialias: true,
      alpha: true
    });
    // 定数を使用
    renderer.setSize(SCREEN_WIDTH, SCREEN_HEIGHT);
    containerRef.current.appendChild(renderer.domElement);

    // シーンの設定
    const scene = new THREE.Scene();
    scene.background = new THREE.Color(0xf0f0f0);

    // 環境光の設定
    // - 全方向から均一に当たる光を追加
    // - 強度1.0で白色光を設定
    const light = new THREE.AmbientLight(0xffffff, 1.0);
    scene.add(light);

    // パースペクティブカメラの設定
    // - 視野角35度
    // - アスペクト比は800:600に固定
    // - near: 0.1, far: 20.0 でクリッピング範囲を設定
    const camera = new THREE.PerspectiveCamera(
      35,
      SCREEN_WIDTH / SCREEN_HEIGHT,  // 定数を使用
      0.1,
      20.0
    );
    camera.position.set(0, 1.2, -2);  // カメラを少し後ろに配置
    camera.lookAt(0, 1.2, 0);         // モデルの頭部付近を注視

    // VRMモデルのローディング設定
    // - GLTFLoaderにVRMプラグインを登録
    const loader = new GLTFLoader();
    loader.register((parser) => new VRMLoaderPlugin(parser));

    loader.load(
      '/models/test.vrm',
      (gltf) => {
        const vrm = gltf.userData.vrm;
        scene.add(vrm.scene);

        // シーンを1回描画
        renderer.render(scene, camera);
      },
      undefined,
      (error) => console.error('VRMロードエラー:', error)
    );

    // コンポーネントのアンマウント時のクリーンアップ
    return () => {
      containerRef.current?.removeChild(renderer.domElement);
      renderer.dispose();
    };
  }, []);

  // 固定サイズのコンテナを中央寄せで配置
  return (
    <div className="flex justify-center items-center min-h-screen">
      <div
        ref={containerRef}
        className={`w-[${SCREEN_WIDTH}px] h-[${SCREEN_HEIGHT}px]`}  // 定数を使用
      />
    </div>
  );
}
とりあえず画面に表示するとはできた。ポーズや表情など全て固定です。
↓
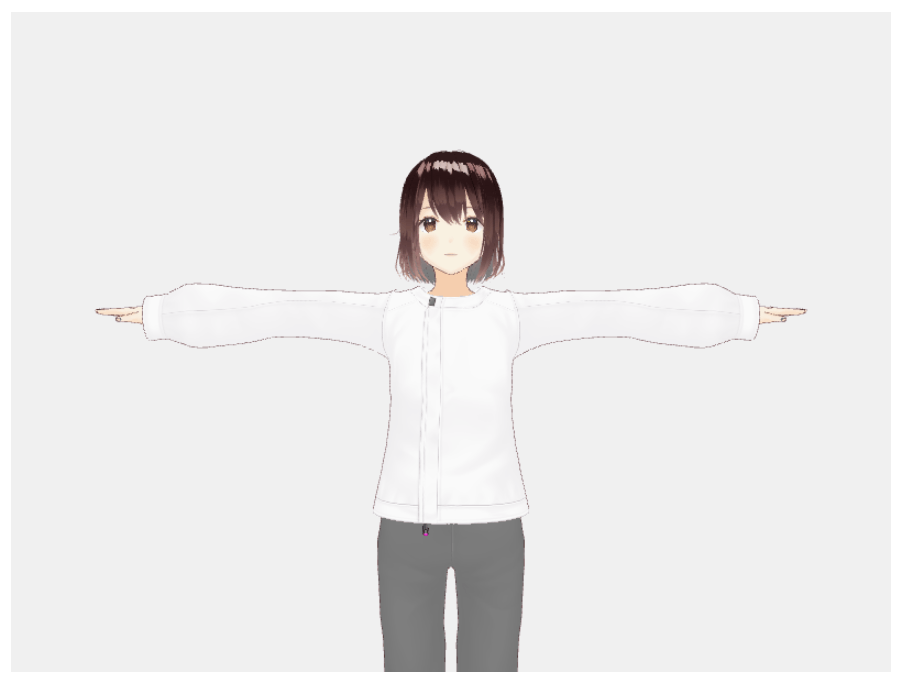
今回はチャット形式なので上半身だけ表示すればOKなので、位置を調整したり、少し顔や体に動きを加えていきます。
3. 表示位置やポーズの調整
ここは調べてもあまり有用なものは出てこなかったし、AIに聞いてもあまりよい結果は得られなかったので、公式ドキュメントを参考にして色々と調整をしていきます。
Cursorを使用している人は、Docsに公式ドキュメントを登録しておくことで、作業効率は爆上がりします!!
公式ドキュメントがよく分からなくてもDocsを参照させて指示を出せば大体なんとかなります。
色々調整した結果↓(慣れてないと難しい...)
'use client';

import { useEffect, useRef } from 'react';
import * as THREE from 'three';
import { GLTFLoader } from 'three/examples/jsm/loaders/GLTFLoader.js';
// @ts-ignore
import { VRMLoaderPlugin } from '@pixiv/three-vrm';

export default function TestPage() {
  const containerRef = useRef<HTMLDivElement>(null);
  const vrmRef = useRef<any>(null);

  // 画面サイズの設定
  // - 必要に応じてサイズを変更可能
  // - アスペクト比は4:3を推奨
  const SCREEN_WIDTH = 800;   // 画面の幅
  const SCREEN_HEIGHT = 600;  // 画面の高さ

  useEffect(() => {
    if (!containerRef.current) return;

    // レンダラーの設定
    // - antialias: エッジのギザギザを滑らかにする(true推奨)
    // - alpha: 背景の透過を有効にする
    // - preserveDrawingBuffer: 画面キャプチャを可能にする
    // - precision: 描画の精度(highp = より高品質な描画)
    const renderer = new THREE.WebGLRenderer({
      antialias: true,
      alpha: true,
      preserveDrawingBuffer: true,
      precision: 'highp',
    });

    // レンダラーの詳細設定
    renderer.setSize(SCREEN_WIDTH, SCREEN_HEIGHT);
    // デバイスのピクセル比を設定(Retinaディスプレイなどで綺麗に表示)
    renderer.setPixelRatio(window.devicePixelRatio);
    // 出力カラースペースの設定(より正確な色表現)
    renderer.outputColorSpace = THREE.SRGBColorSpace;
    // トーンマッピングの設定(HDR→LDRの変換方法)
    renderer.toneMapping = THREE.ACESFilmicToneMapping;
    // シャドウマップの有効化(影の表示)
    renderer.shadowMap.enabled = true;
    // シャドウマップのタイプ(ソフトシャドウ)
    renderer.shadowMap.type = THREE.PCFSoftShadowMap;

    containerRef.current.appendChild(renderer.domElement);

    // シーンの設定
    // - background: 背景色(0xf0f0f0 = 明るいグレー)
    // - 必要に応じて背景色を変更可能
    const scene = new THREE.Scene();
    scene.background = new THREE.Color(0xf0f0f0);

    // 環境光の設定
    // - 色: 0xffffff(白色光)
    // - 強度: 3.0(値を大きくすると明るく、小さくすると暗くなる)
    const light = new THREE.AmbientLight(0xffffff, 3);
    scene.add(light);

    // カメラの設定
    // - 視野角: 35度(小さくすると望遠、大きくすると広角)
    // - アスペクト比: 画面のwidth/height
    // - near: 0.1(これより近いものは表示されない)
    // - far: 20.0(これより遠いものは表示されない)
    const camera = new THREE.PerspectiveCamera(
      35,
      SCREEN_WIDTH / SCREEN_HEIGHT,
      0.1,
      20.0
    );
    // カメラの位置と注視点
    // position.set(x, y, z)
    // - x: 横方向の位置(0 = 中央)
    // - y: 縦方向の位置(1.2 = モデルの顔の高さ程度)
    // - z: 前後の位置(-2 = モデルの2単位後ろ)
    camera.position.set(0, 1.2, -2);
    camera.lookAt(0, 1.2, 0);

    // VRMモデルのローディング設定
    const loader = new GLTFLoader();
    loader.register((parser) => new VRMLoaderPlugin(parser));

    // アニメーションの基準となる時間
    let time = 0;

    // アニメーションループ
    const animate = () => {
      requestAnimationFrame(animate);
      // 時間の更新(値を大きくすると動きが速くなる)
      time += 0.01;

      // VRMモデルのアニメーション処理
      if (vrmRef.current) {
        const vrm = vrmRef.current;

        // 待機モーション(上下の揺れ)
        // - 基準位置: -0.2
        // - 揺れの速さ: time * 1.5(大きくすると速く揺れる)
        // - 揺れの幅: 0.001(大きくすると大きく揺れる)
        vrm.scene.position.y = -0.2 + Math.sin(time * 1.5) * 0.001;

        // 体の回転(左右の揺れ)
        // - 揺れの速さ: time * 0.5(大きくすると速く揺れる)
        // - 揺れの幅: 0.01(大きくすると大きく揺れる)
        vrm.scene.rotation.y = Math.sin(time * 0.5) * 0.01;

        // 瞬き処理
        // - 発生確率: 0.001(大きくすると頻繁に瞬きする)
        // - 瞬きの長さ: setTimeout 50ms(まぶたを閉じている時間)
        if (vrm.expressionManager && Math.random() < 0.0015) {
          const blink = async () => {
            // まぶたを閉じる
            vrm.expressionManager.setValue('blinkLeft', 1.0);
            vrm.expressionManager.setValue('blinkRight', 1.0);
            vrm.expressionManager.update();

            await new Promise(resolve => setTimeout(resolve, 50));

            // まぶたを開く(徐々に開く処理)
            // - 開く速さ: 5ms間隔で0.1ずつ減少
            for (let i = 1.0; i >= 0; i -= 0.1) {
              vrm.expressionManager.setValue('blinkLeft', i);
              vrm.expressionManager.setValue('blinkRight', i);
              vrm.expressionManager.update();
              await new Promise(resolve => setTimeout(resolve, 5));
            }
          };
          blink();
        }
      }

      renderer.render(scene, camera);
    };

    // VRMモデルのロード
    loader.load(
      '/models/test.vrm', // モデルのパス(public/models/内に配置)
      (gltf) => {
        const vrm = gltf.userData.vrm;
        vrmRef.current = vrm;
        scene.add(vrm.scene);

        // モデルのサイズ調整
        // - targetHeight: 目標の表示高さ(1.5 = 標準的な人物の高さ)
        const bbox = new THREE.Box3().setFromObject(vrm.scene);
        const modelHeight = bbox.max.y - bbox.min.y;
        const targetHeight = 1.5;
        const scale = targetHeight / modelHeight;
        vrm.scene.scale.set(scale, scale, scale);

        // モデルの位置調整(足が地面に着くように)
        const offset = -bbox.min.y * scale;
        vrm.scene.position.y = offset;

        // ポーズの設定
        if (vrm.humanoid) {
          // 右腕の設定
          const rightUpperArm = vrm.humanoid.getRawBoneNode('rightUpperArm');
          const rightLowerArm = vrm.humanoid.getRawBoneNode('rightLowerArm');
          if (rightUpperArm && rightLowerArm) {
            // 上腕の回転
            // - rotation.z: 腕の開き具合(負の値で外側に開く)
            // - rotation.x: 腕の前後の傾き(正の値で前に出る)
            rightUpperArm.rotation.z = -1.2;
            rightUpperArm.rotation.x = 0.1;
            // 肘の回転
            // - rotation.x: 肘の曲がり具合(正の値で曲がる)
            rightLowerArm.rotation.x = 0.1;
          }

          // 左腕の設定(右腕と対称的な値を設定)
          const leftUpperArm = vrm.humanoid.getRawBoneNode('leftUpperArm');
          const leftLowerArm = vrm.humanoid.getRawBoneNode('leftLowerArm');
          if (leftUpperArm && leftLowerArm) {
            leftUpperArm.rotation.z = 1.2;
            leftUpperArm.rotation.x = 0.1;
            leftLowerArm.rotation.x = 0.5;
          }

          // 右足の設定
          const rightUpperLeg = vrm.humanoid.getRawBoneNode('rightUpperLeg');
          if (rightUpperLeg) {
            // rotation.z: 足の開き具合
            // rotation.y: 足の向き(つま先の向き)
            rightUpperLeg.rotation.z = 0;
            rightUpperLeg.rotation.y = 0.1;
          }

          // 左足の設定(右足と対称的な値を設定)
          const leftUpperLeg = vrm.humanoid.getRawBoneNode('leftUpperLeg');
          if (leftUpperLeg) {
            leftUpperLeg.rotation.z = -0;
            leftUpperLeg.rotation.y = -0.1;
          }
        }

        animate();
      },
      undefined,
      (error) => console.error('VRMロードエラー:', error)
    );

    // クリーンアップ処理
    return () => {
      containerRef.current?.removeChild(renderer.domElement);
      renderer.dispose();
    };
  }, []);

  return (
    <div className="flex justify-center items-center min-h-screen">
      <div
        ref={containerRef}
        className={`w-[${SCREEN_WIDTH}px] h-[${SCREEN_HEIGHT}px]`}
      />
    </div>
  );
}
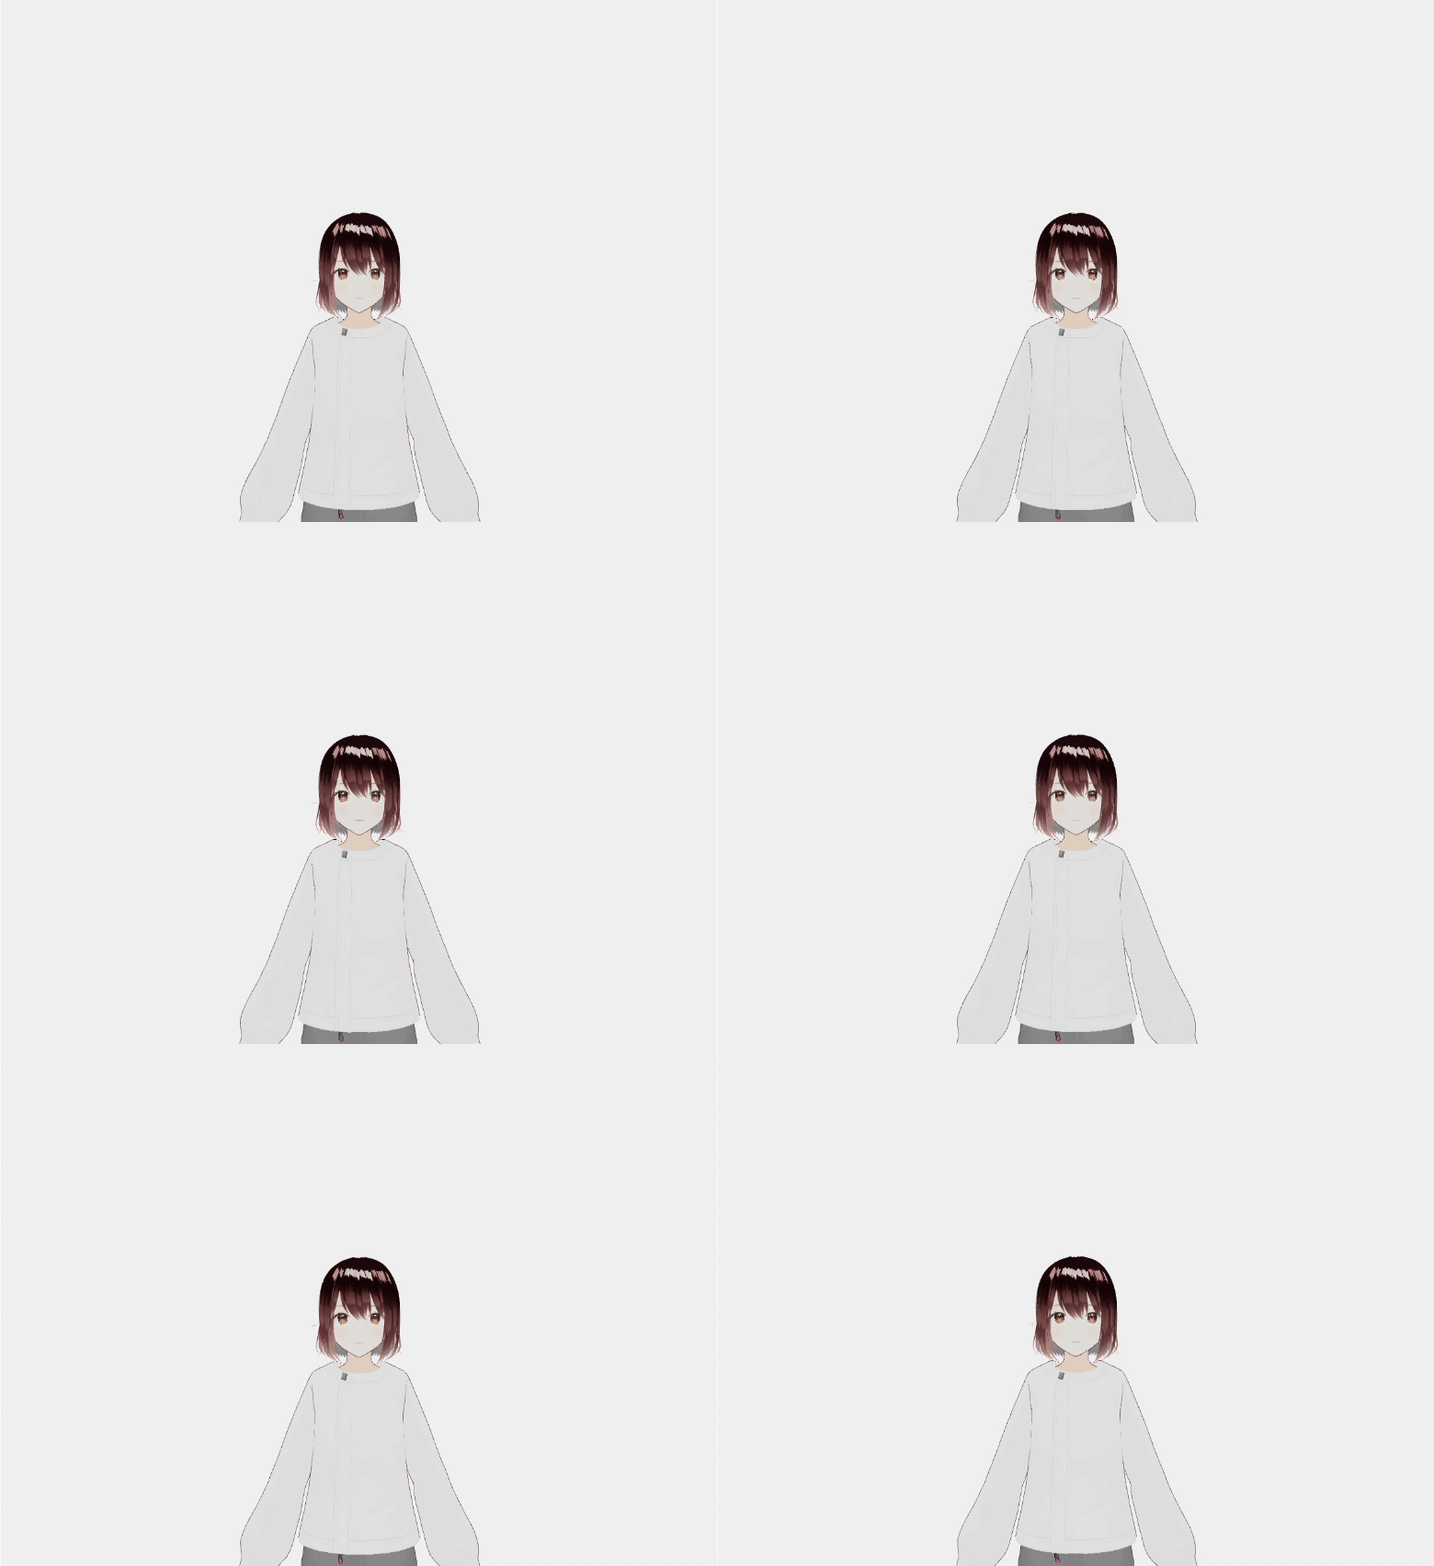
非常にわかりづらくて恐縮ですが、体が微妙に揺れているのと、瞬きが追加されています。
上記の瞬きの動作のように表情を手動で設定することもできますが、プリセットもいくつか用意されているので、紹介します。
下記の関数を使用することで、プリセットの表情を確認することができます。
  // 表情を変更する関数
  const changeExpression = (expressionName: string) => {
    if (!vrmRef.current?.expressionManager) return;

    // 全ての表情をリセット
    const expressions = [
      'happy', 'angry', 'sad', 'relaxed', 'neutral',
      'aa', 'ih', 'ou', 'ee', 'oh'
    ];
    expressions.forEach(expr => {
      vrmRef.current.expressionManager.setValue(expr, 0);
    });

    // 選択された表情を設定
    if (expressionName !== 'neutral') {
      vrmRef.current.expressionManager.setValue(expressionName, 1);
    }

    vrmRef.current.expressionManager.update();
    setCurrentExpression(expressionName);
  };
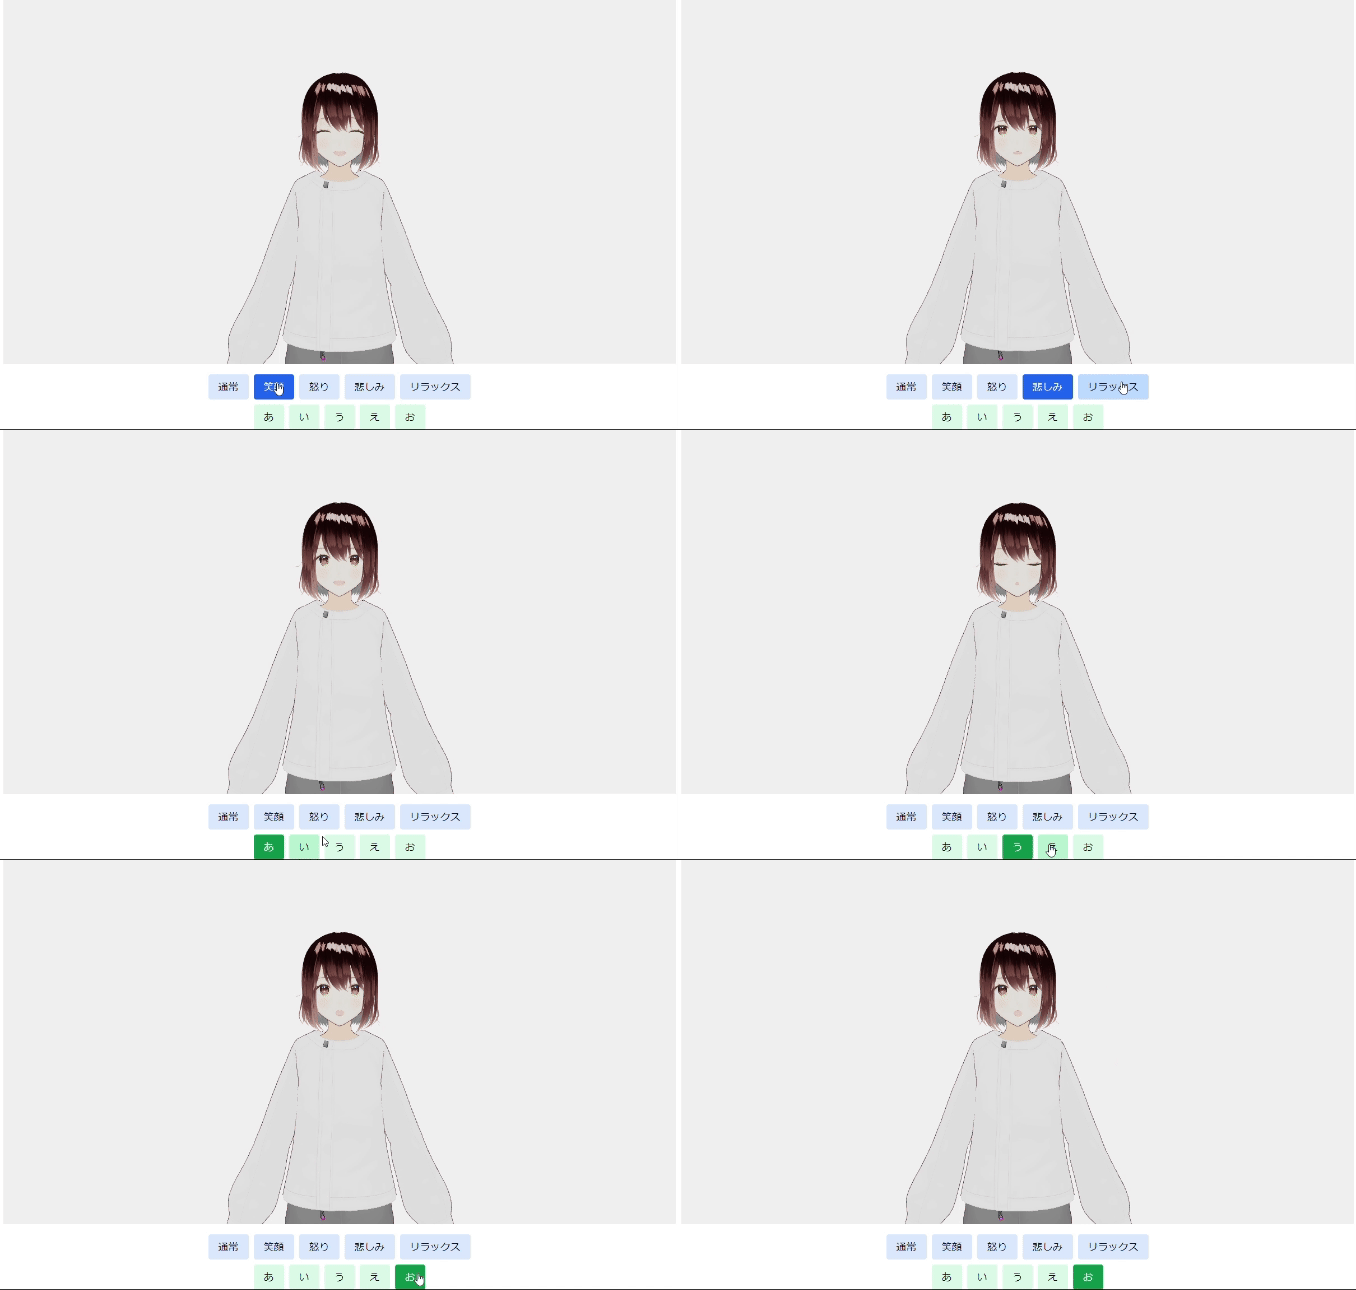
このようなプリセットなども活用して、表現豊かなアバター作成を目指します。
4. 発話内容と口の動きのリンク
いよいよ最後はアバターに発話をさせて、その発話に合わせて口を動かす機能を実装していきます。
ざっくりですが、以下のような実装をします。
発話させたいテキストを入力→VOICEVOXで音声生成→Web Speech APIで音声を解析し、音の大小によってアバターの口の開き具合が変わるように調整
VOICEVOX:
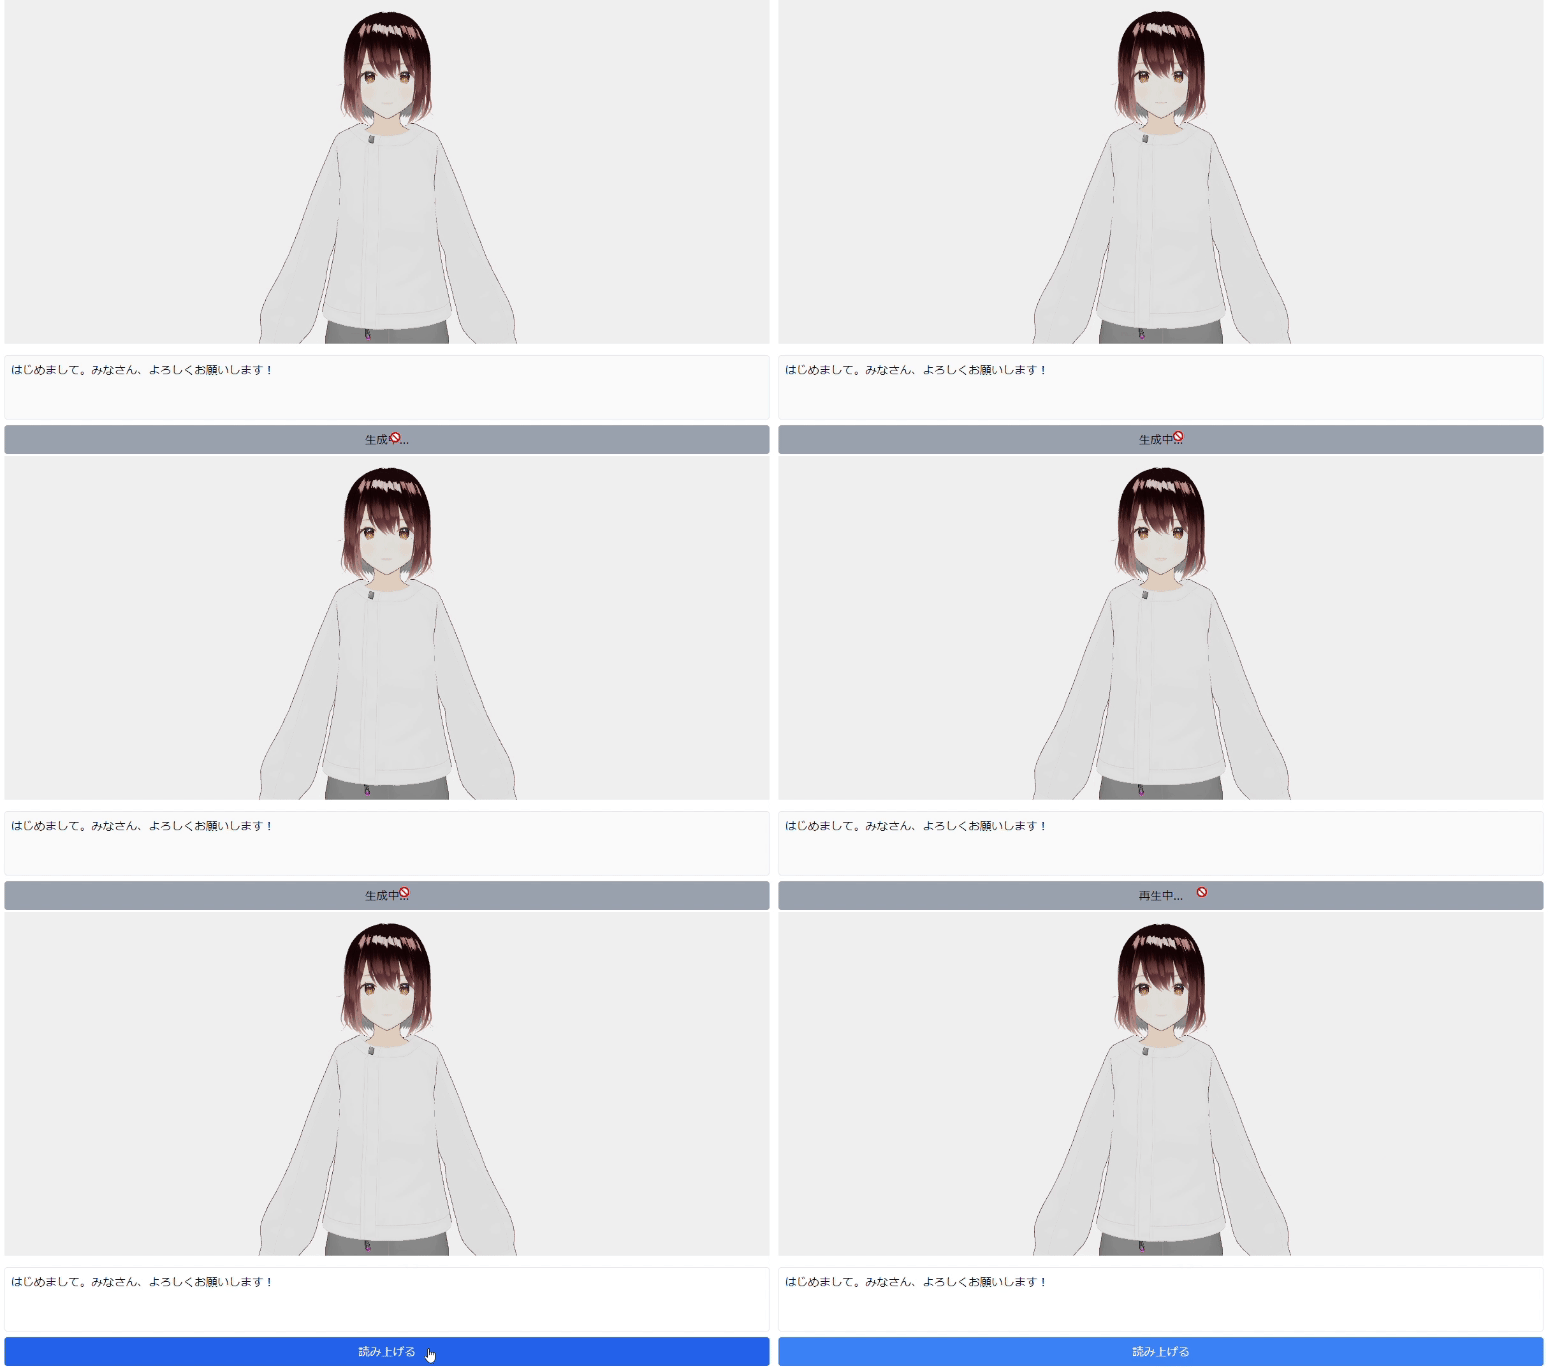
またまた、わかりづらくて恐縮ですが、アバターが発している音声に合わせて、口の開き具合が変わるようになっています。体感的には違和感なくできていると思います。
最終的なソースコード
'use client';

import { useEffect, useRef, useState } from 'react';
import * as THREE from 'three';
import { GLTFLoader } from 'three/examples/jsm/loaders/GLTFLoader.js';
// @ts-ignore
import { VRMLoaderPlugin } from '@pixiv/three-vrm';

// 音声生成のための関数
async function generateSpeech(text: string) {
  try {
    const response = await fetch('/api/ai-speech', {
      method: 'POST',
      headers: {
        'Content-Type': 'application/json',
      },
      body: JSON.stringify({
        text,
        voiceId: 2  // VOICEVOXのスピーカーID
      }),
    });

    if (!response.ok) {
      throw new Error('音声生成に失敗しました');
    }

    return await response.blob();
  } catch (error) {
    console.error('音声生成エラー:', error);
    throw error;
  }
}

export default function TestPage() {
  const containerRef = useRef<HTMLDivElement>(null);
  const vrmRef = useRef<any>(null);
  const [currentExpression, setCurrentExpression] = useState<string>('neutral');

  // 音声関連のstate
  const [text, setText] = useState<string>('');
  const [isLoading, setIsLoading] = useState<boolean>(false);
  const [audioElement, setAudioElement] = useState<HTMLAudioElement | null>(null);
  const [isPlaying, setIsPlaying] = useState<boolean>(false);

  // 画面サイズの設定
  // - 必要に応じてサイズを変更可能
  // - アスペクト比は4:3を推奨
  const SCREEN_WIDTH = 800;   // 画面の幅
  const SCREEN_HEIGHT = 600;  // 画面の高さ

  // 音声解析用のstate
  const [audioContext] = useState<AudioContext | null>(() =>
    typeof window !== 'undefined' ? new (window.AudioContext || (window as any).webkitAudioContext)() : null
  );
  const analyserRef = useRef<AnalyserNode | null>(null);
  const sourceRef = useRef<MediaElementAudioSourceNode | null>(null);
  const animationFrameRef = useRef<number>();

  useEffect(() => {
    if (!containerRef.current) return;

    // レンダラーの設定
    // - antialias: エッジのギザギザを滑らかにする(true推奨)
    // - alpha: 背景の透過を有効にする
    // - preserveDrawingBuffer: 画面キャプチャを可能にする
    // - precision: 描画の精度(highp = より高品質な描画)
    const renderer = new THREE.WebGLRenderer({
      antialias: true,
      alpha: true,
      preserveDrawingBuffer: true,
      precision: 'highp',
    });

    // レンダラーの詳細設定
    renderer.setSize(SCREEN_WIDTH, SCREEN_HEIGHT);
    // デバイスのピクセル比を設定(Retinaディスプレイなどで綺麗に表示)
    renderer.setPixelRatio(window.devicePixelRatio);
    // 出力カラースペースの設定(より正確な色表現)
    renderer.outputColorSpace = THREE.SRGBColorSpace;
    // トーンマッピングの設定(HDR→LDRの変換方法)
    renderer.toneMapping = THREE.ACESFilmicToneMapping;
    // シャドウマップの有効化(影の表示)
    renderer.shadowMap.enabled = true;
    // シャドウマップのタイプ(ソフトシャドウ)
    renderer.shadowMap.type = THREE.PCFSoftShadowMap;

    containerRef.current.appendChild(renderer.domElement);

    // シーンの設定
    // - background: 背景色(0xf0f0f0 = 明るいグレー)
    // - 必要に応じて背景色を変更可能
    const scene = new THREE.Scene();
    scene.background = new THREE.Color(0xf0f0f0);

    // 環境光の設定
    // - 色: 0xffffff(白色光)
    // - 強度: 3.0(値を大きくすると明るく、小さくすると暗くなる)
    const light = new THREE.AmbientLight(0xffffff, 3);
    scene.add(light);

    // カメラの設定
    // - 視野角: 35度(小さくすると望遠、大きくすると広角)
    // - アスペクト比: 画面のwidth/height
    // - near: 0.1(これより近いものは表示されない)
    // - far: 20.0(これより遠いものは表示されない)
    const camera = new THREE.PerspectiveCamera(
      35,
      SCREEN_WIDTH / SCREEN_HEIGHT,
      0.1,
      20.0
    );
    // カメラの位置と注視点
    // position.set(x, y, z)
    // - x: 横方向の位置(0 = 中央)
    // - y: 縦方向の位置(1.2 = モデルの顔の高さ程度)
    // - z: 前後の位置(-2 = モデルの2単位後ろ)
    camera.position.set(0, 1.2, -2);
    camera.lookAt(0, 1.2, 0);

    // VRMモデルのローディング設定
    const loader = new GLTFLoader();
    loader.register((parser) => new VRMLoaderPlugin(parser));

    // アニメーションの基準となる時間
    let time = 0;

    // アニメーションループ
    const animate = () => {
      requestAnimationFrame(animate);
      // 時間の更新(値を大きくすると動きが速くなる)
      time += 0.01;

      // VRMモデルのアニメーション処理
      if (vrmRef.current) {
        const vrm = vrmRef.current;

        // 待機モーション(上下の揺れ)
        // - 基準位置: -0.2
        // - 揺れの速さ: time * 1.5(大きくすると速く揺れる)
        // - 揺れの幅: 0.001(大きくすると大きく揺れる)
        vrm.scene.position.y = -0.2 + Math.sin(time * 1.5) * 0.001;

        // 体の回転(左右の揺れ)
        // - 揺れの速さ: time * 0.5(大きくすると速く揺れる)
        // - 揺れの幅: 0.01(大きくすると大きく揺れる)
        vrm.scene.rotation.y = Math.sin(time * 0.5) * 0.01;

        // 瞬き処理
        // - 発生確率: 0.001(大きくすると頻繁に瞬きする)
        // - 瞬きの長さ: setTimeout 50ms(まぶたを閉じている時間)
        if (vrm.expressionManager && Math.random() < 0.0015) {
          const blink = async () => {
            // まぶたを閉じる
            vrm.expressionManager.setValue('blinkLeft', 1.0);
            vrm.expressionManager.setValue('blinkRight', 1.0);
            vrm.expressionManager.update();

            await new Promise(resolve => setTimeout(resolve, 50));

            // まぶたを開く(徐々に開く処理)
            // - 開く速さ: 5ms間隔で0.1ずつ減少
            for (let i = 1.0; i >= 0; i -= 0.1) {
              vrm.expressionManager.setValue('blinkLeft', i);
              vrm.expressionManager.setValue('blinkRight', i);
              vrm.expressionManager.update();
              await new Promise(resolve => setTimeout(resolve, 5));
            }
          };
          blink();
        }
      }

      renderer.render(scene, camera);
    };

    // VRMモデルのロード
    loader.load(
      '/models/test.vrm', // モデルのパス(public/models/内に配置)
      (gltf) => {
        const vrm = gltf.userData.vrm;
        vrmRef.current = vrm;
        scene.add(vrm.scene);

        // モデルのサイズ調整
        // - targetHeight: 目標の表示高さ(1.5 = 標準的な人物の高さ)
        const bbox = new THREE.Box3().setFromObject(vrm.scene);
        const modelHeight = bbox.max.y - bbox.min.y;
        const targetHeight = 1.5;
        const scale = targetHeight / modelHeight;
        vrm.scene.scale.set(scale, scale, scale);

        // モデルの位置調整(足が地面に着くように)
        const offset = -bbox.min.y * scale;
        vrm.scene.position.y = offset;

        // ポーズの設定
        if (vrm.humanoid) {
          // 右腕の設定
          const rightUpperArm = vrm.humanoid.getRawBoneNode('rightUpperArm');
          const rightLowerArm = vrm.humanoid.getRawBoneNode('rightLowerArm');
          if (rightUpperArm && rightLowerArm) {
            // 上腕の回転
            // - rotation.z: 腕の開き具合(負の値で外側に開く)
            // - rotation.x: 腕の前後の傾き(正の値で前に出る)
            rightUpperArm.rotation.z = -1.2;
            rightUpperArm.rotation.x = 0.1;
            // 肘の回転
            // - rotation.x: 肘の曲がり具合(正の値で曲がる)
            rightLowerArm.rotation.x = 0.1;
          }

          // 左腕の設定(右腕と対称的な値を設定)
          const leftUpperArm = vrm.humanoid.getRawBoneNode('leftUpperArm');
          const leftLowerArm = vrm.humanoid.getRawBoneNode('leftLowerArm');
          if (leftUpperArm && leftLowerArm) {
            leftUpperArm.rotation.z = 1.2;
            leftUpperArm.rotation.x = 0.1;
            leftLowerArm.rotation.x = 0.5;
          }

          // 右足の設定
          const rightUpperLeg = vrm.humanoid.getRawBoneNode('rightUpperLeg');
          if (rightUpperLeg) {
            // rotation.z: 足の開き具合
            // rotation.y: 足の向き(つま先の向き)
            rightUpperLeg.rotation.z = 0;
            rightUpperLeg.rotation.y = 0.1;
          }

          // 左足の設定(右足と対称的な値を設定)
          const leftUpperLeg = vrm.humanoid.getRawBoneNode('leftUpperLeg');
          if (leftUpperLeg) {
            leftUpperLeg.rotation.z = -0;
            leftUpperLeg.rotation.y = -0.1;
          }
        }

        animate();
      },
      undefined,
      (error) => console.error('VRMロードエラー:', error)
    );

    // クリーンアップ処理
    return () => {
      containerRef.current?.removeChild(renderer.domElement);
      renderer.dispose();
    };
  }, []);

  // 表情を変更する関数
  const changeExpression = (expressionName: string) => {
    if (!vrmRef.current?.expressionManager) return;

    // 全ての表情をリセット
    const expressions = [
      'happy', 'angry', 'sad', 'relaxed', 'neutral',
      'aa', 'ih', 'ou', 'ee', 'oh'
    ];
    expressions.forEach(expr => {
      vrmRef.current.expressionManager.setValue(expr, 0);
    });

    // 選択された表情を設定
    if (expressionName !== 'neutral') {
      vrmRef.current.expressionManager.setValue(expressionName, 1);
    }

    vrmRef.current.expressionManager.update();
    setCurrentExpression(expressionName);
  };

  // 音声再生処理を更新
  const handleSubmit = async (e: React.FormEvent) => {
    e.preventDefault();
    setIsLoading(true);

    try {
      const audioBlob = await generateSpeech(text);
      const url = URL.createObjectURL(audioBlob);

      // 既存のaudio要素があれば破棄
      if (audioElement) {
        audioElement.pause();
        URL.revokeObjectURL(audioElement.src);
      }

      const audio = new Audio(url);

      // 音声解析のセットアップ
      if (audioContext) {
        // 既存の接続をクリーンアップ
        if (sourceRef.current) {
          sourceRef.current.disconnect();
          sourceRef.current = null;
        }
        if (analyserRef.current) {
          analyserRef.current.disconnect();
          analyserRef.current = null;
        }
        if (animationFrameRef.current) {
          cancelAnimationFrame(animationFrameRef.current);
        }

        // 新しい解析器をセットアップ
        const analyser = audioContext.createAnalyser();
        analyser.fftSize = 256;
        const source = audioContext.createMediaElementSource(audio);
        source.connect(analyser);
        analyser.connect(audioContext.destination);

        sourceRef.current = source;
        analyserRef.current = analyser;
      }

      // 音声再生開始時の処理
      audio.onplay = () => {
        setIsPlaying(true);
        // 口の動きのアニメーションを開始
        animateMouth();
      };

      // 音声再生終了時の処理
      audio.onended = () => {
        setIsPlaying(false);
        // 口の形をリセット
        if (vrmRef.current?.expressionManager) {
          vrmRef.current.expressionManager.setValue('aa', 0);
          vrmRef.current.expressionManager.update();
        }
        // アニメーションをキャンセル
        if (animationFrameRef.current) {
          cancelAnimationFrame(animationFrameRef.current);
        }
      };

      setAudioElement(audio);

      // AudioContextが中断されている場合は再開
      if (audioContext?.state === 'suspended') {
        await audioContext.resume();
      }

      audio.play();
    } catch (error) {
      console.error('エラー:', error);
      alert('音声生成中にエラーが発生しました');
    } finally {
      setIsLoading(false);
    }
  };

  // 口の動きをアニメーションする関数
  const animateMouth = () => {
    if (!analyserRef.current || !vrmRef.current?.expressionManager) {
      return;
    }

    const analyser = analyserRef.current;
    const dataArray = new Uint8Array(analyser.frequencyBinCount);

    const updateMouth = () => {
      // 周波数データを取得
      analyser.getByteFrequencyData(dataArray);

      // 音声の平均強度を計算
      const average = dataArray.reduce((acc, val) => acc + val, 0) / dataArray.length;

      // 音声強度を0-1の範囲に正規化し、口の開き具合に適用
      // 係数1.5で少し大きめに開くように調整(必要に応じて調整可能)
      const openness = Math.min((average / 255) * 3, 3);

      // 口の形状を更新
      vrmRef.current.expressionManager.setValue('aa', openness);
      vrmRef.current.expressionManager.update();

      // 次のフレームの処理をスケジュール
      animationFrameRef.current = requestAnimationFrame(updateMouth);
    };

    updateMouth();
  };

  // コンポーネントのクリーンアップ
  useEffect(() => {
    return () => {
      if (animationFrameRef.current) {
        cancelAnimationFrame(animationFrameRef.current);
      }
      if (sourceRef.current) {
        sourceRef.current.disconnect();
      }
      if (analyserRef.current) {
        analyserRef.current.disconnect();
      }
    };
  }, []);

  return (
    <div className="flex flex-col items-center justify-center min-h-screen">
      {/* 3Dモデル表示エリア */}
      <div
        ref={containerRef}
        className={`w-[${SCREEN_WIDTH}px] h-[${SCREEN_HEIGHT}px]`}
      />

      {/* テキスト入力フォーム */}
      <div className="mt-4 w-[800px] max-w-full">
        <form onSubmit={handleSubmit} className="flex flex-col gap-2">
          <textarea
            value={text}
            onChange={(e) => setText(e.target.value)}
            className="w-full p-2 border rounded resize-none"
            rows={3}
            placeholder="読み上げるテキストを入力してください"
            disabled={isLoading || isPlaying}
          />
          <button
            type="submit"
            className={`px-4 py-2 rounded ${
              isLoading || isPlaying
                ? 'bg-gray-400 cursor-not-allowed'
                : 'bg-blue-500 hover:bg-blue-600 text-white'
            }`}
            disabled={isLoading || isPlaying}
          >
            {isLoading ? '生成中...' : isPlaying ? '再生中...' : '読み上げる'}
          </button>
        </form>
      </div>

      {/* 基本表情のボタン */}
      <div className="mt-4 space-x-2">
        <button
          onClick={() => changeExpression('neutral')}
          className={`px-4 py-2 rounded ${
            currentExpression === 'neutral'
              ? 'bg-blue-600 text-white'
              : 'bg-blue-100 hover:bg-blue-200'
          }`}
        >
          通常
        </button>
        <button
          onClick={() => changeExpression('happy')}
          className={`px-4 py-2 rounded ${
            currentExpression === 'happy'
              ? 'bg-blue-600 text-white'
              : 'bg-blue-100 hover:bg-blue-200'
          }`}
        >
          笑顔
        </button>
        <button
          onClick={() => changeExpression('angry')}
          className={`px-4 py-2 rounded ${
            currentExpression === 'angry'
              ? 'bg-blue-600 text-white'
              : 'bg-blue-100 hover:bg-blue-200'
          }`}
        >
          怒り
        </button>
        <button
          onClick={() => changeExpression('sad')}
          className={`px-4 py-2 rounded ${
            currentExpression === 'sad'
              ? 'bg-blue-600 text-white'
              : 'bg-blue-100 hover:bg-blue-200'
          }`}
        >
          悲しみ
        </button>
        <button
          onClick={() => changeExpression('relaxed')}
          className={`px-4 py-2 rounded ${
            currentExpression === 'relaxed'
              ? 'bg-blue-600 text-white'
              : 'bg-blue-100 hover:bg-blue-200'
          }`}
        >
          リラックス
        </button>
      </div>

      {/* 口の形のボタン */}
      <div className="mt-2 space-x-2">
        <button
          onClick={() => changeExpression('aa')}
          className={`px-4 py-2 rounded ${
            currentExpression === 'aa'
              ? 'bg-green-600 text-white'
              : 'bg-green-100 hover:bg-green-200'
          }`}
        >
          あ
        </button>
        <button
          onClick={() => changeExpression('ih')}
          className={`px-4 py-2 rounded ${
            currentExpression === 'ih'
              ? 'bg-green-600 text-white'
              : 'bg-green-100 hover:bg-green-200'
          }`}
        >
          い
        </button>
        <button
          onClick={() => changeExpression('ou')}
          className={`px-4 py-2 rounded ${
            currentExpression === 'ou'
              ? 'bg-green-600 text-white'
              : 'bg-green-100 hover:bg-green-200'
          }`}
        >
          う
        </button>
        <button
          onClick={() => changeExpression('ee')}
          className={`px-4 py-2 rounded ${
            currentExpression === 'ee'
              ? 'bg-green-600 text-white'
              : 'bg-green-100 hover:bg-green-200'
          }`}
        >
          え
        </button>
        <button
          onClick={() => changeExpression('oh')}
          className={`px-4 py-2 rounded ${
            currentExpression === 'oh'
              ? 'bg-green-600 text-white'
              : 'bg-green-100 hover:bg-green-200'
          }`}
        >
          お
        </button>
      </div>
    </div>
  );
}
まとめ
今回はVroidで作成したアバターをwebアプリケーションに埋め込み、発話させる機能を実装しました。ここまでできれば、あとはインプットするテキストを変更することで、様々な用途で使えるようになると思います。
昨今、生成AIの登場でチャット形式が非常に増えてきましたが、世の中の多くの人にAIとのチャットを浸透させるためには、ガワを用意することが重要ではないかと思っています。実際、私自身、チャット形式のwebアプリケーションを開発中ですが、ユーザーにテストをしてみたところ、チャット(一応音声だけは実装済み)だけでは、あまり回答する気があまり起きないという意見が非常に多かったです。
今回のガワを用意して、この問題が解消されるのか検証を進めていきたいと思います。
Discussion