🏓
React + Firebase + Stripeでアプリに決済機能を実装する
ReactとFirebaseで作られたC向けWEBサービスに、FunctionsとStripeを使って、サーバーレスな決済機能を導入してみました。
プログラミング歴1年の独学エンジニアがなんとか実装したやり方ですので、初心者さん向けになっております。
完成イメージ
アーティストや作家が自分の作品を出品して販売できる機能です。

購入ボタンを押すと

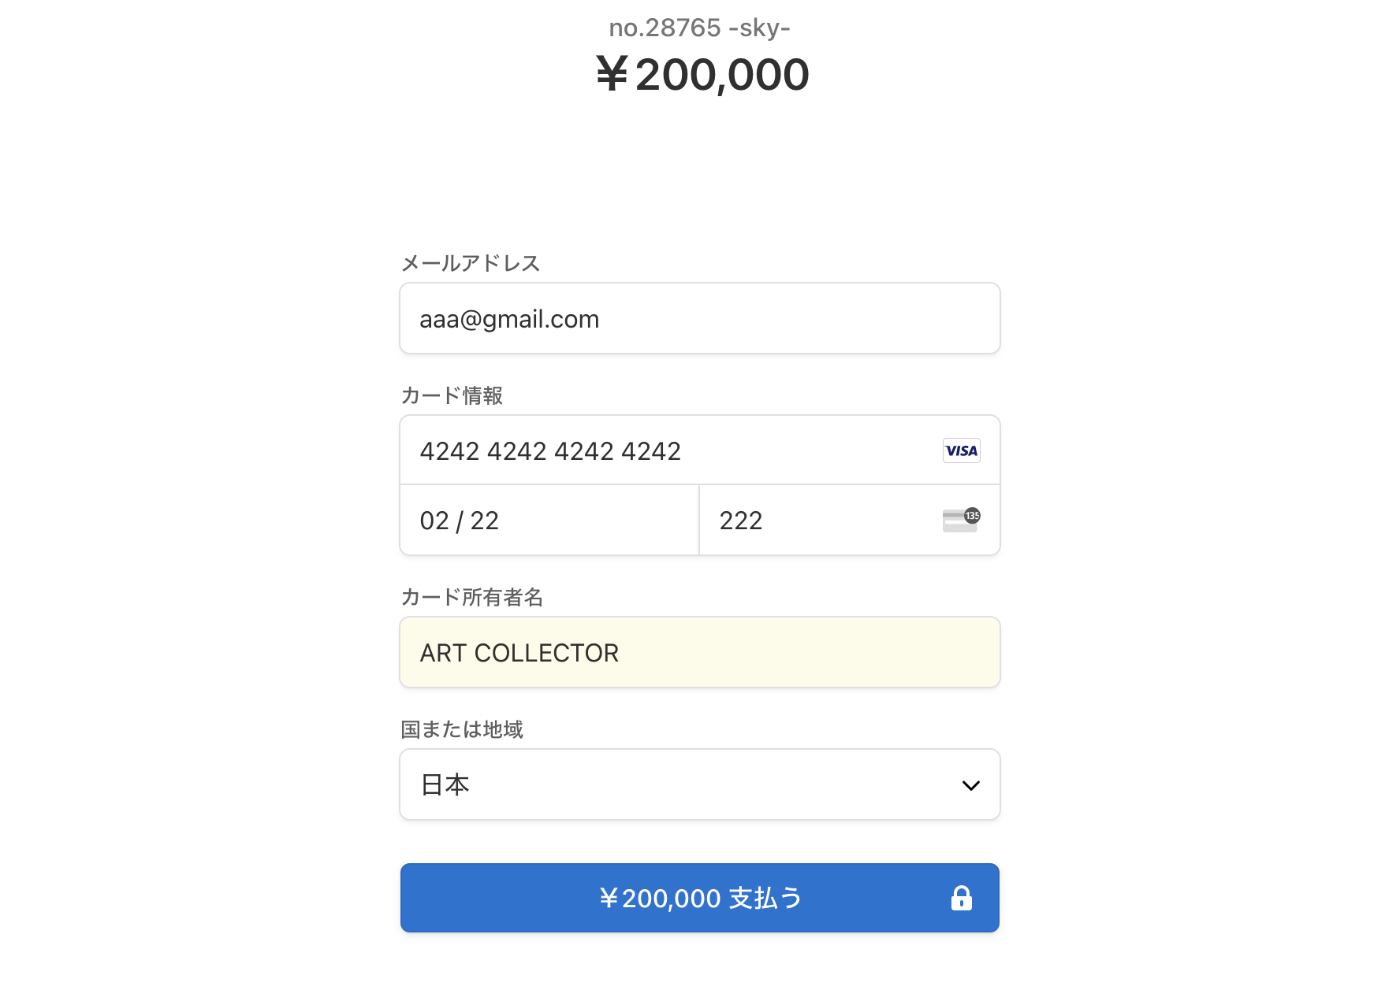
Stripeが用意してくれている決済ページに遷移して、必要項目を入力して決済します。
(シンプルに商品名と値段のstateを渡せるようにしています)

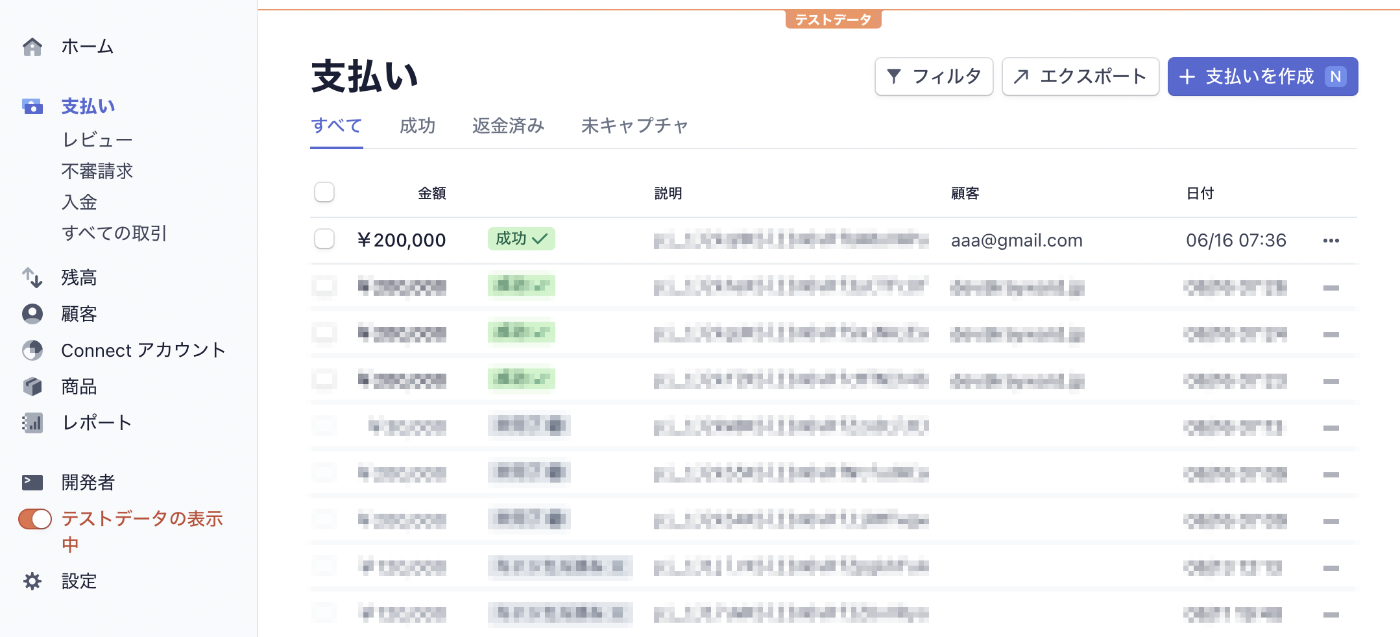
Stripeのコンソールで確認すると、ちゃんと反映されています。
そんな感じの機能です。
前提条件
- MacBook Air (M1, 2020)を使ってます。
- create-react-app で作ったアプリに導入してます。
- アプリ自体はFirebase Hostiongでデプロイ済みとします。
- Stripeのアカウント登録や設定は済ませているものとします。
- Stripe Checkout というUIがあらかじめ決まっている便利なやつを導入してます。自由にUIをカスタマイズしたい場合は別の方法になります。
手順&コード
1.ライブラリのインストール
アプリにstripeライブラリをインストールします。
root(ターミナルのアプリ名が表示された最上位フォルダ)
appName % npm install @stripe/stripe-js
アプリ内のfunctionsフォルダにstripeライブラリをインストールします。
rootからfunctionsに移動
appName % cd functions
functions % npm install --save stripe
2.秘密Keyを管理する
stripeで発行した秘密Keyをfunctionsの環境変数に設定して管理できるようにします。
root
firebase functions:config:set stripe.secret=sk_test_51Is...(各々の秘密キーを入れてください)
補足
firebase functions:config:set
このメソッドを使ってstripe_secretという名の環境変数を設定しています。
ちゃんと保存されているか確認する場合は
firebase functions:config:get
を実行してみてください。
appName % firebase functions:config:get
{
  "stripe": {
    "secret": "sk_test_51Is...(設定した秘密キー)"
  }
}
このように表示されていればOKです。
3.デプロイする
root(ターミナルのアプリ名が表示された最上位フォルダ)
firebase deploy --only functions
4.functions(サーバー側)でセッションを作成する
functions/index.jsx
const functions = require("firebase-functions");
const Stripe = require("stripe");
const stripe = new Stripe(functions.config().stripe.secret, {
  apiVersion: "2020-08-27",
});

exports.createPaymentSession = functions.https.onCall(async (data, context) => {
  // dataに何が渡ってきているか確認したい場合は下記のloggerを記述すればFirebaseコンソールにてデバッグできます
  // functions.logger.log("dataは" + JSON.stringify(data));
  const name = data.name;
  const price = data.price;
  const boothId = data.boothId;

  //line_itemsに渡される値を変数で渡して、商品名や値段を反映させます
  const session = await stripe.checkout.sessions.create({
    payment_method_types: ["card"],
    line_items: [
      {
        price_data: {
          currency: "jpy",
          product_data: {
            name: name,
          },
          unit_amount: price,
        },
        quantity: 1,
      },
    ],
    mode: "payment",
    //決済が終わった後にリダイレクトするURLを設定します
    success_url: `https://00000.web.app/boothlist/${boothId}`,
    cancel_url: `https://00000.web.app/boothlist/${boothId}`,
  });
  const res = session;
  functions.logger.log(res);
  return res;
});
5.stripeを呼び出す購入ボタンを作成する
PurchaseButton.jsx
import React from "react";
import "firebase/functions";
import firebase from "firebase/app";
import Button from "@material-ui/core/Button";
import { makeStyles } from "@material-ui/styles";
import { loadStripe } from "@stripe/stripe-js";
import { useDispatch } from "react-redux";
import { soldOpus } from "../../reducks/opuses/operations";

const useStyles = makeStyles({
  button: {
    backgroundColor: "#216174",
    color: "#FFF",
    fontSize: 12,
    height: 26,
    width: "auto",
    padding: "0px 30px",
  },
});

const PurchaseButton = (props) => {
  const dispatch = useDispatch();
  const classes = useStyles();
  const price = props.price;
  const name = props.name;
  const boothId = props.boothId;
  const opusId = props.id;

  const showPayment = async (price, name, boothId) => {
    // セッション作成functionをインスタンス化
    const createPaymentSession = firebase.functions().httpsCallable("createPaymentSession");

    // 公開可能キーをもとに、stripeオブジェクトを作成
    const stripePromise = loadStripe(
      "pk_test_51Is...(各々の公開キーを入れてください)"
    );
    const stripe = await stripePromise;

    // セッション情報をもとに、支払いページに遷移
    createPaymentSession({
    // ここでFunctionsにオブジェクト型で色々渡せますので、showPaymentの引数から持ってきます
      price: price,
      name: name,
      boothId: boothId,
    }).then((result) => {
      stripe
        .redirectToCheckout({
          sessionId: result.data.id,
        })
        .then((result) => {
          console.log(result);
        });
      //決済が成功したら実行される関数です。詳しくは割愛しますが、ここでは商品が売却済みになるようにデータを渡しています
      dispatch(soldOpus(opusId));
    });
  };

  return (
    <Button className={classes.button} variant="contained" onClick={() => showPayment(price, name, boothId)}>
      {props.label}
    </Button>
  );
};
export default PurchaseButton;
参考
追伸
はじめて技術記事を書きました。めっちゃ大変ですねー。
いつもお世話になってる記事のありがたみを感じました。
Discussion