Firebaseのプロジェクトを後付けでTerraform管理して幸せになる
はじめに
Terraform でインフラ構成を管理しデプロイを自動化するの、とても便利でかっこいいですよね。
そんな軽い動機で、既存の Firebase プロジェクトを Terraform で管理することにチャレンジしてみました。
しかし、想像以上に手間取る部分が多かったので、同じことにチャレンジする方の助けになればと思い、手順をまとめてみました。
本記事で扱う内容
本記事では、Terraform により新たに Firebase プロジェクトを作成する方法は書きません。
あくまで、既存の Firebase プロジェクトを後付けで Terraform で管理する方法について書きます。
また、チーム開発における運用のための管理や、自動デプロイを組むところまでは書きません。
ローカルマシンのみで、Terraform により Firebase のインフラを管理できるようになるところまでを書きます。
前提の方針
以下について、記事執筆時点では Terraform による管理に対応していないため、手動でセットアップ&管理する必要があります。
- Firebase Cloud Messaging
- Firebase Remote Config
- Firebase Crashlytics
- Google Analytics for Firebase
上記以外に関しては、Terraform で管理する方針とします。
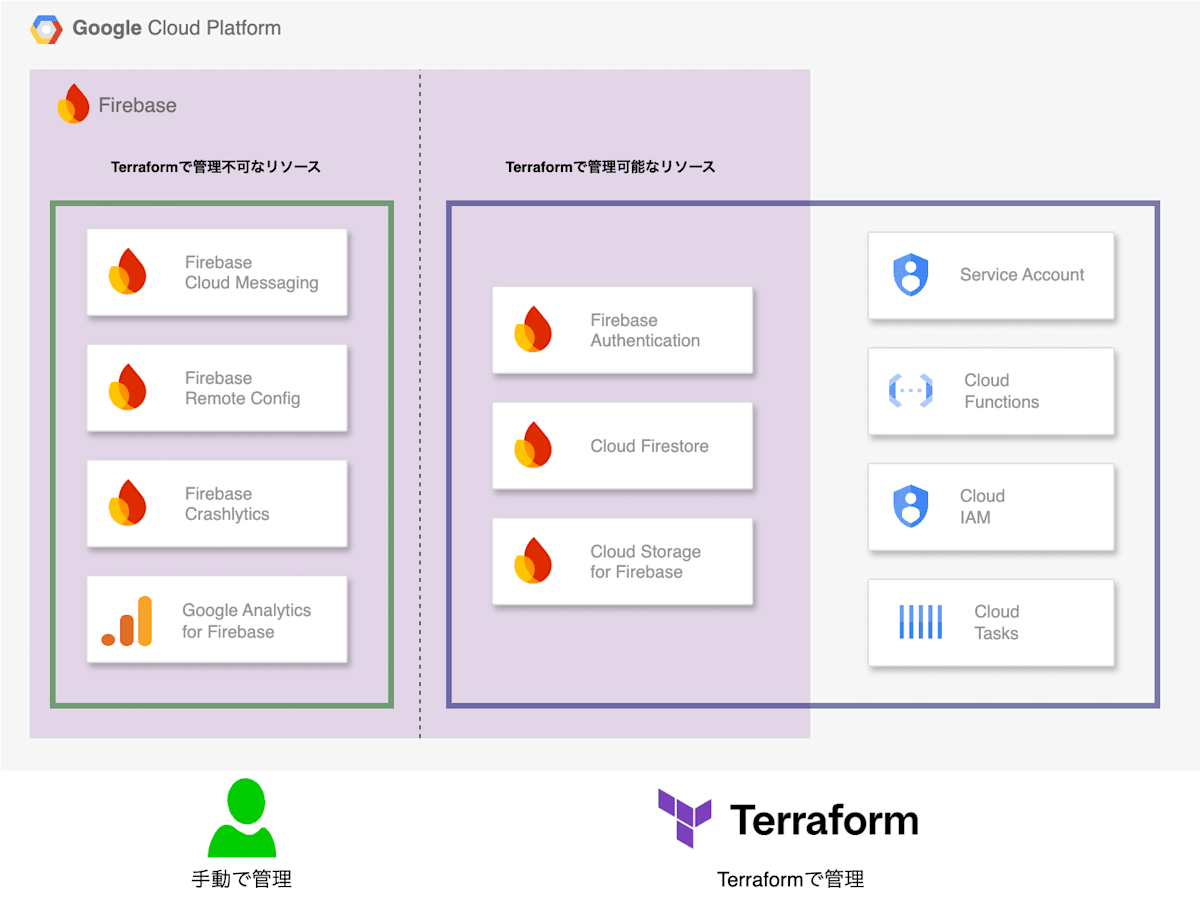
Terraform で管理するリソースに関しては、Firebase Console 上での手動変更は避けるようにします。
手動で変更すると、Terraform が把握しているインフラの現在の状態と実際のインフラの状態が乖離してしまい、その乖離を解消する手間が発生するためです。
手順の概要
手順としては以下のように進めます。
- 必要なツールをインストールする
- 作業ディレクトリを用意する
- Terraform 上で Firebase を管理するための知識を得る
- Terraform に既存リソースのインポート定義を作成する
- Terraform 定義ファイルを自動生成する
- Terraform で一度適用する
1. 必要なツールをインストールする
以下のページを参考に Terraform をセットアップします。
また、以下のページを参考に Firebase CLI をセットアップします。
CLI をインストールしたら、CLI 上での Firebase へのログインも実施しておきます。
ログインするアカウントは、プロジェクトオーナーの権限を持つアカウントで行うと便利です。
これにより、Terraform コマンド実行時の権限エラーに悩まされることなく、手順をスムーズに進められます。
さらに、Google Cloud CLI もセットアップします。
こちらも CLI 上でのログインを実施しておきます。
同様にログインするアカウントは、プロジェクトオーナーの権限を持つアカウントで行うと便利です。
2. 作業ディレクトリを用意する
作業用のディレクトリを作成し、その中に 3 つの Terraform のファイルを配置します。
.
├── main.tf
├── import.tf
└── terraform.tfvars
terraform {
  required_providers {
    google-beta = {
      source  = "hashicorp/google-beta"
      version = "5.34.0"
    }
  }
}

provider "google-beta" {
  user_project_override = true
}
hashicorp/google-beta の最新バージョン名は以下を確認してください。
# インポート定義を記載するためのファイル
# 後から記載するため、一旦空ファイルとしておく
# 環境変数を定義するためのファイル
# 後から記載するため、一旦空ファイルとしておく
Terraform には環境変数を読み込む機能があり、terraform.tfvars に記載した変数は自動的に読み込まれます。
このように環境変数として定義することで、複数の環境への適用を容易にしたり、秘匿情報をバージョン管理対象外としたりできます。
以下コマンドを実行します。
terraform init
生成されたファイルをコミットしておきます。
3. Terraform 上で Firebase を管理するための知識を得る
ここから先、Firebase プロジェクトを作成し各種機能を有効にした際、リソースがどのように構築されているかの知識があるとスムーズです。
そのため、以下公式ドキュメントにおける「Terraform をサポートする Firebase リソース」の部分を読んでみることをおすすめします。
また、Firebase のプロジェクトを Terraform によりゼロから作成してみることもおすすめです。
上記のドキュメントには、実際に Terraform で Firebase プロジェクトを構築するためのサンプルが豊富に記載されています。
4. Terraform に既存リソースのインポート定義を作成する
Terraform で既存のインフラリソースを管理するためには、各リソースを Terraform にインポートする必要があります。
インポートにより、Terraform はリソースの現在の状態を把握し、その結果を State ファイル(*.tfstate ファイル)に記録します。
Terraform は State ファイルと、インフラリソースの目標状態が記載された Terraform ファイル(*.tf ファイル)を比較し、必要なインフラ設定の手順を組み立てます。
State ファイルについては、その存在意義を含めた解説が公式にあります。
インポートには以下 2 種類の方法があります。
- コマンドにより 1 つずつリソースをインポート
- Terraform ファイルに記載されたインポート定義により一気にインポート
今回は、試行錯誤がやりやすい、2 の Terraform ファイルに記載されたインポート定義により一気にインポートする方法を採用します。
一気にインポートする方法では、Terraform ファイル自体を自動生成するという機能もあるため、そちらを利用して Terraform ファイル作成を効率化します。
Terraform ファイルにインポート定義を記載するには、以下の手順が必要です。
- 既存のインフラ構成に対応する Terraform のリソースを見つける
- そのリソースのインポートに必要な ID フォーマットを確認し、Firebase や Google Cloud のコンソール、CLI ツールから ID を取得する
- リソースに対し、Terraform 上で管理するための名前をつける
そして、以下のような形式で Terraform ファイルに定義します。
import {
  # id = "{{リソースの ID}}"
  id = "projects/sample-project-id"
  # to = {{リソースの種別}}.{{リソースの管理のための名前}}
  to = google_firebase_project.default
}
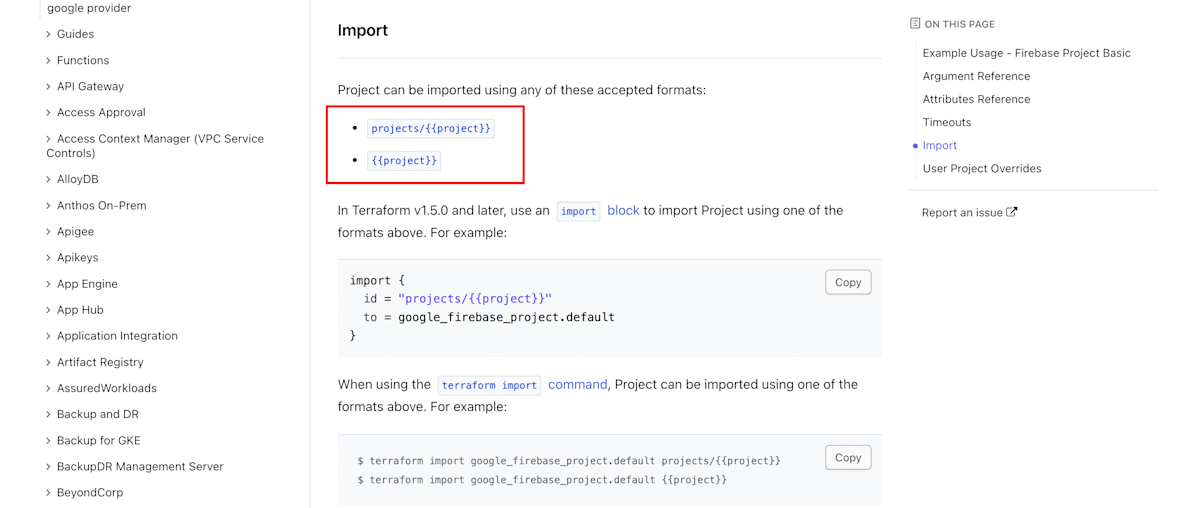
インポートに必要な ID フォーマットは、各リソースの公式ドキュメントの "import" の項目に記載されています。
(準備)Firebase のセキュリティールールの名前を調べておく
Firebase CLI や Google Cloud CLI から、Firebase のセキュリティールールの ID を調べる方法が分かりませんでした。
そのため、一旦 Terraform で関連するリソースをインポートすることで、間接的にセキュリティールールの名前を調べることにします。
まず、以下内容の一時ファイル temporary.tf を作成します。
# Firestore のインポート定義
resource "google_firebaserules_release" "firestore" {
  provider     = google-beta
  name         = "cloud.firestore"
  ruleset_name = ""
}

# Firebase Storage のインポート定義
resource "google_firebaserules_release" "storage" {
  provider     = google-beta
  name         = "cloud.storage"
  ruleset_name = ""
}
また、Google Cloud のプロジェクト ID を調べてから、以下のコマンドを実行します。
PROJECT_ID="{{Google CloudのプロジェクトIDを記載}}"
terraform import google_firebaserules_release.firestore "projects/$PROJECT_ID/releases/cloud.firestore"
terraform import google_firebaserules_release.storage "projects/$PROJECT_ID/releases/firebase.storage/$PROJECT_ID.appspot.com"
すると、terraform.tfstate という名前の JSON ファイルが生成されます。
その中から、ruleset_name というキーに対するバリューを探してメモしておきます。

バリューは、以下のようなフォーマットになっているはずです。
projects/{{Google CloudのプロジェクトID}}/rulesets/xxxxxxxx-xxxx-xxxx-xxxx-xxxxxxxxxxxx
x は数字またはアルファベットを示しています。
xxxxxxxx-xxxx-xxxx-xxxx-xxxxxxxxxxxx の部分を、後のステップで利用します。
メモが完了したら、temporary.tf と terraform.tfstate を削除しておきます。
プロジェクトとアプリ
まず、プロジェクト本体と、Firebase に登録されているアプリのインポート定義を追加します。
私のプロジェクトの場合、取り込む必要があるリソースは以下の通りでした。
| リソース名 | 説明 |
|---|---|
| google_project | Google Cloud プロジェクト本体 |
| google_firebase_project | Firebase プロジェクト本体 |
| google_firebase_apple_app | Firebase に登録された Apple(iOS) アプリ |
| google_firebase_android_app | Firebase に登録された Android アプリ |
上記をもとに、以下のように定義しました。
+variable "google_project_id" {
+  type        = string
+  description = "ID for Google Cloud project."
+}
+
+variable "firebase_apple_app_id" {
+  type        = string
+  description = "App ID for Firebase Apple app, such as 1:000000000000:ios:xxxxxxxxxxxxxxxxxxxxxx."
+}
+
+variable "firebase_android_app_id" {
+  type        = string
+  description = "App ID for Firebase Android app, such as 1:000000000000:android:xxxxxxxxxxxxxxxxxxxxxx."
+}
+
+import {
+  id = var.google_project_id
+  to = google_project.default
+}
+
+import {
+  id = "projects/${var.google_project_id}"
+  to = google_firebase_project.default
+}
+
+import {
+  id = "projects/${var.google_project_id}/iosApps/${var.firebase_apple_app_id}"
+  to = google_firebase_apple_app.default
+}
+
+import {
+  id = "projects/${var.google_project_id}/androidApps/${var.firebase_android_app_id}"
+  to = google_firebase_android_app.default
+}
+google_project_id       = "{{Google CloudのプロジェクトIDを記載}}"
+firebase_apple_app_id   = "{{Firebaseに登録されているAppleアプリのアプリIDを記載}}"
+firebase_android_app_id = "{{Firebaseに登録されているAndroidアプリのアプリIDを記載}}"
terraform.tfvars については、中身の値をご自身のプロジェクトの情報に置き換える必要があります。
Firebase に登録されているアプリ ID は、Firebase Console から確認できます。

Firebase Authentication
Authentication に関して、以下のようにリソースのインポート定義を追加しました。
| リソース名 | 説明 |
|---|---|
| google_identity_platform_config | Authentication の設定 |
# ...

import {
  id = "projects/${var.google_project_id}/androidApps/${var.firebase_android_app_id}"
  to = google_firebase_android_app.default
}
+
+import {
+  id = var.google_project_id
+  to = google_identity_platform_config.auth
+}
Cloud Firestore
Firestore に関するリソースのインポート定義を追加します。
| リソース名 | 説明 |
|---|---|
| google_firestore_database | Firestore 本体 |
| google_firebaserules_ruleset | Firestore のセキュリティルール |
| google_firebaserules_release | Firestore のセキュリティルールの適用状態 |
# ...

variable "firebase_android_app_id" {
  type        = string
  description = "App ID for Firebase Android app, such as 1:000000000000:android:xxxxxxxxxxxxxxxxxxxxxx."
}

+variable "firestore_ruleset_name" {
+  type        = string
+  description = "Firestore rule set name."
+}
+
import {
  id = var.google_project_id
  to = google_project.default
}

# ...

import {
  id = var.google_project_id
  to = google_identity_platform_config.auth
}
+
+import {
+  id = "projects/${var.google_project_id}/databases/(default)"
+  to = google_firestore_database.default
+}
+
+import {
+  id = "projects/${var.google_project_id}/rulesets/${var.firestore_ruleset_name}"
+  to = google_firebaserules_ruleset.firestore
+}
+
+import {
+  id = "projects/${var.google_project_id}/releases/cloud.firestore"
+  to = google_firebaserules_release.firestore
+}
# ...
firebase_android_app_id = "{{Firebaseに登録されているAndroidアプリのアプリIDを記載}}"
+firestore_ruleset_name  = "{{Firestoreのルールセット名を記載}}"
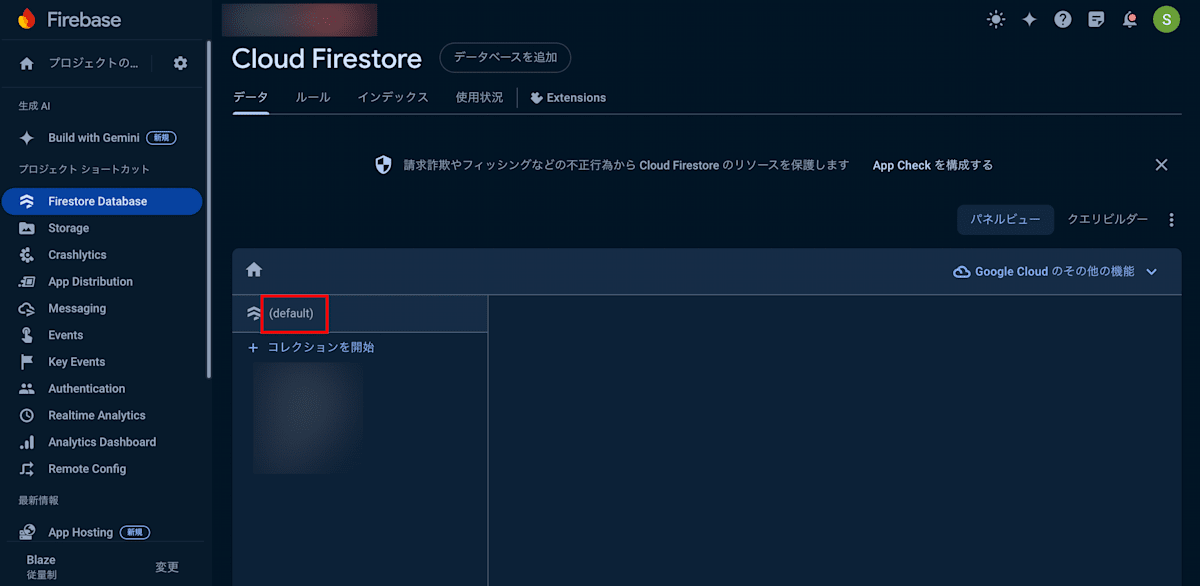
Firebase で Firestore を有効にすると、データベース名が (default) になります。
そのため、google_firestore_database.default の ID の末尾は (default) 固定にしています。
もし、お使いの Firestore のデータベース名が (default) 以外の場合は、その名前を指定してください。
Firestore のデータベース名は、Firebase Console から確認できます。
Firestore のルールセット名は、最初の方の手順でメモした以下のフォーマットのものを記載します。
xxxxxxxx-xxxx-xxxx-xxxx-xxxxxxxxxxxx
Cloud Storage for Firebase
Firebase Storage に関して、以下のようにリソースのインポート定義を追加しました。
| リソース名 | 説明 |
|---|---|
| google_firebase_storage_bucket | Firebase Storage 本体 |
| google_firebaserules_ruleset | Firestore のセキュリティルール |
| google_firebaserules_release | Firestore のセキュリティルールの適用状態 |
| google_app_engine_application | Firestore のために自動で有効化される App Engine |
# ...

import {
  id = "projects/${var.google_project_id}/releases/cloud.firestore"
  to = google_firebaserules_release.firestore
}
+
+import {
+  id = "projects/${var.google_project_id}/buckets/${var.google_project_id}.appspot.com"
+  to = google_firebase_storage_bucket.default
+}
+
+import {
+  id = "projects/${var.google_project_id}/rulesets/${var.firebase_storage_ruleset_name}"
+  to = google_firebaserules_ruleset.storage
+}
+
+import {
+  id = "projects/${var.google_project_id}/releases/firebase.storage/${var.google_project_id}.appspot.com"
+  to = google_firebaserules_release.storage
+}
+
+import {
+  id = var.google_project_id
+  to = google_app_engine_application.default
+}
# ...
firestore_ruleset_name        = "{{Firestoreのルールセット名を記載}}"
+firebase_storage_ruleset_name = "{{Firebase Storageのルールセット名を記載}}"
Firebase Storage のルールセット名は、最初の方の手順でメモした以下のフォーマットのものを記載します。
xxxxxxxx-xxxx-xxxx-xxxx-xxxxxxxxxxxx
Firebase Storage を有効にすると、裏側で AppEngine が有効にされます。
これを Terraform で管理する必要があります。
google_firebaserules_ruleset と google_firebaserules_release は Firestore で取り込んだリソースの種類と同じです。
Cloud Functions
私のプロジェクトの場合、Cloud Functions for Firebase ではなく、Google Cloud の Cloud Functions を直接利用していました。
そのため、以下のようにリソースのインポート定義を追加しました。
| リソース名 | 説明 |
|---|---|
| google_cloudfunctions_function | Cloud Functions の各関数 |
| google_cloudfunctions_function_iam_member | Cloud Functions の公開ポリシー |
variable "google_project_id" {
  type        = string
  description = "ID for Google Cloud project."
}

+variable "google_project_location" {
+  type        = string
+  description = "Location for Google Cloud project."
+}
+
variable "firebase_apple_app_id" {
  type        = string
  description = "App ID for Firebase Apple app, such as 1:000000000000:ios:xxxxxxxxxxxxxxxxxxxxxx."
}

# ...

import {
  id = var.google_project_id
  to = google_app_engine_application.default
}
+
+import {
+  id = "${var.google_project_id}/${var.google_project_location}/function1"
+  to = google_cloudfunctions_function.function1
+}
+
+import {
+  id = "${var.google_project_id}/${var.google_project_location}/detect roles/cloudfunctions.invoker allUsers"
+  to = google_cloudfunctions_function_iam_member.function1_invoker
+}
google_project_id             = "{{Google CloudのプロジェクトIDを記載}}"
+google_project_location       = "{{Google Cloudプロジェクトのロケーションを記載}}"
firebase_apple_app_id         = "{{Firebaseに登録されているAppleアプリのアプリIDを記載}}"
# ...
Function を複数定義している場合は、それぞれに対してインポート定義が必要です。
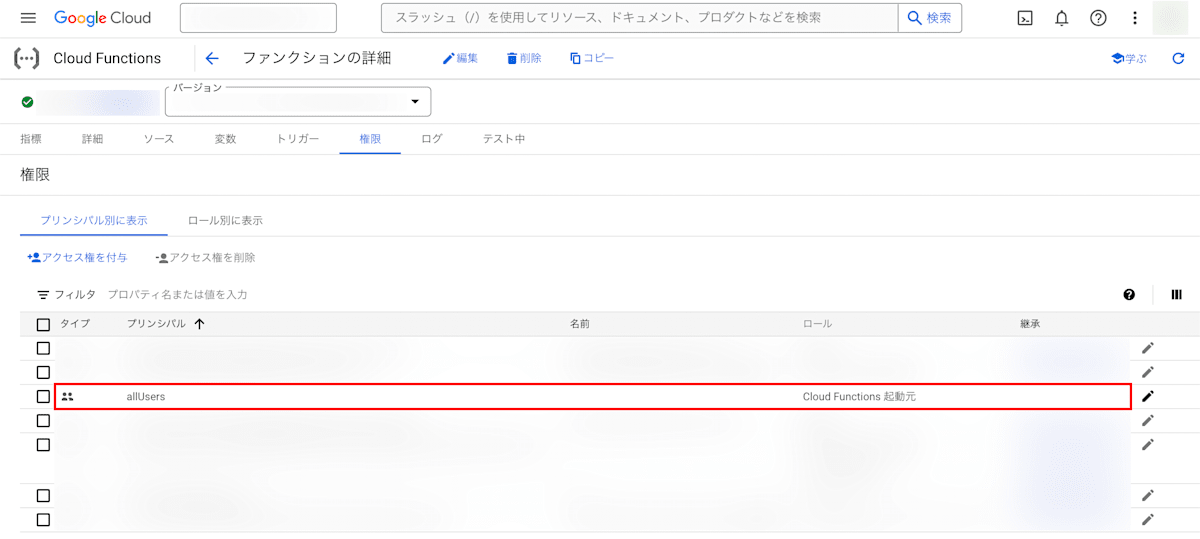
Function は認証不要で全ユーザーがアクセスできるようにしていました。そのため、以下のような IAM ポリシーが設定されています。
Terraform ではこのような IAM ポリシーも 1 つのリソースとして定義されています。
Cloud Tasks
Google Cloud の Cloud Tasks を利用していたので、以下のようにリソースのインポート定義を追加しました。
| リソース名 | 説明 |
|---|---|
| google_cloud_tasks_queue | Cloud Tasks のキュー |
# ...

variable "firebase_storage_ruleset_name" {
  type        = string
  description = "Firebase Storage rule set name."
}

+variable "cloud_tasks_queue_id" {
+  type        = string
+  description = "Cloud Tasks queue ID."
+}
+
import {
  id = var.google_project_id
  to = google_project.default
}

# ...

import {
  id = "${var.google_project_id}/${var.google_project_location}/detect roles/cloudfunctions.invoker allUsers"
  to = google_cloudfunctions_function_iam_member.function1_invoker
}
+
+import {
+  id = "projects/${var.google_project_id}/locations/${var.google_project_location}/queues/${var.cloud_tasks_queue_id}"
+  to = google_cloud_tasks_queue.default
+}
# ...
firebase_storage_ruleset_name = "{{Firebase Storageのルールセット名を記載}}"
+cloud_tasks_queue_id          = "{{Cloud TasksのキューIDを記載}}"
サービスアカウント
Cloud Tasks を Functions から呼び出すためのサービスアカウントを作成していました。
そのため、以下のようにリソースのインポート定義を追加しました。
| リソース名 | 説明 |
|---|---|
| google_service_account | サービスアカウント |
| google_project_iam_member | サービスアカウントの IAM |
# ...

variable "cloud_tasks_queue_id" {
  type        = string
  description = "Cloud Tasks queue ID."
}

+variable "cloud_tasks_service_account_name" {
+  type        = string
+  description = "Service account name for Cloud Tasks."
+}
+
import {
  id = var.google_project_id
  to = google_project.default
}

# ...

import {
  id = "projects/${var.google_project_id}/locations/${var.google_project_location}/queues/${var.cloud_tasks_queue_id}"
  to = google_cloud_tasks_queue.default
}
+
+import {
+  id = "projects/${var.google_project_id}/serviceAccounts/${var.cloud_tasks_service_account_name}@${var.google_project_id}.iam.gserviceaccount.com"
+  to = google_service_account.cloud_tasks
+}
+
+import {
+  id = "${var.google_project_id} roles/cloudtasks.enqueuer serviceAccount:${var.cloud_tasks_service_account_name}@${var.google_project_id}.iam.gserviceaccount.com"
+  to = google_project_iam_member.cloud_tasks_enqueuer
+}
# ...
cloud_tasks_queue_id             = "{{Cloud TasksのキューIDを記載}}"
+cloud_tasks_service_account_name = "{{Cloud Tasksのサービスアカウント名を記載}}"
Cloud Tasks のサービスアカウント名は、サービスアカウントのメールアドレスの @ より前の部分を指定します。
自動生成に対応していないリソースの定義を仮で追加する
全てのリソースのインポート定義を追加したので、早速インポートと Terraform 定義の自動生成に進みたいですが、このまま進んでも定義の自動生成でエラーが出ます。
╷
│ Error: Resource Not Implemented
│
│ The combined provider does not implement the requested resource type. This is always an issue in the provider implementation and should be reported to the provider developers.
│
│ Missing resource type: google_firebase_apple_app
╵
╷
│ Error: Resource Not Implemented
│
│ The combined provider does not implement the requested resource type. This is always an issue in the provider implementation and should be reported to the provider developers.
│
│ Missing resource type: google_firebase_storage_bucket
╵
╷
│ Error: Resource Not Implemented
│
│ The combined provider does not implement the requested resource type. This is always an issue in the provider implementation and should be reported to the provider developers.
│
│ Missing resource type: google_firebase_project
╵
╷
│ Error: Resource Not Implemented
│
│ The combined provider does not implement the requested resource type. This is always an issue in the provider implementation and should be reported to the provider developers.
│
│ Missing resource type: google_firebase_android_app
╵
一部のリソースはインポートからの Terraform 定義の自動生成に対応していないためです。
そのため、一旦仮で Terraform 定義を追加します。
+variable "ios_android_application_id" {
+  type        = string
+  description = "Bundle ID of iOS app and application ID of Android app."
+}
+
terraform {
  required_providers {
    google-beta = {
      source  = "hashicorp/google-beta"
      version = "5.34.0"
    }
  }
}

provider "google-beta" {
  user_project_override = true
}
+
+resource "google_firebase_project" "default" {
+  provider = google-beta
+  project  = var.google_project_id
+}
+
+resource "google_firebase_apple_app" "default" {
+  provider = google-beta
+
+  project      = google_firebase_project.default.project
+  display_name = "iOS"
+  bundle_id    = var.ios_android_application_id
+}
+
+resource "google_firebase_android_app" "default" {
+  provider = google-beta
+
+  project      = google_firebase_project.default.project
+  display_name = "Android"
+  package_name = var.ios_android_application_id
+}
+
+resource "google_identity_platform_config" "auth" {
+  provider = google-beta
+
+  project = google_firebase_project.default.project
+}
+
+resource "google_firebase_storage_bucket" "default" {
+  provider = google-beta
+
+  project   = google_firebase_project.default.project
+  bucket_id = "${var.google_project_id}.appspot.com"
+}
# ...
firebase_android_app_id          = "{{Firebaseに登録されているAndroidアプリのアプリIDを記載}}"
+ios_android_application_id       = "{{iOSアプリのBundle IDとAndroidアプリのアプリIDを記載}}"
firestore_ruleset_name           = "{{Firestoreのルールセット名を記載}}"
# ...
5. Terraform 定義ファイルを自動生成する
以下のコマンドを実行します。
terraform plan -generate-config-out=generated.tf
これにより、Terraform の定義ファイルが generated.tf に生成されます。
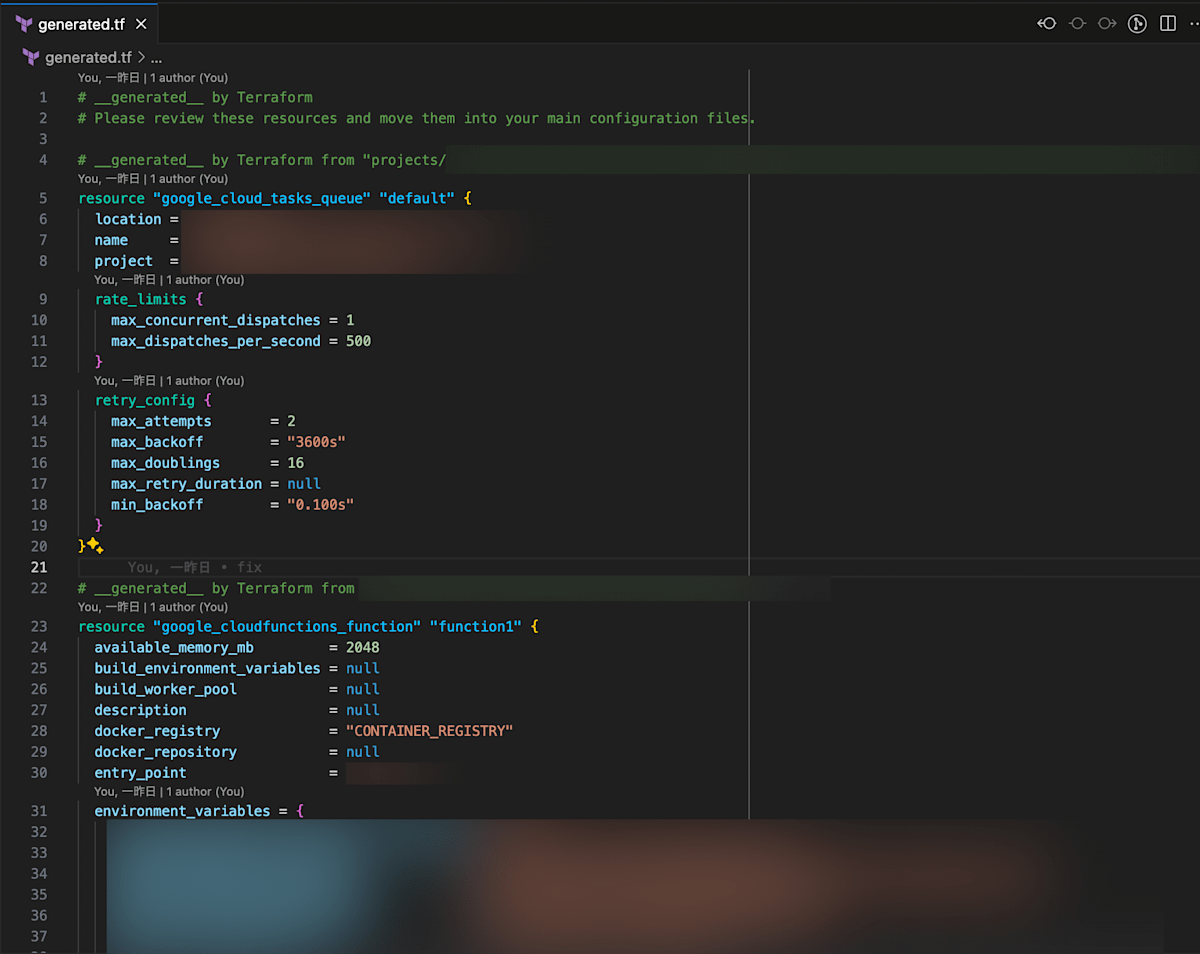
次に自動生成なしでコマンドを再度実行します。
terraform plan
すると以下のようなログが出力されます。
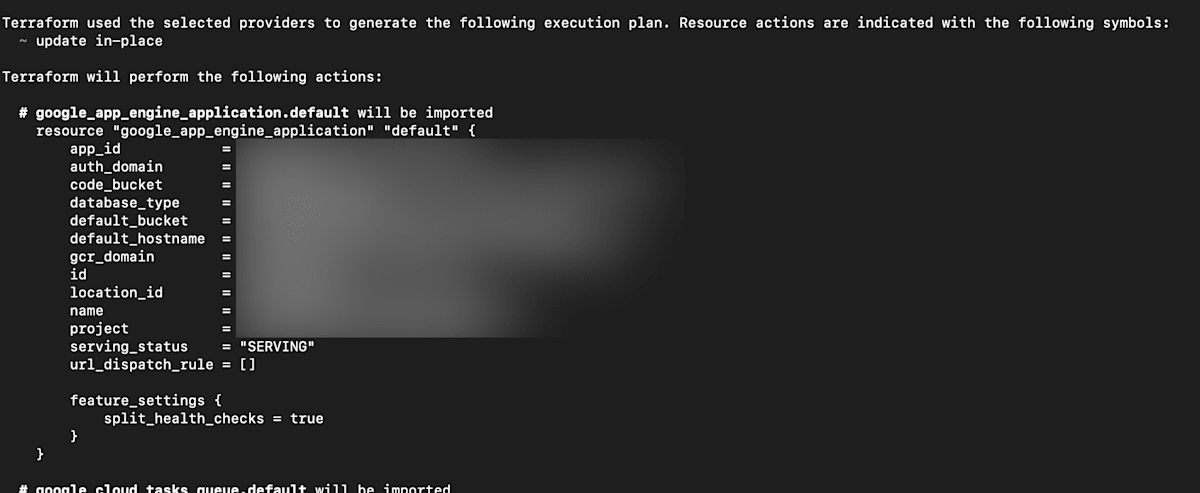
差分がある場合には、以下のようにハイライトされます。
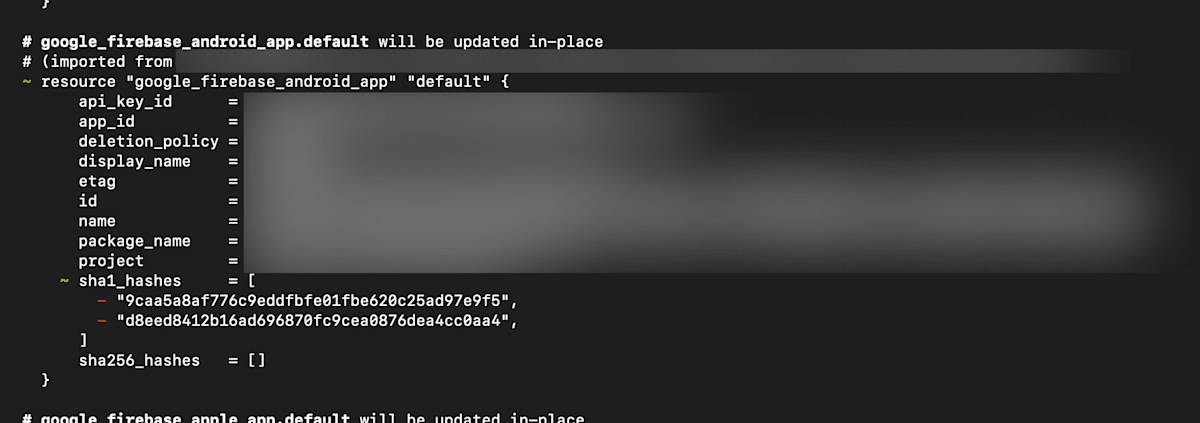
必要に応じて、Terraform の定義内に手動で変更を加えます。
上記の差分を解消したい場合、以下のように修正できます。
+variable "firebase_android_app_sha1_hashes" {
+  type        = list(string)
+  description = "Allowed SHA-1 hashes for Firebase Android app."
+}
+
variable "ios_android_application_id" {
  type        = string
  description = "Bundle ID of iOS app and application ID of Android app."
}

# ...

resource "google_firebase_android_app" "default" {
  provider = google-beta

  project      = google_firebase_project.default.project
  display_name = "Android"
  package_name = var.ios_android_application_id
+  sha1_hashes  = var.firebase_android_app_sha1_hashes
}

# ...
# ...
firebase_android_app_id = "{{Firebaseに登録されているAndroidアプリのアプリIDを記載}}"
+firebase_android_app_sha1_hashes = [
+  "9caa5a8af776c9eddfbfe01fbe620c25ad97e9f5",
+  "d8eed8412b16ad696870fc9cea0876dea4cc0aa4",
+]
ios_android_application_id       = "{{iOSアプリのBundle IDとAndroidアプリのアプリIDを記載}}"
# ...
6. Terraform で一度適用する
意図しない差分がなくなったら、以下のコマンドを実行します。
terraform apply
これにより、State ファイル(terraform.tfstate ファイル)が生成され、既存のリソース群が Terraform により管理されるようになります。
以後は、Terraform の定義ファイルを修正し、Terraform によりリソースに変更を自動で適用できます。
晴れて Firebase の Terraform 管理化の完了です!おめでとうございます!🎉
最後に
Firebase のリソースを Terraform で管理できるようになると、安心感がありますね。
Firebase の扱えるリソース範囲が今より広がりベータも取れれば、今よりもっと活用できるシーンが増えると考えられるので、対応されるのが待ち遠しいです。
Discussion