個人ブログに目次
navタグというのがあるらしい
実装方針
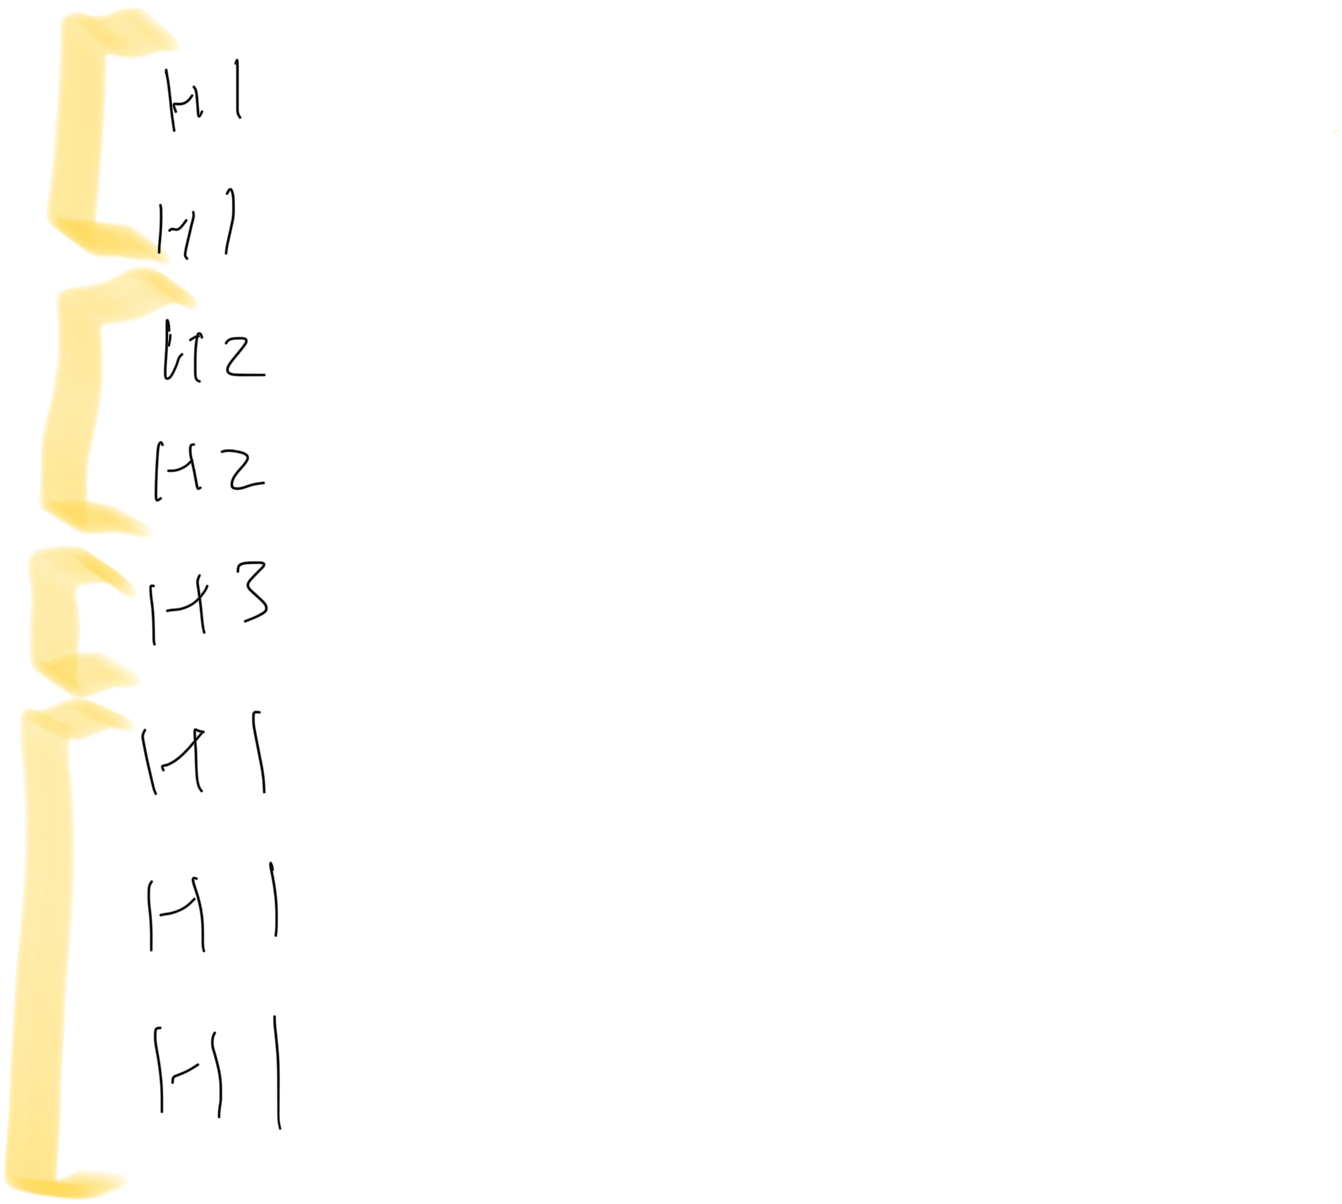
- Notion APIから受け取ったブロック配列を検査して、h1, h2, h3要素だけを取得して目次要素とする
- 目次要素を
renderBlockに渡す- OGP要素と違って、目次はページ単位で1つだから、常に渡しちゃって良い
- table_of_contentsブロックが来たら、目次要素をレンダリングする
- こんな感じ
<nav>
  <h2>目次</h2>
  <ol>
    <li><a href="#section1">セクション1</a></li>
    <li>
      <a href="#section2">セクション2</a>
      <ol>
        <li><a href="#section2-1">セクション2-1</a></li>
        <li><a href="#section2-2">セクション2-2</a></li>
      </ol>
    </li>
    <li>
      <a href="#section3">セクション3</a>
      <ol>
        <li><a href="#section3-1">セクション3-1</a></li>
        <li>
          <a href="#section3-2">セクション3-2</a>
          <ol>
            <li><a href="#section3-2-1">セクション3-2-1</a></li>
            <li><a href="#section3-2-2">セクション3-2-2</a></li>
          </ol>
        </li>
      </ol>
    </li>
  </ol>
</nav>
サイト内のアンカーリンク、意外と簡単につけられるらしいからつけちゃおう
はい、目次の各項目に対して http://domain.com#section1 のようなアンカーリンクを設定することで、特定のセクションにジャンプできます。これを実現するには、以下の手順に従ってください。
-
各見出し要素にIDを割り当てる
- 目次の各項目に対応する見出し要素(h1, h2, h3など)に、一意のIDを割り当てます。
- IDは、見出しのテキストをもとに自動生成することができます(例えば、"セクション1" という見出しに対して "section1" というIDを割り当てるなど)。
-
目次の各項目にアンカーリンクを設定する
- 目次の各項目(
<li>要素)内に、対応する見出し要素のIDを指定したアンカーリンク(<a>要素)を追加します。 - アンカーリンクの
href属性には、#に続いて見出し要素のIDを指定します。
- 目次の各項目(
以下は、目次のHTMLの例です。
<nav>
  <h2>目次</h2>
  <ol>
    <li><a href="#section1">セクション1</a></li>
    <li>
      <a href="#section2">セクション2</a>
      <ol>
        <li><a href="#section2-1">セクション2-1</a></li>
        <li><a href="#section2-2">セクション2-2</a></li>
      </ol>
    </li>
    <li>
      <a href="#section3">セクション3</a>
      <ol>
        <li><a href="#section3-1">セクション3-1</a></li>
        <li>
          <a href="#section3-2">セクション3-2</a>
          <ol>
            <li><a href="#section3-2-1">セクション3-2-1</a></li>
            <li><a href="#section3-2-2">セクション3-2-2</a></li>
          </ol>
        </li>
      </ol>
    </li>
  </ol>
</nav>
- 見出し要素にIDを設定する
- 対応する見出し要素(h1, h2, h3など)に、目次の各項目で指定したIDを
id属性として設定します。
- 対応する見出し要素(h1, h2, h3など)に、目次の各項目で指定したIDを
以下は、見出し要素にIDを設定した例です。
<h1 id="section1">セクション1</h1>
<h2 id="section2">セクション2</h2>
<h3 id="section2-1">セクション2-1</h3>
<h3 id="section2-2">セクション2-2</h3>
<h2 id="section3">セクション3</h2>
<h3 id="section3-1">セクション3-1</h3>
<h3 id="section3-2">セクション3-2</h3>
<h4 id="section3-2-1">セクション3-2-1</h4>
<h4 id="section3-2-2">セクション3-2-2</h4>
これで、目次の各項目をクリックすると、対応するセクションにジャンプできるようになります。また、URLに#section1のようなアンカーを指定してアクセスすると、ページ読み込み後に自動的に対応するセクションにスクロールします。
アンカーリンクを設定することで、ユーザーがページ内の特定のセクションに簡単にアクセスできるようになり、ナビゲーションの利便性が向上します。
デバッグしていると、ブラウザとサーバーで日付の表示が違うというハイドレーションエラーが出て気になるので、
下記で対処しようと思ったが、これでもまだダメらしかった
windowオブジェクトはブラウザ環境でのみ利用可能であり、Next.jsのサーバーサイドレンダリングではアクセスできませんでした、らしい
export const getLocaleDateString = (post: NotionPage) => {
  const pageDate = getPageDate(post)
  const date = new Date(pageDate)
  if (typeof window !== 'undefined') {
    return date.toLocaleDateString(window.navigator.language, {
      year: 'numeric',
      month: '2-digit',
      day: '2-digit',
    })
  }
  return date.toLocaleDateString('ja-JP', {
    year: 'numeric',
    month: '2-digit',
    day: '2-digit',
  })
}
ここ難しいなあ。ハイドレーションエラーの何がいけないのかわからない
一般論としてはわかるんだけど、このシチュエーションは謎
こんなんで対応
  const [formattedDates, setFormattedDates] = useState<string[]>([]);

  useEffect(() => {
    const dates = db.map((page) => {
      const date = new Date(getPageDate(page as NotionPage))
      return date.toLocaleDateString(navigator.language, {
        year: 'numeric',
        month: '2-digit',
        day: '2-digit',
      })
    })
    setFormattedDates(dates)
  }, [db])
package.json を書きなおしたら npm run dev でTSのコンパイルエラーになるようになった
"scripts": {
  "dev": "tsc && next dev",
  "build": "next build",
  "start": "next start"
}
ここがむずい
// …
return (<nav><h1>'目次'</h1><TableOfContentsComponent tableOfContents={tableOfContents}/></nav>)
// …

const TableOfContentsComponent = ({ tableOfContents }: { tableOfContents: NotionBlockWithChildren[] }) => {
  if (tableOfContents.length == 0) {
    return null
  }

  return tableOfContents.map((block) => {
    switch (block.type) {
      case 'heading_1':
        // …
      case 'heading_2':
        // …
      case 'heading_3':
        // …
    }
  })
}
前後のブロックでどう<ol> タグで囲うのかが変わる
HTMLが汚くなるのを許容するのであれば、1ブロック完結でこう書ける
これはこれでわかりやすいかな?
const TableOfContentsComponent = ({ tableOfContents }: { tableOfContents: NotionBlockWithChildren[] }) => {
  if (tableOfContents.length === 0) {
    return null
  }

  const renderTableOfContents = (blocks: NotionBlockWithChildren[]) => {
    return (
      <ol>
        {blocks.map((block) => {
          switch (block.type) {
            case 'heading_1':
              return (
                <li key={block.id}>
                  <a href={`#${block.id}`}>{block.heading_1.text[0].plain_text}</a>
                </li>
              )
            case 'heading_2':
              return (
                <ol>
                  <li key={block.id}>
                    <a href={`#${block.id}`}>{block.heading_2.text[0].plain_text}</a>
                  </li>
                </ol>
              )
            case 'heading_3':
              return (
                <ol>
                  <ol>
                    <li key={block.id}>
                    <a href={`#${block.id}`}>{block.heading_3.text[0].plain_text}</a>
                    </li>
                  </ol>
                </ol>
              )
            default:
              return null
          }
        })}
      </ol>
    )
  }

  return (
    <nav>
      <h1>目次</h1>
      {renderTableOfContents(tableOfContents)}
    </nav>
  )
}
この単位でまとめられたらいいのか
NotionBlockWithChildrenの二重配列をつくるのが筋がいい

流れ
- 目次要素の入った
NotionBlockWithChildren[]が来る - 先頭から順にh1, h2, h3で仕分けて二重配列をつくる
- 二重配列の先頭からJSXコンポーネントを生成
こんなんで
const TableOfContentsComponent = ({ tableOfContents }: { tableOfContents: NotionBlockWithChildren[] }) => {
  if (tableOfContents.length === 0) {
    return null
  }

  const renderTableOfContents = (blocks: NotionBlockWithChildren[]) => {
    const groupedBlocks: NotionBlockWithChildren[][] = []
    const sameHeadingBlocks: NotionBlockWithChildren[] = []

    blocks.forEach((block, index) => {
      if (sameHeadingBlocks[sameHeadingBlocks.length - 1] &&
          block.type != sameHeadingBlocks[sameHeadingBlocks.length - 1].type) {
        groupedBlocks.push([...sameHeadingBlocks])
        sameHeadingBlocks.length = 0
      }

      sameHeadingBlocks.push(block)

      if (index == blocks.length - 1) {
        groupedBlocks.push([...sameHeadingBlocks])
      }
    })

    return (
      <ol>
        {groupedBlocks.map((blocks) => {
          switch (blocks[0]?.type) {
            case 'heading_1':
              return (
                <Fragment key={blocks[0]?.id}>
                {blocks.flatMap((block) => renderBlock(block))}
                </Fragment>
              )
            case 'heading_2':
              return (
                <ol>
                  {blocks.flatMap((block) => renderBlock(block))}
                </ol>
              )
            case 'heading_3':
              return (
                <ol>
                  <ol>
                    {blocks.flatMap((block) => renderBlock(block)) }
                  </ol>
                </ol>
              )
            default:
              return null
          }
        })}
      </ol>
    )
  }

  const renderBlock = (block: NotionBlockWithChildren) => {
      switch (block.type) {
        case 'heading_1':
          return (
            <li key={block.id}>
              <a href={`#${block.id}`}>{block.heading_1.text[0].plain_text}</a>
            </li>
          )
        case 'heading_2':
          return (
            <li key={block.id}>
              <a href={`#${block.id}`}>{block.heading_2.text[0].plain_text}</a>
            </li>
          )
        case 'heading_3':
          return (
            <li key={block.id}>
              <a href={`#${block.id}`}>{block.heading_3.text[0].plain_text}</a>
            </li>
          )

        default:
          return null
    }
  }

  return (
    <nav>
      <h1>目次</h1>
      {renderTableOfContents(tableOfContents)}
    </nav>
  )
}
最初<ol></ol>しか入ってなくて絶望したけど、Claudeに聞いたら解決した
コードを確認したところ、renderTableOfContents 関数内で renderBlock 関数を呼び出す部分に問題があるようです。
具体的には、以下の部分です:
{
  blocks.flatMap((block) => { renderBlock(block) })
}
renderBlock 関数は JSX 要素を返すように設計されていますが、この呼び出し方では、関数の実行結果そのものが JSX の中に展開されてしまいます。つまり、要素ではなく関数の実行結果が展開されてしまうため、期待通りの動作にならないのです。
この問題を解決するには、renderBlock 関数の返り値を JSX 要素として明示的に返す必要があります。例えば以下のようにします:
{
  blocks.flatMap((block) => renderBlock(block))
}
または、より簡潔に書くなら:
{blocks.map((block) => renderBlock(block))}
こうすれば、renderBlock から返された JSX 要素が適切にレンダリングされるはずです。
このワーニングに対処する
Warning: A title element received an array with more than 1 element as children. In browsers title Elements can only have Text Nodes as children. If the children being rendered output more than a single text node in aggregate the browser will display markup and comments as text in the title and hydration will likely fail and fall back to client rendering
    at title
    at head
    at Head (webpack-internal:///./node_modules/next/dist/pages/_document.js:308:1)
    at html
    at Html (webpack-internal:///./node_modules/next/dist/pages/_document.js:782:132)
    at Document (webpack-internal:///./node_modules/next/dist/pages/_document.js:798:1)
このワーニングは、Next.jsのHeadコンポーネント内の<title>タグに複数の要素が含まれている場合に発生します。ブラウザの<title>タグには、テキストノードのみを子要素として含めることができます。
提供されたコードを確認したところ、<title>タグ内に複数の要素が含まれていないように見えます。しかし、{titlePre}の値が複数の要素を含む可能性があります。
このエラーを解決するには、以下のように<title>タグ内で文字列の結合やテンプレートリテラルを使用して、タイトルを一つの文字列として表現してください。
const Header = ({ titlePre = '' }) => {
  const { pathname } = useRouter()

  return (
    <header className={styles.header}>
      <Head>
        <link rel="icon" href="/profile.png" />
        <title>{`${titlePre}`}</title>
        {/* ... */}
      </Head>
      {/* ... */}
    </header>
  )
}
上記のように、{titlePre}を{``${titlePre}``}のようにテンプレートリテラル内に入れることで、titlePreの値が文字列として評価され、<title>タグ内に単一のテキストノードが含まれるようになります。
また、titlePreの値が適切な文字列であることを確認し、不要な空白や改行がないようにしてください。
これらの修正を行うことで、ワーニングが解消されるはずです。
このワーニングも対処したい
(node:36056) [DEP0040] DeprecationWarning: The `punycode` module is deprecated. Please use a userland alternative instead.
CSS書いてもらう
こんな目次HTMLが生成されるらしい
<nav>
  <h1>目次</h1>
  <ol>
    <li>
      <a href="#block1">Heading 1</a>
    </li>
    <ol>
      <li>
        <a href="#block2">Heading 2</a>
      </li>
      <li>
        <a href="#block3">Heading 2</a>
      </li>
    </ol>
    <ol>
      <ol>
        <li>
          <a href="#block4">Heading 3</a>
        </li>
        <li>
          <a href="#block5">Heading 3</a>
        </li>
      </ol>
    </ol>
  </ol>
</nav>
このワーニングに対処する
Warning: Each child in a list should have a unique "key" prop.

Check the top-level render call using <ol>. See https://reactjs.org/link/warning-keys for more information.
Reactでは、リスト内の各要素に一意のキーを割り当てることが推奨されています。これは、Reactがリストの変更を効率的に処理するために使用します。
具体的には、以下のようなルールがあります:
- 動的に生成される要素(つまり、mapや他のイテレーション関数を使って生成される要素)には、一意のキーが必要です。
- キーは、兄弟要素の中で一意である必要があります。リスト全体で一意である必要はありません。
- 静的な要素(つまり、繰り返し生成されない要素)にはキーは不要です。
これでいいようだ
const renderTableOfContents = (blocks: NotionBlockWithChildren[]) => {
  // ...

  return (
    <ol>
      {groupedBlocks.map((blocks) => {
        switch (blocks[0]?.type) {
          case 'heading_1':
            return blocks.map((block) => renderBlock(block));
          case 'heading_2':
            return (
              <ol key={blocks[0]?.id}>
                {blocks.map((block) => renderBlock(block))}
              </ol>
            );
          case 'heading_3':
            return (
              <ol key={blocks[0]?.id}>
                <ol>
                  {blocks.map((block) => renderBlock(block))}
                </ol>
              </ol>
            );
          default:
            return null;
        }
      })}
    </ol>
  );
};
これにも対処
Warning: React does not recognize the `fetchPriority` prop on a DOM element. If you intentionally want it to appear in the DOM as a custom attribute, spell it as lowercase `fetchpriority` instead. If you accidentally passed it from a parent component, remove it from the DOM element.
- トップページにアクセスしたときに発生
- fetchPriorityを誤って呼んでいる?
- どうもNext.jsのバグっぽいので対応待ち
できたので閉じ