FastAPIの認証(HTTPBearer)を開発環境でのみバイパスする
こんにちは、わいけい です。
突然ですが、私は日々FastAPIを使った開発をしているのですが認証周りで時々面倒を感じることがあります。
それは、せっかくFastAPIがOpenAPI形式の動的ドキュメント(Swagger UI)を自動生成してくれているのにも関わらず、ログインが必要なエンドポイントに関しては毎度認証トークンを取得しないと叩くことが出来ないということです。
セキュリティ上「まあ、それはそうだよね」という話ではあります。
が、ローカルでコンテナ立てて開発しているときには地味に面倒なのもまた事実です。
長期的に開発を続ける想定であれば、開発チーム全体で何千回もローカル環境でのログイン&トークン取得を行うことになることが予想されます。
これは開発効率の観点からあまり好ましくなさそうだと私は思いました。
そこで今回は開発環境でのみ良い感じに認証をスキップする実装を行ってみました。
やりたいこと
具体的には以下を実現するのを目標とします。
- 本番環境ではリクエストのヘッダーに付与されたjwtトークンを真面目に検証し、通常の認証機能を実現する。同時に、アクセスしているユーザーのidもこの時取得するものとする。
- 開発環境(主にローカルを想定)ではリクエストにトークンが乗っていなくてもそれぞれの開発者が指定したユーザーIDで自動的に認証が通るようにする。
- これらの設定はいつでも切り替えられるようにする
大前提として、アプリケーションで使用されているuser_idがjwtトークンにエンコードされて送られてきているシチュエーションを想定しています。
(認証の仕方も色々あると思いますが、ここではjwtトークンによる認証方法を想定しました。
なのでAWS Cognitoとかで認証を行っている場合でも今回の方法が応用できると思います。)
まず普通にFastAPIを起動してみる
まず、普通にDocker環境下でローカルにてFastAPIアプリケーションを起動してみます。
以下のファイル群を準備してください。
FROM python:3.10-slim

WORKDIR /app

COPY requirements.txt ./
RUN pip install --no-cache-dir -r requirements.txt

COPY . .

CMD ["uvicorn", "main:app", "--host", "0.0.0.0", "--port", "8000"]
fastapi==0.105.0
uvicorn==0.23.1
python-jose==3.3.0
version: '3.8'
services:
  web:
    build: .
    ports:
      - "8000:8000"
    volumes:
      - .:/app
    command: uvicorn main:app --reload --host 0.0.0.0 --port 8000
from fastapi import FastAPI, Depends, HTTPException, Security
from fastapi.security import HTTPBearer, HTTPAuthorizationCredentials
from jose import jwt, JWTError

# JWTトークンの秘密鍵とアルゴリズム
SECRET_KEY = "your_secret_key"
ALGORITHM = "HS256"

app = FastAPI()

security = HTTPBearer()

def get_current_user(token: HTTPAuthorizationCredentials = Security(security)):
    try:
        payload = jwt.decode(token.credentials, SECRET_KEY, algorithms=[ALGORITHM])
        user_id = payload.get("user_id")
        if user_id is None:
            raise HTTPException(status_code=403, detail="Invalid authentication credentials")
        return user_id
    except JWTError:
        raise HTTPException(status_code=403, detail="Invalid token or expired token")

@app.get("/protected")
def read_protected(user_id: str = Depends(get_current_user)):
    return {"user_id": user_id}

@app.get("/open")
def read_open():
    return {"response":"Hello!"}
この状態でdocker compose upしてコンテナのビルドを行います。
その後、ブラウザでlocalhost:8000/docsにアクセスしてSwaggerUIが見られれば成功です。
下の画像のように、
/protectedと/openの2つのエンドポイントが存在していると思います。

この内、/protectedの方は鍵マークがついていることからも察せられる通り、認証を要求する設定になっています。
実際にそのまま叩いてみるとステータスコード403で
{
  "detail": "Not authenticated"
}
というレスポンスが来ると思います。
(一方/openの方は普通に叩けますね)
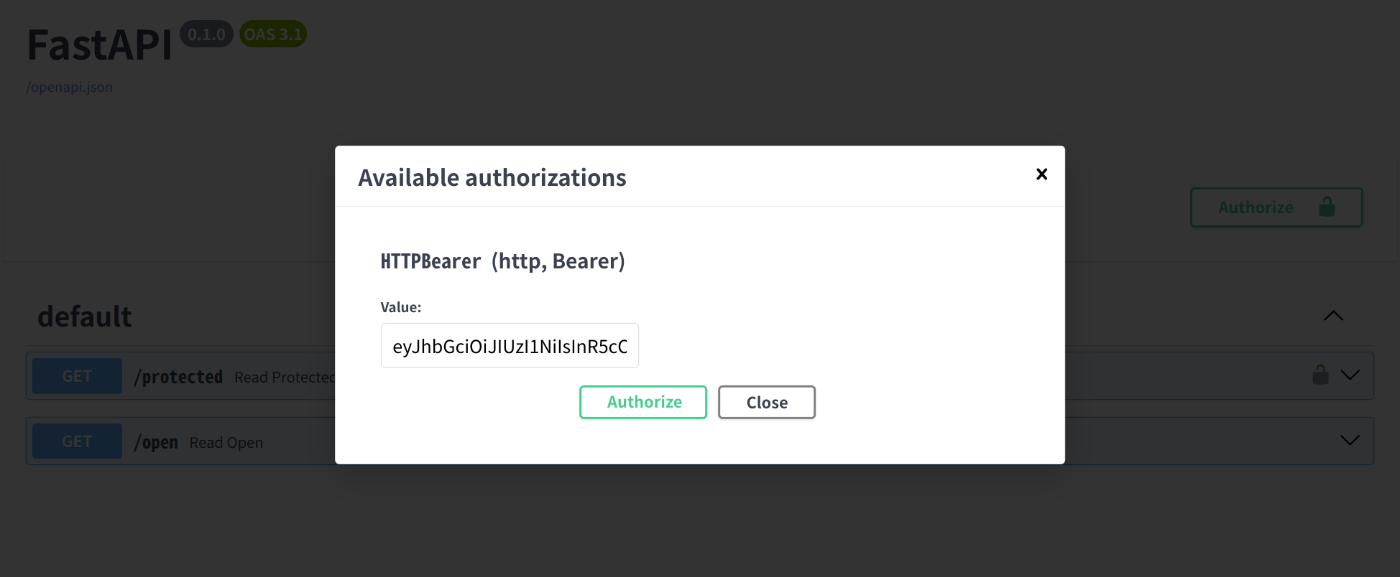
この/protectedエンドポイントを叩くには、鍵マークをクリックして例えば下記のトークンをセットしてあげる必要があります。
eyJhbGciOiJIUzI1NiIsInR5cCI6IkpXVCJ9.eyJ1c2VyX2lkIjoiZXhhbXBsZV91c2VyX2lkIn0.ciWMfJIkODOHxqyAe3rmEFxphZfjVgbnDhR7bop05Lg

(これは下記コードにて私が作成した仮のトークンです。サンプルなので有効期限などが設定されていないことに注意してください。)
from jose import jwt

SECRET_KEY = "your_secret_key"
ALGORITHM = "HS256"
user_id = "example_user_id"

token = jwt.encode({"user_id": user_id}, SECRET_KEY, algorithm=ALGORITHM)
print(token)
実際に上記トークンがヘッダーに乗った状態だと、問題なく/protectedが叩けたかと思います。
このようなFastAPIの認証サポート機能は非常に便利かつ、これ自体かなり開発者フレンドリーでもあります。
が、冒頭でも述べたとおり、私にはローカル開発時に毎回トークン入力するのは面倒に感じられました(かなりの面倒くさがりなのです)。
ローカル開発環境での認証スキップ方法
そこで、ローカル開発時は任意で認証をスキップしつつ、好きなuser_idでログインしたように見せかけるようにして行きたいと思います。
まず、下記の.envファイルを作成します。
AUTH_SKIP=true
AUTH_SKIP_USER_ID=my-user-id
あわせてdocker-compose.ymlを以下のように変更します。
version: '3.8'
services:
  web:
    build: .
    ports:
      - "8000:8000"
    volumes:
      - .:/app
    command: uvicorn main:app --reload --host 0.0.0.0 --port 8000
    environment:
      - AUTH_SKIP=${AUTH_SKIP}
      - AUTH_SKIP_USER_ID=${AUTH_SKIP_USER_ID}
この状態でサーバーを起動すると、.envに記載された環境変数が取得できるようになります。
次は環境変数に応じて、認証処理をカスタマイズしていきます。
以下のように、main.pyを変更します。
from fastapi import FastAPI, Depends, HTTPException, Security, status
from fastapi.security import HTTPBearer, HTTPAuthorizationCredentials
from jose import jwt, JWTError
import os

# 環境設定
SECRET_KEY = "your_secret_key"
ALGORITHM = "HS256"

app = FastAPI()
security = HTTPBearer()

def get_current_user(token: HTTPAuthorizationCredentials = Security(security)) -> str:
    # 開発モードでは認証をスキップし、いつでも環境変数で指定したuser_idを使う
    AUTH_SKIP = os.getenv("AUTH_SKIP", "false") == "true" #pythonではbool("false")がTrueとなることなどに注意する
    if AUTH_SKIP:
        user_id = os.getenv("AUTH_SKIP_USER_ID")
        if user_id is None:
            raise HTTPException(
                status_code=status.HTTP_403_FORBIDDEN,
                detail="Please set AUTH_SKIP_USER_ID in .env file.",
            )
        return user_id
    try:
        payload = jwt.decode(token.credentials, SECRET_KEY, algorithms=[ALGORITHM])
        user_id: str = payload.get("user_id")
        if user_id is None:
            raise HTTPException(
                status_code=status.HTTP_403_FORBIDDEN,
                detail="Invalid authentication credentials",
            )
        return user_id
    except JWTError:
        raise HTTPException(
            status_code=status.HTTP_403_FORBIDDEN,
            detail="Invalid token or expired token",
        )


@app.get("/protected")
def read_protected(user_id: str = Depends(get_current_user)):
    return {"user_id": user_id}


@app.get("/open")
def read_open():
    return {"response": "Hello!"}
上記では、get_current_user関数内で環境変数AUTH_SKIPをチェックし、値によっては認証処理自体をスキップする実装にしています。
この状態で改めてdocker compose up --buildし、ブラウザでlocalhost:8000/docsにアクセスしてトークンをセットせずに/protectedエンドポイントを叩いてみましょう。
無事認証を通過……できませんね。
先程と同じく403で、
{
  "detail": "Not authenticated"
}
が返ってきたかと思います。
FastAPIのHTTPBearerの設定を変更
改めてFastAPIのソースコードを読んでみます。
すると、この原因は独自に作成したSkip処理に入る前にFastAPI側でエラーになっていることだと分かります。
具体的にはHTTPBearerクラスの__call__メソッドの中でAuthorizationヘッダーが空の場合に強制エラーにされてしまう仕様が原因のようです。
(つまり逆に言うと現在の状態でもAPIを叩くときに適当な文字列(aaaとか)をヘッダーに入れておくと認証を突破出来ます。)
これでも正規のトークンを毎回入れるよりは大分ラクなのですが、とはいえ毎回適当な文字列を入れるのも面倒かつ不自然です。
更にFastAPIのコードを読むと、HTTPBearerクラスの__init__でauto_errorパラメータを調節することでこの事象を回避できそうだと分かります。
        auto_error: Annotated[
            bool,
            Doc(
                """
                By default, if the HTTP Bearer token not provided (in an
                `Authorization` header), `HTTPBearer` will automatically cancel the
                request and send the client an error.

                If `auto_error` is set to `False`, when the HTTP Bearer token
                is not available, instead of erroring out, the dependency result will
                be `None`.

                This is useful when you want to have optional authentication.

                It is also useful when you want to have authentication that can be
                provided in one of multiple optional ways (for example, in an HTTP
                Bearer token or in a cookie).
                """
            ),
        ] = True,
ということで開発環境では、これがFalseになるようにしておきます。
from fastapi import FastAPI, Depends, HTTPException, Security, status
from fastapi.security import HTTPBearer, HTTPAuthorizationCredentials
from jose import jwt, JWTError
import os

# 環境設定
SECRET_KEY = "your_secret_key"
ALGORITHM = "HS256"

app = FastAPI()

AUTH_SKIP = os.getenv("AUTH_SKIP", "false") == "true"

security = HTTPBearer(auto_error=not AUTH_SKIP)


def get_current_user(token: HTTPAuthorizationCredentials = Security(security)) -> str:
    # 開発モードでは認証をスキップし、いつでも環境変数で指定したuser_idを使う
    if AUTH_SKIP:
        user_id = os.getenv("AUTH_SKIP_USER_ID")
        if user_id is None:
            raise HTTPException(
                status_code=status.HTTP_403_FORBIDDEN,
                detail="Please set AUTH_SKIP_USER_ID in .env file.",
            )
        return user_id
    try:
        payload = jwt.decode(token.credentials, SECRET_KEY, algorithms=[ALGORITHM])
        user_id: str = payload.get("user_id")
        if user_id is None:
            raise HTTPException(
                status_code=status.HTTP_403_FORBIDDEN,
                detail="Invalid authentication credentials",
            )
        return user_id
    except JWTError:
        raise HTTPException(
            status_code=status.HTTP_403_FORBIDDEN,
            detail="Invalid token or expired token",
        )


@app.get("/protected")
def read_protected(user_id: str = Depends(get_current_user)):
    return {"user_id": user_id}


@app.get("/open")
def read_open():
    return {"response": "Hello!"}
これでAuthorizationヘッダーがnullでも認証を通せるようになりました!お疲れ様でした。
注意点
言うまでもなく、本番環境で認証が外れていると大変なことになります。
なので、本番では設定ミスで認証が外れないようにくれぐれも気をつけてください。
また、開発環境でも状況によっては普通にログイン&認証したい場合も多々あると思います。
その場合は.envのAUTH_SKIPをいじった上でdockerを起動させればOKです。
Discussion