コンプリケーションとは
AppleWatchの文字盤上にコンテンツを表示したり、アプリを起動するショートカットを設置出来るエリアをコンプリケーションと呼びます。
今回は「コンプリケーションを設定後から1分経過するごとに表示を更新(1MIN,2MINなど)するコンプリケーション」を作成しながら実際に実装する手順や流れを紹介して行きたいとおもいます。
① プロジェクトのセットアップ
新規 watchOS アプリを作成(または iOS プロジェクトに追加)
Xcode で新規プロジェクトを作成
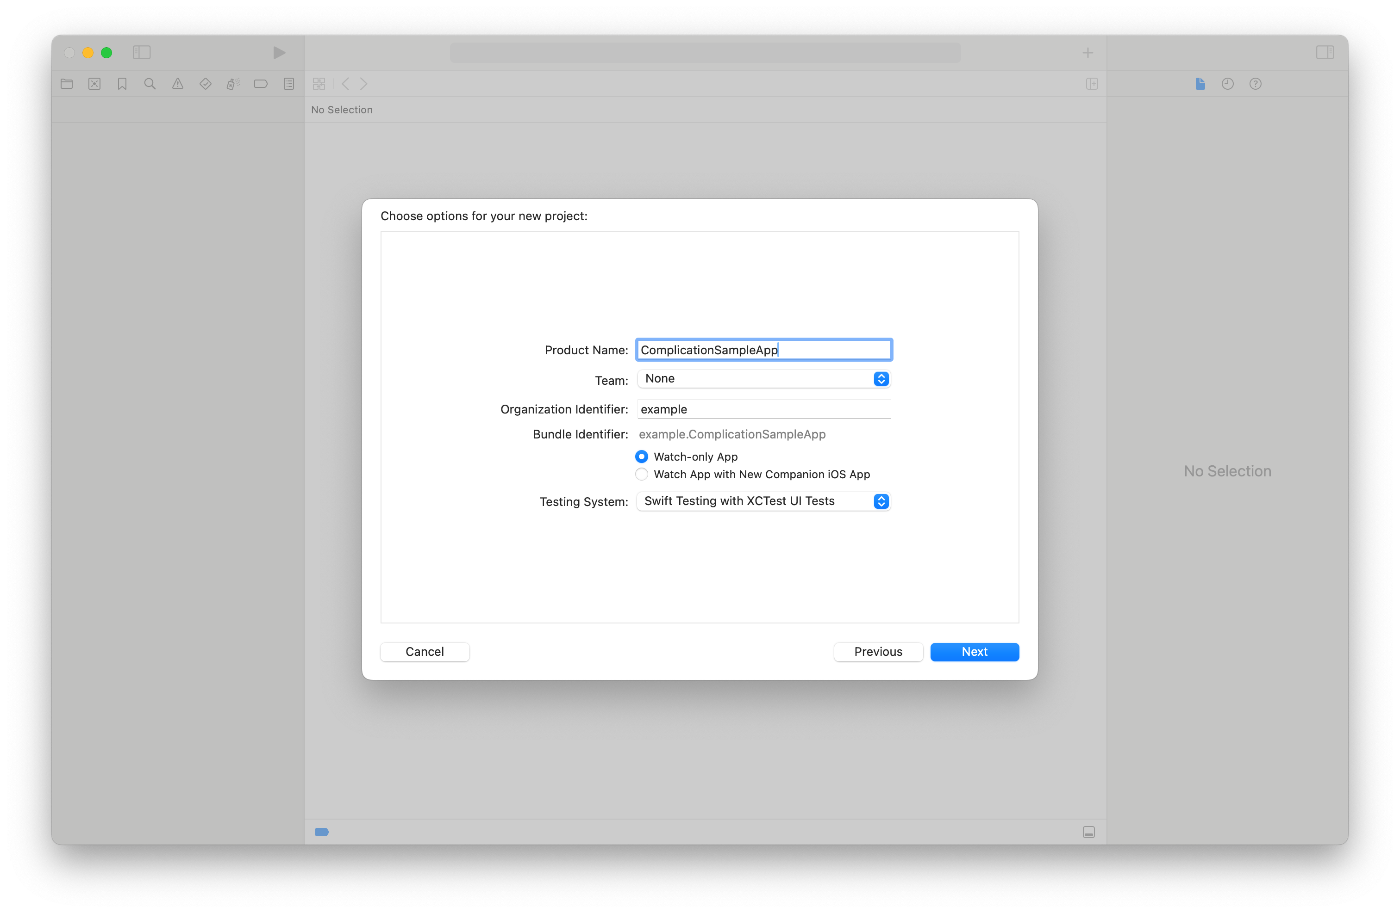
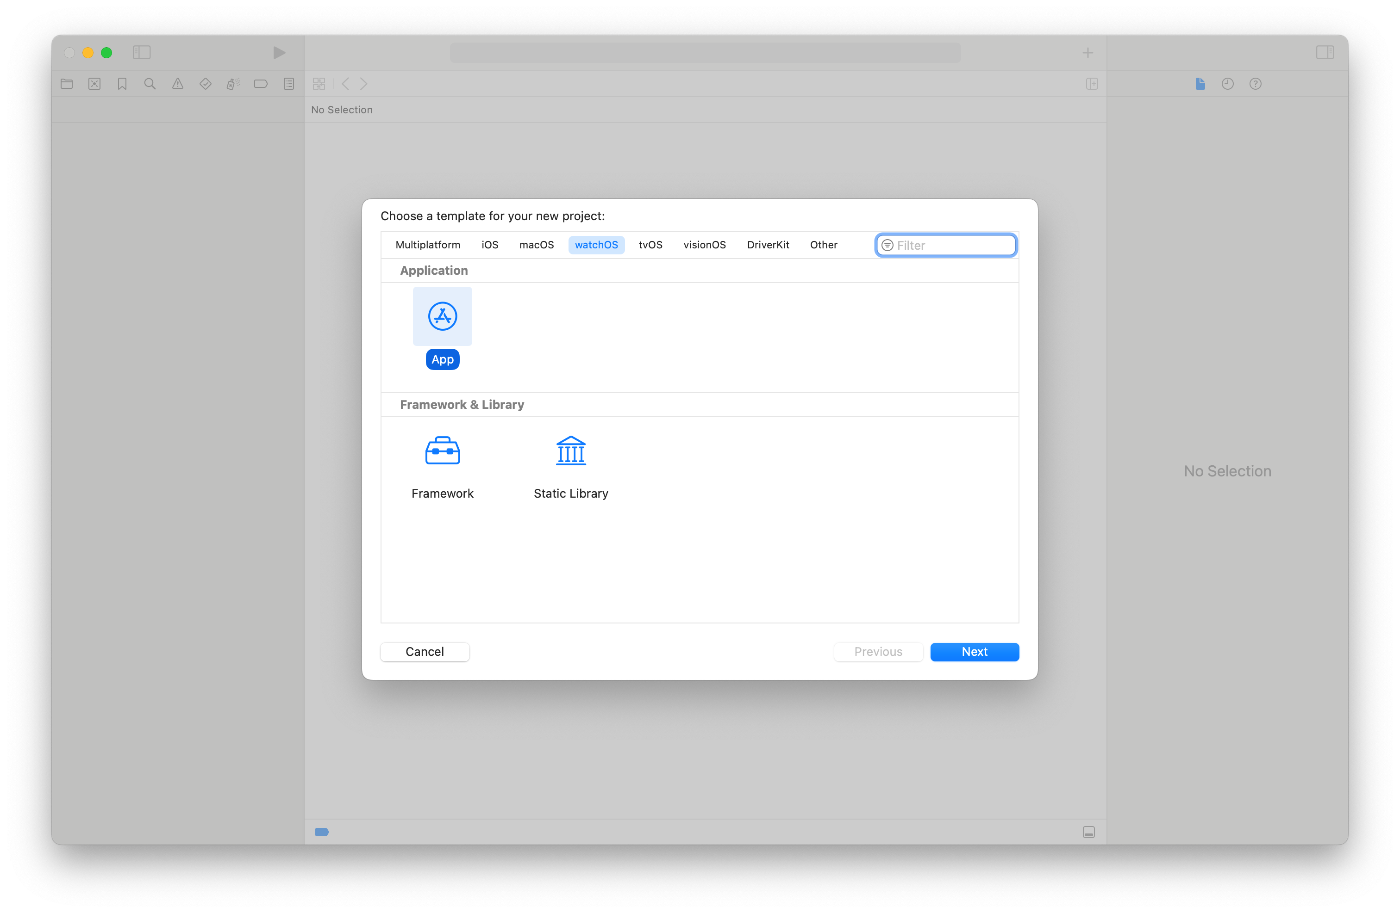
- 「watchOS App」 を選択
- 既存の iOS プロジェクトがある場合は、watchOS のターゲットを追加
Widget Extension を追加
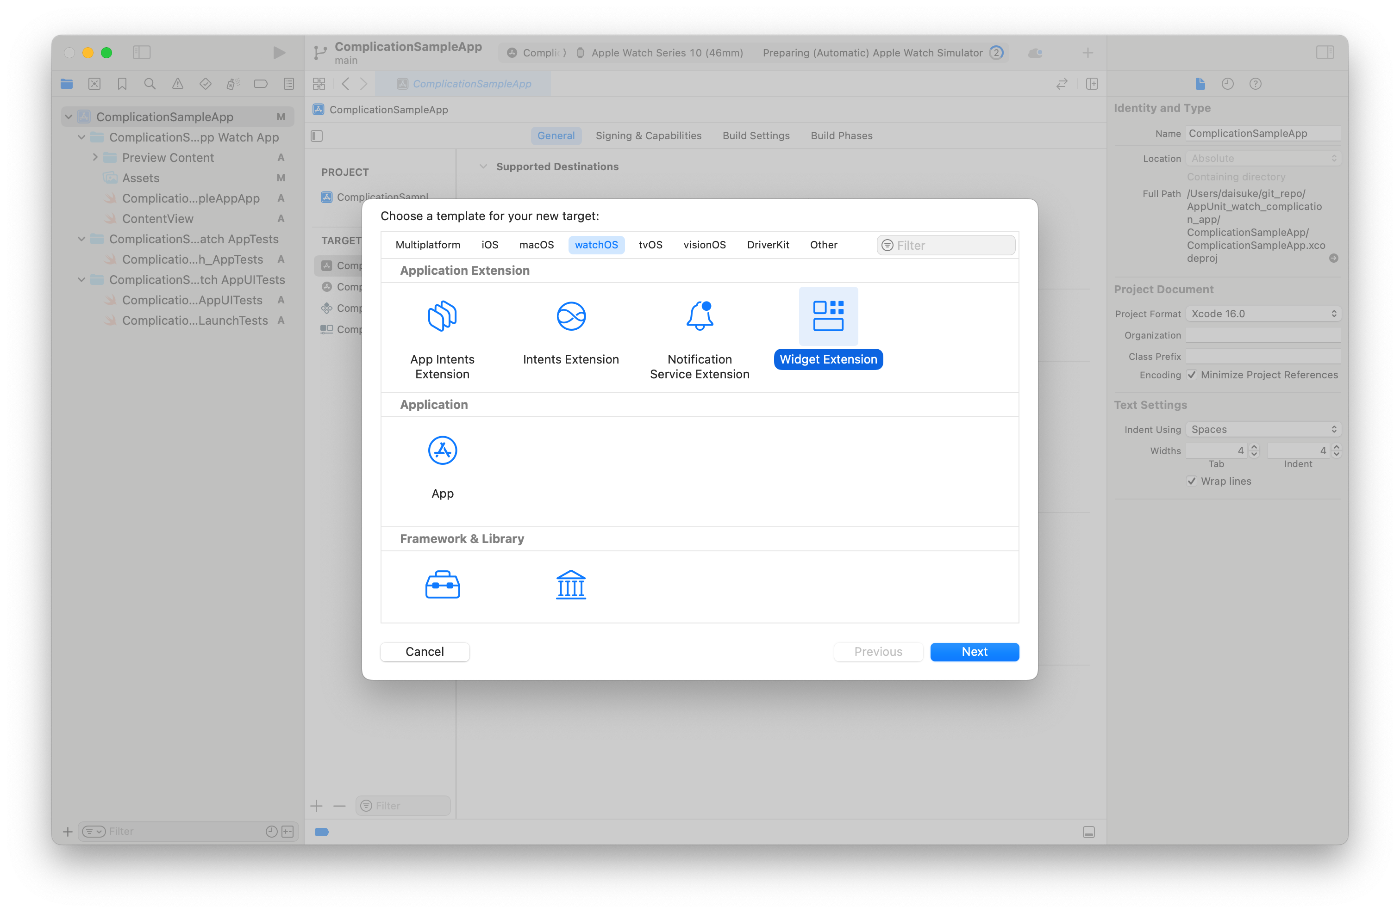
- File > New > Target を選択
- 「Widget Extension」 を追加
② Complication(コンプリケーション)の実装
1 Complication のデータモデルを作成
まず、コンプリケーションのデータを表すモデルを作成します。
import WidgetKit
import SwiftUI

struct SimpleEntry: TimelineEntry {
    let date: Date
    let text: String
}
date・・・タイムラインの基準時刻。この時点のデータを基準として計算される
text・・・コンプリケーションやウィジェットに表示するテキストデータ
2 TimelineProvider の作成
TimelineProvider を作成し、コンプリケーションのデータを提供します。
import WidgetKit

struct Provider: AppIntentTimelineProvider {
    func placeholder(in context: Context) -> SimpleEntry {
        SimpleEntry(date: Date(), text: "Sample")
    }

    func snapshot(for configuration: ConfigurationAppIntent, in context: Context) async -> SimpleEntry {
        SimpleEntry(date: Date(), text: "Snapshot")
    }

    func timeline(for configuration: ConfigurationAppIntent, in context: Context) async -> Timeline<SimpleEntry> {
        let entries = [
            SimpleEntry(date: Date(), text: "Now"),
            SimpleEntry(date: Calendar.current.date(byAdding: .minute, value: 1, to: Date())!, text: "1 min"),
            SimpleEntry(date: Calendar.current.date(byAdding: .minute, value: 2, to: Date())!, text: "2 min"),
            SimpleEntry(date: Calendar.current.date(byAdding: .minute, value: 3, to: Date())!, text: "3 min"),
            SimpleEntry(date: Calendar.current.date(byAdding: .minute, value: 4, to: Date())!, text: "4 min"),
            SimpleEntry(date: Calendar.current.date(byAdding: .minute, value: 5, to: Date())!, text: "5 min")
        ]

        return Timeline(entries: entries, policy: .atEnd)
    }

    func recommendations() -> [AppIntentRecommendation<ConfigurationAppIntent>] {
        // Create an array with all the preconfigured widgets to show.
        [AppIntentRecommendation(intent: ConfigurationAppIntent(), description: "Example Widget")]
    }
}
placeholder(in context:)
役割: ウィジェットの初期表示として、データが読み込まれていない場合に表示する仮のデータ(プレースホルダー)を提供する。
実装内容: SimpleEntry(date: Date(), text: "Sample") を返して、データがまだ準備されていないときに表示するサンプルデータを提供します。
snapshot(for:in)
役割: 特定の設定のスナップショット(静的なプレビュー)を生成し、ウィジェットのプレビューを表示する際に使用される。
実装内容: SimpleEntry(date: Date(), text: "Snapshot") を返して、ウィジェットの現在の状態のスナップショットを提供します。このメソッドは非同期的に実行されるため、データの取得を待ってスナップショットを生成できます。
timeline(for:in)
役割: 時間の経過に応じて更新されるウィジェットのタイムラインを提供し、ウィジェットがどのようにデータを更新するかを管理する。
実装内容: 複数の SimpleEntry を作成し、それらを Timeline として返します。SimpleEntry の date プロパティには、時間を1分ずつずらした値を設定し、ウィジェットが時間と共にどのように更新されるかを示しています。タイムラインのポリシーとして .atEnd を設定し、エントリがタイムラインの最後に到達したときに新しいエントリを追加するようにしています。
3 Complication の UI を作成
コンプリケーションの表示部分を SwiftUI で作成します。
import SwiftUI

struct ComplicationSampleAppWidgetExtensionEntryView: View {
    var entry: SimpleEntry

    var body: some View {
        Text(entry.text)
            .font(.system(size: 12))
            .minimumScaleFactor(0.5)
    }
}
4 Widget(Complication)の定義
作成した Provider と ComplicationSampleAppWidgetExtensionEntryView を組み合わせて、WidgetKit 用のコンプリケーションを作成します。
import WidgetKit
import SwiftUI

@main
struct ComplicationSampleAppWidgetExtension: Widget {
    let kind: String = "ComplicationSampleAppWidgetExtension"

    var body: some WidgetConfiguration {
        AppIntentConfiguration(kind: kind, intent: ConfigurationAppIntent.self, provider: Provider()) { entry in
            ComplicationSampleAppWidgetExtensionEntryView(entry: entry)
                .containerBackground(.fill.tertiary, for: .widget)
        }
        .configurationDisplayName("My Complication")
        .description("This is a sample complication.")
        .supportedFamilies([
            .accessoryCircular,    // 丸型
            .accessoryInline,      // テキストのみ
            .accessoryRectangular  // 長方形
        ])
    }
}
ComplicationSampleAppWidgetExtension 構造体:
kind: ウィジェットの識別子。
body: ウィジェットの設定を定義。
AppIntentConfiguration でウィジェットのデータプロバイダー (Provider) を指定し、表示するビュー (ComplicationSampleAppWidgetExtensionEntryView) を設定。
背景スタイルを tertiary に設定。
configurationDisplayName でウィジェットの名前を設定。
description でウィジェットの簡単な説明を設定。
supportedFamilies でサポートするウィジェットの表示形式(丸型、テキスト、長方形)を指定。
③ watchOS の Info.plist に Complication 設定を追加
watchOS の Info.plist にコンプリケーションをサポートする設定を追加します。
- Watch Extension の
Info.plistを開く - 以下のキーを追加
<key>WKComplicationDescriptors</key>
<array>
    <dict>
        <key>WKComplicationRole</key>
        <string>provider</string>
        <key>WKComplicationSupportedFamilies</key>
        <array>
            <string>accessoryCircular</string>
            <string>accessoryInline</string>
            <string>accessoryRectangular</string>
        </array>
    </dict>
</array>
④ Watchアプリで Complication を有効化
- iPhone の「Watch」アプリを開く
- 「マイ文字盤」から「コンプリケーション」設定を変更
- 作成した MyComplication を選択
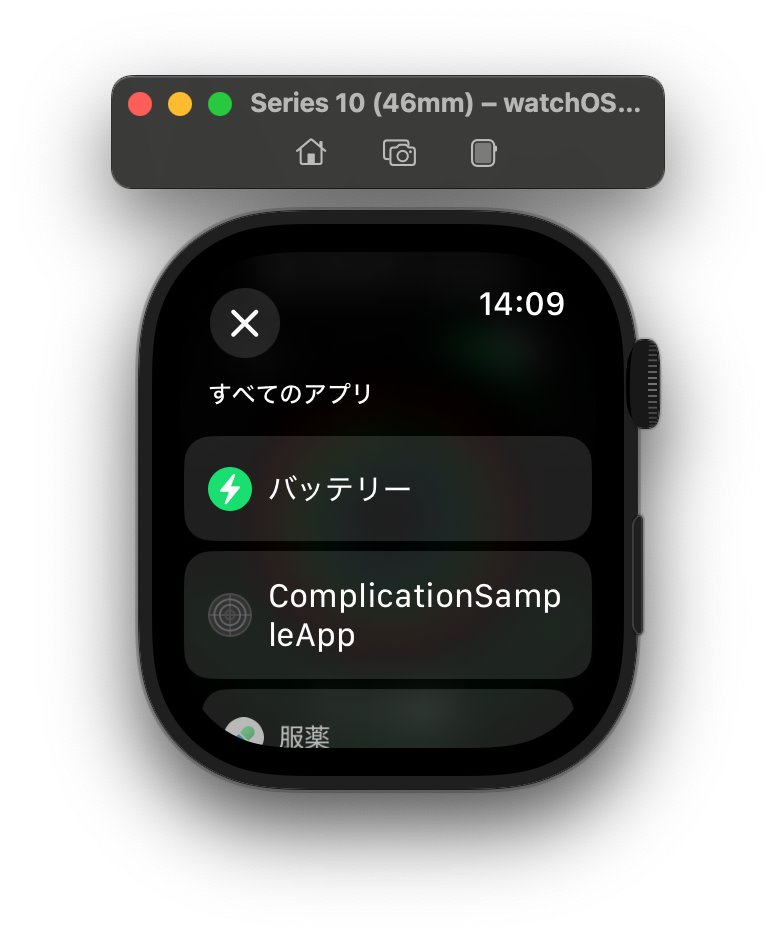
⑤ 動作確認
- Watch シミュレーターで動作確認
- ⌘ + R で Watch アプリを実行
- Watch シミュレーターで コンプリケーションの更新を確認


GitHub リポジトリ
以下GitHubリポジトリからコードをご覧いただけます。
GitHub リポジトリ

Discussion