【Flutter】パスコードロック機能をflutter_screen_lockで実装してみた
はじめに
こんにちは、たけ🎋といいます。
最近、パスコードロック機能の実装機会があったのですが、flutter_screen_lockを使用した実装ドキュメントが少ないなと感じたので、自分の備忘録として残しておこうと思います。
この記事を通じて、皆さんの開発にお役に立てれば幸いです🙌
この記事では、パスコードロックと生体認証を実装する方法についてまとめています。
パスコードロック機能は、ユーザーのプライバシー保護や、アプリのセキュリティ向上に便利な機能なので、ぜひ参考にしていただければと思います。
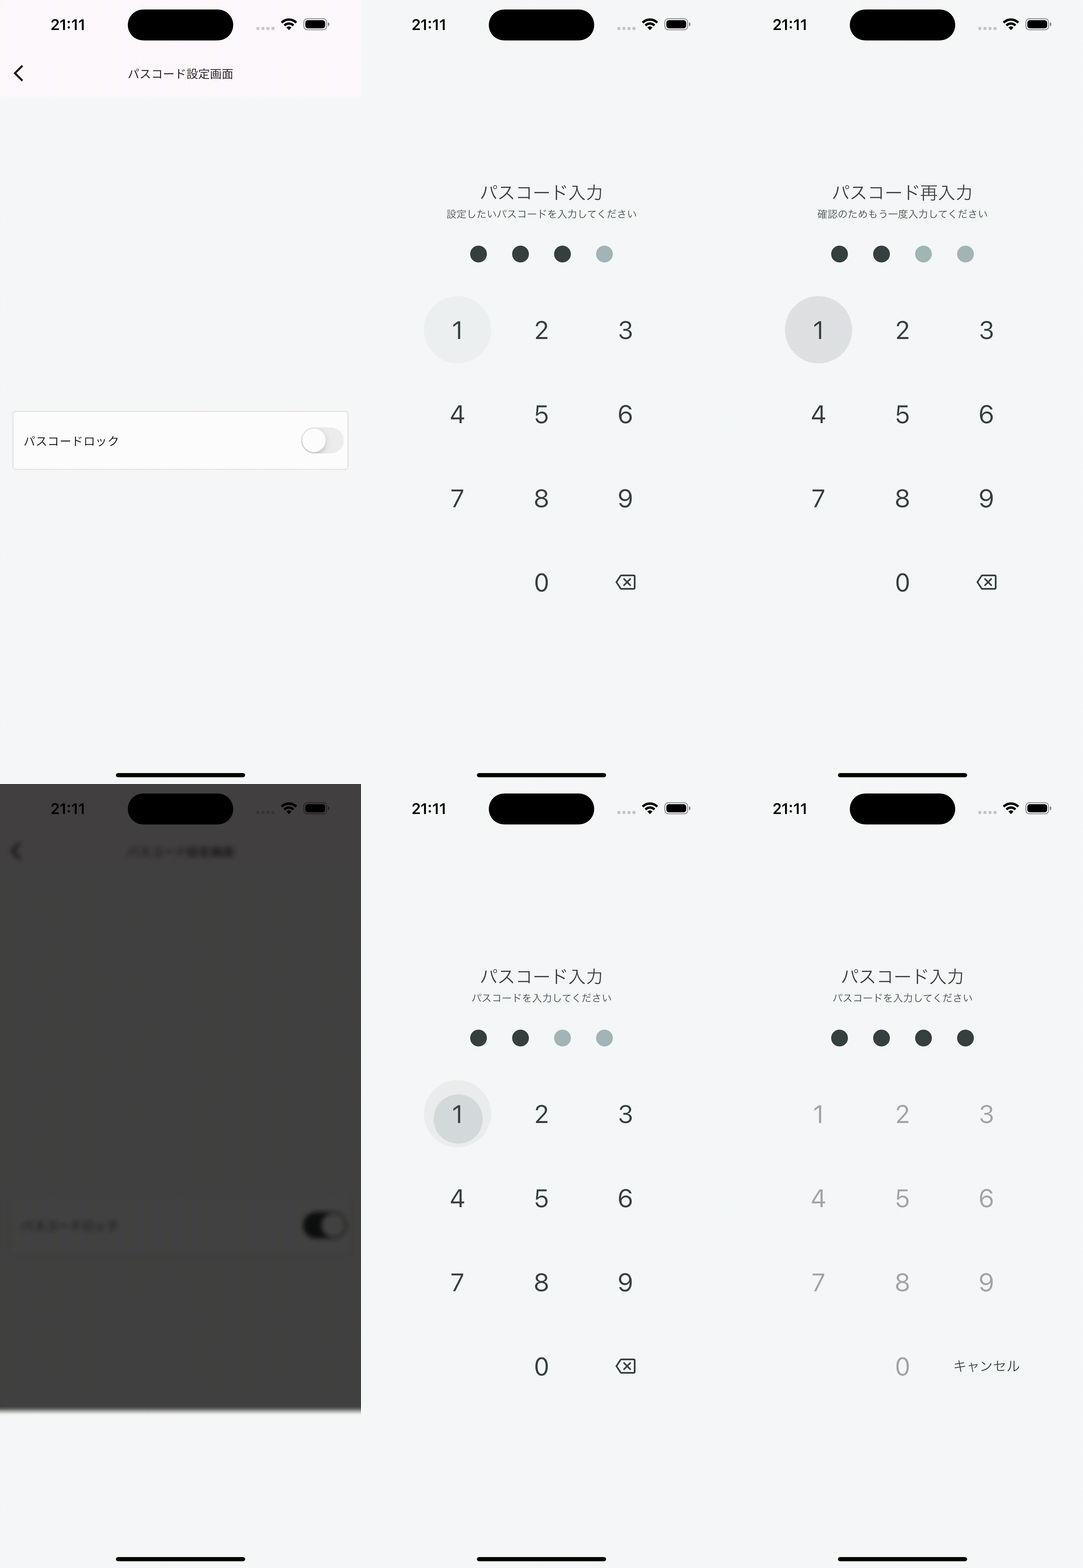
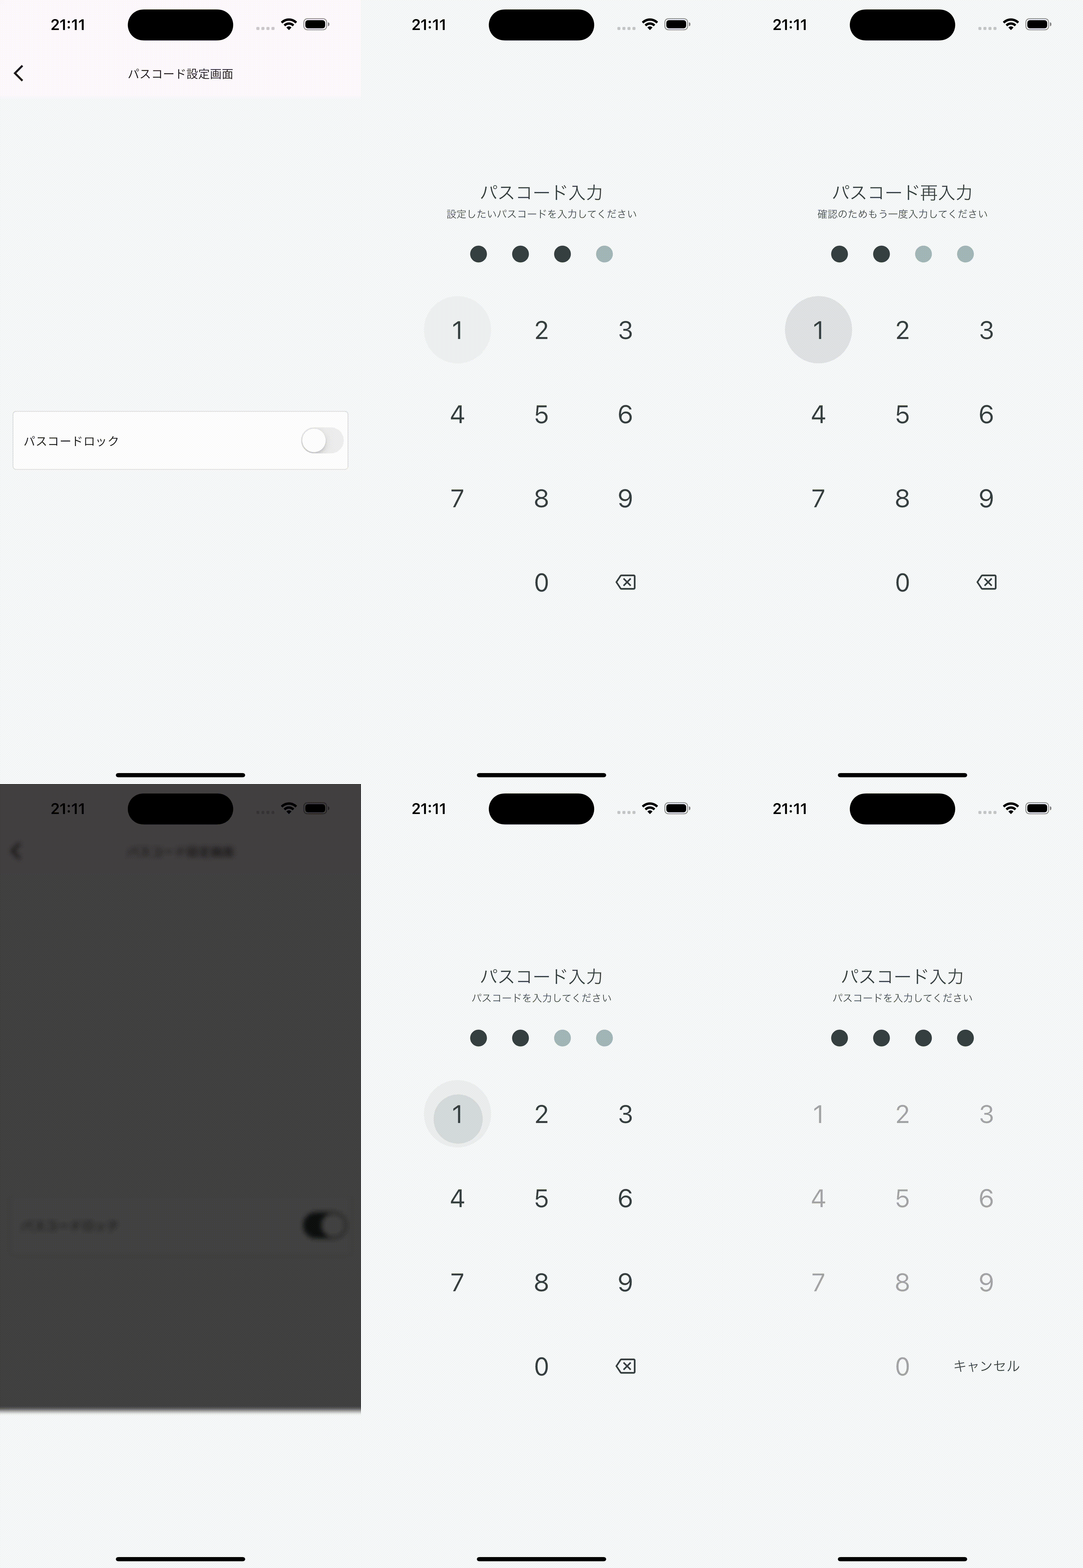
実装イメージ

実装方法
-
パッケージは以下を使用します。
- flutter_screen_lock:パスコードロック画面が簡単に作れるパッケージ。
-
local_auth:生体認証を使うためのパッケージ。
※生体認証の実装は省略します。必要な場合は、公式ドキュメントや他の記事を参照してください。 - shared_preferences:データベースを使用せず、値を端末保存できるパッケージ。
-
状態管理は、riverpod+state_notifier+state_notifierを使用しています。使い方が分からない方は、こちらを参考にどうぞ。
-
コードが冗長的な所もありますのであらかじめご了承ください🙇
では、実装手順を見ていきましょう!
ステップ1: 依存関係の追加
pubspec.yamlに以下の依存関係を追加します。バージョンは最新のものをおすすめします。
dependencies:
  flutter:
    sdk: flutter
  // 状態管理に必要なパッケージ
  hooks_riverpod: ^最新のバージョン
  freezed_annotation: ^最新のバージョン
  state_notifier: ^最新のバージョン
  // パスコードロックに必要なパッケージ
  flutter_screen_lock: ^最新のバージョン
  local_auth: ^最新のバージョン
  shared_preferences: ^最新のバージョン
dev_dependencies:
  flutter_test:
    sdk: flutter
  build_runner: ^最新のバージョン
  freezed: ^最新のバージョン
パッケージを追加できたらflutter pub getを実行しましょう。
ステップ2: 状態管理のクラス作成
まずは、riverpod+state_notifier+freezedで状態管理ができるように、passcode_lock_state.dart,passcode_lock_view_model.dart,passcode_lock_repository.dartのファイルを作成します。
ここからコピペで大丈夫です🙆♂️(多分)
2-1: Freezedのクラス作成
passcode_lock_state.dartでPasscodeLockStateを定義します。
port 'package:freezed_annotation/freezed_annotation.dart';
part 'passcode_lock_state.freezed.dart';
abstract class PasscodeLockState implements _$PasscodeLockState {
factory PasscodeLockState({
//後でここに変数を追加
}) = _PasscodeLockState;
PasscodeLockState._();
}
2-2: StateNotifierクラスの作成
passcode_lock_view_model.dartでPasscodeLockViewModelを定義します。
import 'package:hooks_riverpod/hooks_riverpod.dart';
import 'passcode_lock_state.dart';

final passcodeLockViewModelProvider =
    StateNotifierProvider<PasscodeLockViewModel, PasscodeLockState>((ref) => PasscodeLockViewModel(ref));

class PasscodeLockViewModel extends StateNotifier<PasscodeLockState> {
  PasscodeLockViewModel(this.ref) : super(PasscodeLockState()) {
    () async {
      await _initState();
    }();
  }
  final Ref ref;
  //後でここにメソッドを追加
  Future<void> _initState() async {}
}
2-3: Repositoryクラスの作成
passcode_lock_repository.dartでPasscodeLockRepositoryを定義します。
ここでは、PasscodeLockStateの変数を、shared_preferencesパッケージを使用して、取得・保存できるように管理します。
iimport 'package:hooks_riverpod/hooks_riverpod.dart';

final passcodeLockRepository = Provider((ref) => PasscodeLockRepository());

class PasscodeLockRepository {
  //後でここにメソッドを追加
}
ステップ3: パスコードロックの設定
状態管理のクラスが準備できたら、パスコードロックの設定を作成しましょう。
3-1: Freezedクラスに変数追加
PasscodeLockStateに、以下の変数を追加します。
-
isPasscodeLocked:パスコードロックのON/OFF設定。 -
passcodeLockValue:パスコードの値。
abstract class PasscodeLockState implements _$PasscodeLockState {
factory PasscodeLockState({
(false) bool isPasscodeLocked,
('') String passcodeLockValue,
}) = _PasscodeLockState;
PasscodeLockState._();
}
追加できたら、flutter pub run build_runner build --delete-conflicting-outputsを実行しましょう。
3-2: StateNotifierクラスにメソッド追加
PasscodeLockViewModelに、以下のメソッドを追加します。
-
_initState:PasscodeLockRepositoryから端末保存の情報を取得。 -
setIsPasscodeLocked:パスコードのON・OFF設定。 -
setPasscodeLockValue:パスコードの値設定。
class PasscodeLockViewModel extends StateNotifier<PasscodeLockState> {
  PasscodeLockViewModel(this.ref) : super(PasscodeLockState()) {
    () async {
      await _initState();
    }();
  }
  final Ref ref;

  Future _initState() async {
      final isPasscodeLocked = await ref.read(passcodeLockRepository).getIsPasscodeLocked();
      final passcodeLockValue = await ref.read(passcodeLockRepository).getPasscodeLockValue();
      state = state.copyWith(
          isPasscodeLocked: isPasscodeLocked,
          passcodeLockValue: passcodeLockValue,
      );
  }

  Future setIsPasscodeLocked({required bool value}) async {
      state = state.copyWith(isPasscodeLocked: value);
      await ref.read(passcodeLockRepository).setIsPasscodeLocked(value);
      if (!value) {
        await setIsShowPasscodeScreen(value: value);
      }
  }

  Future setPasscodeLockValue({required String value}) async {
      state = state.copyWith(passcodeLockValue: value);
      await ref.read(passcodeLockRepository).setPasscodeLockedValue(value);
  }
}
3-3: Repositoryクラスにメソッド追加
PasscodeLockRepositoryに、以下のメソッドを追加します。
-
getIsPasscodeLocked:保存したisPasscodeLockedを取得。 -
getPasscodeLockValue:保存したpasscodeLockValueを取得。 -
setIsPasscodeLocked:isPasscodeLockedを端末保存。 -
setIsPasscodeLocked:passcodeLockValueを端末保存。
class PasscodeLockRepository {
  final isPasscodeLockedName = 'isPasscodeLocked';
  final passcodeLockValue = 'passcodeLockNumber';

  Future<bool> getIsPasscodeLocked() async {
    final prefs = await SharedPreferences.getInstance();
    return prefs.getBool(isPasscodeLockedName) ?? false;
  }

  Future<String> getPasscodeLockValue() async {
    final prefs = await SharedPreferences.getInstance();
    return prefs.getString(passcodeLockValue) ?? '';
  }

  Future<void> setIsPasscodeLocked(bool value) async {
    final prefs = await SharedPreferences.getInstance();
    await prefs.setBool(isPasscodeLockedName, value);
  }

  Future<void> setPasscodeLockedValue(String value) async {
    final prefs = await SharedPreferences.getInstance();
    await prefs.setString(passcodeLockValue, value);
  }
}
3-3: パスコードロック画面のUI作成
passcode_setting.dartでPasscodeScreenを作成します。
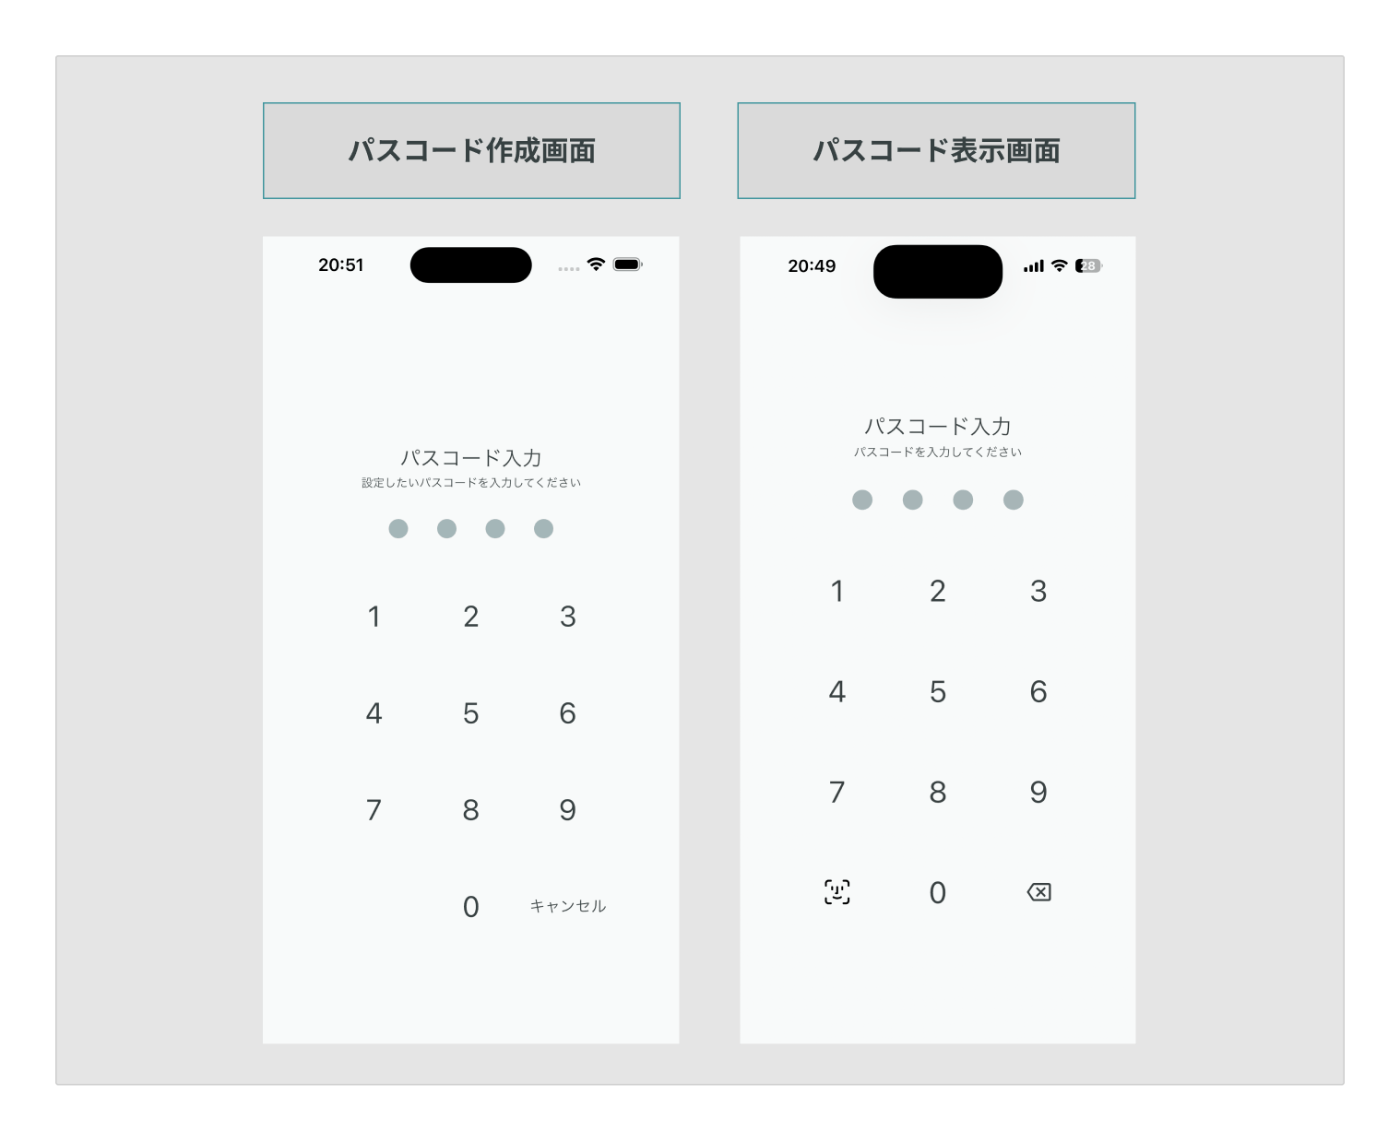
ここでは、flutter_screen_lockパッケージを使用して、パスコード画面の作成・表示を簡単に管理するために、以下のメソッドを定義します。
-
createPasscode:パスコード作成画面表示。 -
unlockPasscode:パスコード解除画面表示。
パスコードロック画面のデザインは、_screenLockConfig,_secretsConfig,_keyPadConfig で作成しています。
ここら辺のコードはもしかしたら冗長かもしれません。。
もし不要だなと感じる箇所があれば、お好みにカスタムしてください。
実装イメージ

import 'package:flutter/material.dart';
import 'package:flutter_screen_lock/flutter_screen_lock.dart';
import 'package:gap/gap.dart';
import 'package:hooks_riverpod/hooks_riverpod.dart';

class PasscodeScreen {
  PasscodeScreen(this.ref, this.context);

  final WidgetRef ref;
  final BuildContext context;

  // パスコード作成画面表示
  void createPasscode({required ValueChanged<String> onConfirmed}) {
    screenLockCreate(
      context: context,
      onConfirmed: (passcode) async {
        onConfirmed(passcode);
      },
      title:  Column(
        children: [
          const Text(
            'パスコード入力',
            style: TextStyle(color: Colors.black87, fontSize: 21),
          ),
          Gap(3),
          Text(
            '設定したいパスコードを入力してください',
            style: TextStyle(color: Colors.grey.shade500, fontSize: 12),
          ),
        ],
      ),
      confirmTitle:  Column(
        children: [
          const Text(
            'パスコード再入力',
            style: TextStyle(color: Colors.black87, fontSize: 21),
          ),
          const Gap(3),
          Text(
            '確認のためもう一度入力してください',
            style: TextStyle(color: Colors.grey.shade500, fontSize: 12),
          ),
        ],
      ),
      config: _screenLockConfig(),
      secretsConfig: _secretsConfig(),
      keyPadConfig: _keyPadConfig(),
      cancelButton: const Text('キャンセル', style: TextStyle(fontSize: 16)),
      deleteButton: const Icon(Icons.backspace_outlined),
    );
  }

  // パスコード解除画面表示
  void unlockPasscode({
    required bool isBiometric,
    required bool canCancel,
    required VoidCallback onOpened,
    required VoidCallback onUnlocked,
  }) {
    ScreenLock(
      correctString:
      ref.read(passcodeLockViewModelProvider).passcodeLockValue,
      onOpened: isBiometric ? onOpened : null,
      onUnlocked: onUnlocked,
      onCancelled: () async {
        if (canCancel) {
          Navigator.of(context).pop();
        }
      },
      title: const Column(
        children: [
          Text(
            'パスコード入力',
            style: TextStyle(color: AppColor.black, fontSize: 21),
          ),
          Gap(3),
          Text(
            'パスコードを入力してください',
            style: TextStyle(color: AppColor.gray, fontSize: 12),
          ),
        ],
      ),
      config: _screenLockConfig(),
      secretsConfig: _secretsConfig(),
      keyPadConfig: _keyPadConfig(),
      cancelButton: canCancel
          ? const Text('キャンセル', style: TextStyle(fontSize: 16))
          : const Icon(Icons.backspace_outlined),
      deleteButton: const Icon(Icons.backspace_outlined),
      customizedButtonChild: isBiometric
          ? ref.read(passcodeLockViewModelProvider).biometricType ==
          BiometricType.face
          ? SvgPicture.asset('assets/svgs/Account/face_id.svg',
          height: 30)
          : SvgPicture.asset('assets/svgs/Account/face_id.svg',
          height: 30)
          : null,
      customizedButtonTap: () async {
        if (isBiometric) {
          final didAuthenticate = await ref
              .read(passcodeLockViewModelProvider.notifier)
              .openBiometric(true);
          if (didAuthenticate && context.mounted) {
            await ref
                .read(passcodeLockViewModelProvider.notifier)
                .setIsShowPasscodeScreen(value: false);
            await GaAnalyticsService()
                .sendToggleEvent(action: 'PasscodeLocked', value: false);
            Navigator.pop(context);
          }
        }
      },
    );

  ScreenLockConfig _screenLockConfig() {
    return ScreenLockConfig(
      buttonStyle: OutlinedButton.styleFrom(
        foregroundColor: Colors.black87,
        backgroundColor: Colors.white,
        shape: const CircleBorder(),
        padding: const EdgeInsets.all(0),
        side: BorderSide.none,
      ),
      titleTextStyle: const TextStyle(
        color: Colors.black87,
        fontSize: 20,
      ),
      textStyle: const TextStyle(
        color: Colors.black87,
        fontSize: 18,
      ),
      backgroundColor: Colors.white,
    );
  }

  SecretsConfig _secretsConfig() {
    return SecretsConfig(
      spacing: 30,
      padding: const EdgeInsets.symmetric(horizontal: 20, vertical: 30),
      secretConfig: SecretConfig(builder: (context, config, enabled) {
        return Container(
          decoration: BoxDecoration(
            shape: BoxShape.rectangle,
            color: enabled ? Colors.black87 : Colors.grey.shade300,
            borderRadius: BorderRadius.circular(90),
          ),
          padding: const EdgeInsets.all(10),
          width: 20,
          height: 20,
        );
      }),
    );
  }

  KeyPadConfig _keyPadConfig() {
    return KeyPadConfig(
      buttonConfig: KeyPadButtonConfig(
        size: 80,
        fontSize: 30,
        actionFontSize: 70,
        foregroundColor: Colors.black87,
        backgroundColor: Colors.transparent,
        buttonStyle: OutlinedButton.styleFrom(
          side: const BorderSide(color: Colors.transparent, width: 0),
        ),
      ),
      actionButtonConfig: KeyPadButtonConfig(
        size: 80,
        fontSize: 18,
        actionFontSize: 18,
        foregroundColor: Colors.black87,
        backgroundColor: Colors.red,
        buttonStyle: OutlinedButton.styleFrom(
          side: const BorderSide(color: Colors.transparent, width: 0),
        ),
      ),
    );
  }
}
3-4: パスコードロック設定画面のUI作成
passcode_setting_screen.dartでPasscodeSettingScreenと_PasscodeSwitchを定義します。
_PasscodeSwitchでは、onChangedで以下の実装をしています。
-
valueがtrueになる時、createPasscode()を実行して、パスコード作成画面を表示して、パスコードを設定できたらスイッチをON。 -
valueがfalseになる時、unlockPasscode()を実行して、パスコード入力画面を表示し、パスコードの値が正しければスイッチをOFF。
※今回は生体認証の処理を省略しています。パスコード入力画面で生体認証を起動する場合、unlockPasscode()で、isBiometricをtrue,isOpenedに生体認証の処理を追加してください。
こちらも不要だなと感じる箇所があれば、お好みに合わせてカスタムしてください。
実装イメージ

class PasscodeSettingScreen extends HookConsumerWidget {
Widget build(BuildContext context, WidgetRef ref) {
final isPasscodeLocked = ref
.watch(passcodeLockViewModelProvider.select((s) => s.isPasscodeLocked));
final passcodeLockValue = ref.watch(
passcodeLockViewModelProvider.select((s) => s.passcodeLockValue));
return Scaffold(
appBar: AppBar(
title: Text('パスコード設定画面', style: TextStyle(fontSize: 14)),
),
body: Center(
child: Container(
padding: const EdgeInsets.symmetric(vertical: 10),
margin: const EdgeInsets.symmetric(horizontal: 15, vertical: 10),
decoration: BoxDecoration(
borderRadius: BorderRadius.circular(4),
color: Colors.white,
border: Border.all(color: Colors.grey.shade300),
),
child: Column(
mainAxisSize: MainAxisSize.min,
mainAxisAlignment: MainAxisAlignment.center,
children: [
///パスコードロック
_PasscodeSwitch(
isPasscodeLocked: isPasscodeLocked,
passcodeLockValue: passcodeLockValue,
onChanged: (value) async {
if (value) {
PasscodeScreen(ref, context).createPasscode(
onConfirmed: (passcode) async {
await ref
.read(passcodeLockViewModelProvider.notifier)
.setIsPasscodeLocked(value: true);
await ref
.read(passcodeLockViewModelProvider.notifier)
.setPasscodeLockValue(value: passcode);
Navigator.pop(context);
},
);
} else {
PasscodeScreen(ref, context).unlockPasscode(
isBiometric: false,
canCancel: true,
onOpened: () async {},
onUnlocked: () async {
await ref
.read(passcodeLockViewModelProvider.notifier)
.setIsPasscodeLocked(value: false);
await GaAnalyticsService().sendToggleEvent(
action: 'PasscodeLocked', value: false);
Navigator.of(context).pop();
},
);
}
},
),
],
),
),
),
);
}
}
///パスコードのON/OFFスイッチ
class _PasscodeSwitch extends HookConsumerWidget {
const _PasscodeSwitch({
required this.isPasscodeLocked,
required this.passcodeLockValue,
required this.onChanged,
});
final bool isPasscodeLocked;
final String passcodeLockValue;
final ValueChanged<bool> onChanged;
Widget build(BuildContext context, WidgetRef ref) {
return Row(
mainAxisAlignment: MainAxisAlignment.spaceBetween,
children: <Widget>[
Container(
padding: const EdgeInsets.only(left: 12),
width: MediaQuery.of(context).size.width * 3.75 / 5,
child: const Text('パスコードロック'),
),
Switch.adaptive(
value: isPasscodeLocked,
activeColor: Theme.of(context).primaryColor,
activeTrackColor: Theme.of(context).primaryColor.withOpacity(0.5),
inactiveThumbColor: Colors.grey.shade300,
inactiveTrackColor: Colors.grey.shade300.withOpacity(0.5),
onChanged: (value) async {
onChanged(value);
},
),
],
);
}
}
操作確認動画

余談
flutter_screen_lockのサンプルコードがかなり攻めたUIになって面白かったです😅

まとめ
最後まで記事を読んでくださりありがとうございました✨
今回はflutter_screen_lockでパスコードロック機能を実装する方法を紹介してみました!
気になる点がありましたらお気軽にお声がけください!
役に立ったよっていう方は、ハート・フォローをいただけますとうれしいです :)
Discussion