TCA + Supabaseでログイン画面を作る
TCA (The Composable Architecture) とは?
アプリを開発するための状態管理フレームワーク。TCA は、開発者が使いやすいように、一貫性のある理解しやすい方法でアプリケーションを構築するために使用される。
https://github.com/pointfreeco/swift-composable-architecture
主な機能
-
State management
- 単純な値型を使ってアプリケーションの状態を管理し、多くの画面にわたって状態を共有する方法
-
Composition
- 大規模なフィーチャーをどのように小さな構成要素に分解し、それぞれ独立したモジュールに抽出し、フィーチャーを形成するために簡単につなぎ合わせることができるか
-
Side effects
- アプリケーションの特定の部分を、可能な限りテスト可能で理解しやすい方法で外界と対話させる方法
-
Testing
- 結合テストからE2Eテストまで
-
Ergonomics
- 上記のすべてを、できるだけ少ないコンセプトと可動部品で、シンプルなAPIで実現するにはどうすればいいか
パッケージ導入
今回は学習の為、外部パッケージ導入用のPackageを作成し、その Package.swift にTCAをインポートするようにしてみたいと思います。
-
File > New > Package から
DependenciesPackagesという名前でPackageを作成する- ※ この時「Add to:」に自身のプロジェクトを指定する
-
Package.swiftを以下に修正する// swift-tools-version: 5.8 // The swift-tools-version declares the minimum version of Swift required to build this package. import PackageDescription let package = Package( name: "DependenciesPackages", platforms: [ .iOS(.v16) ], products: [ .library( name: "DependenciesPackages", targets: ["DependenciesPackages"]), ], dependencies: [ .package(url: "https://github.com/pointfreeco/swift-composable-architecture", branch: "main") ], targets: [ .target( name: "DependenciesPackages", dependencies: [ .product(name: "ComposableArchitecture", package: "swift-composable-architecture") ]), ] ) -
メインのTargetの設定 > General > Frameworks, Libraries, and Embedded Content に
DependenciesPackagesを追加する
カウンターアプリのサンプル
こちらを参考に作成してみたいと思います。
1. Reducerの作成
struct Counter: Reducer {
    struct State: Equatable {
        var count = 0
    }

    enum Action: Equatable {
        case decrement
        case increment
    }

    func reduce(into state: inout State, action: Action) -> Effect<Action> {
        switch action {
        case .decrement:
            state.count -= 1
            return .none
        case .increment:
            state.count += 1
            return .none
        }
    }
}
2. Viewの修正
struct CounterView: View {
    let store: StoreOf<Counter>

    var body: some View {
        WithViewStore(self.store, observe: { $0 }) { viewStore in
            HStack {
                Button {
                    viewStore.send(.decrement)
                } label: {
                    Image(systemName: "minus")
                }
                Text("\(viewStore.count)")
                    .monospacedDigit()
                Button {
                    viewStore.send(.increment)
                } label: {
                    Image(systemName: "plus")
                }
            }
        }
    }
}
3. Previewの修正
struct CounterView_Previews: PreviewProvider {
    static var previews: some View {
        CounterView(
            store: Store(initialState: Counter.State()) {
              Counter()
            }
        )
    }
}
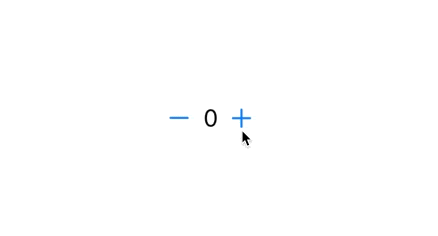
Previewで確認してみると、ちゃんとカウントアップ・ダウンできているかと思います。
TCA + Supabaseでログイン画面を作ってみる
まずはSupabaseのSwift用のライブラリを導入
Supabase Swift Client - Introduction
Package.swift に以下を追加
let package = Package(
    ...
    dependencies: [
        ...
        .package(url: "https://github.com/supabase/supabase-swift", branch: "master"), // Add the package
    ],
    targets: [
        .target(
            name: "YourTargetName",
            dependencies: [
              .product(name: "Supabase", package: "supabase-swift")
            ] // Add as a dependency
        )
    ]
)
試しにログインできるか↓で確認してみます。
import Supabase
import SwiftUI

struct LoginView: View {
    // swiftlint:disable line_length
    let client = SupabaseClient(
        supabaseURL: URL(string: "...")!, // supabase projectのurlを入力
        supabaseKey: "...") // // supabase projectのanon api kyを入力
    // swiftlint:enable line_length
    var body: some View {
        VStack {
            Button("LOGIN") {
                Task.detached(priority: .background) {
                    do {
                        try await client.auth.signIn(email: "...", password: "...")
                        let session = try await client.auth.session
                        print("### Session Info: \(session)")
                    } catch {
                        print("### Sign In Error: \(error)")
                    }
                }
            }
        }
    }
}
「LOGIN」ボタンを押してセッション情報がログに表示されていればOKです。
実際にっぽいログイン画面を作成
LoginButton
まずは、専用のLoginButtonのコンポーネントを作っていきたいと思います。↓のButtonStyleで調整していきます。
SwiftUIのButtonStyle
SwiftUIのButtonStyleをカスタマイズ |TAAT
ButtonStyle | Apple Developer Documentation
import SwiftUI

struct RoundedButtonStyle: ButtonStyle {
    @Environment(\.isEnabled)
    var isEnabled

    var color: Color = .blue
    private let disabledColor: Color = .init(uiColor: .lightGray)
    private let cornerRadius: CGFloat = 12.0

    func makeBody(configuration: Configuration) -> some View {
        configuration.label
            .padding()
            .fontWeight(.bold)
            .foregroundColor(.white)
            // 有効無効でカラーを変更
            .background(isEnabled ? color : disabledColor)
            // 押下時かどうかで透明度を変更
            .opacity(configuration.isPressed ? 0.8 : 1.0)
            .clipShape(RoundedRectangle(cornerRadius: cornerRadius))
    }
}

struct LoginButton: View {
    @Binding var isDisabled: Bool
    var onClick: () -> Void

    var body: some View {
        Button(action: onClick, label: {
            Text("Login")
        })
        .buttonStyle(RoundedButtonStyle())
        .disabled(isDisabled)
    }
}

struct LoginButton_Previews: PreviewProvider {
    static var previews: some View {
        ForEach(["iPhone 14", "iPhone SE (3rd generation)", "iPad (10th generation)"], id: \.self) { deviceName in
            VStack {
                LoginButton(isDisabled: .constant(true)) {
                    print("onClick")
                }
                LoginButton(isDisabled: .constant(false)) {
                    print("onClick")
                }
            }
            .previewDevice(PreviewDevice(rawValue: deviceName))
            .previewDisplayName(deviceName)
        }
    }
}
↓Preview表示した様子がこちらです。

Reducerプロトコルを実装したSessionを作成する
Indicatorの表示/非表示の切り替えや、name, passwordのデータ、実際のログイン処理を行える様に実装していきます。
struct Session: Reducer {
    struct State: Equatable {
        var isLoading = false
        var name = ""
        var password = ""
    }

    enum Action: Equatable {
        case login
        case setName(String)
        case setPassword(String)
        case startLoading
        case stopLoading
    }

    func reduce(into state: inout State, action: Action) -> Effect<Action> {
        switch action {
        case .login:
            state.isLoading = true
            return .run(priority: .background, operation: { [name = state.name, password = state.password] send in
                do {
                    try await client.auth.signIn(email: name, password: password)
                    let session = try await client.auth.session
                    print("### Session Info: \(session)")
                } catch {
                    print("### Sign Up Error: \(error)")
                }
                await send(.stopLoading) // ログイン処理が完了したら自身のActionを呼び出してます
            })
        case let .setName(arg):
            state.name = arg
            return .none
        case let .setPassword(arg):
            state.password = arg
            return .none
        case .startLoading:
            state.isLoading = true
            return .none
        case .stopLoading:
            state.isLoading = false
            return .none
        }
    }
}
最終的なログイン画面の実装
import Combine
import ComposableArchitecture
import Supabase
import SwiftUI

// swiftlint:disable line_length
let client = SupabaseClient(
    supabaseURL: URL(string: "...")!,
    supabaseKey: "...")
// swiftlint:enable line_length

struct Session: Reducer {
    struct State: Equatable {
        var isLoading = false
        var name = ""
        var password = ""
    }

    enum Action: Equatable {
        case login
        case setName(String)
        case setPassword(String)
        case startLoading
        case stopLoading
    }

    func reduce(into state: inout State, action: Action) -> Effect<Action> {
        switch action {
        case .login:
            state.isLoading = true
            return .run(priority: .background, operation: { [name = state.name, password = state.password] send in
                do {
                    try await client.auth.signIn(email: name, password: password)
                    let session = try await client.auth.session
                    print("### Session Info: \(session)")
                } catch {
                    print("### Sign Up Error: \(error)")
                }
                await send(.stopLoading)
            })
        case let .setName(arg):
            state.name = arg
            return .none
        case let .setPassword(arg):
            state.password = arg
            return .none
        case .startLoading:
            state.isLoading = true
            return .none
        case .stopLoading:
            state.isLoading = false
            return .none
        }
    }
}
// UIActivityIndicatorViewを使ったシンプルなIndicatorです
struct ActivityIndicator: UIViewRepresentable {
    func makeUIView(context: UIViewRepresentableContext<ActivityIndicator>) -> UIActivityIndicatorView {
        return UIActivityIndicatorView(style: .large)
    }
    func updateUIView(_ uiView: UIActivityIndicatorView, context: UIViewRepresentableContext<ActivityIndicator>) {
        uiView.startAnimating()
    }
}

struct LoginView: View {
    let store: StoreOf<Session>
    @State var isDisabled = true

    var body: some View {
        WithViewStore(self.store, observe: { $0 }) { viewStore in
            ZStack {
                VStack(alignment: .center) {
                    VStack(spacing: 24) {
                        TextField("User name", text: viewStore.binding(get: \.name, send: Session.Action.setName))
                            .padding()
                            .background(Color(.systemGray6))
                            .cornerRadius(12.0)
                            .onChange(of: viewStore.name) { _ in
                                isDisabled = viewStore.name.isEmpty || viewStore.password.isEmpty
                            }
                        SecureField("Password",
                                    text: viewStore.binding(get: \.password, send: Session.Action.setPassword))
                            .padding()
                            .background(Color(.systemGray6))
                            .cornerRadius(12.0)
                            .onChange(of: viewStore.password) { _ in
                                isDisabled = viewStore.name.isEmpty || viewStore.password.isEmpty
                            }
                    }
                        .padding(.horizontal, 24)
                        .padding(.bottom, 24)
                    LoginButton(isDisabled: $isDisabled) {
                        viewStore.send(.login)
                    }
                }
                if viewStore.isLoading {
                    ActivityIndicator()
                }
            }
        }
    }
}

struct LoginView_Previews: PreviewProvider {
    static var previews: some View {
        LoginView(
            store: Store(initialState: Session.State()) {
                Session()
            }
        )
    }
}
シュミレータで動作させてみたものが↓こちらになります。「Login」ボタン押下してコンソールログにSession情報が出力されていれば成功です!

Discussion