初めてのMacメニューバーアプリ「QuickShelf」を公開するまで
概要
毎回Finderを開いて目的のファイルを探し、ブラウザにドラッグ&ドロップ…
この作業、地味に面倒じゃないですか?
私の場合、確定申告などの事務作業やテストでのファイルアップロードのたびに
「ダウンロード → Finderで探す → 再アップロード」
を何度も繰り返していて、面倒だなと感じていました。
「これ、もっとサクッとできないの?」
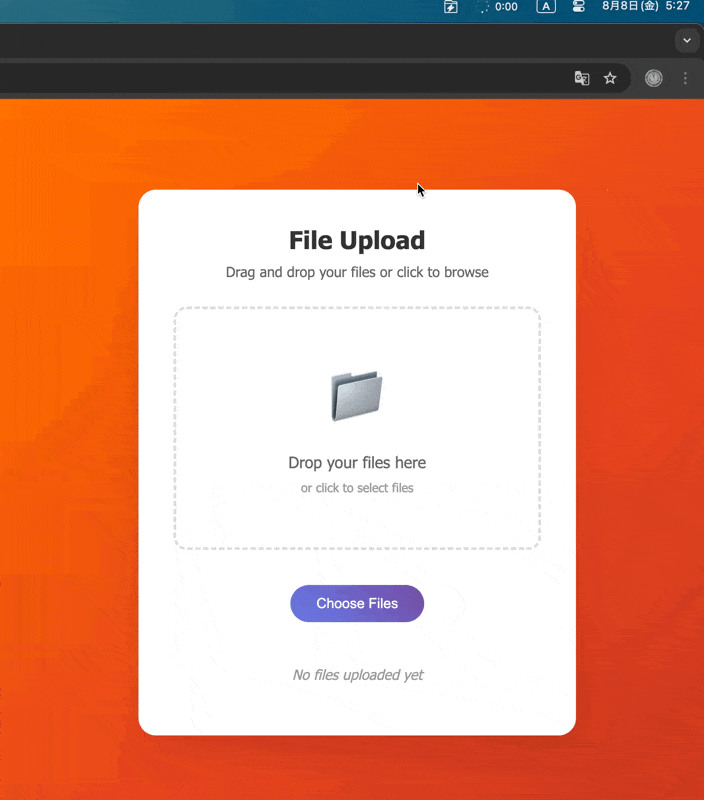
そう思って作ったのが、Macのメニューバーから一瞬で目的フォルダを開き、そのままファイルをD&Dできる アプリ QuickShelf です。

👇 実際の動作イメージ。ワンクリックで指定フォルダを開き、その中のファイルをドラッグできます。
この記事では、このアプリをSwiftUIで開発し、実際に配布できる形にするまでの流れと、実装時にハマったポイントをまとめます。
実装
今回ベース部分の実装は過去の記事👇の通りで、ここから機能を追加していく形で進めて行きました!
ファイル一覧表示
本アプリは選択されたディレクトリ配下のファイルやサブディレクトリの一覧を表示する機能があるのですが、まずはその機能を実装しました。単に表示するだけでなく、App Sandbox のセキュアチェックなど考慮する必要があります。
※ 事前にXCode上で Signing & Capabilities > App Sandbox の File Access > User Selected File を「ReadOnly」になっている必要があります。
簡易的な擬似コードが以下になります。
- ContentView
import SwiftUI

struct ContentView: View {
    @State private var inputDir = ""
    @State private var items: [URL] = []

    var body: some View {
        VStack(alignment: .leading) {
            Text("Directory")
            HStack {
                TextField("Please select directory", text: $inputDir)
                    .disabled(true)
                Button {
                    openPanel()
                } label: {
                    Image(systemName: "folder")
                }
            }
            Text("Items")
            List {
                ForEach(items, id: \.self) { item in
                    Text("\(item.lastPathComponent)")
                }
            }
            .frame(height: 300)
            .scrollContentBackground(.hidden)
            .background(Color.black.opacity(0.3))
        }
        .padding(.all, 16)
    }

    private func openPanel() {
        let panel = NSOpenPanel()
        panel.canChooseDirectories = true
        panel.canChooseFiles = false
        panel.begin { result in
            guard result == .OK, let url = panel.url else { return }
            if let bookmark = try? url.bookmarkData(options: .withSecurityScope,
                                                includingResourceValuesForKeys: nil,
                                                relativeTo: nil),
                                                url.startAccessingSecurityScopedResource() {
              UserDefaults.standard.set(bookmark, forKey: "user_selected_dir")
              self.items = load(path: url)
              self.inputDir = url.relativePath
              url.stopAccessingSecurityScopedResource()
            }
        }
        panel.orderFrontRegardless()
    }

    private func load(path: URL) -> [URL] {
        let result = try? FileManager.default.contentsOfDirectory(
            at: path,
            includingPropertiesForKeys: [.isDirectoryKey, .fileSizeKey],
            options: [.skipsHiddenFiles])
        return result ?? []
    }
}
👇実行して、フォルダ選択した様子

if let bookmark = try? url.bookmarkData(options: .withSecurityScope,
                                                includingResourceValuesForKeys: nil,
                                                relativeTo: nil),
                                                url.startAccessingSecurityScopedResource() {
  UserDefaults.standard.set(bookmark, forKey: "user_selected_dir")
  // ...
  url.stopAccessingSecurityScopedResource()
}
👆この部分でユーザーが選択したディレクトリ配下にアプリからアクセスできる様にし、ユーザーが選択したディレクトリのbookmarkDataをUserDefaultsで保存し、再度アプリ起動時に同じディレクトリを参照できる様にしています。
Drag&Dropできる様に修正
次に一覧から対象のフォルダ or サブディレクトリをDrag&Dropできる様に実装します。
- ContentView
// 省略...
            List {
                ForEach(items, id: \.self) { item in
                    Text("\(item.lastPathComponent)")
                        .draggable(item) // ← 追加
                }
            }
// 省略...
macOS 13以降で使用可能な Transferable を使っています。一行追加するだけなのでとても簡単に実現できます。もし古いOSでも使えるようにするには NSItemProvider を使う必要があります。
NSItemProviderを使った場合
Text("\(item.lastPathComponent)")
  .onDrag {
    NSItemProvider(object: item as NSURL)
  }
実行するとDrag&Dropできる様になっています。
ショートカットキーで開ける様にする
本アプリでは素早くアクセスできる様に、ショートカットキーで開ける様にしています。macOSでグローバルなショートカットキーを設定できる KeyboardShortcuts というライブラリを使って実装します。
XCode上で「File」>「Add Package Dependencies…」を選択し右上の検索窓に https://github.com/sindresorhus/KeyboardShortcuts を入力しパッケージが見つかったら「Add Package」しときます。

- KeyboardShortcuts+Name
まず定義するショートカットを KeyboardShortcuts.Name の extension という形で定義します。
import KeyboardShortcuts

extension KeyboardShortcuts.Name {
    static let openShelfWindow = Self("openShelfWindow", default: .init(.s, modifiers: [.command, .control]))
}
その際にデフォルトのショートカットキーの設定も行えます。
次に実際に定義したショートカットキーが押された場合の処理ですが、今回は本アプリのwindowを開く様にしたかったので以下の様に実装しています。
@main
struct QuickShelfApp: App {
    // ...
    var body: some Scene {
        MenuBarExtra {
            ContentView()
        } label: {
            // ...
        }
        .menuBarExtraStyle(.window)
        .menuBarExtraAccess(isPresented: $isPresented) { item in
            // ...
            KeyboardShortcuts.onKeyDown(for: .openShelfWindow) { [] in
                item.button?.performClick(nil)
            }
        }
        // ...
    }
}
KeyboardShortcuts.onKeyDown(for: .openShelfWindow) で定義したショートカットが押された時の処理で menuBarExtraAccess の item.button を擬似的にクリックする様にしてwindowを開くようにしています。
またこの KeyboardShortcuts ライブラリの便利な所が、定義したショートカットを引数に KeyboardShortcuts.Recorder よ呼ぶようにしてやると、
KeyboardShortcuts.Recorder(
    "Open Window:",
    name: .openShelfWindow
)

👆の様にショートカットの変更Formが表示され、実際に変更できるようになります。便利!
フォルダ選択時にサイドバーが無効で選択できない
NSOpenPanel でフォルダ選択ダイアログを開く際に、初回はサイドパネル部分がDisabled状態なのに、再度開くと選択できる様になっている現象が発生したことがありました。
-
初回

-
2回目以降

これは Application is agent (UIElement) の設定になっている場合、初回起動時にはまだアプリがアクティブになっていない為、制限付きモードでダイアログが開いてサイドバーが選択できない状態になります。
なので NSOpenPanel を開く前に以下を追加し、アプリをアクティブ化してあげます。
NSApp.activate()
これで初回でもサイドバーが選択できるようになります。
Finderで表示される様なアイコンを表示したい
折角ならFinderで表示される時と同じようなアイコンでファイルやフォルダー等を表示できたら親和性が高まると思ったので、本アプリで挑戦してみました。
といってもそんな難しい事はなく FileManager.default.contentsOfDirectory で取得したURLをもとにNSWorkspace.shared.icon(forFile:) を使用するとシステムが管理するアイコンをNSImage形式で取得できます。
一覧表示時の各アイテム専用のView ShelfItemView を作成し、以下の様に実装しました。
struct ShelfItemView: View {
    let item: ShelfItem

    var body: some View {
      HStack {
            Image(nsImage: NSWorkspace.shared.icon(forFile: item.url.path))
                .resizable()
                .aspectRatio(contentMode: .fit)
                .frame(width: 20, height: 20)
            Text(item.url.lastPathComponent)
        }
        .padding(.all, 8)
    }
}
こうする事で以下の様にFinderと同じ様なアイコンが表示されます。

よく見る Launch at login を実装したい
こちらも先ほどの KeyboardShortcuts ライブラリ作者のSindre Sorhusさんが作成された LaunchAtLogin-Modern ライブラリを使用すると簡単に実現できます。
KeyboardShortcuts 同様に「Add Package Dependencies…」から https://github.com/sindresorhus/LaunchAtLogin-Modern を入力し「Add Package」します。
あとは設定画面などに👇を追加するだけです (便利!)
LaunchAtLogin.Toggle()

これだけで Launch at login が実現できます!
アプリを配布できる状態にする
作成したアプリを配布して皆んなに使ってもらえるようにしたいのですが、何も考えてなかった昔の自分は、「zipにして配布すればいいんでしょ」くらいに思っていたら最後に大きな砦が残ってました。。(セキュリティ面を考えると至極当たり前な事ですが)
macOSには Gatekeeper という有害なソフトウェアから保護する仕組みがあります。
何も署名されていないアプリを配布しても、この Gatekeeper で引っかかってしまいます。
これを通過する為に、Appleから公証(notarization)を得る必要があります。
手順としては👇になります。1つずつ実施していきます。
- Developer ID 証明書の取得
- Hardened Runtime を有効にしてコード署名
-
notarytoolで Apple のノータリサーバへ zip/dmg を提出 - 審査が通ったらチケットを貼り付け&検証
その前にまずはReleaseビルドしときます。
 $ xcodebuild -project QuickShelf.xcodeproj \
   -scheme QuickShelf \
   -config Release \
   build \
   ARCHS="arm64 x86_64" \
   ONLY_ACTIVE_ARCH=NO
最後の ARCHS="arm64 x86_64" ONLY_ACTIVE_ARCH=NO でIntelとApple Silicon両方のアーキテクチャに対応したアプリをビルドする様にしています。
1. Developer ID 証明書の取得
Apple Developerライセンスが必要です。ライセンス契約後「証明書、ID、プロファイル」>「証明書(英語)」へ移動します。
「Certificates」へ移動し「+」をクリックして新規に「Developer ID Application」の証明書を作成します。

「Profile Type」を「G2 Sub-CA (Xcode 11.4.1 or later)」にチェック入れ、Certificate Signing Request (CSR) ファイルをアップして「Continue」>「Download」します。
ダウンロードした証明書はダブルクリックしてKeyChainに入れときます。
2. Hardened Runtime を有効にしてコード署名
Releaseビルドして作成された XXXX.app を Hardened Runtime というオプションを有効にしてコード署名を実施してやる必要があります。
codesign --force --deep \
        --timestamp \
        --options runtime \   # ← Hardened Runtime を有効化
        --entitlements QuickShelf/QuickShelf.entitlements \
        --sign "Developer ID Application: TEAM" "{buildパス}/QuickShelf.app"
Developer ID Application: TEAM の部分は先ほどKeyChainに入れた署名書の「通称」になります。

署名が完了したらちゃんと署名できたら確認します。
$ codesign --verify --deep --strict --verbose=4 QuickShelf.app
# 👇が表示されればOK
QuickShelf.app: valid on disk
QuickShelf.app: satisfies its Designated Requirement
3. notarytool で Apple のノータリサーバへ zip/dmg を提出
次は成果物をAppleに審査を提出します。まずは事前に資格情報を Keychain に保存します。
その際にアプリ用パスワードを聞かれるので、未設定の場合は設定しときます。
account.apple.comでApple Accountにサインインし 「サインインとセキュリティ」 を開きます。
右下の「アプリ用パスワード」からパスワードを作成しときます。

準備ができたら以下コマンドで資格情報を Keychain に保存します。
xcrun notarytool store-credentials "NotaryProfile" \
      --apple-id "appleid@example.com" \
      --team-id TEAMID \
      --password "app-specific-password"
- apple-id: デベロッパー登録しているアカウントのメールアドレス
- team-id: チームID
- password: 先ほど作成したアプリ用パスワード
やっと準備ができたのでzip化してAppleに審査提出します。
# zip化
$ ditto -c -k --keepParent "QuickShelf.app" "QuickShelf.zip"
# 審査提出
$ xcrun notarytool submit "QuickShelf.zip" \
      --keychain-profile "NotaryProfile" \
      --wait
--wait オプションをつけると完了するまで待ってくれます。審査がパスされると以下の様なメッセージが返ってきます。
Processing complete
  id: xxxxxxx-xxxxxx-xxxxx-xxxxxx-xxxx
  status: Accepted
4. 審査が通ったらチケットを貼り付け&検証
これで完了かと思いきや、オフライン時にチェックできないのでパスしたチケットを貼り付ける設定を行います。しかもzipファイルには対応してない様なので、一度zipファイルを解凍して貼り付け、再圧縮する必要があります。(めんどう。。)
$ ditto -xk "QuickShelf.zip" "unpacked"
# 貼り付け
$ xcrun stapler staple "unpacked/QuickShelf.app"
# => The staple and validate action worked! と表示されればOK
# 貼り付けれてるか検証
$ xcrun stapler validate -v "unpacked/QuickShelf.app"
# Gatekeeper が見るメタ情報を確認
$ spctl --assess --type execute --verbose=4 "unpacked/QuickShelf.app"
# => source=Notarized Developer ID が含まれていればOK
# 再圧縮
$ ditto -c -k --keepParent "unpacked/QuickShelf.app" "QuickShelf.zip"
これでやっとアプリを配布できるようになりました!
CI/CD設定 (現在未使用)
最後にGithub ActionsでCI/CD設定を試した際のものになります。というのも結果Github Actions経由で作成したバイナリだと何故かファイルをDrag&Dropすると拒否されてしまう現象が発生して解決ができなかったので参考までに。。という内容になります。
今回Github ActionsでのCI/CDでやりたかった事としては上記の「アプリを配布できる状態にする」を自動化して、Releaseページを作成しAssetsにアップロードされたリンクからダウンロードして使ってもらうという想定でした。
事前準備
まずは Developer ID 証明書+秘密鍵をp12形式でKeyChainからExportします。この時にパスワードは設定する様にしときます。

次に対象のリポジトリの「Settings」>「Secrets and variables」>「Actions」で以下を設定しときます。
| Secret 名 | 内容 | 入手方法 |
|---|---|---|
DEV_ID_CERT_P12 |
👆でExportしたp12ファイルを base64 でエンコードした文字列 | Keychain Access で p12 書き出し |
DEV_ID_CERT_PASSWORD |
上記 p12 のパスワード(未設定だとエラーになる) | 👆 |
APPLE_ID |
ノータライズ用 Apple ID(メール) | Apple ID |
APPLE_PASS |
Apple ID の App 用パスワード | AppleID → セキュリティ → App 用パスワード |
TEAM_ID |
10 文字のチーム ID | Developer Web |
.github/workflows/create-release.yml を以下内容で作成しました!
※ XXXX の箇所はプロジェクト名が入ります。
name: build-macos
on:
  push:
    tags: ["v*"]

permissions:
  contents: write

jobs:
  build-sign-notarize:
    # macosイメージ
    # https://github.com/actions/runner-images
    runs-on: macos-15

    steps:
    - uses: actions/checkout@v4

    # Import certificates into Keychain
    - uses: apple-actions/import-codesign-certs@v3
      with:
        p12-file-base64: ${{ secrets.DEV_ID_CERT_P12 }}
        p12-password:    ${{ secrets.DEV_ID_CERT_PASSWORD }}

    #  Xcode build (signed)
    - name: Build release
      run: |
        xcodebuild -project QuickShelf.xcodeproj \
                   -scheme QuickShelf \
                   -config Release \
                   -archivePath build/QuickShelf.xcarchive \
                   clean archive \
                   ARCHS="arm64 x86_64" \
                   ONLY_ACTIVE_ARCH=NO
      env:
        TEAM_ID: ${{ secrets.TEAM_ID }}

    - name: Codesign
      run: |
        xcrun codesign --force --deep \
          --timestamp \
          --options runtime \
          --entitlements QuickShelf/QuickShelf.entitlements \
          --sign "$SIGN_ID" "build/QuickShelf.xcarchive/Products/Applications/QuickShelf.app"
      env:
        TEAM_ID: ${{ secrets.TEAM_ID }}
        SIGN_ID: ${{ secrets.DEVID_COMMON_NAME }}
    # ZIP the .app
    - name: Zip app
      run: |
        ditto -c -k --keepParent "build/QuickShelf.xcarchive/Products/Applications/QuickShelf.app" QuickShelf.zip

    # Submit with notarytool (save Keychain profile on the fly)
    - name: Store notary credentials
      run: |
        xcrun notarytool store-credentials "notary-profile" \
          --apple-id "$APPLE_ID" \
          --team-id "$TEAM_ID" \
          --password "$APPLE_PASS"
      env:
        APPLE_ID: ${{ secrets.APPLE_ID }}
        APPLE_PASS: ${{ secrets.APPLE_PASS }}
        TEAM_ID: ${{ secrets.TEAM_ID }}

    - name: Submit to notarization
      run: |
        xcrun notarytool submit QuickShelf.zip \
          --keychain-profile "notary-profile" --wait

    # Staple
    - name: Staple ticket
      run: xcrun stapler staple "build/QuickShelf.xcarchive/Products/Applications/QuickShelf.app"

    # Gatekeeper verification and re-zipping
    - name: Validate
      run: |
        spctl --assess --type execute --verbose=4 "build/QuickShelf.xcarchive/Products/Applications/QuickShelf.app"
        xcrun stapler validate "build/QuickShelf.xcarchive/Products/Applications/QuickShelf.app"
        ditto -c -k --keepParent "build/QuickShelf.xcarchive/Products/Applications/QuickShelf.app" QuickShelf.zip

    # - name: Create Release and Upload Assets
      env:
        GITHUB_TOKEN: ${{ secrets.GITHUB_TOKEN }}
      uses: softprops/action-gh-release@v2
      with:
        files: QuickShelf.zip
        draft: true
        generate_release_notes: true

    # Upload Deliverables
    # - uses: actions/upload-artifact@v4
    #   with:
    #     name: QuickShelf-macOS
    #     path: QuickShelf.zip
.github/release.yml
changelog:
  exclude:
    authors:
      - github-actions
  categories:
    - title: New Features 🎉
      labels:
        - "enhancement"
    - title: Bug Fix 💊
      labels:
        - "bug"
    - title: Other Changes 🛠
      labels:
        - "*"
やっている事は、先ほど手元で「アプリを配布できる状態にする」を実施した内容をGithub Actions上で行い、softprops/action-gh-release を使用してリリースページを作成、zipファイルをリリースページに添付しています。
v1.0.0 などのタグをpushするとCIが走り、上手くいくとリリースページが作成されます。
まとめ
今回初めてmacOS向けのアプリを作ってみましたが、当たり前ですがiOSにはないmacOSアプリを実装する上での固有の知識がいるというのを再認識しました。
ただiOS向けにSwiftUIを触ってたのもあってUIの部分はすんなり実装する事ができたので、SwiftUI感謝だなと感じることができましたw
また、Sindre Sorhus さんの着眼点や発想には本当に刺激を受けました。機会があれば、またmacOS向けアプリを作ってみようと思います。
QuickShelfの詳細やダウンロードはこちらになります👇
OSSとしてGitHubで公開しているので、StarやPRをいただけるととても嬉しいです 🙌
バグ報告や機能提案も歓迎です。ぜひ使ってみて、感想を聞かせて頂けたら嬉しいです!
参考URL
Discussion