GraphAIとは
GraphAIは、LLM/RAG/WebAPI/データ分析/Code generator/Tools/DBなどの複数のAgentを組み合わせて作る、Multi agentsシステムを効率よく構築するためにフレームワークです。
Multi agentsも数個の単純な組み合わせであればプログラムで記述することは容易です。しかし、複雑な組み合わせて、並列実行やデータの依存関係がある場合、並列で動くMulti agentsを作ることは容易ではありません。
最適化を考えないで作れば作ることはできますが、それぞれの処理に数秒かかるAgentを多く組み合わせるとユーザへのアウトプットが極端に遅くなります。また、スケーラビリティや、サーバ、クライアントでの役割、Stream処理など、現在のAIシステムは様々な要求があります。
Agentを分散処理したり、途中でユーザとのinteractionがあると、サーバ、クライアントでシームレスな構成をするのも苦労します。
GraphAIはDifyやLangGraphで出来るようなことは一通り出来ますが、それに加えて
- Graph 構造で定義されたワークフロー(GraphData)と Agent の実装(TypeScript)が分離されているため、各 Agent はAgent単位で任意の環境(ローカル / ブラウザ / サーバー)で実行可能となる。
- Agentのlocal/serverでの呼び出しは、少し設定を変更するだけで簡単に変更できる。
- サーバー上の Agent は API 呼び出しによって動作するため、任意の言語で実装可能
- TypeScript(JavaScript)で実装しているGraphAIと、GraphAIのAgentは、サーバ、ブラウザで実行可能(ブラウザ、サーバの差異を埋める実装サンプルあり)
- ブラウザ上のみでGraphAI/Agentを実行可能なので、local llmと組み合わせて、外部と通信不要な閉じた環境でのAI処理が可能。
- オフラインでの実行や、外部に情報を出さないでAIを使うことが可能
- ワークフローの途中の任意の部分でユーザとのインタクション(Chat/ボタンによる選択など)を入れることが出来る
- Stream を透過的かつ容易に扱う仕組みが備わっている。
- Graph 構造で定義されたワークフローから、別のグラフ(サブグラフ)を呼び出せる
- サブグラフはAgentの動作結果として動的に作成して呼び出すことが可能
- Tools(Function calling)を使ったMCPのような仕組みを用意しており、Chatでブラウザ内のAPIを呼び出して、既存のWebサイトをAI化可能
- 複雑な非同期/並列処理とデータの依存関係を解決できる
- GraphAIを使うために様々なツールやサンプルが揃っている
といった特徴があります。
GraphAIで使うAgentは
- Agentは、それ単体で実装/テストができるので、開発しやすい
- Open Sourceで提供されているAgentを利用できる
です。
現在は、receptronという組織で開発をしています。
Quick Start
まずは、簡単にGraphAIを使ってみましょう。npmの環境とOpenAIのapi keyを用意してください。
そして、GraphAI の cliをインストールします。
npm i -g @receptron/graphai_cli
以下のyamlファイル(Graphデータ)をダウンロードして保存してください。
そのファイルを保存したディレクトリーに.envというファイルをつくってOpenAIのAPI KEYを記述します。
OPENAI_API_KEY=sk-xxxx
用意は以上です。実行します。
graphai business_idea_jp.yaml
成功していれば、何も表示されないでしばらくまちます。
しばらくすると、「このビジネスアイデアコンテスト」のアイデア、評価、結果が表示されます。
yamlファイルをみると流れはわかると思いますがOpenAIのGPTに問い合わせるAgentが3回実行されています。
GPT(AI)への問い合わせと、その結果を使って更に問い合わせをするという流れです。
問い合わせの内容を変更すると、ビジネスアイデア以外の結果を得ることができるので、改良して使ってみてください。
このように、yamlファイルに定義することで、簡単にAIを使ったAgentを組み合わせて動かすことが可能となります。
Sample
yamlのサンプル
graphaiのcliコマンドで実行できるyamlサンプルです。@receptron/graphai_cliがインストール済みであれば
graphai {filename}
で実行できます。
tsのサンプル
typescriptで書かれたサンプルです。ソースをcloneして、それぞれのディレクトリーで以下のコマンドで実行できます。
yarn run sample {sampleFile}
簡単なGraphAIの使い方
こちらのチュートリアルを参考にしてください。英語ですが、ほとんどがソースなので翻訳を使いながらでも簡単に理解できます。
このチュートリアルは、graphai_cliを使ってCliでyamlを読み込んでGraphAIを使います。
graphai_cliはGraphAI本体と、@graphai/agentsを含んでいて、全てのAgentを利用できます。
GraphAIの簡単な動作の流れ
- yamlやjson,TypeScriptで記述されたGraphデータを読み込む
- Graphデータに矛盾がないかvalidationをする。矛盾があればエラーで終了
- 全てのComputed nodeをタスクキューに入れて、依存がないNodeから実行する
- 1つのNodeの実行が終わると、それに依存し、他のタスク待ちがないNodeを探し、見つかればそのNodeが実行される。ただし並列動作の上限に達した場合には実行待ちとなる。
- AgentFilterが設定されている場合、各Nodeの実行前にAgentFilterが実行される
- 全てのNodeの実行が終わるとisResultで指定されたNodeの結果が返される。Loop指定がある場合は、最初から実行される。
GraphAIのNode.jsで使い方
GraphAIを動作させるのに必要な最小限のnpmはgraphaiといずれかのagentです。
最も簡単に使えるAgentのvanilla agents(@graphai/vanilla 他に依存がないagentをvanillaと呼んでいます)を使って簡単なGraphデータを作り、動かしてみます。
最初にnpmの初期化をして、必要なnpmを入れます。typescriptを実行するためにts-nodeも入れます。
npm init
yarn add graphai @graphai/vanilla ts-node
以下が最小限のスクリプトです。graphai.tsで保存します。
Static nodeのnode1でメッセージを指定して、そのデータを受け取ったComputed nodeのnode2でcopyAgentを実行します。
node2の結果を出力としてかえします。
import { GraphAI } from "graphai";
import * as agents from "@graphai/vanilla";

const graph_data = {
  version: 0.5,
  nodes: {
    node1: {
      value: "hello, GraphAI",
    },
    node2: {
      agent: "copyAgent",
      inputs: {text: ":node1"},
      isResult: true,
    },
  },
};

export const main = async () => {
  const graph = new GraphAI(graph_data, agents);
  const result = await graph.run();
  console.log(JSON.stringify(result));

};

if (process.argv[1] === __filename) {
  main();
}
実行します
$ npx ts-node graphai.ts
{"node2": {text: "hello, GraphAI"}}
node1で指定して文字列がnode2に渡され、結果として表示されました。
Webのサンプル
Vue3で書かれたwebのサンプルです。
サンプルサイト
WebのサンプルStream編
LLMをサーバで動かし、そのレスポンスをstreamで受け取るサンプルです。
サーバ側、クラアント側、両方でstreamをサポートしています。
クライアント
サーバ
localで動作します。
両方のレポジトリをclone
root directorynpmのinstall.
yarn install
vueの起動
yarn run serve
serverの起動
yarn run server
で利用できます。
レポジトリとnpm構成
ソースコード
にあります。このレポジトリはモノレポとなっていて、GraphAI本体の他に、各種ツールやAgentが含まれます。
-
packagesディレクトリ
- GraphAI本体とcliやテスト用の各種ツール、AgentFilter,全てのAgentを利用できるagentのメタパッケージなど
-
agentsディレクトリ
- GraphAIで利用するagentsがそれぞれの分類ごとに分かれておいてある
各packages/agents以下のディレクトリはそれぞれのnpmのパッケージとして提供されています。
GraphAI本体は https://github.com/receptron/graphai/blob/main/packages/graphai/src/ 以下の
-
graphai.ts
- GraphAI本体
-
node.ts
- Agentと対応するNode
-
task_manager.ts
- 並列処理を含むAgentの実行を管理するタスクマネージャー
-
type.ts
- 型定義
の4つのファイルで、合わせても1000行程度とコンパクトに作られています。
本体以外にAgent/AgentFilter/Validator/GraphAIの機能を拡張するAgent(nestしたGraphやGraphを並列で動かす)などを組み合わせて使うため、シンプルなエンジンで複雑な処理を行うことが可能となります。
npm package
npmパッケージは以下で配布しています。
GraphAI本体
GraphAI関連ツール
receptronのorganization配下で、ツールを提供しています。
yamlやjsonをcliで読み込んで使うツールやexpressのmiddlewareなどがあります。
Agents
graphai organization下で、Agentを配布しています。
-
@graphai/agents
- 配布している全てのパッケージを盛り込んだメタパッケージ。
- 含まれるパッケージは、ここのソースを参照してください
-
@graphai/vanilla
- 他のnpmに依存しないagent群
- nestedGraph
- arrayの処理
- データ処理
- 文字列やjsonの変換
- 他のnpmに依存しないagent群
-
@graphai/service_agents
- wikipediaやfetchなどネットワークサービスを使うagent.
-
@graphai/llm_agents
- LLMのagent. LLMをapi経由で使うのにAPI KEYが必要になります。サーバで使うことを想定しています。
-
@graphai/data_agents
- データ加工用のAgent. vanillaに入れなかった依存関係のあるパッケージ
用語説明
- Graph
- 円グラフや棒グラフのグラフではなく、グラフ理論のグラフ。NodeとそれをつなぐEdgeで、それぞれのNodeの関連性を示す
- GraphAI
- GraphAI本体
- Graphデータ
- GraphAIで使うGraphを定義したデータ。グラフ理論のNodeはnodeとして、edgeはinputsで定義される。グラフは有向グラフで閉loopなし。
- yaml, jsonファイルで定義したり、TypeScriptで直接記述も可能。
- Agent
- GraphAIで実行されるプログラム。各Node(Computed Node)は1つのAgentと対応し、実行する。同じAgentを複数のNodeで使うこともできる。LLMを実行するLLM Agentや、データを処理するpopAgent, stringAgentなどがある。TypeScriptで記述する
- Node
- GraphのNode。Static NodeとComputed Nodeの2種類がある。
- Static Node
- データのみを扱うNode。初期値を定義したり、loop(同じグラフを繰り返し処理する)時に、前回実行した結果をデータとして受け取る。
- Computed Node
- Agentに対応したNode。プログラムを実行する
- Agent Filter
- 各Agentを実行する前に実行されるプログラム。共通の処理、AgentのデータのValidation, stream処理などができる。
- Node.js
- JavaScriptの実行環境。GraphAIのnodeと混同しそうなので、Node.jsと表記します。
Graphデータの作り方
echoAgentを使った簡単なGraphの作成
echoAgent(指定されたデータを出力するAgent)を使って、簡単なGraphファイルを作ります。
GraphAIのGraphファイルの必須項目はversionとnodesです。
versionは、0.5を指定します。(2024/06現在)
nodesは、GraphAIで使う各ノードを書いていきます。
このサンプルではnodesにechoAgentを使った1つのnodeを追加します。
echoAgentはparamsで指定しているユーザからの入力値をそのまま返すAgentです。
追加するnodeは、node1というNode名をつけます。
このnodeはmessage: helloというデータを出力します。
このサンプルのYAMLは1つしかnodeがありませんが、結果を返すnodeはnode1なので、isResult: trueを追加し、このnodeの結果がこのGraphの結果と指定します。
version: 0.5
nodes:
  node1:
    params:
      message: hello
    agent: echoAgent
    isResult: true
これをecho.yamlというファイル名で保存して、graphaiのcliで実行します
$ graphai echo.yaml
{ node1: { message: 'hello' } }
2行目のmessage: helloが表示されていれば成功です。
inputsを追加する
次に複数のAgentを組み合わせ、inputsで入力を指定したYAMLを作ります。
入力を指定することで依存関係が定義でき、それによって実行順が制御されます。
copyAgentは入力値をそのまま出力値で返すAgentです。
先程のechoAgentのyamlにnode2を追加します。node2のagentはcopyAgentを指定します。
入力のinputsとして、前のnode1を指定します。inputsは文字列の配列で、node名を指定します。
今回は出力はcopyAgentのnode2なので、node2にisResult: trueを指定します。node1のisResultは削除します。
version: 0.5
nodes:
  node1:
    params:
      message: hello
    agent: echoAgent
  node2:
    agent: copyAgent
    inputs:
      text: ":node1.message"
    isResult: true
実行される順に説明すると、
- node1のechoAgentが実行され、paramsの値を結果として返す
- node1を入力としているnode、node2が実行される。node2の入力値はnode1の実行結果で、それを入力としてうけとる。node2のcopyAgentは入力値をそのまま結果として返すagentなので、node1の結果をそのまま返す。
これを実行するとnode2の結果としてtext: 'hello'が表示されます。
また結果はarrayになっています。
 $ graphai echo2.yaml
{ node2: { text: 'hello' } }
同じように、今度は入力を増やして試してみます。
node1と同じechoAgentをnode2とし、copyAgentをnode3にします。
入力のinputsは今度は array: [":node1", ":node2"]と2つ指定します。
node3がisResult: trueです。
version: 0.5
nodes:
  node1:
    params:
      message: hello
    agent: echoAgent
  node2:
    params:
      message: こんにちは
    agent: echoAgent
  node3:
    agent: copyAgent
    inputs:
      array:
        - ":node1.message"
        - ":node2.message"
    isResult: true
$ graphai echo3.yaml
{ node3: { array: ['hello', 'こんにちは'] }}
node3の結果として、2つの入力値がそのまま出力されます
このようにinputsを使って、複数のエージェントをつなげていくことができます。
inputsを持つagentは、入力となるnode1, node2のagentの実行結果を待ってから実行します。
入力のagentがデータベースに接続したり、APIを叩くような時間のかかる処理の場合でも、その前の処理が終わるのを待ってから実行されます。
Agentのdocument
各AgentのAgentFunctionInfoに書かれた情報を元に、機械的に生成したdocumentがAgentDocにあります。
AgentFunctionInfoについて
npmで配布されるagentは、実行されるagentの関数と、そのAgentの情報を含むAgentFunctionInfoの形式配布されます。
AgentFunctionInfoには、Agentの情報(nameやdescription)、サンプルの入出力、入力のスキーマなどの情報が含まれています。Sampleはドキュメントの自動生成やUnit testにも使われます。
Agentを作成してGraphAIで利用するときは、AgentFunctionInfoを作る必要があります。
(* 簡易的にagentを即時関数で使う方法や、AgentFunctionInfoのモックデータを使うなど、開発時には省略する方法もあります。別途説明予定)
Agentの開発方法
GraphAIで使うAgentの作り方の説明をします。
こちらのサンプルのagentのレポジトリがあります。
Agentは、Agentの本体とそれをテストするテストコードで構成されます。
Agentの本体をsrc/以下(今回はsrc/sample_agent.ts), Agentのテストコードをtest/以下(今回はtests/test_agent.ts)に作ります。
今回作成するAgentはSampleAgentという名前です。
動作は、GraphAIからの入力値(設定ファイルのparams)のparamsと、前のagentからの入力値namedInputs、この2つの値をmergeしてobjectとして返す簡単なAgentです。
Agent
Agentの本体はこちらです。
import { AgentFunction } from "graphai";

export const sampleAgent: AgentFunction = async ({ params, namedInputs }) => {
  return { params, namedInputs };
};
Agentは必ずAgentFunctionの型で、非同期(async)な関数です。
最初の説明にあったように、paramsと入力をとって、それを返すだけのコードです。
どんなAgentも基本的にはこのように入力値を受け取って、何らかの結果を返す1つの関数です。
AgentFunctionInfo
Agentは、AgentFunctionInfoの型のデータとしてGraphAIにわたす必要があります。
AgentFunctionInfoはAgent本体とinputs/params/resultのサンプルの値、Agentのメタ情報を含みます。
src/sample_agent.tsに追加します。
// for test and document
以下にテストのサンプル値と、このAgentの情報(AgentFunctionInfo)を記載しています。
これらをsampleAgentInfoにまとめてexportします。
サンプル値はUnit Test(つまり、サンプルのドキュメントとUnit Testの両方を兼ねています)で使います。
後述する開発時にはこのサンプル値を使ってTestRunnerでテストをします。
Agentのファイルは、agentを含むパッケージ情報(AgentFunctionInfo)をdefaule exportします。
import { AgentFunctionInfo } from "graphai";

const sampleInput = [{message: "hello"}, {message: "test"}];
const sampleParams = { sample: "123" };
const sampleResult = { namedInputs: sampleInput, params: sampleParams };

const sampleAgentInfo: AgentFunctionInfo = {
  name: "sampleAgent",
  agent: sampleAgent,
  mock: sampleAgent,
  samples: [
    {
      inputs: sampleInput,
      params: sampleParams,
      result: sampleResult,
    },
  ],
  description: "Sample agent",
  author: "isamu arimoto",
  repository: "https://github.com/isamu/graphai_agent_template",
  license: "MIT",
};

export default sampleAgentInfo;
複数のサンプル値を用意する場合は
  samples: [
    {
      inputs: sampleInput,
      params: sampleParams,
      result: sampleResult,
    },
    {
      inputs: sampleInput2,
      params: sampleParams2,
      result: sampleResult2,
    },
  ],
とします。
複数のサンプル値があるときはテストランナーは全てのケースをテストします。
Unit Test
Agentのパッケージの情報を使ってAgent単体のUnit Testをします。
GraphAIに含まれるagentTestRunnerにsampleAgentInfoを渡してUnit Testを実行します。
agentTestRunnerは、sampleAgentInfoに含まれるサンプル値を使ってAgentを実行します。
この関数は、内部でnode:testを使っています。
inputs, paramsのペアを使ってAgentを実行、結果とresultが一致すればテストは成功です。
import sampleAgentInfo from "@/sample_agent";
import { agentTestRunner } from "@receptron/test_utils";

agentTestRunner(sampleAgentInfo);
package.jsonにテスト実行のスクリプトがあるので
yarn run test
でテストを実行します。
開発
最初にAgentを開発するとき、このレポジトリをforkして使うと良いです。
Agent作成に必要な設定は package.json, eslintrc.js, .prettierrc, tsconfig.json に設定済みです
src/sample_agent.tsをベースに必要な実装を追加していき、期待すべきsamplesを更新、追加しながらUnit Testを動かします。
Unit TestをPassし、期待すべき動作がするようになればAgentは完成です。
Agentの受け取るデータ
sampleAgentでは、Agentの関数で{ params, namedInputs }を受け取りました。
実際はAgentFunctionContextの情報を受け取っています。
- params
- GraphDataのyaml/jsonのparamsで与えられる値
- namedInputs
- GraphDataの
inputsで指定される値。前に実行したAgentの結果や、Static nodeでの値、inputsに書かれた値など。 - namedInputsはObjectで渡されます
- GraphDataの
基本的にはこのうちの2つ(paramsと(inputs or namedInputs))を入力として受け取り、Agentの処理をします。結果はreturnで返します。
Agentの結果は、次に実行されるAgentのinputsなどで利用されます。(inputの記述方法は別途解説します)
- agentFilters
- AgentFilterという仕組みを使う場合に使う
- debugInfo
- debug時などに必要な情報
で、それ以外はNestedGraphで使う特別なデータなので、通常は利用しません。
Agentのdocument生成とテスト
AgentFunctionInfoに含まれる方法を使って、agentのunit testを実行する、documentを自動生成することが可能です。
Test runnerは、@receptron/test_utilsに含まれています。
import { agentTestRunner } from "@receptron/test_utils";

const main = async () => {
  await agentTestRunner(agentFunctionInfo);
};

main();
Documentの自動生成はこちらを参考に。今後、利用しやすい形式で提供予定です。
AgentFilter
AgentFilterは、それぞれのComputed Nodeが実行される前に、なにかの処理を追加することができます。
@graphai/agent_filtersではhttpのstreamのためのfilterや、AgentFunctionInfoのinput schemaを使った入力値のvalidateを行うagent filterがあります。
namedInput Validator
namedInputの値をagentFunctionInfoのinput schemaの情報を元にvalidationします
Testコードでの利用例
import { GraphAI } from "graphai";
import * as agents from "@graphai/agents";
import { namedInputValidatorFilter } from "@graphai/agent_filters";

const agentFilters = [
  {
    name: "namedInputValidatorFilter",
    agent: namedInputValidatorFilter,
  },
];

const graph = new GraphAI(graph_data, agents, { agentFilters });
const results = await graph.run();
streamAgentFilterGenerator
filterParamsのstreamTokenCallback関数を通してstreamのデータを受信します。
サーバ、クライアントで利用可能です。
server 例
express server
    return async (req: express.Request, res: express.Response) => {
      res.setHeader("Content-Type", "text/event-stream;charset=utf-8");
      res.setHeader("Cache-Control", "no-cache, no-transform");
      res.setHeader("X-Accel-Buffering", "no");

      const callback = (context: AgentFunctionContext, token: string) => {
        if (token) {
          res.write(token);
        }
      };
      const streamAgentFilter = {
        name: "streamAgentFilter",
        agent: streamAgentFilterGenerator<string>(callback),
      };
      const agentFilters = [streamAgentFilter]

      const agentFilterRunner = agentFilterRunnerBuilder(agentFilters);
      const result = await agentFilterRunner(context, agent.agent);

      const json_data = JSON.stringify(result);
      res.write("___END___");
      res.write(json_data);
      return res.end();
   }
web client
const useAgentFilter = (callback: (context: AgentFunctionContext, data: T) => void) => {
  const streamAgentFilter = streamAgentFilterGenerator(callback);

  const agentFilters = [
    {
      name: "streamAgentFilter",
      agent: streamAgentFilter,
      agentIds: streamAgents,
    },
  ];
  return agentFilters;
};

export default defineComponent({
  setup() {
    const streamingData = ref<Record<string, unknown>>({});

    const callback = (context: AgentFunctionContext, data: string) => {
      const { nodeId } = context.debugInfo;
      streamingData.value[nodeId] = (streamingData.value[nodeId] ?? "") + data;
    };
    const agentFilters = useAgentFilter(callback);

    const graphai = new GraphAI(graphData, agents, { agentFilters });
  }
})
httpAgentFilter
グラフのフローで、agentの実行をバイパスし、http経由でサーバのagentを実行します。
Webでのサンプルはこちらにあります。
agentFilterRunnerBuilder
GraphAIを使わないでagentFilterとagentを動かすRunnerです。
クライアントからサーバのagentを呼び出すときに、サーバ側で使います。
agentFilterやagentの単体テストでも利用可能です。
expressとtest時のサンプルはこちら。
express
test
関連レポジトリ
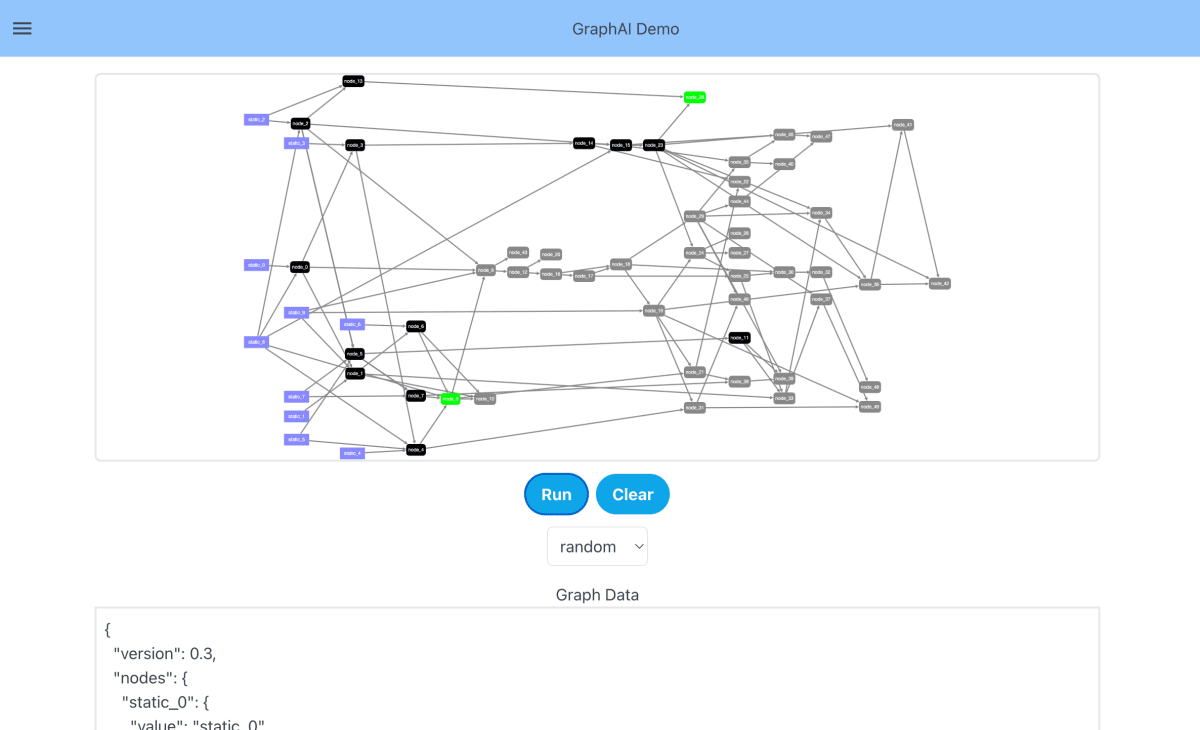
GraphAI visual programing
GraphAI Python Agent server
GraphAI PlayGround

人工知能を活用したアプリケーションやサービスを活用し、内発的動機付けで行動するエンジニア、起業家、社会起業家をサポートするコミュニティーです。 singularitysociety.org Supported by 週刊 Life is beautiful
Discussion
コメント失礼いたします。
typescriptで書かれたサンプルを動かす
yarn run samples {sampleFile}コマンドに関してですが、正しくはsamplesではなくsampleではないでしょうか?コメントありがとうございます。
確かに
sampleが正しいコマンドでした。ご指摘ありがとうございます。修正しました。