RaspberryPiをクラウドとちゃんと話せるようにする(第2回)
組込みエンジニア katsu です。
RaspberryPiをクラウドとちゃんと話せるようにする、第2回です。
全体の位置付けは以下となります。
第1回
お試しで、RaspberryPiをAWS IoTと繋げてみます。
AWSに公開されている手順で、RaspberryPiとAWS IoTサービスを繋げて、メッセージの送受信をしてみます。
第2回
RaspberryPiをゼロからビルドできる環境を構築します。
DockerでUbuntu環境を立ち上げ、Yoctoというビルドシステムを用いてビルドします。
初めてビルドすると、一晩ぐらいかかります。大変。
第3回
AWS IoTサービス向けに必要な機能を組込みます。
AWSが提供しているAWS IoT向けレシピ集 meta-aws をYoctoビルドシステムに組み込むことで、AWS接続できる機能を組み込むことができます。
第4回
RaspberryPiとAWS IoTサービスとメッセージの送受信をしてみます。
好きなメッセージをどうやって送るのか、AWS上でどうやって受信するのか、これを製品に仕立てるには何が必要なのか、確認します。
第5回
AWSに接続するために必要な情報をどうやって組み込むのか考えます。
AWSと接続するために必要な情報は何か、RaspberryPiに組み込むには、どのような方法があるのか、考察します。
第2回: RaspberryPiをゼロからビルドする
ここでは、Dockerを使ってUbuntu環境を作ってから、
Yoctoを使ってRaspberryPi向けのビルドをゼロからやってみます。
Yoctoとは
最近のLinuxベースの組込み機器は、Yoctoというビルドシステムを使ってビルドします。
Yoctoがやることは、組込み機器向けのコンパイラ(gcc)を作るところから始まり、
Linux kernelや、各種コマンドやライブリをビルドして、
製品向けのイメージまで作ってくれる優れものです。
組み込むコマンドや各種ライブラリをカスタマイズできるのはもちろん、
いい感じにコマンドやライブラリの依存関係を考慮して
順番にOSSをダウンロードし、エラーしないような順番でビルドしてくれます。
一昔前は、この全てを手動でやっていました。
当然ものすごい時間が掛かっていたし、最後まで作るのは職人技でした。
Yocto仕組み
Yoctoビルドシステムを図で表すと以下のようになります。
公式Yoctoドキュメントはこちら。

ちょっと難しそうですね。
私たちが指定するのは、左側の各種設定(Configuration)です。
Yoctoでは、その設定に従って、ソースコード(Source Materials)を取得(Fetch)して、
Patch当てて、ビルドして、組込み機器向けのイメージ(Images)を作ってくれたりします。
図にありますが、QATestを実行したり、SDK(.debパッケージ)を作ったりもできます。
とは言え、まずは知っておくべきなのは以下です。
Bitbake
Yoctoで使用するビルドコマンドです。
Recipe
OSS単位でビルド方法をまとめた調理方法(レシピ)になります。
どこのGitリポジトリのどのブランチを使用するか、
どんなパッチを当てるか、configure, make, packaging, license収集方法などを記載します。
BSPLayer
BSP(Board Support Package)レイヤー。
特定の機器向けに、複数のRecipeをグループ化した情報(レシピ集)になります。
自分で作成することもできます。
では、事前知識は得たので、環境作りからやっていきましょう。
Docker インストール
DockerをHomebrewで簡単にお手軽インストールしましょう。
ターミナルから以下のコマンドでインストールします。
$ brew install docker
しばらく待って、完了です。
インストールできたか、以下で確認します。
$ docker --version
Docker version 23.0.5, build bc4487a
起動しておきます。
$ open /Applications/Docker.app
起動しました。

とはいえ、ここでは、ターミナルで操作しますので、どこか見えないところに置いておきましょう。
Ubuntu22.04環境を構築します
続いて、ビルドするLinux環境を準備します。
YoctoがサポートしているLinux 環境のうち、今回は Ubuntu22.04を使用します。
公式Yoctoページ
Macのターミナルから、DockerコマンドでUbuntuのイメージをとってきます。
$ docker pull ubuntu:22.04
イメージは、実体ではなく確か手順書だけな感じなので、すぐに完了します。
イメージが取得できていることを確認しましょう。
$ docker images
REPOSITORY              TAG       IMAGE ID       CREATED        SIZE
ubuntu                  22.04     3f5ef9003cef   1 days ago    69.2MB
コンテナ(実体)を作成します。
コンテナ名は、”raspi2-env" とします。以降、この名前を使用します。
$ docker run -it -d --name raspi2-env ubuntu:22.04
”raspi2-env"が、作成できたか確認します。
$ docker ps
CONTAINER ID   IMAGE          COMMAND       CREATED          STATUS          PORTS     NAMES
b7c4cb3eeb5c   ubuntu:22.04   "/bin/bash"   48 seconds ago   Up 47 seconds             raspi2-env
では、コンテナの中に入ります。
$ docker exec -it raspi2-env /bin/bash
root@b7c4cb3eeb5c:/#
無事入れました!
ここで実行するコマンドは、Ubuntuの中で実行するコマンドになります。
root@b7c4cb3eeb5c:/#  uname -a
Linux b7c4cb3eeb5c 5.15.49-linuxkit #1 SMP PREEMPT Tue Sep 13 07:51:32 UTC 2022 aarch64 aarch64 aarch64 GNU/Linux
root@b7c4cb3eeb5c:/# ls
bin  boot  dev  etc  home  lib  media  mnt  opt  proc  root  run  sbin  srv  sys  tmp  usr  var
root@b7c4cb3eeb5c:/#
必要なコマンドをUbuntu環境にインストールします
まずは、各種パッケージを更新しておきます。
root@b7c4cb3eeb5c:/# apt update
root@b7c4cb3eeb5c:/# apt -y upgrade
次に、よく使うコマンドは入れておきます。
Vimエディタと、bashタブ補完するパッケージです。
apt install -y vim bash-completion
続いて、Yoctoビルドシステムで使用するパッケージをインストールしていきます。
必要なパッケージは以下記載されています。
Yocto公式ページ
これに従って、インストールします。
途中、タイムゾーン(tzdata)を選択させられるので、Asia(6), Tokyo(79)を選択します。
root@b7c4cb3eeb5c:/# apt install -y gawk wget git diffstat unzip texinfo gcc build-essential chrpath socat cpio python3 python3-pip python3-pexpect xz-utils debianutils iputils-ping python3-git python3-jinja2 libegl1-mesa libsdl1.2-dev python3-subunit mesa-common-dev zstd liblz4-tool file locales
...
Configuring tzdata
------------------

Please select the geographic area in which you live. Subsequent configuration questions will narrow this down by
presenting a list of cities, representing the time zones in which they are located.

  1. Africa   3. Antarctica  5. Arctic  7. Atlantic  9. Indian    11. US
  2. America  4. Australia   6. Asia    8. Europe    10. Pacific  12. Etc
Geographic area: 6
Please select the city or region corresponding to your time zone.

  1. Aden      14. Beirut      27. Gaza         40. Karachi       53. Muscat        66. Riyadh         79. Tokyo
  2. Almaty    15. Bishkek     28. Harbin       41. Kashgar       54. Nicosia       67. Sakhalin       80. Tomsk
  ...
Time zone: 79
...
done.
root@b7c4cb3eeb5c:/#
数分待つと完了しました。
続いて、locale設定します。
root@b7c4cb3eeb5c:/# locale-gen en_US.UTF-8
ここで、最低限の準備が完了しました。
ですが、”root" のまま作業するのも気持ち悪いので、
ユーザー"hoge"を作って、
パスワード設定し、
そちらで作業をしましょう。
root@b7c4cb3eeb5c:/# useradd -m hoge
root@b7c4cb3eeb5c:/# passwd hoge
New password:
Retype new password:
passwd: password updated successfully
root@b7c4cb3eeb5c:/# su - hoge
$
今のアカウントを確認します。
$ whoami
hoge
”hoge"になりました。
Yoctoビルドシステムを導入する
ここからYoctoを使って、RaspberryPiのビルド準備を行います。
Yocto本体を取得する
作業ディレクトリを作って、Yocto本体を持ってきます。
git clone は、数分ほどかかります。
$ mkdir raspi2
$ cd raspi2
$ git clone git://git.yoctoproject.org/poky
中身を確認します。
$ ls poky
LICENSE		      MAINTAINERS.md  README.OE-Core.md   README.poky.md  contrib	 meta-poky	meta-yocto-bsp
LICENSE.GPL-2.0-only  MEMORIAM	      README.hardware.md  README.qemu.md  documentation  meta-selftest	oe-init-build-env
LICENSE.MIT	      Makefile	      README.md		  bitbake	  meta		 meta-skeleton	scripts
meta-xxx というのが、BSPレイヤー(OSSビルドするレシピを集めたもの)です。
現在は基本的なものしかありません。
RaspberryPi BSPレイヤーを取得する
ここに、RaspberryPi向けのBSPレイヤー(レシピ集)を追加します。
$ cd poky
$ git clone git://git.yoctoproject.org/meta-raspberrypi
meta-raspberrypi というレイヤーが追加されました。
$ ls
LICENSE		      MEMORIAM		  README.md	  contrib	 meta-raspberrypi  oe-init-build-env
LICENSE.GPL-2.0-only  Makefile		  README.poky.md  documentation  meta-selftest	   scripts
LICENSE.MIT	      README.OE-Core.md   README.qemu.md  meta		 meta-skeleton
MAINTAINERS.md	      README.hardware.md  bitbake	  meta-poky	 meta-yocto-bsp
現時点では、meta-raspberrypiフォルダが展開されただけで、ビルド対象には組み込まれていません。
ビルド環境を準備する
ビルドに使用する環境変数などを設定してくれるスクリプトを実行します。
正しく実行できると、カレントディレクトリが "poky/build"に移動します。
$ source oe-init-build-env
You had no conf/local.conf file. This configuration file has therefore been
created for you from /home/hoge/raspi2/poky/meta-poky/conf/templates/default/local.conf.sample
You may wish to edit it to, for example, select a different MACHINE (target
hardware).

You had no conf/bblayers.conf file. This configuration file has therefore been
created for you from /home/hoge/raspi2/poky/meta-poky/conf/templates/default/bblayers.conf.sample
To add additional metadata layers into your configuration please add entries
to conf/bblayers.conf.

The Yocto Project has extensive documentation about OE including a reference
manual which can be found at:
    https://docs.yoctoproject.org

For more information about OpenEmbedded see the website:
    https://www.openembedded.org/


### Shell environment set up for builds. ###

You can now run 'bitbake <target>'

Common targets are:
    core-image-minimal
    core-image-full-cmdline
    core-image-sato
    core-image-weston
    meta-toolchain
    meta-ide-support

You can also run generated qemu images with a command like 'runqemu qemux86-64'.

Other commonly useful commands are:
 - 'devtool' and 'recipetool' handle common recipe tasks
 - 'bitbake-layers' handles common layer tasks
 - 'oe-pkgdata-util' handles common target package tasks
実行結果を読むと、以下のような設定ファイルがあることがわかります。
少し補足します。
- conf/local.conf
ビルド対象を指定する設定ファイル。"MACHINE"変数を指定します。 - conf/bblayers.conf
どの BSPレイヤー(レシピ集)を使うのかを指定する設定ファイル。 - bitbake <target>
ビルドコマンドです。"bitbake xxx"という感じで実行します。
ビルド対象に、RaspberryPi2を指定する
@@ -36,7 +36,8 @@
 # This sets the default machine to be qemux86-64 if no other machine is selected:
-MACHINE ??= "qemux86-64"
+#MACHINE ??= "qemux86-64"
+MACHINE ?= "raspberrypi2"
RaspberryPi4 とかを使っている場合は、"raspberrypi4-64"としてください。
RaspberryPi BSPレイヤーを追加する
bblayers.conf に ”meta-raspberrypi" レイヤーを追加して、ビルド対象にします。
@@ -9,4 +9,5 @@
   /home/hoge/raspi2/poky/meta \
   /home/hoge/raspi2/poky/meta-poky \
   /home/hoge/raspi2/poky/meta-yocto-bsp \
+  /home/hoge/raspi2/poky/meta-raspberrypi\
   "
以上で、準備完了です!
ビルドを実行する
ビルドには、"bitbake"コマンドを使います。
最小限イメージは以下のコマンドでビルドします。
$ bitbake core-image-minimal
実行すると、しばらくというか、4〜5時間とか待つので、スリープしないようにして気長に待ちまます。
このコマンドは、何をしているかというと、
$ bitbake core-image-minimal
Loading cache: 100% |                                 | ETA:  --:--:--
Loaded 0 entries from dependency cache.
Parsing recipes: 100% |###############################| Time: 0:00:40
Parsing of 935 .bb files complete (0 cached, 935 parsed). 1838 targets, 74 skipped, 0 masked, 0 errors.
Parsing recipies ってところは、指定されたBSPレイヤー(meta-xxx)の中にあるレシピ(.bbファイル)を解析して、ビルド対象のOSSを決めて、ビルド順序を決めています。
そのまま放置すると、以下のような表示になります。
Currently  4 running tasks (429 of 3408)  12% |#########
0: gcc-cross-arm-13.1.1-r0 do_compile - 1m36s (pid 37037)
1: perl-native-5.36.1-r0 do_compile - 58s (pid 63069)
2: libffi-native-3.4.4-r0 do_configure - 30s (pid 71626)
3: re2c-native-3.0-r0 do_compile - 12s (pid 79170)
ここではビルド対象のOSSは3408個で、1つずつダウンロードして順番にビルドしているところです。
この図では、CPUコア0がRaspberryPiのビルドをするためのarmコンパイラを作っているところです。
armコンパイラを作ったら、
RaspberryPi向けのLinuxビルドして、ファイルシステムに組み込む全コマンドをビルドします。
確かに、時間はかかりそうです。
PCがスリープしないように気をつけて、休憩ください。
そうこうして、、、、、、
やっと終わりました!
$ bitbake core-image-minimal
Loading cache: 100% |#######################################################################################| Time: 0:00:00
Loaded 1838 entries from dependency cache.
NOTE: Resolving any missing task queue dependencies

Build Configuration:
BB_VERSION           = "2.4.0"
BUILD_SYS            = "aarch64-linux"
NATIVELSBSTRING      = "universal"
TARGET_SYS           = "arm-poky-linux-gnueabi"
MACHINE              = "raspberrypi2"
DISTRO               = "poky"
DISTRO_VERSION       = "4.2"
TUNE_FEATURES        = "arm vfp cortexa7 neon vfpv4 thumb callconvention-hard"
TARGET_FPU           = "hard"
meta
meta-poky
meta-yocto-bsp       = "master:13b646c0e167ca52f69c91be5538049b172015ac"
meta-raspberrypi     = "master:dff85b9a9f66002856b9ed3b1aa3a384c0bc43d9"

Initialising tasks: 100% |##################################################################################| Time: 0:00:01
Sstate summary: Wanted 1284 Local 0 Mirrors 0 Missed 1284 Current 198 (0% match, 13% complete)
NOTE: Executing Tasks
NOTE: Tasks Summary: Attempted 3408 tasks of which 819 didn't need to be rerun and all succeeded.
"poky/build" 以下を見てみましょう。
$ ls
bitbake-cookerdaemon.log  cache  conf  downloads  sstate-cache  tmp
まず覚えておくのがよいフォルダは、以下です。
- conf
先ほどビルド対象を設定したフォルダです。 - downloads
ビルドしたソースコード一式 - sstate-cache
ビルド結果をキャッシュするフォルダです。
次回ビルドする時に同じソースコードならここを参照します。 - tmp
ビルドした成果物を置くフォルダです。
tmp/deploy : 最終成果物を置くフォルダ
tmp/work : ビルドしたソースコードなどが置いてあるフォルダ
ビルドイメージを取得する
ビルドイメージは、以下になります(.wic.bz2ファイル)。
$ ls tmp/deploy/images/raspberrypi2/*.wic.bz2
tmp/deploy/images/raspberrypi2/core-image-minimal-raspberrypi2-20230624163917.rootfs.wic.bz2
tmp/deploy/images/raspberrypi2/core-image-minimal-raspberrypi2.wic.bz2
2つあるように見えますが、シンボリックリンクなので日付があるファイルが本体になります。
Macのターミナルから、
”docker cp"コマンドで、コンテナIDを指定してビルドイメージを現在のフォルダにコピーします。
ついでに、"bunzip2"コマンドで解凍しておきましょう。
$ docker ps
CONTAINER ID   IMAGE          COMMAND       CREATED      STATUS              PORTS     NAMES
b7c4cb3eeb5c   ubuntu:22.04   "/bin/bash"   1 days ago   Up About 10 hour             raspi2-env
$ docker cp b7c4cb3eeb5c:/home/hoge/raspi2/poky/build/tmp/deploy/images/raspberrypi2/core-image-minimal-raspberrypi2-20230624163917.rootfs.wic.bz2 .
$ bunzip2 core-image-minimal-raspberrypi2-20230624163917.rootfs.wic.bz2
$ ls -l
total 164776
-rw-r--r--@ 1 macuser  staff  84156416  6 25 10:58 core-image-minimal-raspberrypi2-20230624163917.rootfs.wic
80MBぐらいのイメージが取り出せました。
RaspberryPiに焼いてみる
書き込みに、前章で使用した RaspberryPi Imager を使用しましょう。
RaspberryPi Imagerを起動します。

書き込むOSを選択します。
一番下の「カスタムイメージを使う」から、先ほど用意したビルドイメージを選択します。

RaspberyPi用のSDカードをMacに挿し、
ストレージに選択します。

「書き込む」ボタンを押して、しばらく待ってください。
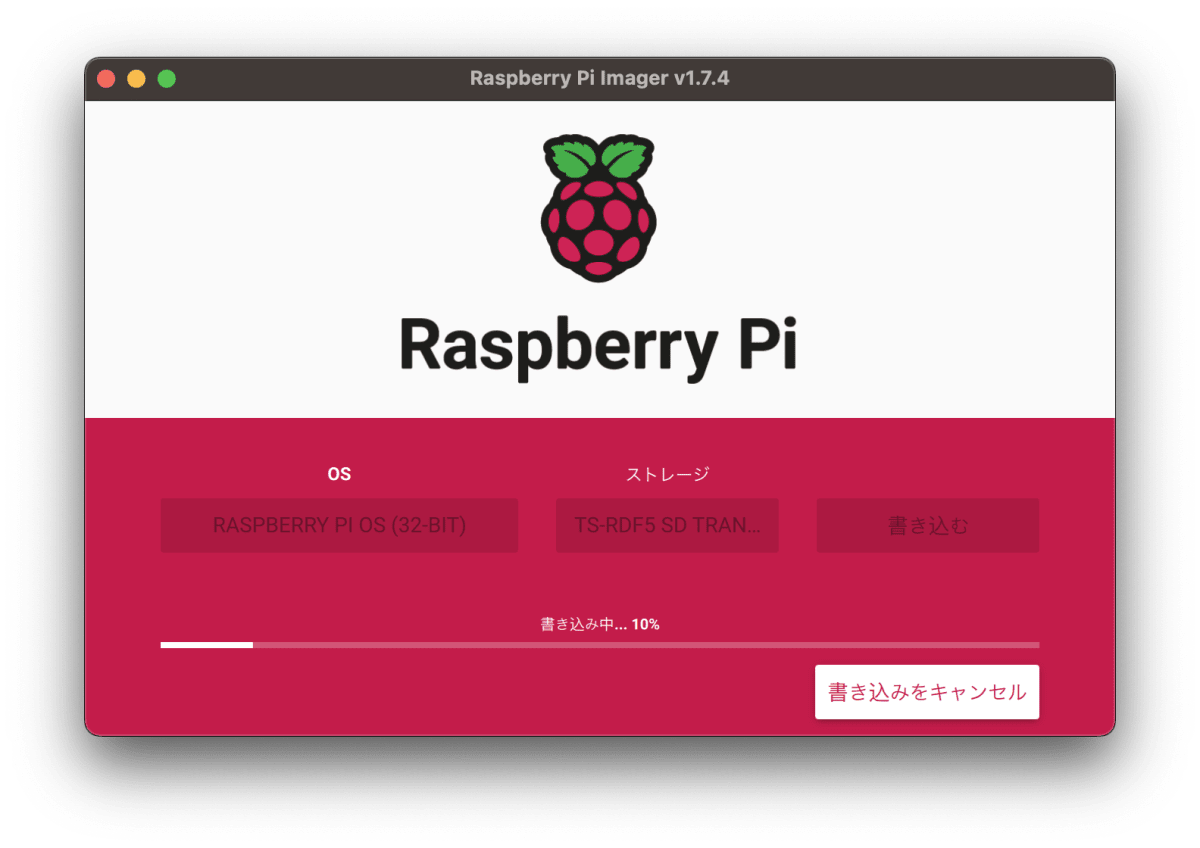
10秒ぐらいで完了しました。
完了したら、そのままSDカードを抜いてOKです。
起動確認する
RaspberryPiにSDカードを差して、
HDMIケーブルでディスプレイを接続し、電源投入します。
そして、、、出ました!

Poky(Yocto project Reference Distro) 4.2 raspberrypi2 でビルドされたものです!
お疲れ様でした!
ということで、
今回はゼロからビルドして、RasberryPiを起動するところまで行きました。
次回は、AWS向けBSPレイヤーを更に追加して、AWS IoTサービスに必要な機能を追加しましょう。
Discussion