iOSの3DスキャンAPI「Object Capture」の内部処理
Object Captureとは、iOS/macOSで利用可能な3DスキャンAPIです。本記事では、このObject Captureが内部でLiDARデータや深度データをどのように使用しているか、またどのようにそれらをAPIで扱えばよいか、公式情報や動作検証した結果をまとめていきます。
Object Captureとは
Object Capture API は RealityKit フレームワークに含まれており、iOS 17 または macOS 12 以降で利用可能です。
これらを利用して、現実世界の物体をスキャンし、
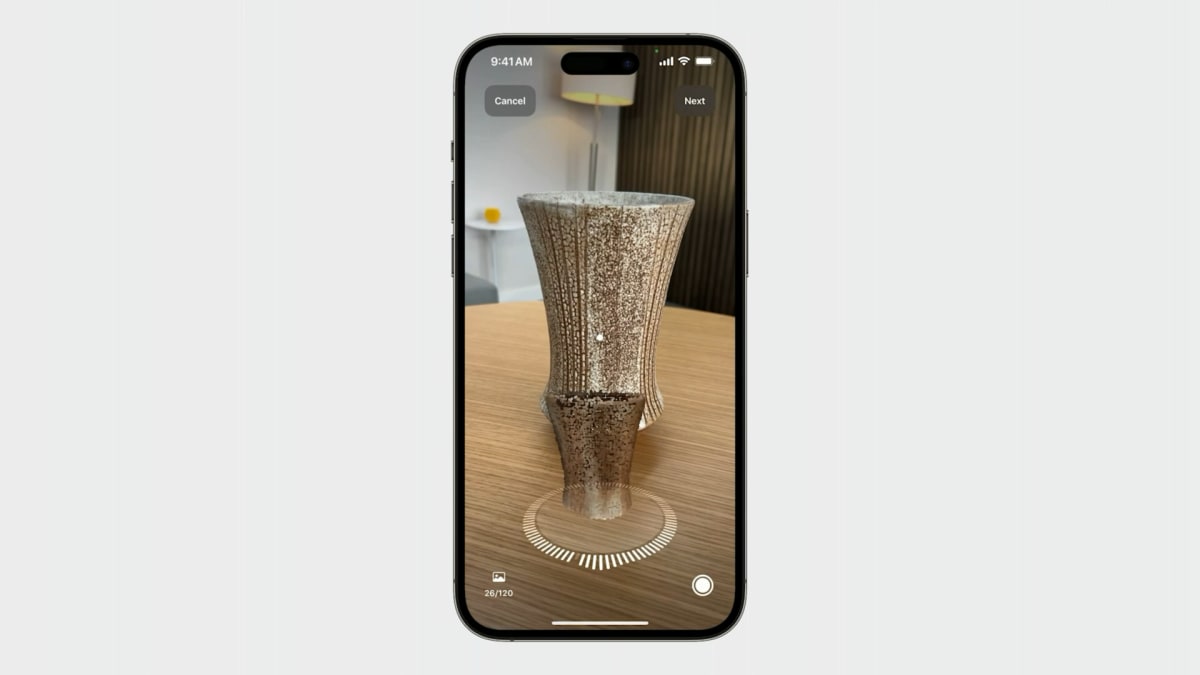
スキャンの様子
高精細な3Dモデルを生成する機能を、簡単な実装でアプリに組み込むことができます。

↑のスキャンにより生成された3Dモデル
詳しくは、iOSDCのトーク「iOSではじめるフォトグラメトリ」の動画、またはスライド、または記事をご参照ください [1]。
本記事では、このObject Captureの内部処理はどうなっているか、という話を書きます。
もちろん実際の中身(ソースコード)はAppleの中の人のみぞ知るわけですが、
- ドキュメントの片隅に書いてあったこと
- WWDCで言及されていたこと
- 出力するデータの中身をのぞいてみてわかったこと
などをまとめます。
公式ドキュメントでの言及
まずはAPIリファレンスでの言及箇所を見てみましょう。
パッと見では実装方法の解説だけで内部的なことは解説されてなさそうなのですが、実は、PhotogrammetrySample [2] という構造体のAPIリファレンスを掘るといろいろと詳しい解説が出てきます。
深度データの扱い
PhotogrammetrySample の depthDataMap プロパティのAPIリファレンスで、深度データの扱い(PhotogrammetrySession における深度データの内部処理での扱い)について次のように解説されています。
Some cameras, including iPhone cameras, capture depth data in addition to image data. Providing this data can help PhotogrammetrySession determine the real-world scale of the photographed object and result in a correctly sized 3D object for placement in an AR scene. This property is read-only.
(iPhoneのカメラを含むいくつかのカメラは、画像データに加えて深度データをキャプチャします。このデータを提供することで、PhotogrammetrySessionは 撮影されたオブジェクトの実世界の縮尺を決定し、ARシーンに配置するための正しいサイズの3Dオブジェクトを生成 することができます。このプロパティは読み取り専用です。)
写真からのReconstructionプロセスにおいて点群の推定等に使われるというよりは、サイズ決定に関わるとのことです。
重力データの扱い
PhotogrammetrySample の gravity プロパティのAPIリファレンスでこう解説されています。
Some cameras, including iPhone cameras, capture a gravity vector for each image. This vector indicates the orientation of the camera at the moment you took the picture. RealityKit uses this gravity vector to improve landmark matching with the other images in the session.
(iPhoneのカメラを含むいくつかのカメラは、画像ごとに重力ベクトルをキャプチャします。このベクトルは、撮影した瞬間のカメラの向きを示しています。RealityKitはこの重力ベクトルを使って、セッション内の他の画像とのランドマークマッチングを改善します。)
こちらは想像通り、写真のアラインメントに使用されるようです。つまり、フォトグラメトリの入力となる写真群の向きを決めるために使用します。
EXIFデータの扱い
PhotogrammetrySample の metadata プロパティのドキュメントに、EXIF情報についても解説がありました。
You can provide EXIF metadata captured by your digital camera to assist in the object-creation process. During object creation, RealityKit can use data from the EXIF keys listed below.
(デジタルカメラで撮影したEXIFメタデータを提供することで、オブジェクト作成プロセスを支援することができます。オブジェクト作成時に、RealityKitは以下のEXIFキーのデータを使用できます。)
RealityKitが利用するEXIFデータのキーの一覧:
-
TIFFMake
-
TIFFModel
-
TIFFOrientation
-
ExifBodySerialNumber
-
ExifLensMake
-
ExifLensModel
-
ExifLensSerialNumber
-
ExifFocalLength
-
ExifFocalLengthIn35mmFilm
-
GPSAltitude
-
GPSAltitudeRef
-
GPSLatitude
-
GPSLatitudeRef
-
GPSLongitude
-
GPSLongitudeRef
それぞれが内部でどう使用されるかまでは言及されていませんでした。
マスクの扱い
object maskとは、たとえば Portrait Matte のように、画像内における全景と背景を分離するためのデータです [3]。
これについて、PhotogrammetrySample の objectMask プロパティに解説がありました。
When a photograph of an object includes surrounding objects, such as plants, buildings, or people in an outdoor space, you can create an object mask to exclude the portions of the image that don’t contain the object. Masking extraneous image data reduces the number of landmarks RealityKit attempts to match, speeds up the object-creation process, and produces a more accurate 3D model.
(オブジェクトの写真に、植物や建物、屋外の人など、周囲のオブジェクトが含まれている場合、オブジェクトマスクを作成して、画像のオブジェクトが含まれていない部分を除外することができます。余計な画像データをマスクすることで、RealityKitがマッチングを試みるランドマークの数が減り、オブジェクトの作成プロセスがスピードアップし、より正確な3Dモデルが作成されます。)
作成スピード、生成物の精度に影響を与えるようです。
Provide the object mask in kCVPixelFormatType_OneComponent8 format and with the same height and width as image.
オブジェクトマスクは、kCVPixelFormatType_OneComponent8 フォーマットで、サイズは画像と同じ高さと幅を指定します。
RealityKit ignores any pixel in image when the corresponding pixel in objectMask has a value of 0.0 (black) unless isObjectMaskingEnabled is set to False in the session’s configuration.
PhotogrammetrySession で isObjectMaskingEnabled が false に設定されていない場合に、objectMaskの対応するピクセルの値が 0.0 (黒)である場合、画像内のピクセルを無視します。
WWDCでの言及
LiDARの扱い
WWDC23の "Meet Object Capture for iOS" セッションでは、LiDARの扱いについて言及があります。
We now support the reconstruction of low-texture objects by leveraging the LiDAR Scanner.
(LiDARスキャナーを活用することで、低テクスチャーのオブジェクトの再構築をサポートするようになりました。)

Let's take a look at this chair as example.
(この椅子を例にとって見てみましょう。)

It lacks texture details, making it challenging for Object Capture to create a good model of it.
(この椅子はテクスチャーの詳細がないため、オブジェクトキャプチャーで良いモデルを作成するのは困難です。)

However, using LiDAR, we are able to reconstruct it in better quality.
(しかし、LiDARを使うことで、より良い品質で再構築することができます。)

During capturing, we take RGB photos of this chair.
However, because the seat and the back are textureless, we cannot recover a complete model of it.
In addition to RGB images, our API also collects point cloud data with LiDAR, which helps to produce a comprehensive representation of the object's 3D shape with enhanced coverage and density.
Finally, a complete 3D model is generated from the fused-point cloud data.
(キャプチャーでは、この椅子をRGBで撮影しています。しかし、座面や背面にはテクスチャーがないため、完全なモデルを復元することはできません。このAPIでは、RGB画像に加えて、LiDARで点群データを収集し、対象物の3D形状を網羅的に表現するために、カバー率と密度を向上させたデータを作成することができます。最後に、融合された点群データから完全な3Dモデルが生成されます。)
写真のRGBからのフォトグラメトリ処理に加え、LiDARから得た点群データを組み合わせていることが明言されています。
また同セッションの「Capturing for Mac」のパートでは以下のような言及もありました。
This year, Mac reconstruction also utilizes the LiDAR data we save in our images.
(今年は、画像に保存されているLiDARデータもMacの再構築に利用されます。)
APIリファレンスには書かれていませんでしたが、PhotogrammetrySesssionでは3Dモデル復元にLiDARで取得した情報も使っているということについて公式の言質が取れました。
公式サンプルにおける実装
WWDC23に伴いAppleが公開したiOS 17向けのObject Captureサンプルがあります。
新たに追加された撮影用のAPIを使い、物体の撮影・3Dモデルの生成をすべてiOSデバイス上で行うサンプルとなっています。
iOS 17の新しいObject Capture APIは要LiDARなので、この公式サンプルでは当然フォトグラメトリAPIにLiDARデータを渡していると考えられます。
しかし、PhotogrammetrySession の実装を見てみると、
photogrammetrySession = try PhotogrammetrySession(
    input: scanFolderManager.imagesFolder,
    configuration: configuration)
と、普通に画像フォルダの URL を渡しているだけ。デプスや重力データを PhotogrammetrySession に渡すためのAPIである PhotogrammetrySample も使用されていません。
また、アプリの Documents 配下を見てみると、HEIC画像しか保存されていないようです。

ではLiDARデータ等はどのようにフォトグラメトリ処理に渡されているのでしょうか?
ObjectCaptureSession はデプス含め様々なデータをHEICに保存している
ObjectCaptureSession (Object Captureの撮影API)で撮影した画像のHEICファイルの中身をのぞいてみましょう。
次のような CGImageSource の extension を書いておき、
extension CGImageSource {

    var auxiliaryDataProperties: [[String : AnyObject]]? {
        guard let sourceProperties = CGImageSourceCopyProperties(self, nil) as? [String: AnyObject] else { fatalError() }
        guard let fileContentsProperties = sourceProperties[String(kCGImagePropertyFileContentsDictionary)] as? [String : AnyObject] else { fatalError() }
        guard let images = fileContentsProperties[String(kCGImagePropertyImages)] as? [AnyObject] else { return nil }
        for imageProperties in images {
            guard let auxiliaryDataProperties = imageProperties[String(kCGImagePropertyAuxiliaryData)] as? [[String : AnyObject]] else { continue }
            return auxiliaryDataProperties
        }
        return nil
    }

    ...
}
画像URLから CGImageSource を作成すれば、画像内に入っているAuxiliary Data(直訳すると補助データ)が出力できます [4]。
let imageSource = CGImageSourceCreateWithURL(url as CFURL, nil)!
print("auxiliaryDataProperties: \(imageSource.auxiliaryDataProperties)")
ObjectCaptureSession (Object Captureの撮影API)で撮影した画像のHEICファイルのauxiliary dataをprintした結果がこちら:
`ObjectCaptureSession` で撮影した画像のHEICファイルのauxiliary dataの中身
["{FileContents}": {
    ImageCount = 1;
    Images =     (
                {
            AuxiliaryData =             (
                                {
                    AuxiliaryDataType = kCGImageAuxiliaryDataTypeDepth;
                    Height = 192;
                    Width = 256;
                },
                                {
                    AuxiliaryDataType = "tag:apple.com,2023:ObjectCapture#DepthConfidenceMap";
                    Height = 192;
                    Width = 256;
                },
                                {
                    AuxiliaryDataType = "tag:apple.com,2023:ObjectCapture#CameraTrackingState";
                },
                                {
                    AuxiliaryDataType = "tag:apple.com,2023:ObjectCapture#CameraCalibrationData";
                },
                                {
                    AuxiliaryDataType = "tag:apple.com,2023:ObjectCapture#ObjectTransform";
                },
                                {
                    AuxiliaryDataType = "tag:apple.com,2023:ObjectCapture#ObjectBoundingBox";
                },
                                {
                    AuxiliaryDataType = "tag:apple.com,2023:ObjectCapture#RawFeaturePoints";
                },
                                {
                    AuxiliaryDataType = "tag:apple.com,2023:ObjectCapture#PointCloudData";
                },
                                {
                    AuxiliaryDataType = "tag:apple.com,2023:ObjectCapture#BundleVersion";
                },
                                {
                    AuxiliaryDataType = "tag:apple.com,2023:ObjectCapture#SegmentID";
                },
                                {
                    AuxiliaryDataType = "tag:apple.com,2023:ObjectCapture#Feedback";
                },
                                {
                    AuxiliaryDataType = "tag:apple.com,2023:ObjectCapture#WideToDepthCameraTransform";
                }
            );
            Height = 3024;
            ImageIndex = 0;
            NamedColorSpace = kCGColorSpaceSRGB;
            ThumbnailImages =             (
                                {
                    Height = 240;
                    Width = 320;
                }
            );
            Width = 4032;
        }
    );
}, "CanAnimate": 0, "FileSize": 3907659]
kCGImageAuxiliaryDataTypeDepth のデプスデータだけでなく、
-
PointCloudData
-
LiDARから取得した点群データと思われる
-
RawFeaturePoints
-
ObjectBoundingBox
-
SegmentID
-
CameraCalibrationData
-
WideToDepthCameraTransform
といった情報まで保存していることがわかります。
つまり、ObjectCaptureSession は、LiDARデータ、デプスデータ、EXIFデータ等をHEICファイルにAuxiliary Dataとして保存し、PhotogrammetrySession は画像ファイルが入ったフォルダのURLを渡すだけで(PhotogrammetrySampleで明示的に渡さなくても)、その画像に含まれているLiDARデータetc.をしっかり3Dモデル復元に利用してくれている、ということがわかりました。
PhotogrammetrySample を用いて PhotogrammetrySession に追加データを渡す
PhotogrammetrySession に重力やobject mask等のデータを明示的に渡すには、PhotogrammetrySampleを使用します。
PhotogrammetrySession のイニシャライザに、PhotogrammetrySample のシーケンスを渡せるものが用意されています:
init<S>(
    input: S,
    configuration: PhotogrammetrySession.Configuration = Configuration()
) throws where S : Sequence, S.Element == PhotogrammetrySample
APIリファレンスより:
Creates a new session instance from a custom sequence of PhotogrammetrySample objects by iterating over the provided Sequence object.
(提供された Sequence オブジェクトを繰り返し処理することで、PhotogrammetrySample オブジェクトのカスタムシーケンスから新しいセッションインスタンスを作成します。)
The constructor will only use makeIterator() on input and will then iterate through the sequence only once. A provided iterator should be lazy, or a lazy Sequence and map used.
(コンストラクタは入力に対して makeIterator() を使用し、シーケンスを一度だけ繰り返し処理します。提供されるイテレータは遅延であるか、遅延 Sequence とマップを使用する必要があります。)
例として、PhotogrammetrySample を用いて PhotogrammetrySession にマスク画像を渡すには次のように実装します:
// PhotogrammetrySampleの初期化
let pixelBuffer = createPixelBuffer(from: inputImage)
var sample = PhotogrammetrySample(id: index, image: pixelBuffer)

// マスク画像をobjectMaskプロパティにセット
let maskPixelBuffer = createMaskPixelBuffer(from: maskImage)
sample.objectMask = maskPixelBuffer
// PhotogrammetrySamples から PhotogrammetrySession を初期化
session = try PhotogrammetrySession(input: samples,
                                    configuration: configuration)
まとめ
Object CaptureフレームワークにおいてLiDARデータやデプスデータ、マスク、EXIFデータ等が内部処理でどのように使用されているのか、それらのデータをどのように PhotogrammetrySession に渡すのか、といったことについて調査し、まとめました。
内部処理がどのようになっているかを把握することは、生成される3Dモデルの品質を高めるために有用です。何かしらの参考になれば幸いです。
-
壇上でもデモを行ったので、動画がおすすめです。 ↩︎
-
PhotogrammetrySampleは、PhotogrammetrySessionにデプスや重力等の情報を明示的に渡す際に使用します。本記事冒頭で紹介したiOSDCのトークでも解説しています。 ↩︎ -
フォトグラメトリにおける「マスク」については、本記事冒頭で紹介したiOSDCのトークでも解説しています。 ↩︎
-
拙OSSのiOS-Depth-Samplerにこのauxiliary dataを取り出すコードがあるので見てみてください。 ↩︎
Discussion