Slate を Docker で構築して、Github pages にデプロイする
メモ:このポストは、2月10日(土曜)静的サイトジェネレータ勉強会の資料です。
Slateとは
- 主にAPIドキュメント用のジェネレータ
- レスポンシブデザイン
- 今回 slate を選んだ理由は slate のデフォルトのデザインが好きだからです
参考資料
事前準備
- Github Account
- Git install
- まとめてくれている方がいらっしゃったので、こちらが参考になると思います;Gitをインストールする方法(Windows、macOS、Linux別)|Kinsta®
- かんたんな Git command の知識
- Docker Install
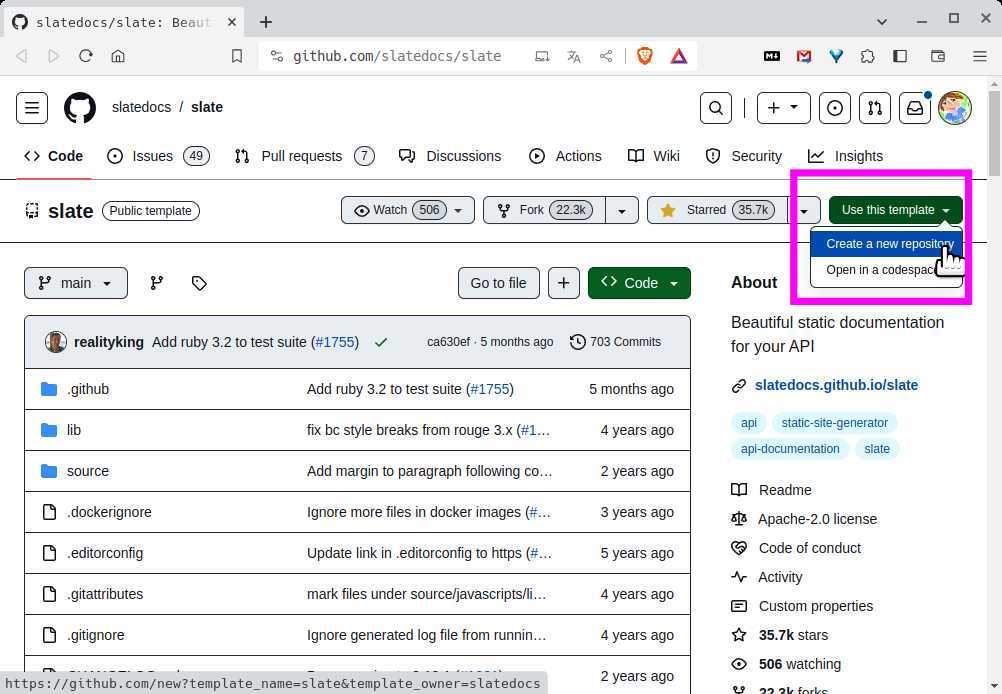
Github にレポジトリ作成
- https://github.com/ ログイン
-
https://github.com/slatedocs/slate >
User this template>Create a repository -
Repository name*に適宜名前をいれて、必ずPublicを選び、Create Repository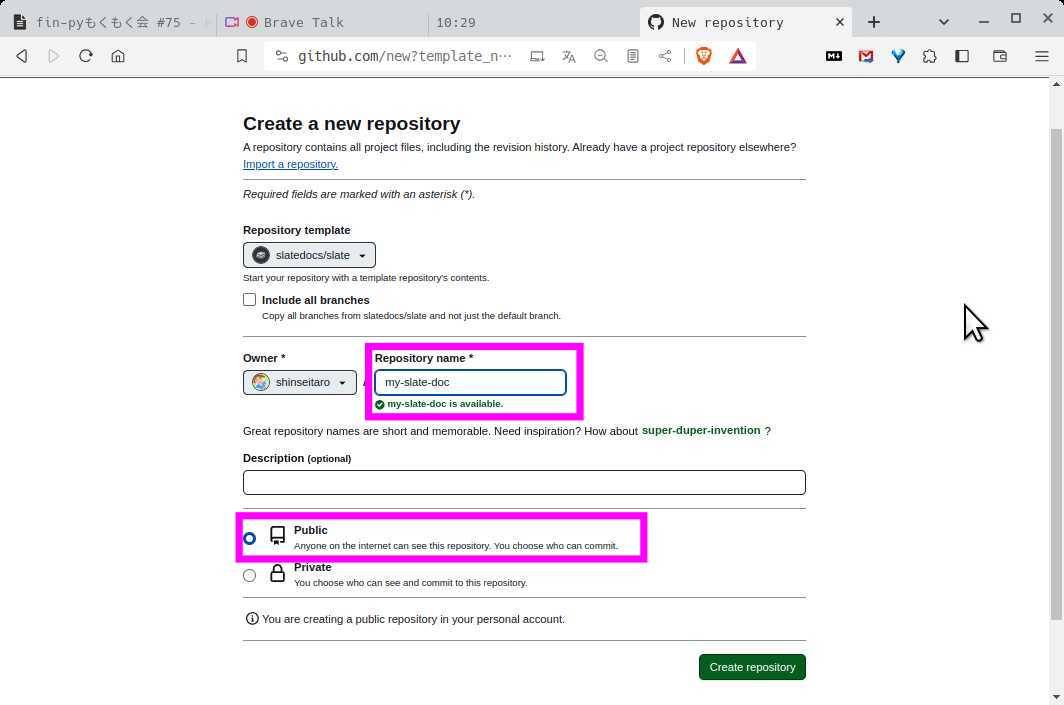
- Github pages を使うためには必ず Public 設定にする必要があります。
- このポストでは レポジトリ名を
my-slate-docにします。ご自身の名前に適宜入れ替えて読み進めてください。
- 今作ったレポジトリを、
git cloneして、cd my-slate-doc
Slate image を Pull
- slate image を pull
docker pull slatedocs/slate - image の確認
docker image ls
REPOSITORY        TAG       IMAGE ID       CREATED       SIZE
slatedocs/slate   latest    d21c88e98067   6 weeks ago   515MB
ドキュメントをビルド
- コンテナ作成してビルド実行
docker run --rm --name slate -v $(pwd)/build:/srv/slate/build -v $(pwd)/source:/srv/slate/source slatedocs/slate build- コマンドの説明
-
docker run:Dockerコンテナを作成、実行 -
--rm:コンテナが終了した後に自動的に削除(不要なコンテナを残さない) -
--name slate: 実行するコンテナの名前を指定 -
-v $(pwd)/build:/srv/slate/build: ホストのディレクトリとコンテナ内のディレクトリをマウント(buildディレクトリ) -
-v $(pwd)/source:/srv/slate/source: ホストのディレクトリとコンテナ内のディレクトリをマウント(ソースファイル用のディレクトリ) -
slatedocs/slate: 使用するDockerイメージの名前(上記で確認したimage名) -
build: Slateのビルドコマンド。指定されたソースディレクトリからMarkdownファイルを読み込み、HTML形式のドキュメントを生成
-
- これで、Slateを使用してドキュメントをビルドし、静的ファイルをbuildディレクトリに出力します。
- このようなワーニングメッセージが出るかもしれませんが、問題ありません。
Your RubyGems version (3.0.3.1) has a bug that prevents `required_ruby_version` from working for Bundler. Any scripts that use `gem install bundler` will break as soon as Bundler drops support for your Ruby version. Please upgrade RubyGems to avoid future breakage and silence this warning by running `gem update --system 3.2.3` - コマンドの説明
ローカルでサーバを起動し、Slateドキュメントを確認
-
実行
docker run --rm --name slate -p 4567:4567 -v $(pwd)/source:/srv/slate/source slatedocs/slate serve- コマンドの説明(上記との差異だけ)
-
-p 4567:4567: ホストのポート4567をコンテナのポート4567にマッピング。ホスト側のブラウザからコンテナ内のウェブサーバにアクセスできるようになる。 -
serve: Slateのサーバーを起動。Slateのドキュメントがホストされ、ブラウザからアクセスできるようになる。
-
- コマンドの説明(上記との差異だけ)
-
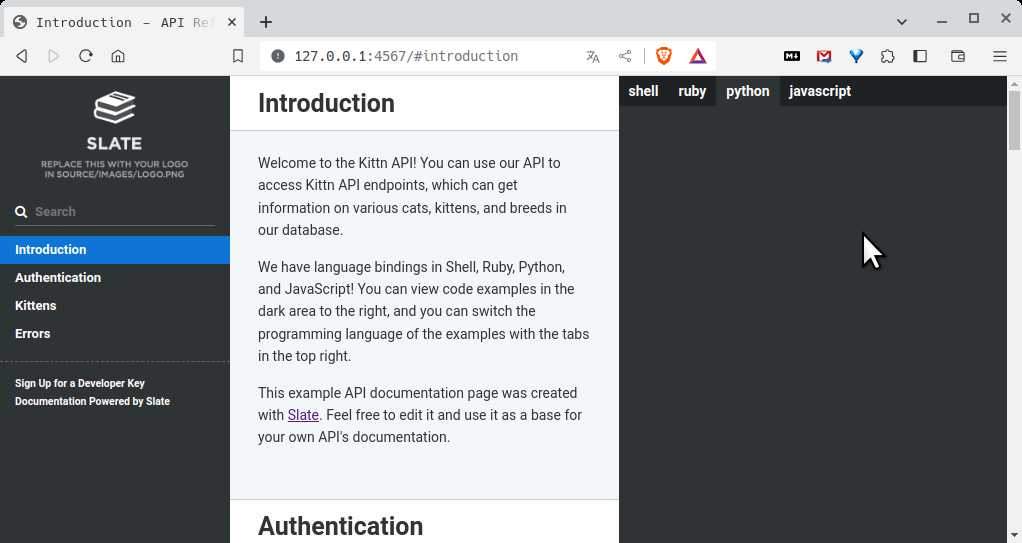
http://127.0.0.1:4567/ でウェブサイト確認 🚀 🎉
-
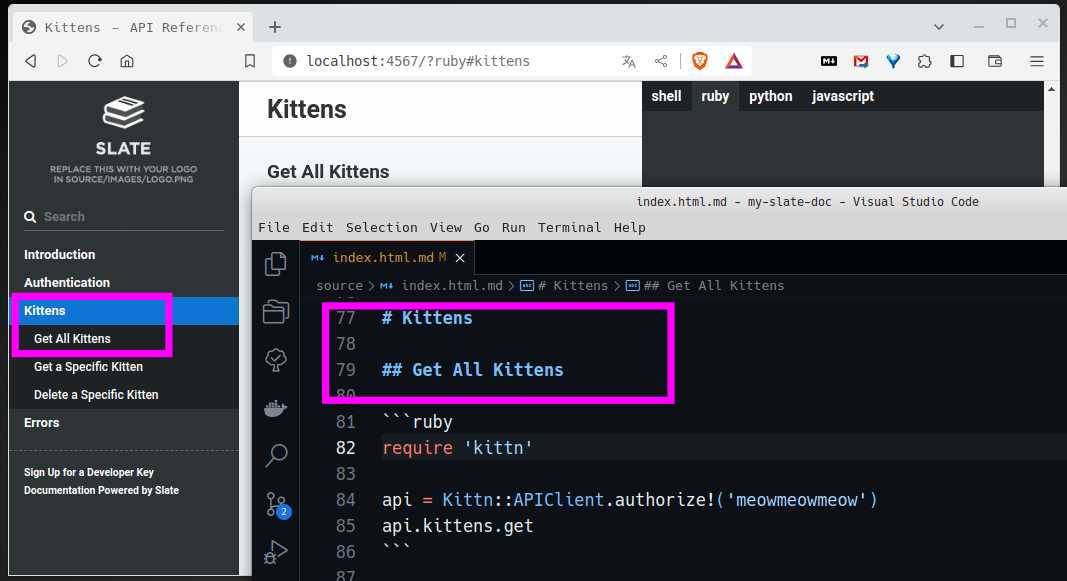
ファイルを更新して反映されるか確認
-
source/index.html.mdの# Introductionより下の行に、適当に書き込み - 保存して http://127.0.0.1:4567/ をリロードすると変更が確認できる
-
Github pages に デプロイ
-
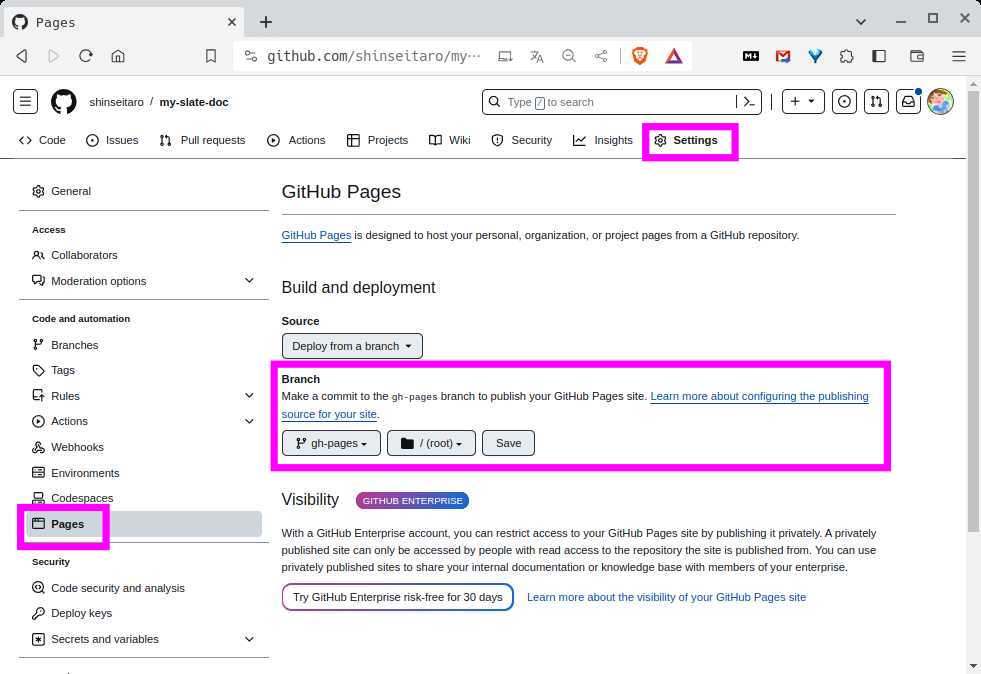
Github pages の設定
- 先程つくったレポジトリ >
Settings>Pages -
Branchをgh-pagesと/(root)にして Save
- 先程つくったレポジトリ >
-
git remote show originして、自分自身のアカウントをpullして作業していることを確認git remote show origin # * remote origin # Fetch URL: git@github.com:shinseitaro/my-slate-doc.git # Push URL: git@github.com:shinseitaro/my-slate-doc.git #(...略...) -
さっきの修正を commit and push
git add source/index.html.md git commit -m"updated index.html.md" git push -
deply
- docker を使っているときは
--push-onlyオプションを付けます。
./deploy.sh --push-only # 7dd8336b528d234b71a0f49a9a9a07f797480cef refs/heads/gh-pages # remote: Enumerating objects: 22, done. # remote: Counting objects: 100% (22/22), done. # remote: Compressing objects: 100% (16/16), done. # remote: Total 22 (delta 5), reused 22 (delta 5), pack-reused 0 # Unpacking objects: 100% (22/22), 89.82 KiB | 268.00 KiB/s, done. # From github.com:shinseitaro/my-slate-doc # * [new branch] gh-pages -> gh-pages # * [new branch] gh-pages -> origin/gh-pages # [gh-pages fd1af6f] publish: updated index.md # 2 files changed, 2 deletions(-) # delete mode 100644 .nojekyll - docker を使っているときは
-
Github pages 確認
- https://<your-username>.github.io/<your-repositry-name>/
- 反映が確認できないときは、ブラウザのシークレットウィンドウで確認してみてください
- Github pages が
availableかどうかは、設定画面で確認出来ます。 - 初回は10分くらいかかることもあります
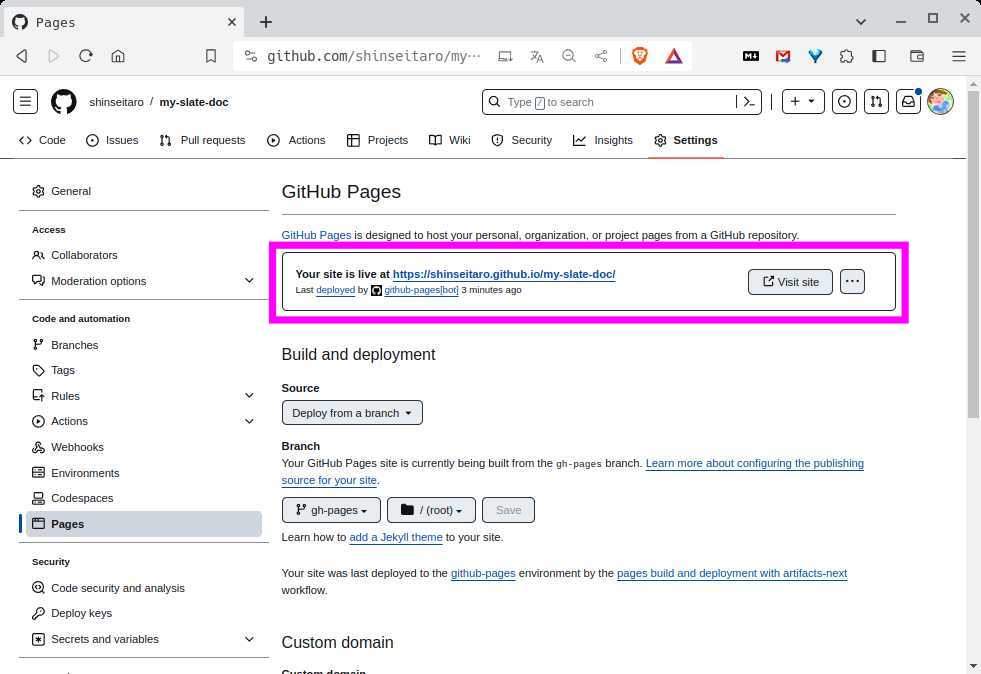
- https://<your-username>.github.io/<your-repositry-name>/
push のタイミングでテストが fail する
一旦、ここまでの設定が出来てしまえば、あとはドキュメントをローカルで修正更新してpushすれば良いだけです。
ただし、ローカルでは無視していたRubyGemsのUpdateワーニングが Github Actions ではBuild途中でFail扱いになります。ドキュメントの生成に影響はないので気にならない方は無視しててもよいかと思います。
そのうち本家レポジトリが修正してくれるかもしれないと思いますが、テストのフェイル通知がウザいという方は、Buildのワークフローを無効化するという力技とかもあります。(よくない)
Actions > Build > … > Dispable workflow
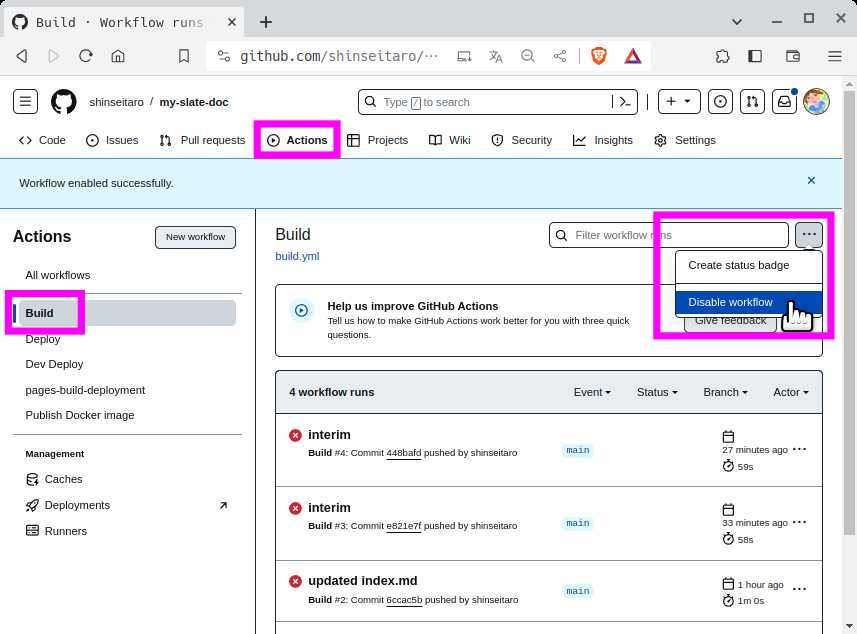
この設定を行っても、ドキュメントのBuildには問題ありません。
わたしが全然Rubyを知らないので、これ以外に方法が思いきませんでした。有識者のみなさま、教えてください 🙇
Slate 記法
ドキュメントは source/index.html.md に 記述していきます。ファイルを分割する方法はあとで説明します。
記法は markdown です。
Slate 独自の記法がありますので説明していきます。
TOC
Header 1と Header 2が、Table of Contensとして扱われます。
パラグラフ
ノーマルテキストはパラグラフとして扱われます。空白の改行を入れると、1パラグラフとして扱われます。
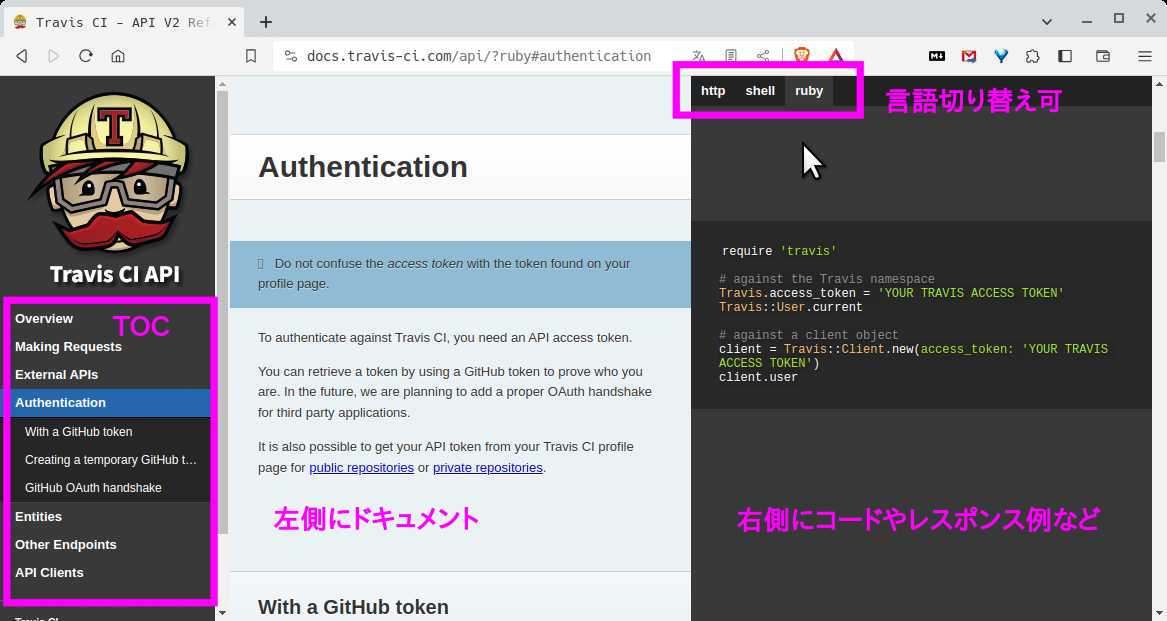
右側のコードペイン
-
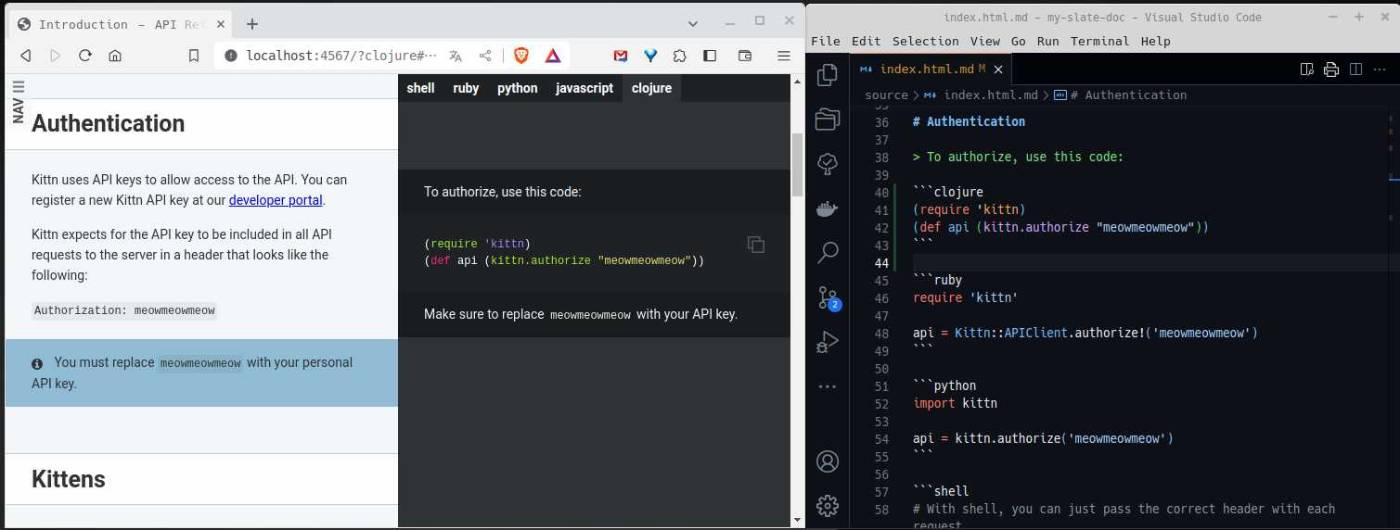
source/index.html.mdのメタ情報のlanguage_tabsに、言語をリストしますlanguage_tabs: - shell - ruby - python - javascript - clojure # 追加- これで code tab がすぐに反映されます。タブの順番はこのリスト順です。
- 記述可能な言語はこちら
- Header1のすぐ下に、ハイライト記法で書くと右側に反映されます。
- code annotation
Headerとコードの間に、>でコメントを書くとコードの説明を書くことができます。これはどのコードタブを開いても表示されます> To authorize, use this code:
ファイル分割
-
source/includesディレクトリに_付きで markdown file を作成します。記法はsource/index.html.mdに書くときと全く同じです -
source/index.html.mdのメタ情報のincludesに_無しのファイル名をリストします - メタ情報に追加した順番に、ドキュメントの最後に追加されます。
その他
ロゴを変更したい
-
source/images/logo.pngを差し替え - 幅は230px、高さは50~100px程度を推奨
- padding は、
source/stylesheets/_variables.scssの$logo-marginで調整 - 参照:https://github.com/slatedocs/slate/wiki/Changing-the-Logo-and-adding-Images#changing-the-logo
TOCのネストを深くしたい
- こちらをご参照ください:Deeper Nesting · slatedocs/slate Wiki
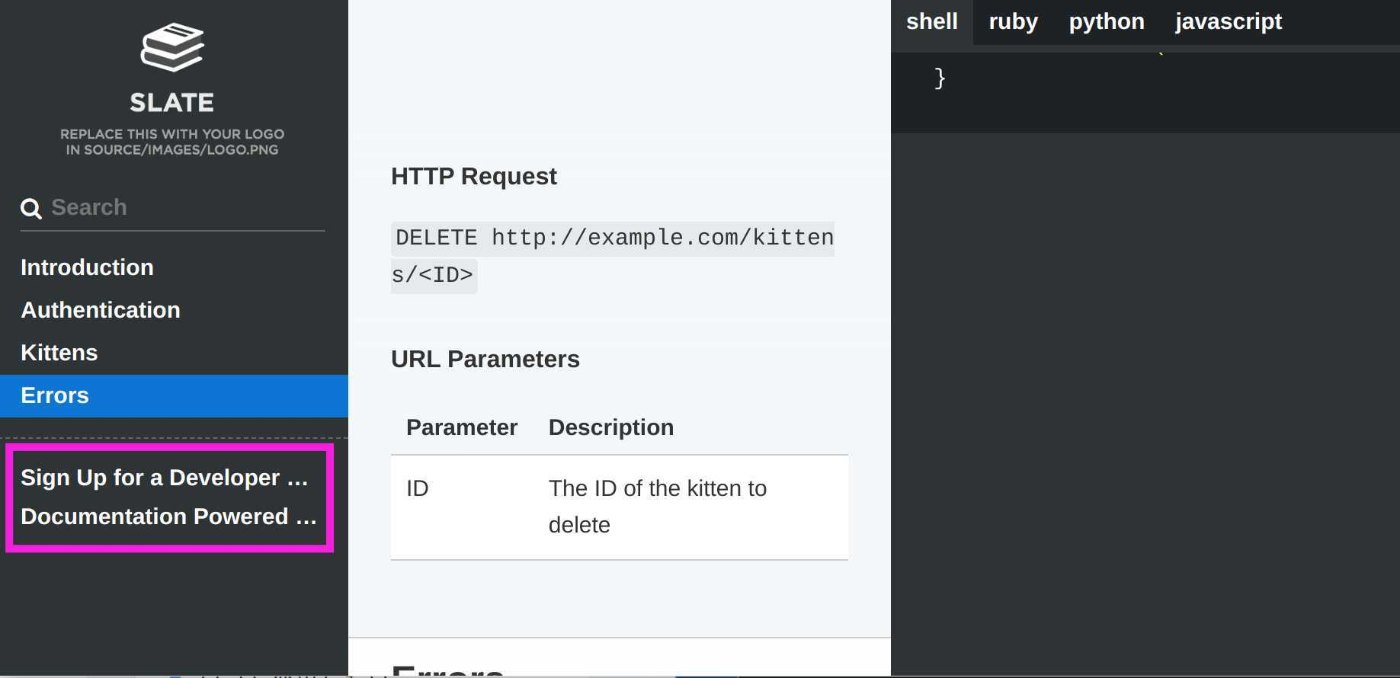
ToC の下にある外部サイトへのリンクを更新したい
-
source/index.html.mdのtoc_footers:を更新toc_footers: - <a href='#'>Sign Up for a Developer Key</a> - <a href='https://github.com/slatedocs/slate'>Documentation Powered by Slate</a> - リンクはいくつでも追加可能
- いらない場合は
toc_footers:ごと削除
フォント変更
-
source/stylesheets/screen.css.scssのGENERAL STUFFコメントの後にフォントをインポート@import url("https://fonts.googleapis.com/css?family=Roboto");html { font-family: sans-serif; -ms-text-size-adjust: 100%; -webkit-text-size-adjust: 100% } -
source/stylesheets/_variables.scssの%default-fontを更新%default-font { font-family: Roboto, -apple-system, BlinkMacSystemFont, "Segoe UI", Helvetica, Arial, sans-serif, "Apple Color Emoji", "Segoe UI Emoji", "Segoe UI Symbol"; font-size: 14px; }
favicon 挿入
-
source/imagesにファイルを格納(ファイル名をfavicon.icoと仮定します) -
source/layouts/layout.erbの<head>内に下記を挿入<%= favicon_tag 'favicon.ico' %>
Theme をカスタマイズ
-
Slate のテーマを簡単に切り替える方法はありません。自身でカスタマイズする必要があります。
-
もしくはGithubなどに公開されている有志のかたのデザインをCloneして使うことになるようです。
Discussion