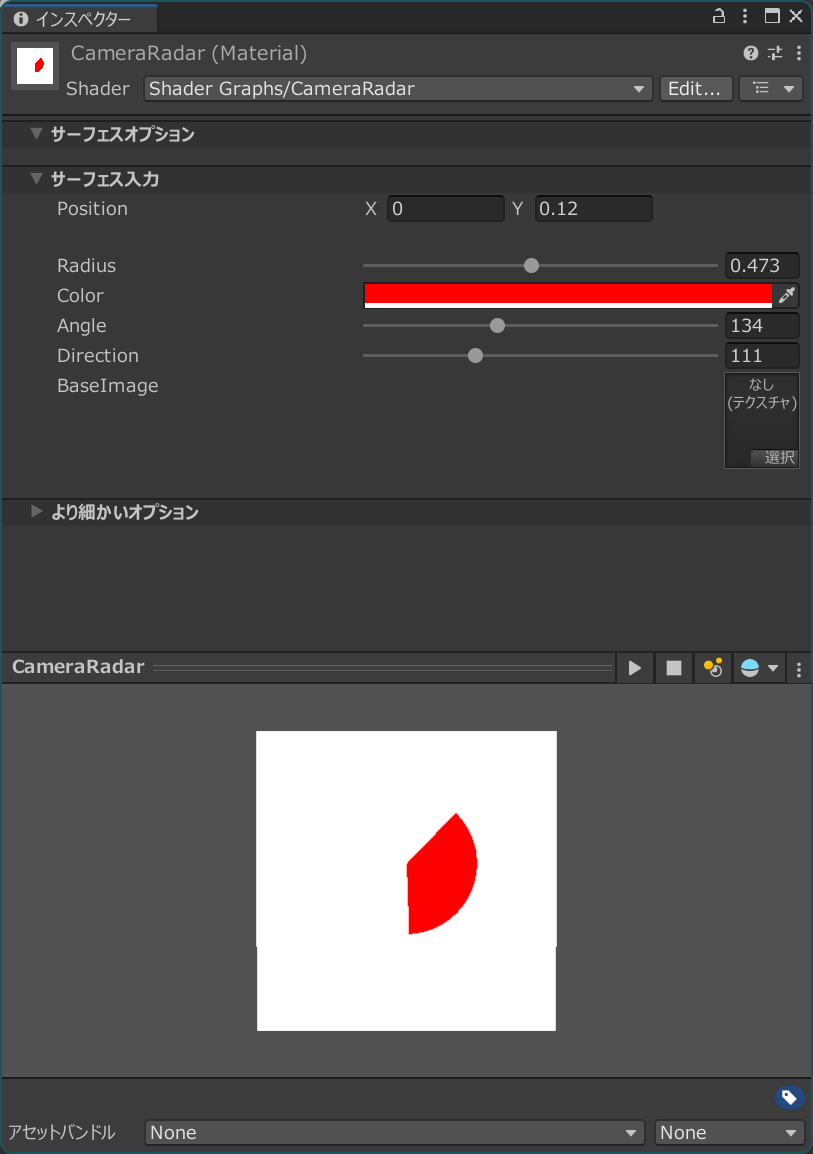
Unity関連ではまったもの
Windowsでタイトルフォントが小さくなる
Windowsのディスプレイ設定で表示スケールを100%以外にしてUnityのPreference > UI Scalingをデフォルト以外に変更するとウインドウのタイトルが小さくなる。
ログオフするか再起動しないとタイトルのフォントサイズを元に戻せない。
Input SystemはGame Viewをフォーカスしないとデータが更新されないデバイスがある
XR Interaction ToolkitでInput System (Action-based)を利用してOculus XR Pluginを組み合わせるとUnityエディタでPlayした時にGame Viewをフォーカスしないとコントローラーが動かない。
VRでカメラをRenderTextureに書き出すと歪む
VRかつCameraのTarget EyeをBothにしてRenderTextureに書き出すと歪むパターンがある。
CameraのTarget EyeをNone(0)にすれば解消するがUnity2019.4以前ではInspectorをDebugにしないとTarget Eyeが表示されない組み合せがあるので気付きにくい。
SteamVRのHand.csはInvokeRepeatingで当たり判定を取る
SteamVRはInteractableコンポーネントで物を掴んだり押しこんだりできるがInvokeRepeatingで当たり判定を繰り返す。そのためHand.csを使いつつ当たり判定用オブジェクトの座標をUpdateなどで更新するとタイミングがずれてすり抜ける事がある。
たとえばVRIKはUpdate/LateUpdateでアバターを動かすのでアバターの手に当たり判定があるとすり抜けが起きる。
Hand.csの子オブジェクトやデフォルトで生成されるオブジェクトで当たり判定するなら問題ない。
ゲーム内カメラをRenderTextureに映すと色が暗い
RenderTextureのSRGBをチェックすると正しい色になる。
SRGBが表示されない場合はInspectorをDebugにすると出てくる。
Unityエディタでゲーム再生して実行状態になった時のコールバック
メソッドに[InitializeOnEnterPlayMode]を付けるとゲーム再生した直後に呼ばれるがまだEditorApplication.isPlaying == falseなので実行状態になっていない。
EditorApplication.playModeStateChangedでEnterPlayModeになった時が初めてEditorApplication.isPlaying == trueとなる。
[InitializeOnEnterPlayMode]を付けたメソッドからEditor CoroutineでEditorApplication.isPlaying == trueになるまで待ってもいいがEditorApplication.playModeStateChangedの方が簡潔になる。
[InitializeOnLoadMethod]
private static void Initialize()
{
    void OnPlayModeStateChanged(PlayModeStateChange mode)
    {
        if (mode == PlayModeStateChange.EnteredPlayMode)
        {
            Debug.Log("Entered PlayMode");
        }
    }
    EditorApplication.playModeStateChanged += OnPlayModeStateChanged;
}
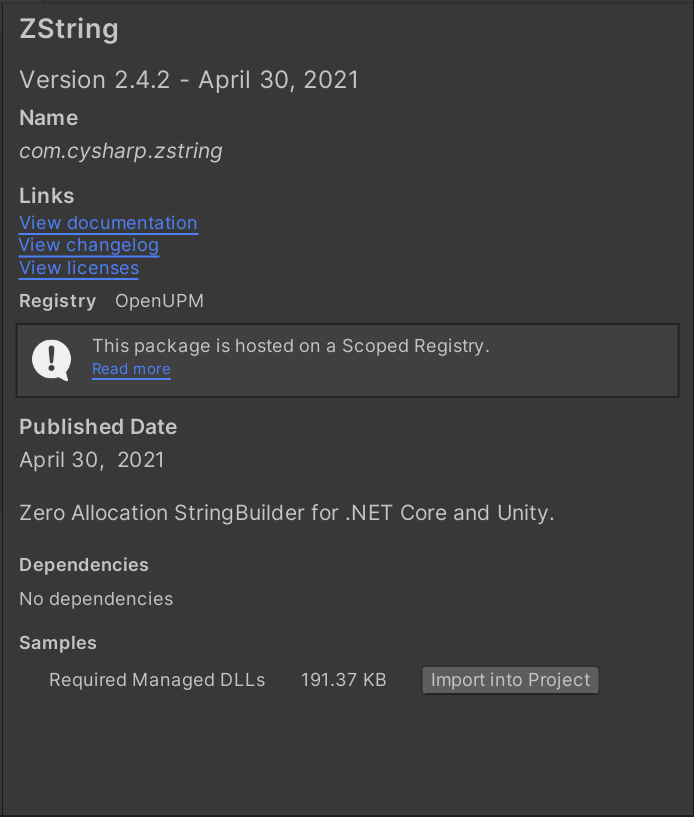
upmからZStringをインストールする
upmからZStringをインストールするときはSamplesのRequired Managed DLLsからDLLを追加する
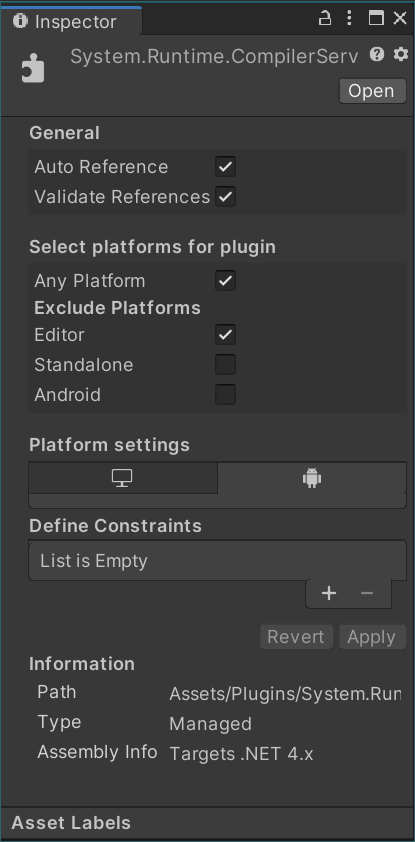
その時にSystem.Runtime.CompilerServices.Unsafe.dllがUnityエディタで競合するがビルドに必要なのでImport SettingsでEditorを除外する。
VContainerとMonoBehaviourのライフサイクル
VContainerのIPostInitializable.PostInitializeはOnEnableとStartの間に呼ばれるはずだがIPostInitializableを実装したPure C#クラスとMonoBehaviourクラスをDIするとMonoBehaviourクラスのStartが先に呼ばれる事がある。恐らく呼び出し元が違うのでタイミングがずれる事が原因だと思われる。そのためMonoBehaviourクラスでIStartable.Startを明示的に実装するとvcontainerのライフサイクルで呼ばれる。
Play時にGame Viewにフォーカスを移す
EditorApplication.playModeStateChangedにイベントハンドラを登録するとPlayした時に実行できるのでこれを利用する。
GameViewが1つの場合
EditorApplication.ExecuteMenuItemでWindow/General/Gameを呼ぶとフォーカスを移せる
using UnityEditor;

public static class ActiveGameView
{
    [InitializeOnLoadMethod]
    private statc void Initialize()
    {
        EditorApplication.playModeStateChanged += OnPlayModeStateChanged
    }

    private static void OnPlayModeStateChanged(PlayModeStateChange mode)
    {
        if (mode == PlayModeStateChange.EnteredPlayMode)
        {
            EditorApplication.ExecuteMenuItem("Window/General/Game");
        }
    }
}
複数のGame ViewからDisplay 1を表示中のものにフォーカスを移す
- UnityEditor.GameViewクラスのウインドウを取得できればGame Viewの情報にアクセスできる。
- EditorWindow.GetWindowは1つしか取れないので利用できない
- IMGUI Debuggerが使っているGUIViewDebuggerHelper.GetViewsで複数のGame Viewを取得できる
- asmrefを利用すると
namespace UnityEditorのinternalクラスへアクセスできる
これらを組み合わせた以下のエディタ拡張でDisplay 1のGame Viewへフォーカスできる
using System.Collections.Generic;
using System.Linq;
using System.Reflection;
using UnityEditor;

public static class ActiveGameView
{
    private const int TargetDisplay = 0;

    [InitializeOnLoadMethod]
    private static void Initialize()
    {
        EditorApplication.playModeStateChanged += OnPlayModeStateChanged;
    }

    private static GameView GetGameView(GUIView view)
    {
        if (!(view is DockArea dockArea))
        {
            return null;
        }

        if (!(dockArea.actualView is GameView gameView))
        {
            return null;
        }

        return gameView;
    }

    private static int GetTargetDisplay(this GameView gameView)
    {
        if (gameView == null)
        {
            return -1;
        }

        var flags = BindingFlags.NonPublic | BindingFlags.FlattenHierarchy | BindingFlags.Instance;
        var propertyInfo = typeof(GameView).GetProperty("targetDisplay", flags);
        if (propertyInfo == null)
        {
            return -1;
        }

        var val = propertyInfo.GetValue(gameView);
        if (!(val is int display))
        {
            return -1;
        }

        return display;
    }

    private static void OnPlayModeStateChanged(PlayModeStateChange mode)
    {
        if (mode != PlayModeStateChange.EnteredPlayMode)
        {
            return;
        }

        var views = new List<GUIView>();
        GUIViewDebuggerHelper.GetViews(views);
        var gameView1 = views.Select(GetGameView)
            .FirstOrDefault(e => TargetDisplay == e.GetTargetDisplay());
        if (gameView1 == null)
        {
            return;
        }

        gameView1.Focus();
    }
}
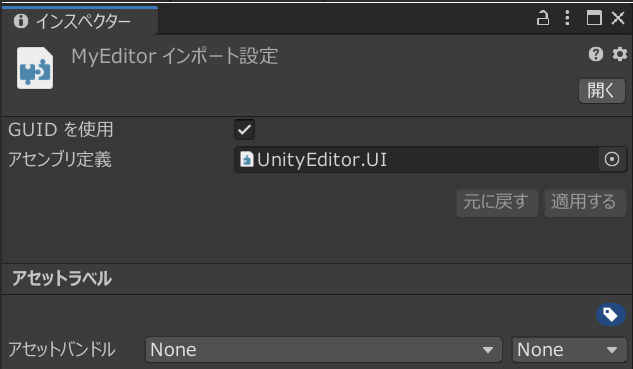
このスクリプトと同じフォルダに置くasmref
参考
Unity Localizationでフォントも切り替える
フォーラムにスクリプトが投稿されているが未検証
Unity Standalone File BrowserをインポートしたプロジェクトをIL2CPPでビルドする
WindowsでUnity Standalone File BrowserをインポートしてIL2CPPでビルドするとSystem.Windows.Forms.dllが参照するAssemblyが不足するためエラーになる。
<Unity Editor Path>\Editor\Data\MonoBleedingEdge\lib\mono\gacから以下の不足dllをPluginsフォルダにコピーするとビルドが通る。
- System.Windows.Forms.dll (上書き)
- Mono.Posix.dll
- Mono.WebBrowser.dll
EncodingにSJISを使う方法とOSデフォルトのエンコーディングを取得する方法
UnityでビルドするとEncoding.GetEncoding("shift_jis")がnullを返すが以下のようにI18N.dllとI18N.CJK.dllをコピーする
現在のCodePageは
CultureInfo.CurrentCulture.TextInfo.OEMCodePage
アプリ上で変更した場合は
Thread.CurrentThread.CurrentCulture.TextInfo.OEMCodePage
で取得できるのでEncoding.GetEncoding()の引数に指定するとOSデフォルトのエンコーディングを取得できる。
UniTaskのForgetについて
戻り値がUniTaskのメソッドをawaitしないと警告が出る。その対策として破棄変数に代入する方法とForget()を呼ぶ方法がある。UniTaskVoidの場合はどちらも同じ結果になるがUniTask/UniTask<>で破棄変数に代入すると例外発生時に通知が遅れてしまう。
Forget()にするとUniTaskVoidとUniTask/UniTask<>のどちらでも使えるのでこちらがおすすめ
OpenXR+QuestでUnityエディタから音が出なくなる
Unity2020.3.37f1とMRTK + OpenXRで開発中に以下の状態でUnityエディタをPlayすると音が出なくなった。
- OpenXRでStandaloneのInitialize XR on Startupを有効にする
- Meta QuestとPCをUSBケーブルで接続している
- PCのOculusアプリで「コンピュータの音声をVRで聞く」を有効にする
どうやらPlay時にOculus Virtual Audio Deviceだけに音が出て規定のデバイスから出なくなってしまうらしい。そのため以下のいずれかでUnityからOculusへ向けて流れないようにすれば音が出るようになった。
- OpenXRでStandaloneのInitialize XR on Startupを無効にする
- Meta QuestとPCをつないでるUSBケーブルを抜く
- PCのOculusアプリで「コンピュータの音声をVRで聞く」を無効にする
複数プロジェクトでロード可能なAddressableAsset
後で検証する
Json.Netでデシリアライズ時に日時の値をDateTimeへ変換させない
Json.Netでデシリアライズすると日時っぽい文字列はデフォルトでDateTime型へ変換されるのでSelectTokenで日時っぽい要素を取得してToStringするとCurrentCultureに沿った日時フォーマットされる。そのため日本語だとyyyy/MM/dd hh:mm:ss形式になるがGithub Actionsやサーバーなどen-USな環境だとM/d yyyy h:m:s:tt形式になりハマる。
そこでDateParseHandleing.Noneを指定すると変換されなくなる。
JObject.Loadの場合
using(JsonReader reader = new JsonTextReader(new StringReader(j1.ToString()))) {
    reader.DateParseHandling = DateParseHandling.None;
    JObject o = JObject.Load(reader);
}
JsonConvert.DeserializeObjectの場合
var obj = JsonConvert.DeserializeObject(jsonStr, new JsonSerializerSettings
{
    DateParseHandling = DateParseHandling.None
});
親要素を取得して置換する
DateParseHandlineg.Noneを指定しなくても親要素を取得するとそのままの文字列を取得できるのでそこから目的の値を取り出す方法もある。
using System;
using System.Text.RegularExpressions;
using Newtonsoft.Json.Linq;

public class Program
{
	public static void Main()
	{
		var root = JObject.Parse(@"{""updated_at"":""2020-09-04T01:23:45Z""}");
		var token = root.SelectToken("$");
		Console.WriteLine(token);
		Console.WriteLine("----------");
		var u = Regex.Replace(token.ToString(), @".*updated_at.*""(\d.*)"".*", "$1");
		Console.WriteLine(u);
	}
}
{
  "updated_at": "2020-09-04T01:23:45Z"
}
----------
{
2020-09-04T01:23:45Z
}
UnityでHololens2からデバイス毎にユニークな値を取る
SystemInfo.deviceUniqueIdentifierは以下の記事のようにHardwareIdentification.GetPackageSpecificToken(IBuffer)から取得したIdと同じ値になる
MRTKのDialogのタイトルとメッセージを動的に変更する
Dialog.Openで指定したタイトルとメッセージはResultに保持されるのでそれを更新する。
更にSetTitleAndMessageメソッドを実行すると反映されるがアクセス修飾子がprotectedで直接呼び出せないのでMonoBehaviour.Invokeを使う。
var dialog = Dialog.Open(dialogPrefab, DialogButtonType.Close, "title", "message", true);
dialog.Result.Title = "new title";
dialog.Result.Message = "new message";
dialog.Invoke("SetTitleAndMessage", 0f);
別解
Invokeの代わりにリフレクションで呼んでもいいしDialogクラスを継承して独自のpublicなSetTitleAndMessageメソッドを作ってもよい。
UWPのBuild SettingsのBuild configurationを取得/設定したい
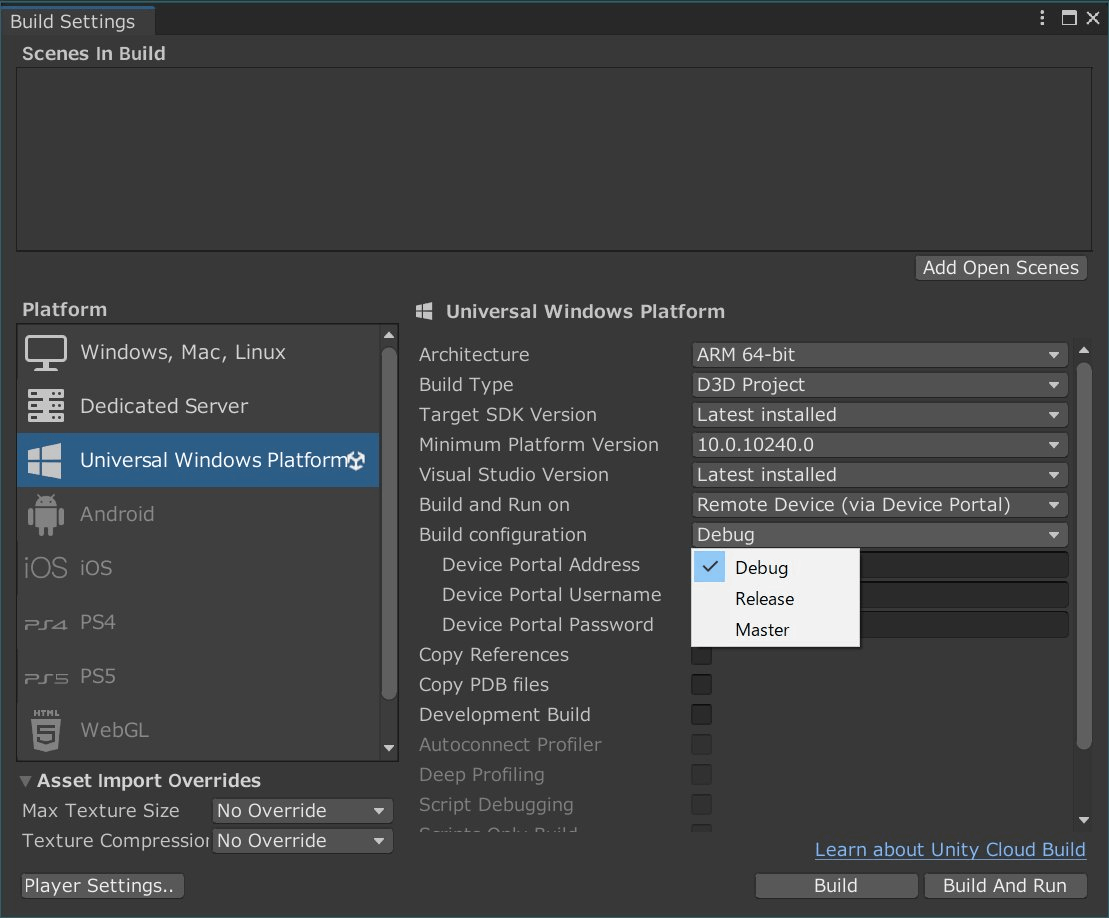
// 取得
var bs = EditorUserBuildSettings.GetPlatformSettings("WindowsStoreApps", "BuildConfiguration");

// 設定
EditorUserBuildSettings.SetPlatformSettings("WindowsStoreApps", "BuildConfiguration", "Release");
IAsyncOperationをCancellationTokenでキャンセルできる拡張メソッドの作り方
IAsyncOperationはUWPの非同期メソッドの返り値で使われているやつ
Riderで#if UNITY_ANDROIDのようなプラットフォーム依存コードを補完する
特定の座標が視錐台に入っているかチェックする方法
プロジェクション座標変換を行うと視錐台はカメラを中心として(1,1,1)~(-1,-1,-1)の立方体に収まる。
また、プロジェクション座標変換する時はwで割るが範囲が分かれば良いのでwで割らずに
xは-w~w、yも-w~w、zは0~wの範囲ならば視錐台に収まっていると判定できる。
bool IsInFrustum(Vector3 targetPosition)
{
    var cam = Camera.main;
    var pv = GL.GetGPUProjectionMatrix(cam.projectionMatrix, true) * cam.worldToCameraMatrix;
    var pos = pv * targetPosition;
    return (pos.z >= 0 && pos.z <= pos.w
        && pos.x >= -pos.w && pos.x <= pos.w
        && pos.y >= -pos.w && pos.y <= pos.w);
}
同じような判定は「Unityで視錐台を使って画面内外判定」のようにGeometryUtility.TestPlanesAABBでも行えるがメインスレッドでしか動作しない。しかし上記の方法はpvとtargetPosition以外はメインスレッド不要なのでJob Systemで高速に判定できる利点がある。
using Unity.Burst;
using Unity.Collections;
using Unity.Jobs;
using Unity.Mathematics;
using UnityEngine;

[BurstCompile]
public struct CullingJob : IJobParallelFor
{
    [ReadOnly] [DeallocateOnJobCompletion] public NativeArray<Matrix4x4> Pv;
    [ReadOnly] [DeallocateOnJobCompletion] public NativeArray<Vector3> TargetPositions;
    [WriteOnly] public NativeArray<bool> CullingResult;

    public void Execute(int index)
    {
        CullingResult[index] = IsInFrustum(TargetPositions[index]);
    }

    private bool IsInFrustum(Vector3 targetPosition)
    {
        var pos = Pv[0] * targetPosition;
        return (pos.z >= 0 && pos.z <= pos.w
            && pos.x >= -pos.w && pos.x <= pos.w
            && pos.y >= -pos.w && pos.y <= pos.w);
    }
}
using System.Linq;
using Unity.Collections;
using UnityEngine;

public class TestCulling : Monobehaviour
{
    [SerializeField] private Transform[] targetTransforms;

    private void Update()
    {
        var cam = Camera.main;
        var pv = GL.GetGPUProjectionMatrix(cam.projectionMatrix, true) * cam.worldToCameraMatrix;
        var nativePv = new NativeArray<Matrix4x4>(new [] { pv }, Allocater.JobTemp);
        var positions = targetTransforms.Select(t => t.position).ToArray();
        var nativePositions = new NativeArray<Vector3>(target, Allocator.JobTemp);
        using var nativeResult = new NativeArray<bool>(positions.Length, Allocator.JobTemp);
        var handle = new CullingJob
        {
            Pv = nativePv,
            TargetPositions = nativePositions,
            CullingResult = nativeResult
        }.Schedule(targetTransforms.Length, 32);
        handle.Complete();

        // 視錐台の外のGameObjectを非アクティブにする
        for (var i = 0; i < nativeResult.Length; i++)
        {
            targetTransforms[i].SetActive(nativeResult[i]);
        }
    }
}
参考
VuforiaのArea Targetではまったやつ
Requires External Positions
大規模なArea Targetを使う時は Requires External Positionsを有効にすると動的にモデル読み込みされるのでメモリを圧迫しない。しかしSetExternal3DPositionでカメラ位置を指定しないと位置が認識されないので注意が必要。
- https://library.vuforia.com/develop-area-targets/area-target-api-overview
- https://library.vuforia.com/sites/default/files/references/native/structVuAreaTargetConfig.html#aa9ad343caa131b7a25f39726a51228c8
AreaTargetBehaviourの子オブジェクト
StatusがExtended Tracked以外の場合はAreaTargetBehaviourの子オブジェクトのRendererが無効化されて見えなくなる。そのため建物に沿って常時何かを出現させたい場合は別のオブジェクトとAreaTargetBehaviourをParent Constraintで位置と回転を同期させてその子に配置すると良い。
MeshおよびColliderのレイヤー
AreaTargetBehaviourの Advanced/Add Occlusion Mesh か Advanced/Add Mesh Collider を有効にするとMeshおよびColliderのGameObjectrのレイヤーに PhysicalWorld が設定される。
それに伴ないMainCameraのCullingMaskから PhysicalWorld が除外されて子オブジェクトに名前が SeeThroughCamera のカメラが追加される。このカメラのCulling Maskは PhysicalWorld のみとなっている。
そのため、Meshと当たり判定を行う際にレイヤー PhysicalWorld に限定すると負荷を減らせる。
尚、SeeThroughCamera は Vuforia.Internal.Simulator.SimulatedObjectFactory クラスの CreateSeeThroughCamera メソッドが追加している。
カメラのfpsを下げて描画する
モニターやライブステージ上のスクリーンなどの演出でfpsを下げて描画したい場合は以下のようにCamera自体は一旦無効化して描画タイミングの時だけ Render() を呼ぶと実現できる。
using UnityEngine;

[RequireComponent(typeof(Camera))]
public class ManualCameraRenderer : MonoBehaviour
{
    public int fps = 20;
    private float _elapsed;
    private Camera _cam;

    private void Start()
    {
        _cam = GetComponent<Camera>();
        _cam.enabled = false;
    }

    private void Update()
    {
        _elapsed += Time.deltaTime;
        if (_elapsed > 1f / fps)
        {
            _elapsed = 0;
            _cam.Render();
        }
    }
}
参考
Unity2021.3からAndroidビルドでAssets/Plugins/Android/resにリソースファイルを配置できない
以下の記事の方法で対策できる
ScriptableObject Architectureは使い所が難しい
以下の記事で紹介されているようにScriptableObjectでイベント発火およびリスナーを作ると一見疎結合になるが組み方を誤ると処理フローを追うのが困難になる。
- https://unity.com/ja/how-to/architect-game-code-scriptable-objects
- https://github.com/DanielEverland/ScriptableObject-Architecture
たとえば記事中のFloatVariableを2箇所以上で使用するとイベント発火側からリスナー側までの処理フローを追いたい場合は以下のようにコードとUnityを交互に探す羽目になり非常に時間がかかる。またアセットを使わなくなっても本当に使っていないかどうかを調べるには全てのシーンとプレハブを調査する事になり非常に時間がかかる。
- イベント発火するコード
- UnityのInspectorからFloatVariableのアセット
- そのアセットを使っているリスナーのInspectorを探す
- リスナーのコード
すべてのイベントで別々のScripatableObjectを作ってユニークにしてしまえば処理フローはコードのみで追跡可能になるが今度は別々のScriptableObjectを作る手間が増えてしまうし未使用アセットの調査は面倒さは変わらない。
以上のようなデメリットがあるので使わない、使うとしても範囲を限定する事をお勧めする。
間違ってもすべてのイベント発火で使おうとしてはいけない。
Unity2021.3でAndroidビルドするとapkサイズが大きい
Unity2021.3.16f1でAndroidビルドするとUnity2020.3以前よりもapkサイズが大きくなる。
既にバグレポートされているようだがまだ解決していない。
Unity2019.4までAndroid Library ProjectはAssets/Plugins/Androidフォルダに配置する必要がある
表題の通りで2020.3以降は任意のフォルダ内の Plugins/Android フォルダに配置できるようになる
UnityでAndroidのNative Pluginを作る時のおすすめ方法
Native側で凝った処理を行いたい場合はUnityPlayerActivityを継承したクラスを作ればできるが、他のライブラリが提供するActivityクラスが必須の場合に困る。そんな時は以下の記事のようにFragmentを利用すれば解決する。
ただしスマホ回転時にインスタンスを保持するためのsetRetainInstance(true)は非推奨なので代わりにViewModelに保存する方法が推奨されている。
AndroidManifest.xmlのandroid:configChangesを調整する方法もあるが推奨されていない。
- https://stackoverflow.com/a/71891158/17862594
- https://developer.android.com/guide/topics/resources/runtime-changes?hl=ja
staticメソッドのみで構成されていてインスタンスが破棄されても構わない場合は上記の限りではない。
AndroidでScoped Storageを使って画像ファイルを保存する
ViveVRにVive CosmosをデバイスセットアップするとMRTKのHolographic Remotingでハンドトラッキングが動かなくなる
Holographic Remotingのカスタムデータチャンネルを使う
プロジェクト作成方法
x64とx86とuwpに対応したC++プロジェクトの作成方法
Holographic Remotingのカスタムデータチャンネルについて
カスタムデータチャンネルはC++のAPIしか用意されていない
ネイティブの非同期処理をC#から呼ぶ方法
- https://forum.unity.com/threads/using-a-callback-delegate-inside-a-c-thread-in-a-dll.460861/
- https://www.slideshare.net/dena_tech/unity-denatechcon
- https://blog.sgry.jp/entry/2006/04/22/000000
- https://kamino.hatenablog.com/entry/unity_native_plugin
上記の記事のコードが見えなくなっているので以下にコードを転記したもの
#include <atomic>
#include <random>
#include <thread>
#include <chrono>

#ifdef _WIN32
#define UNITYCALLCONV __stdcall
#define UNITYEXPORT __declspec(dllexport)
#else
#define UNITYCALLCONV
#define UNITYEXPORT
#endif

extern "C" {
    std::thread getNumberThread;  // threadの情報を保持するための変数</span>
    std::atomic<int> latestData;  // 最後に取得できた値を保持するための変数</span>
    std::atomic<bool> exitFlag;   // threadに終了を通知するためのフラグ</span>

    int getNumber() {
        std::this_thread::sleep_for(std::chrono::milliseconds((int)(100.0 * rand() / RAND_MAX)));
        return 777;
    }

    UNITYEXPORT void UNITYCALLCONV initThread() {
        latestData = 0;
        exitFlag = false;

        // getNumber()を繰り返し呼び出しlatestDataを更新し続けるthreadを作成・開始する
        getNumberThread = std::thread([] {
            while (!exitFlag) { latestData = getNumber(); }
        });
    }

    UNITYEXPORT int UNITYCALLCONV getLatestNumber() { return latestData; }

    UNITYEXPORT void UNITYCALLCONV terminateThread() {
        exitFlag = true;         // threadに終了を通知する
        getNumberThread.join();  // threadが終了するまで待つ
    }
}
using System.Collections;
using System.Collections.Generic;
using UnityEngine;
using System.Runtime.InteropServices;

public class NativePluginTest : MonoBehaviour
{
    [DllImport("mylib")]
    private static extern int getLatestNumber();
    [DllImport("mylib")]
    private static extern void initThread();
    [DllImport("mylib")]
    private static extern void terminateThread();

    void Start() {
        // getNumber用スレッドを開始
        initThread();
    }

    void Update() {
        // 最近取得した値を読み込む
        var num = getLatestNumber();
        Debug.Log(num);
    }

    void OnDestroy() {
        // getNumber用スレッドを終了
        terminateThread();
    }
}
Cの非同期関数をC#でTask化する
#include <thread>
#include <functional>
#include <chrono>

extern "C"
{
    __declspec(dllexport) void StartAsyncTask(std::function<void()> callback)
    {
        std::thread([callback]() {
            // Do some long task here
            std::this_thread::sleep_for(std::chrono::seconds(10));
            callback();
        }).detach();
    }
}
using System.Runtime.InteropServices;
using System.Threading.Tasks;

public class NativePlugin
{
    [DllImport("NativePlugin")]
    public static extern void StartAsyncTask(IntPtr callback);

    public static Task StartTask(Action callback)
    {
        var tcs = new TaskCompletionSource<bool>();
        var callbackDelegate = new Action(() => {
            callback();
            tcs.SetResult(true);
        });
        var handle = GCHandle.Alloc(callbackDelegate);
        StartAsyncTask(GCHandle.ToIntPtr(handle));
        return tcs.Task;
    }
}

pubic class Test : Monobehaviour
{
    private async void Start()
    {
        await NativePlugin.StartTask(() => {
            Debug.Log("Task completed");
        });
    }
}
Unity2020.3とMessagePackからUnity2021.3へ移行時の注意
Unity2020.3でMessagePack for C#を利用する際はunitypackageに入っている以下のdllも必要になるが、Unity2021.3から.net standard2.1になったのでSystem.Memory.dllとSystem.Buffers.dllが不要になり入れたままにするとビルドエラーになってしまう。そのためこの2つのdllは削除必須となる。
- System.Memory.dll
- System.Buffers.dll
- System.Runtime.CompilerServices.Unsafe.dll
- Microsoft.NET.StringTools.dll
複数Job実行時のJobHandle.Completeについて
2つのJobをUpdateで実行する処理があり、1つ目が重いので次フレーム以降でJobHandle.Completeを呼び出し、2つ目はJobHandle.Schedule後にJobHandle.Completeを呼ぶようなフローにした時に何故か2つ目のCompleteを呼んだ時に1つ目のJobも完了待ちしてしまいFPSが落ちてしまった。仕方がないので1つ目のJobでScheduleした後はJobHandle.IsCompletedがtrueになるまで2つ目のJobを呼ばないようにした。
AudioSource.PlayOneShotを再生完了まで待つ
UniTask版
再生完了まで待つ拡張メソッド
using Cysharp.Threading.Tasks;
using System.Threading;
using UnityEngine;

public static class AudioSourceExtension
{
    public static UniTask PlayOneShotAsync(this AudioSource self, AudioClip audioClip, PlayerLoopTiming timing = PlayerLoopTiming.Update, CancallationToken cancellationToken = default)
    {
        self.PlayOneShot(audioClip);
        return UniTask.WaitWhile(() => self.isPlaying, timing, cancellationToken);
    }
}
使い方
[SerializedField] private AudioSource audioSource;
[SerializedField] private AudioClip audioClip;

public async UniTaskVoid OnClick()
{
    await audioSource.PlayOneShotAsync(audioClip, cancellationToken = this.GetCancellationTokenOnDestroy()).Forget();
}
Unity2023以降のAwaitable版
using System.Threading;
using UnityEngine;

public static class AudioExtension
{
    public static async Awaitable PlayOneShotAsync(this AudioSource self, AudioClip audioClip, CancellationToken cancellationToken = default)
    {
        self.PlayOneShot(audioClip);
        while (self.isPlaying)
        {
            await Awaitable.FixedUpdateAsync(cancellationToken);
        }
    }
}
使い方
[SerializedField] private AudioSource audioSource;
[SerializedField] private AudioClip audioClip;

public async void OnClick()
{
    await audioSource.PlayOneShotAsync(audioClip, destroyCancellationToken);
}
Python.NETの処理をC#から割り込んで停止する
Ultra Leap Controller2が接続されていない事を検出する
Ultraleap Unity Pluginを利用するとデバイスが接続されたり抜かれた時に通知されるイベントを利用して検出できる。でもアプリ起動時に接続されていない時はイベント通知されないので Leap.Controller.Init イベントの中で自前でポーリングする必要がある。
ドライバーがインストールされていない時は Controller.IsServiceConnected は trueにならず
デバイスが接続されていない時は LeapServiceProvider.IsConnected() が true にならないので一定時間ポーリングする事でそれぞれの状態を検出できる。
また、デバイスを使い続けて熱い時は接続成功するまでの時間が長くなるのでポーリング時間が短すぎるとエラー誤検知するので注意が必要である。
using Leap;
using Leap.Unity;
using System.Collections;
using UnityEngine;
using UnityEngine.Events;

public class LeapConnectionDispatcher : MonoBehaviour
{
    [SerializeField]
    private LeapServiceProvider _provider;

    [SerializeField]
    public float _maxConnectingSecond = 3f;

    private Coroutine serviceCoroutine;
    private Coroutine initCoroutine;

    /// <summary>
    /// Ultra Leap Controller2が接続された時に呼ばれるイベント
    /// </summary>
    public UnityEvent OnConnectAction;

    /// <summary>
    /// Ultra Leap Controller2が切断された時に呼ばれるイベント
    /// </summary>
    public UnityEvent OnDisconnectAction;

    /// <summary>
    /// Ultra Leap Controller2のデーモンがインストールされていない時に呼ばれるイベント
    /// </summary>
    public UnityEvent OnNoServiceAction;

    /// <summary>
    /// 起動時にUltra Leap Controller2が未接続の時に呼ばれるイベント
    /// </summary>
    public UnityEvent OnEmptyDeviceOnConnectAction;


    private void Start()
    {
        SubscribeToService();
    }


    private void OnDestroy()
    {
        UnsubscribeFromService();
    }


    private void SubscribeToService()
    {
        if (serviceCoroutine is { })
        {
            return;
        }

        serviceCoroutine = StartCoroutine(ServiceCoroutine());
    }


    private IEnumerator ServiceCoroutine()
    {
        global::Leap.Controller controller = null;
        do
        {
            controller = _provider.GetLeapController();
            yield return null;
        } while (controller is null);

        controller.Init += OnInit;
        controller.DeviceLost += OnDeviceLost;
        _provider.OnDeviceChanged += OnDeviceChanged;
    }


    private void UnsubscribeFromService()
    {
        if (_provider.GetLeapController() is { } controller)
        {
            controller.Init -= OnInit;
            controller.DeviceLost -= OnDeviceLost;
            _provider.OnDeviceChanged -= OnDeviceChanged;
        }

        if (serviceCoroutine is { })
        {
            StopCoroutine(serviceCoroutine);
            serviceCoroutine = null;
        }

        if (initCoroutine is { })
        {
            StopCoroutine(initCoroutine);
            initCoroutine = null;
        }
    }


    private void OnInit(object sender, LeapEventArgs e)
    {
        initCoroutine = StartCoroutine(InitCoroutine());
    }


    private IEnumerator InitCoroutine()
    {
        var controller = _provider.GetLeapController();
        var start = Time.time;
        do
        {
            yield return null;

            if (Time.time - start > _maxConnectingSecond)
            {
                if (!controller.IsServiceConnected)
                {
                    Debug.LogWarning("Daemon/Service is not connected");
                    OnNoServiceAction?.Invoke();
                    yield break;
                }
                if (!_provider.IsConnected())
                {
                    Debug.LogWarning("Ultra Leap Controller2 is not connected");
                    OnEmptyDeviceOnConnectAction?.Invoke();
                    yield break;
                }
                break;
            }
        } while (!_provider.IsConnected());

        OnConnectAction?.Invoke();
    }


    /// <summary>
    /// Ultra Leap Controller2が無効になった時に呼ばれる
    /// </summary>
    /// <param name="sender"></param>
    /// <param name="e"></param>
    private void OnDeviceLost(object sender, DeviceEventArgs e)
    {
        Debug.Log(nameof(OnDeviceLost));
        OnDisconnectAction?.Invoke();
    }


    /// <summary>
    /// デバイスが変更されたら呼ばれる
    /// </summary>
    /// <param name="d"></param>
    private void OnDeviceChanged(Device d)
    {
        UnsubscribeFromService();
        SubscribeToService();
    }
}
Ultra Leap Controller2で手のモデルのサイズを変える
Leap Unity Pluginで手のプレハブにアタッチされているHandBinderに対して以下のように操作すると手のモデルのサイズを変えられます。このスクリプトは右手用と左手用で別々に用意します。
using Leap.Unity.HandsModule;

public class HandController
{
    [SerializeField]
    private HandBinder handBinder;

    [SerializeField]
    private float handScale = 1f;

    private void Start()
    {
        // 手の各ボーンの位置をトラッキング位置に追従しない
        handBinder.SetPositions = false;

        // 手の各Scaleのオフセットを調整する
        handBinder.BoundHand.scaleOffset *= handScale;
        foreach (var finger in handBinder.BoundHand.fingers)
        {
            finger.fingerTipScaleOffset *= handScale;
        }
    }
}
シェーダーで扇形を描画する
フラグメントシェーダーで以下の関数を使う。
- uv: UV座標
- angle: 扇形の中心角(degree)
- radius: 扇形の半径
- position: 扇形の座標(uv)
- direction: (x, y) == (0, 1)を0°とした時の右回りの向き(degree)
- aspect: アスペクト比(マテリアルを割り当てる板ポリやUIのwidth/height)
float drawCircularSector(float2 uv, float angle, float radius, float2 position, float direction, float aspect) {
    float2 pos = -(uv*2.0 - 1.0) + position;
    pos.x *= aspect;
    float theta = degrees(atan2(pos.x, pos.y)) + 180.0 + angle/2.0;
    float adjustedTheta = fmod(theta - direction + 360.0, 360.0);
    float circle = length(pos) <= radius;
    float sector = adjustedTheta <= angle;
    return (circle * sector);
}
