Next as Frontend + Hono as BFF
introduction
HonoにはRPCの機能があり、routerで定義している情報(引数とか型とか)を他のファイルで簡単に利用することができます。
この記事では、そのRPCの機能とNextを組み合わせて、HonoをNextのBFFとして使用する組み合わせについて紹介していきたいと思います。
まず、今回作成した2つのサンプルのリポジトリを紹介します。
以下の2つのリポジトリのコードを用いて説明するので、もし興味があればクローンして色々試してみて下さい。
next-hono-webはshadcn/uiのコンポーネントをお借りして作成したサンプルのダッシュボードに対して、一部の値を動的に設定するよう変更を加えたものです。
next-hono-backendはとてもシンプルで、next-hono-webで使用するサンプルデータを返すよう定義されています。
next-hono-backend側の処理
以下のファイルで処理が定義されています。
import { Hono } from 'hono'

const overViewApp = new Hono().get('/', (c) => {
  return c.json(
    {
      totalRevenue: {
        value: '$45,231.8',
        sub: '+20.1% from last month',
      },
      subscriptions: {
        value: '+2350',
        sub: '+180.1% from last month',
      },
      sales: {
        value: '+12,234',
        sub: '+19% from last month',
      },
      activeNow: {
        value: '+573',
        sub: '+201 since last hour',
      },
    },
    200,
  )
})

const chartDataApp = new Hono().get('/', (c) => {
  const getRandomNumber = () => {
    return Math.floor(Math.random() * 5000) + 1000
  }
  return c.json(
    {
      data: [
        { name: 'Jan', total: getRandomNumber() },
        { name: 'Feb', total: getRandomNumber() },
        { name: 'Mar', total: getRandomNumber() },
        { name: 'Apr', total: getRandomNumber() },
        { name: 'May', total: getRandomNumber() },
        { name: 'Jun', total: getRandomNumber() },
        { name: 'Jul', total: getRandomNumber() },
        { name: 'Aug', total: getRandomNumber() },
        { name: 'Sep', total: getRandomNumber() },
        { name: 'Oct', total: getRandomNumber() },
        { name: 'Nov', total: getRandomNumber() },
        { name: 'Dec', total: getRandomNumber() },
      ],
    },
    200,
  )
})

const app = new Hono()
  .route('/overview', overViewApp)
  .route('/chartdata', chartDataApp)

export type AppType = typeof app
export default app
こちらの実装は以下のページを参考に行いました。
こちらのページを見れば実装方法はわかると思うので、詳しい説明は省きます。
next-hono-web側の処理
まず、next-hono-backendで定義されている処理を利用したいので、パッケージとしてインストールします。
npm install git+https://github.com/shinaps/next-hono-backend.git
今回、next-hono-webの中で実装したのは以下の3種類のリクエストです。
- サーバーコンポーネント内で
next-hono-backendへGETリクエストを送信する - クライアントサイドのコンポーネント内で
next-hono-backendへGETリクエストを送信する - ルートハンドラーで定義したAPIに対してGETリクエストを送信する
サーバーコンポーネント内で
next-hono-backendへGETリクエストを送信する
データを取得するための関数は以下のように定義してあります。
import { hc, InferResponseType } from 'hono/client'
import { AppType } from 'next-hono-backend/src'

export const getOverview = async () => {
  const client = hc<AppType>('http://localhost:8787/')
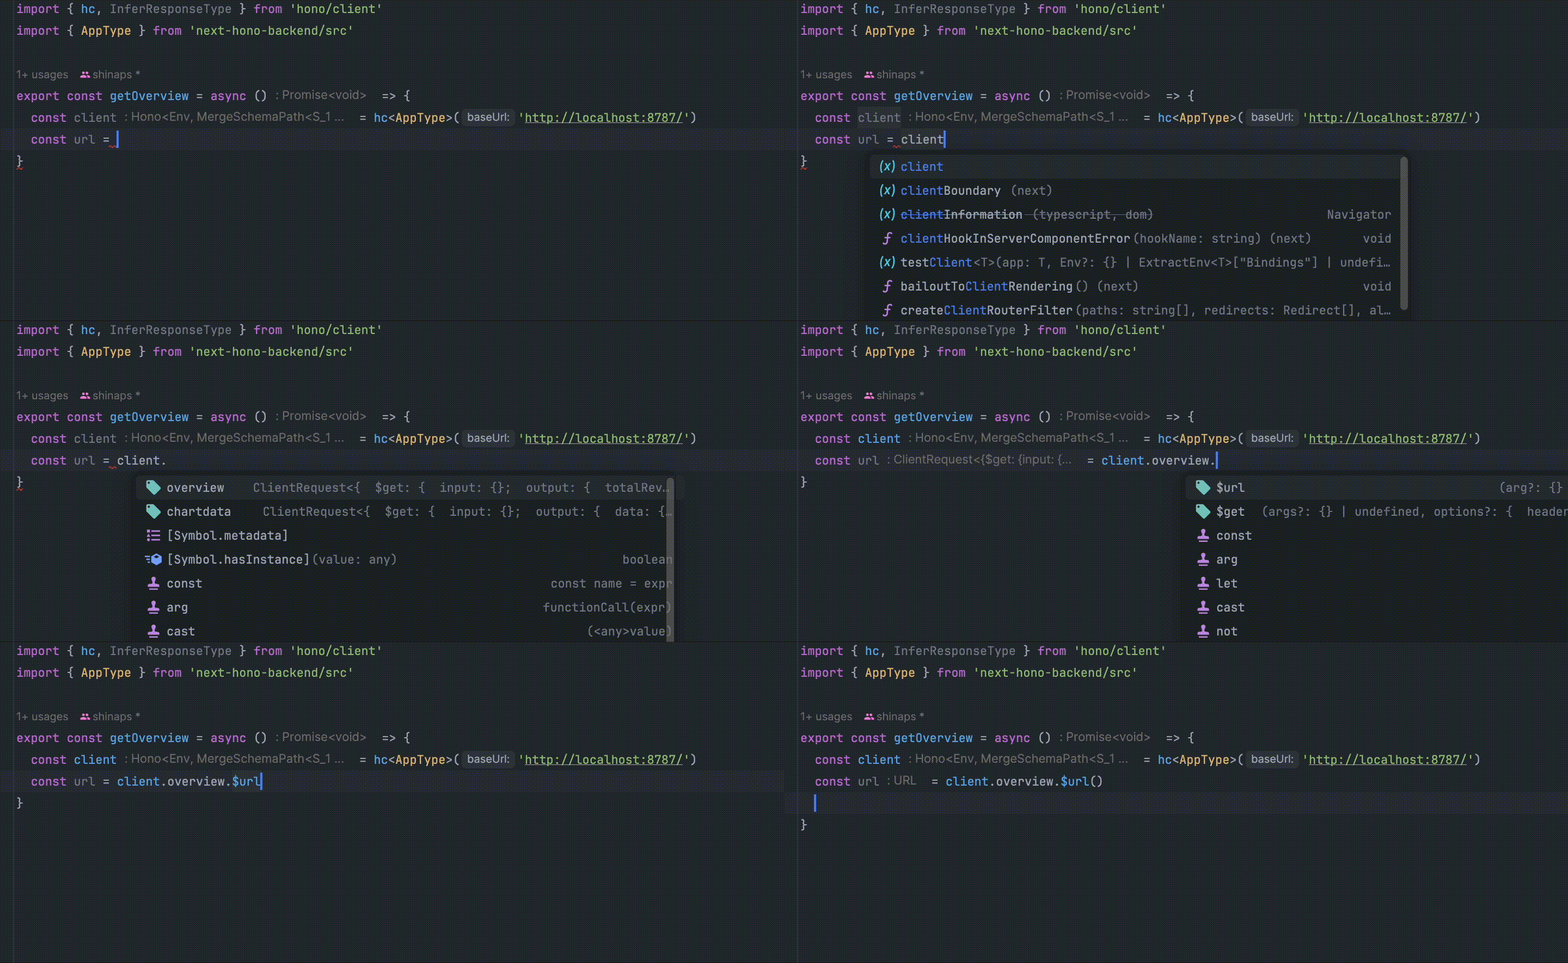
  const url = client.overview.$url()
  const res = await fetch(url, { cache: 'no-store' })

  const $get = client.overview.$get
  type ResType = InferResponseType<typeof $get>

  const json: ResType = await res.json()
  console.log('fetch data in server side', json)
  return json
}
この時、next-hono-backendで定義されているエンドポイントの補完が効きます。

client.overview.$url()でnext-hono-backendのoverviewのエンドポイントのURLを取得することができ、こちらのURLを使用してNextのfetchを使用することで、キャッシュをコントロールすることができます。
また、以下のようにすることで、対象のエンドポイントの返り値の型を取得することができ、fetchを使用して取得したデータに型を付与することができます。
const $get = client.overview.$get
type ResType = InferResponseType<typeof $get>
クライアントサイドのコンポーネント内で
next-hono-backendへGETリクエストを送信する
データを取得するための関数は以下のように定義してあります。
'use server'

import { hc, InferResponseType } from 'hono/client'
import { AppType } from 'next-hono-backend/src'

export const getChartData = async () => {
  const client = hc<AppType>('http://localhost:8787/')
  const url = client.chartdata.$url()
  const res = await fetch(url, { cache: 'no-store' })

  const $get = client.chartdata.$get
  type ResType = InferResponseType<typeof $get>

  const json: ResType = await res.json()
  console.log('fetch data in server side', json)
  return json
}
こちらは'use server'が追加されていること以外はgetOverviewと同様の処理なので説明は省略します。
ルートハンドラーで定義したAPIに対して
GETリクエストを送信する
こちらのページを参考にして以下のようなファイルを作成しました。
import { Hono } from 'hono'
import { handle } from 'hono/vercel'

export const runtime = 'edge'

const app = new Hono().basePath('/api')

const router = app.get('/sales', (c) => {
  return c.json({
    data: {
      olivia: '+$1,999.00',
      jackson: '+$39.00',
      isabella: '+$299.00',
      will: '+$99.00',
      sofia: '+$39.00',
    },
  })
})

export type AppType = typeof router

export const GET = handle(app)
これのポイントは、エンドポイントごとにファイルを作成する必要がなく、バックエンドで使用しているHonoの書き方と同様の記述で実装できるという点です。server actionsでデータを扱っている場合はあまりルートハンドラーを使用することはないかもしれないですが、シリアライズできないデータを扱う場合などはルートハンドラーを使用する必要があるため、同様の記述で実装ができるというのはすごく嬉しいです。
そして、こちらのAPIを使用する場合は以下のようにコードを書けば使用できます。
import { AppType } from '@/app/api/[[...route]]/route'
import { hc, InferResponseType } from 'hono/client'

export async function RecentSales() {
  const client = hc<AppType>('http://localhost:3000/')
  const url = client.api.sales.$url()
  const res = await fetch(url, { cache: 'no-store' })

  const $get = client.api.sales.$get
  type ResType = InferResponseType<typeof $get>

  const json: ResType = await res.json()
  console.log('fetch data in server side', json)
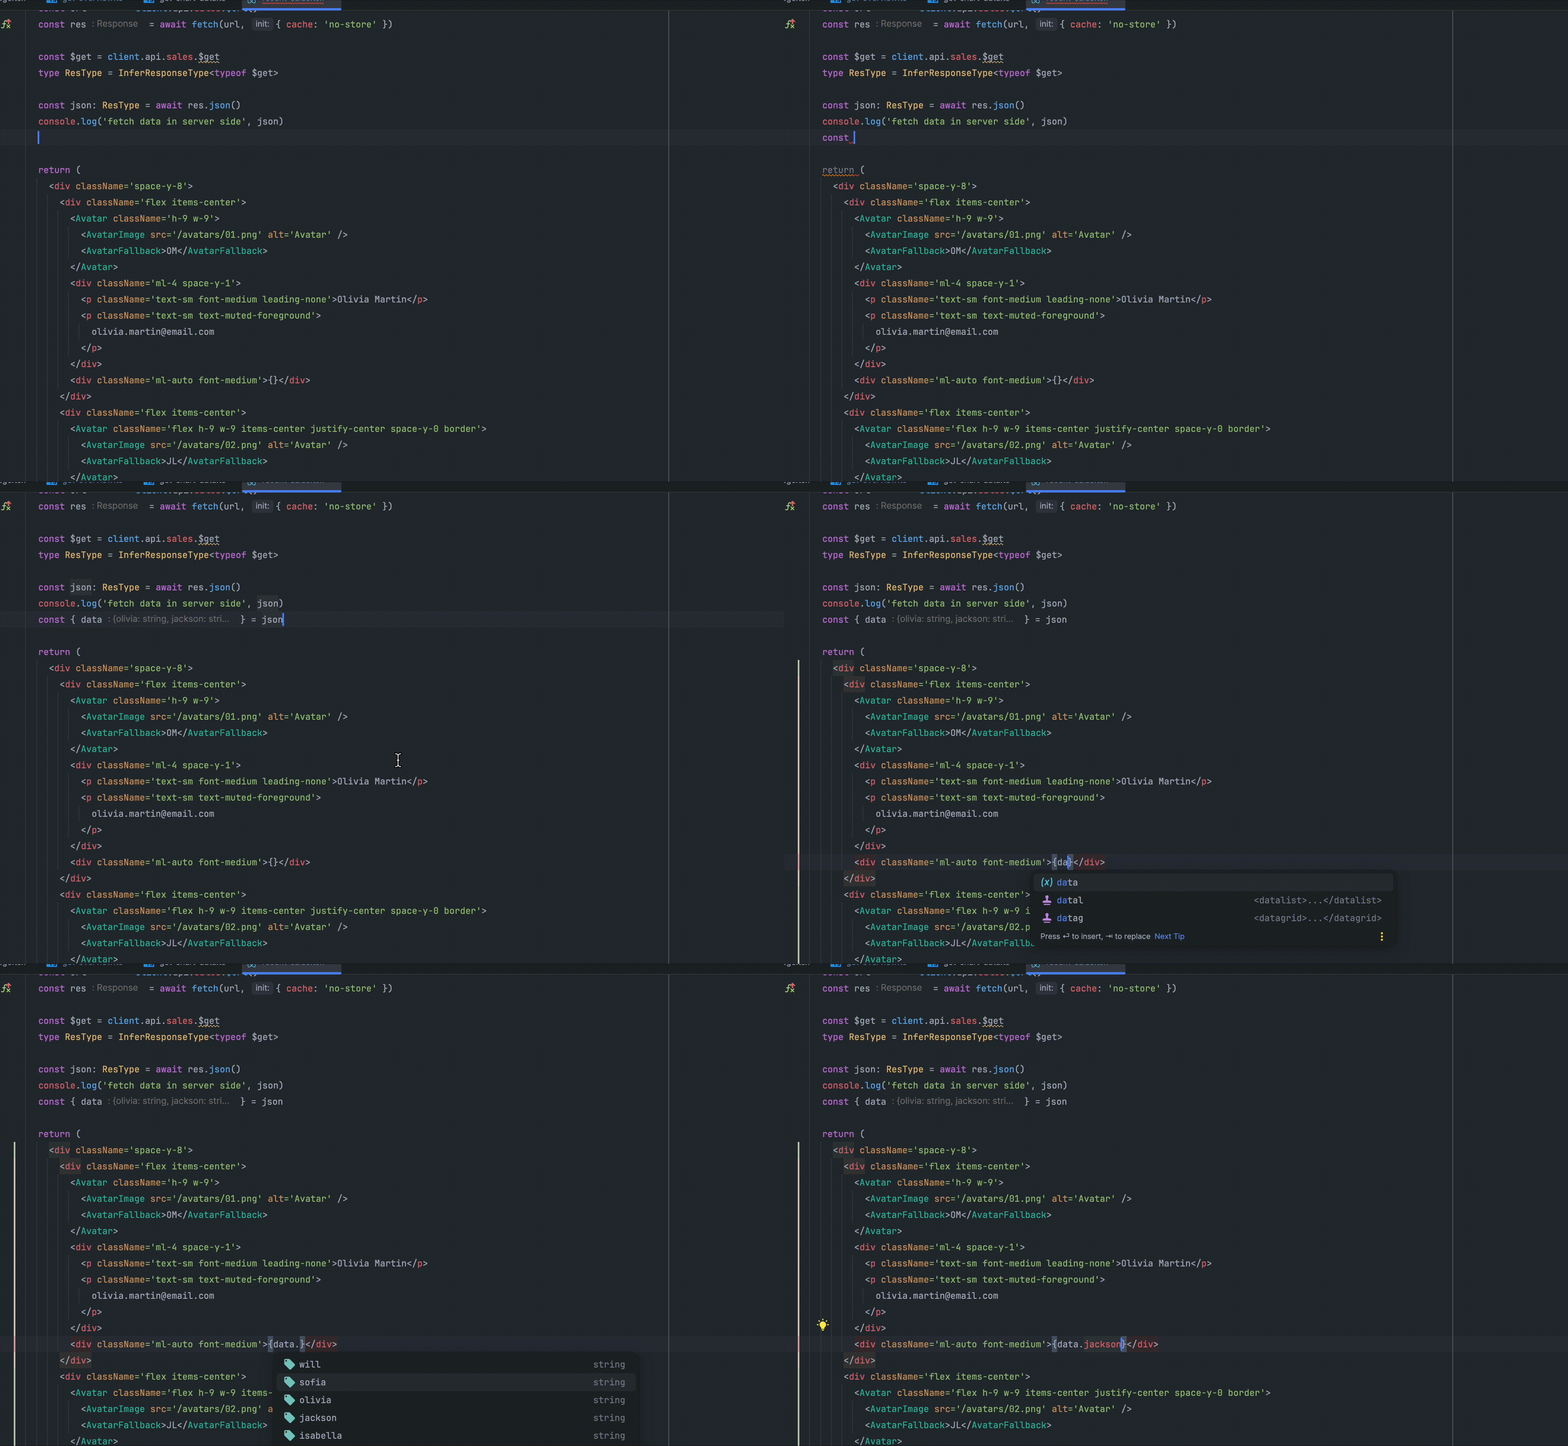
  const { data } = json

  return // 省略します。
}
next-hono-backendに対してリクエストを送る時とルートハンドラーのAPIに対してリクエストを送る時でほとんど同じような記述で実装することができています。
また、しっかり型が当てられているので、補完も効きます。

まとめ
NextのBFFとしてHonoを使用することによって、Nextでのルートハンドラーとバックエンドで同様の記述ができるという点や、RPCの機能が簡単に利用できるという点がこの組み合わせのおすすめポイントです。
しばらくはこの構成で色々試してみたいと思います。
Discussion