【Next.js】Auth.js・Prisma・MailHog・Dockerを用いたメールログイン機能の実装
はじめに
今回は、Next.jsとAuth.jsを用いたメールログイン機能を実装したので、そちらを記事にしていこうと思います。
認証方法
認証方法はマジックリンクを用いています。
マジックリンクは、ログイン時に入力したメールアドレス宛にログイン用のリンクが届き、リンクからログインするという認証方法です。
必要なライブラリの導入
公式を参照し、以下を導入します。
- next-auth
- prisma
- @prisma/client
- @auth/prisma-adapter
yarn add next-auth @prisma/client @auth/prisma-adapter
yarn add prisma --dev
認証プロバイダーの実装
[..nextauth].tsを作成し、Providerを以下のように作成します。
import { PrismaAdapter } from '@auth/prisma-adapter'
import NextAuth from 'next-auth'
import EmailProvider from 'next-auth/providers/email'

import { prisma } from '@/libs/prisma'

const EMAIL_SERVER = process.env.EMAIL_SERVER
const EMAIL_FROM = process.env.EMAIL_FROM
const NEXTAUTH_SECRET = process.env.NEXTAUTH_SECRET

if (!EMAIL_SERVER || !EMAIL_FROM || !NEXTAUTH_SECRET) {
  throw new Error('EMAIL_SERVER, EMAIL_FROM, or NEXTAUTH_SECRET not found.')
}

export default NextAuth({
  adapter: PrismaAdapter(prisma),
  providers: [
    EmailProvider({
      server: EMAIL_SERVER,
      from: EMAIL_FROM,
    }),
  ],
  secret: NEXTAUTH_SECRET,
})
記述はほとんど公式と同じようになっています。
Prismaを使用するので、adapterにPrisamAdapterを使用し、メール認証をするためEmailProviderを使用しています。
そのほかの認証を追加する場合、providersに追加していく形になります。
プロバイダーの実装は以上となります。
:::note info
API Routerについて補足
:::
ちなみに、Next.jsではAPI Routeといってapiディレクトリ以下にAPIのエンドポイントを作成することができます。例えば、デフォルトではhello.tsというファイルがありますが、こちらには、http://localhost:3000/helloとすることでアクセスできます。
そのため[..nextauth].tsとすると、/auth/[...nextauth]となるため、/auth/aでも/auth/bでもアクセスできますし、/auth/a/b、/auth/a/b/cでもアクセスできます。要するに、ネストしたようなパスも全て、[ファイル名].tsでキャッチするということです。
Auth.jsではGoogle認証やTwitter認証などもあり、それをauthディレクトリ以下で管理するため、一元化するため(/auth/google・/auth/twitterなどをまとめて管理するため)、上記のようなファイル形式としています。
prismaクライアントの実装
src/libsディレクトリ以下に作成していきます。
import { PrismaClient } from '@prisma/client'

const globalForPrisma = global as unknown as { prisma: PrismaClient }

export const prisma =
  globalForPrisma.prisma ||
  new PrismaClient({
    log: ['query'],
  })

if (process.env.NODE_ENV !== 'production') globalForPrisma.prisma = prisma
公式とは少し記述が違いますが、このようにすることで正しく動作します。
DB・MailHogの環境構築 with Docker
続いて、PrismaでのDB環境やMailHogを使用できるようにDockerでコンテナを作成していきます。
version: '3.9'
services:
  db:
    image: mysql:8.0
    ports:
      - 3306:3306
    volumes:
      - mysql:/var/lib/mysql
    environment:
      - MYSQL_ROOT_PASSWORD=password
      - MYSQL_DATABASE=nextjs-prisma-graphql-codegen-dev
  mailhog:
    image: mailhog/mailhog
    ports:
      - 8025:8025
      - 1025:1025
volumes:
  mysql:
私の場合、MySQLを使用していますが、お好きなDBを使用してください。
Prismaのデフォルトがpostgresなので、postgresの方が構築は容易かもしれません。
(MySQLでの構築について記事にしているので、そちれも参照してみてください)
またmailhogについても環境を構築するようにしています。
http://localhost:8025でアクセスできるようにしています。
次のコマンドを実行し、.envを作成します。
npx prisma init
以下のようなファイルが作成されます。
# Environment variables declared in this file are automatically made available to Prisma.
# See the documentation for more detail: https://pris.ly/d/prisma-schema#accessing-environment-variables-from-the-schema

# Prisma supports the native connection string format for PostgreSQL, MySQL, SQLite, SQL Server, MongoDB and CockroachDB.
# See the documentation for all the connection string options: https://pris.ly/d/connection-strings

DATABASE_URL="mysql://root:パスワード@localhost:3306/DB名"
ここでコンテナによるローカル環境構築を行います。
docker-compose up
::: note alert
環境変数追加
:::
正常に立ち上がったら環境変数を追加していきます。
以下のようになります。
# Environment variables declared in this file are automatically made available to Prisma.
# See the documentation for more detail: https://pris.ly/d/prisma-schema#accessing-environment-variables-from-the-schema

# Prisma supports the native connection string format for PostgreSQL, MySQL, SQLite, SQL Server, MongoDB and CockroachDB.
# See the documentation for all the connection string options: https://pris.ly/d/connection-strings

DATABASE_URL="mysql://root:password@localhost:3306/nextjs-prisma-graphql-codegen-dev"
EMAIL_SERVER="smtp://user:password@localhost:1025"
EMAIL_FROM="noreply@example.com"
NEXTAUTH_SECRET="XXXXXXXXXXXXXXXXXXXXXXXXXXXXXXXXXXXXXXXX"
NEXTAUTH_URL="http://localhost:3000/"
NEXTAUTH_SECRETですが、以下のコマンドでシークレット情報を取得し、コピーする必要があります。
openssl rand -base64 32
これで出力されたシークレットを貼り付けてください。
最後にPrismaのマイグレーションファイル(テーブル)を作成していきます。
以下を実行します。
npx prisma migrate dev
正常通りいけば、prisma/migrationsにファイルが作成されます。
フロントエンド実装
次に簡易的ではありますが、フロント部分を作成します。
まず、pagesディレクトリにある_app.tsxを改修します。
import '@/styles/globals.css'

import type { AppProps } from 'next/app'
import { SessionProvider } from 'next-auth/react'

export default function App({ Component, pageProps }: AppProps) {
  return (
    <SessionProvider session={pageProps.session}>
      <Component {...pageProps} />
    </SessionProvider>
  )
}
ここでは、SessionProviderにより、セッションを扱えるようにしています。
次に、index.tsxも手を加えます。
import { signIn, signOut, useSession } from 'next-auth/react'

const Home = () => {
  const { data: session } = useSession()

  if (session) {
    return (
      <>
        Signed in as {session.user?.email} <br />
        <button onClick={() => signOut()}>Sign out</button>
      </>
    )
  }

  return (
    <>
      Not signed in <br />
      <button onClick={() => signIn()}>Sign in</button>
    </>
  )
}

export default Home
こちらはAuth.jsの公式のまんまの記述になります。
useSessioonでセッションを扱え、セッション情報があれば、user情報を表示するようになっています。
::: note info
画面動作確認
:::
実際の画面の動きは以下です。
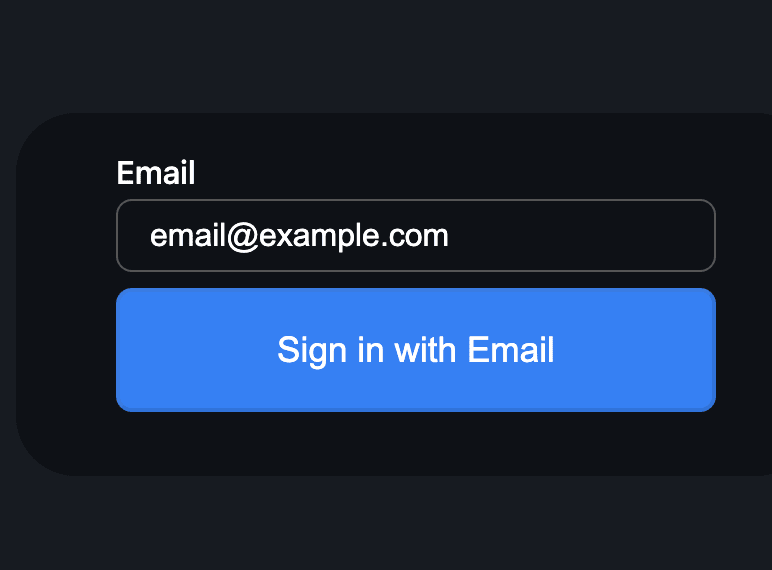
メールアドレスを入力し、ボタンを押すと、MailHogにメール通知が行きます。
MailHogにはhttp://localhost:8025でアクセスできます。

さらに、以下のコマンドでPrismaスキーマのデータを確認できます。
npx prisma studio
http://localhost:5555でPrismaStudioを見ることができます。
Userスキーマですが、以下のようにデータが入っているのがわかると思います。

以上で、実装は終了です。
参考にしてみてください。
Discussion