Flutter × M1 Mac | Getting Started
0. Prerequisite
- Install Homebrew.
- Install Google Chrome.
- Install VS Code.
0.1. PC Info
Information on the PC used is as follows.
OS: macOS Ventura(v13.2.1)
Device: MacBook Pro (13-inch, M1, 2020)
Chip: Apple M1
Memory: 16GB
0.2. Check Homebrew version
% which brew
/opt/homebrew/bin/brew
% brew -v
Homebrew 4.0.4-192-gf02aea0
Homebrew/homebrew-core (git revision ae7840726fa; last commit 2022-11-13)
Homebrew/homebrew-cask (git revision bef70e652f; last commit 2022-11-12)
%
1. Get the Flutter SDK
1.1. Download Flutter SDK
Download the following installation bundle to get the latest stable release of the Flutter SDK.
Flutter SDK
- Intel: flutter_macos_3.7.6-stable.zip
- Apple Silicon: flutter_macos_arm64_3.7.6-stable.zip
% cd ~/Downloads
% curl -OL https://storage.googleapis.com/flutter_infra_release/releases/stable/macos/flutter_macos_arm64_3.7.6-stable.zip
% ls | grep zip
flutter_macos_arm64_3.7.6-stable.zip
%
1.2. Update your path
Add the flutter tool to your path.
% mkdir ~/development
% cd ~/development
% unzip ~/Downloads/flutter_macos_arm64_3.7.6-stable.zip
% ls
flutter                                 flutter_macos_arm64_3.7.6-stable.zip
% rm flutter_macos_arm64_3.7.6-stable.zip
% ls
flutter
%
% cat ~/.zshrc | grep flutter
% vim ~/.zshrc
% cat ~/.zshrc | grep flutter
export PATH="$PATH:/Users/admin/development/flutter/bin"
% . ~/.zshrc
% which flutter
/Users/admin/development/flutter/bin/flutter
%
% flutter --version
Flutter 3.7.6 • channel stable • https://github.com/flutter/flutter.git
Framework • revision 12cb4eb7a0 (2 days ago) • 2023-03-01 10:29:26 -0800
Engine • revision ada363ee93
Tools • Dart 2.19.3 • DevTools 2.20.1
%
1.3. Run flutter doctor
Run the following command to see if there are any dependencies you need to install to complete the setup.
% flutter doctor -v
[✓] Flutter (Channel stable, 3.7.6, on macOS 13.2.1 22D68 darwin-arm64, locale en-JP)
...
...
[✗] Android toolchain - develop for Android devices
...
...

[✗] Xcode - develop for iOS and macOS
...
...

[✓] Chrome - develop for the web
...
...

[!] Android Studio (not installed)
...
...

[✓] IntelliJ IDEA Community Edition (version 2022.2.1)
...
...

[✓] VS Code (version 1.74.2)
...
...

[✓] Connected device (2 available)
...
...

[✓] HTTP Host Availability
...
...

! Doctor found issues in 3 categories.
%
2. Platform setup | iOS setup
2.1. Install Xcode
2.1.1. Install the latest stable version of Xcode
Install the latest stable version of Xcode (using web download or the Mac App Store).
% which xcode-select
/usr/bin/xcode-select
% which xcodebuild
/usr/bin/xcodebuild
%
2.1.2. Configure the Xcode command-line tools
Configure the Xcode command-line tools to use the newly-installed version of Xcode by running the following from the command line.
% sudo xcode-select --switch /Applications/Xcode.app/Contents/Developer
Password:
% sudo xcodebuild -runFirstLaunch
...
...
Install Started
1%.........20.........40.........60.........80.......Install Succeeded
%
2.1.3. Make sure the Xcode license agreement is signed
Make sure the Xcode license agreement is signed by either opening Xcode once and confirming or running sudo xcodebuild -license from the command line.
% sudo xcodebuild -license
...
...
By typing 'agree' you are agreeing to the terms of the software license agreements. Type 'print' to print them or anything else to cancel, [agree, print, cancel]                         agree

You can view the license agreements in Xcode's About Box, or at /Applications/Xcode.app/Contents/Resources/en.lproj/License.rtf
%
2.2. Set up the iOS simulator
On your Mac, find the Simulator via Spotlight or by using the following command.
% open -a Simulator
iOS simulator

2.3. Create and run a simple Flutter app
2.3.1. Create a new Flutter app
Create a new Flutter app by running the following from the command line.
% flutter create my_app
Creating project my_app...
Running "flutter pub get" in my_app...
Resolving dependencies in my_app... (1.0s)
+ async 2.10.0
...
...
Your application code is in my_app/lib/main.dart.

%
% cd my_app
% flutter run

Launching lib/main.dart on iPhone 14 Pro Max in debug mode...
Running Xcode build...
 └─Compiling, linking and signing...                        12.2s
Xcode build done.                                           22.2s
Syncing files to device iPhone 14 Pro Max...                        75ms
...
...
Application finished.
%
% tree -d -L 3
.
├── android
│   ├── app
│   │   └── src
│   └── gradle
│       └── wrapper
├── build
│   ├── 814b80dcdb346899c5f31b414ffeb01b
│   └── ios
│       ├── Debug-iphonesimulator
│       └── iphonesimulator
├── ios
│   ├── Flutter
│   ├── Runner
│   │   ├── Assets.xcassets
│   │   └── Base.lproj
│   ├── Runner.xcodeproj
│   │   ├── project.xcworkspace
│   │   └── xcshareddata
│   └── Runner.xcworkspace
│       └── xcshareddata
├── lib
├── linux
│   └── flutter
├── macos
│   ├── Flutter
│   │   └── ephemeral
│   ├── Runner
│   │   ├── Assets.xcassets
│   │   ├── Base.lproj
│   │   └── Configs
│   ├── Runner.xcodeproj
│   │   ├── project.xcworkspace
│   │   └── xcshareddata
│   └── Runner.xcworkspace
│       └── xcshareddata
├── test
├── web
│   └── icons
└── windows
    ├── flutter
    └── runner
        └── resources

42 directories
%
Simple Flutter app Screenshot
-
Portrait
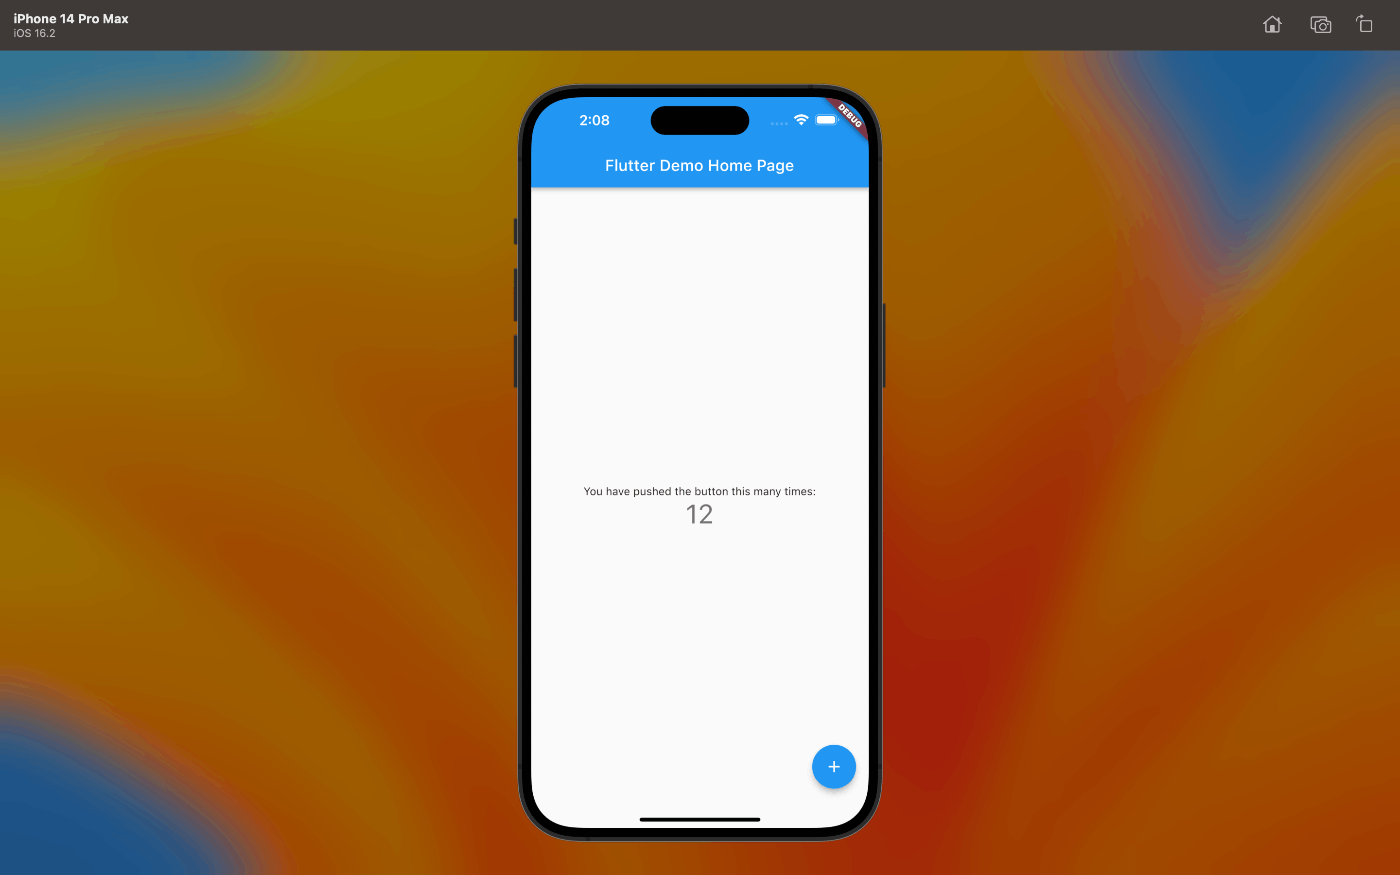
-
Landscape

-
VS Code × Chrome

2.4. Deploy to iOS devices
I do not have iOS devices. So, I can not deploy to iOS devices.
2.5. Install CocoaPods
CocoaPods is used to retrieve the iOS and macOS platform side's plugin.
For macOS desktop development, you need CocoaPods.
% sudo gem install activesupport -v 6.1.7.2
...
...
% sudo gem install cocoapods
...
...
% gem list | grep activesupport
activesupport (6.1.7.2)
%
% gem list | grep cocoapods
cocoapods (1.12.0)
cocoapods-core (1.12.0)
cocoapods-deintegrate (1.0.5)
cocoapods-downloader (1.6.3)
cocoapods-plugins (1.0.0)
cocoapods-search (1.0.1)
cocoapods-trunk (1.6.0)
cocoapods-try (1.2.0)
%
3. Platform setup | Android setup
3.1. Install Android Studio
3.1.1. Install Android Studio
Download and install Android Studio.
FYI: https://developer.android.com/studio
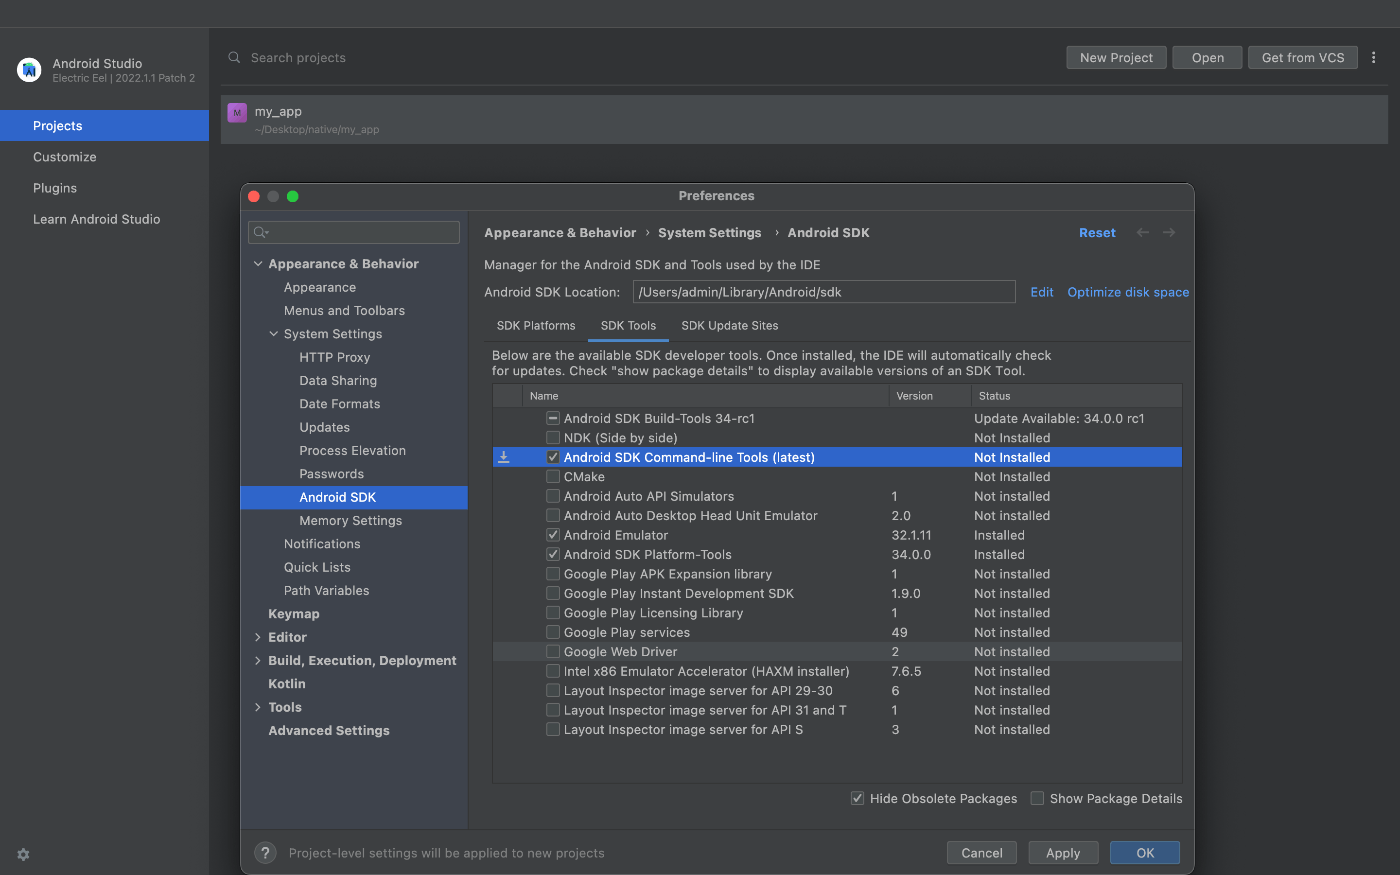
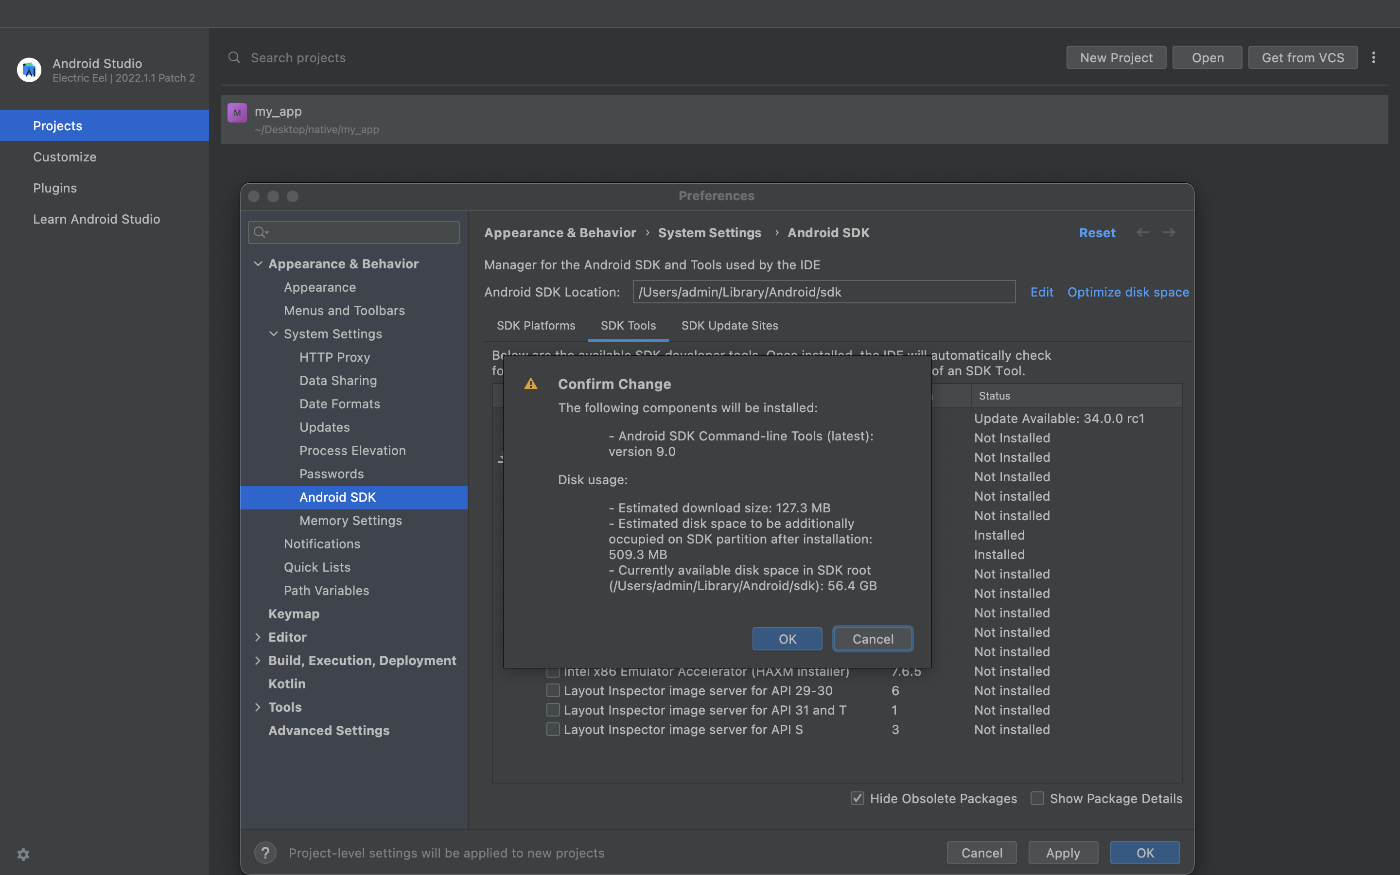
3.1.2. Install Android SDK components
Start Android Studio, and go through the ‘Android Studio Setup Wizard.
'Android Studio Setup Wizard' installs the following Android SDK components.
These components are required by Flutter when developing for Android.
Android SDK components
- Android SDK
- Android SDK Command-line Tools
- Android SDK Build-line Tools
Install Android SDK Command-line Tools
3.2. Agree to Android Licenses
Before you can use Flutter, you must agree to the licenses of the Android SDK platform.
% flutter doctor --android-licenses
...
...
Accept? (y/N): y
All SDK package licenses accepted

% flutter doctor --android-licenses
[=======================================] 100% Computing updates...
All SDK package licenses accepted.

%
3.3. Run flutter doctor
Run flutter doctor to confirm that Flutter has located your installation of Android Studio.
% flutter doctor
Doctor summary (to see all details, run flutter doctor -v):
[✓] Flutter (Channel stable, 3.7.6, on macOS 13.2.1 22D68 darwin-arm64, locale en-JP)
[✓] Android toolchain - develop for Android devices (Android SDK version 33.0.2)
[✓] Xcode - develop for iOS and macOS (Xcode 14.2)
[✓] Chrome - develop for the web
[✓] Android Studio (version 2022.1)
[✓] IntelliJ IDEA Community Edition (version 2022.2.1)
[✓] VS Code (version 1.76.0)
[✓] Connected device (2 available)
[✓] HTTP Host Availability

• No issues found!
%
3.4. Set up your Android device
I do not have a USB cable. So, I can not deploy to Android devices.
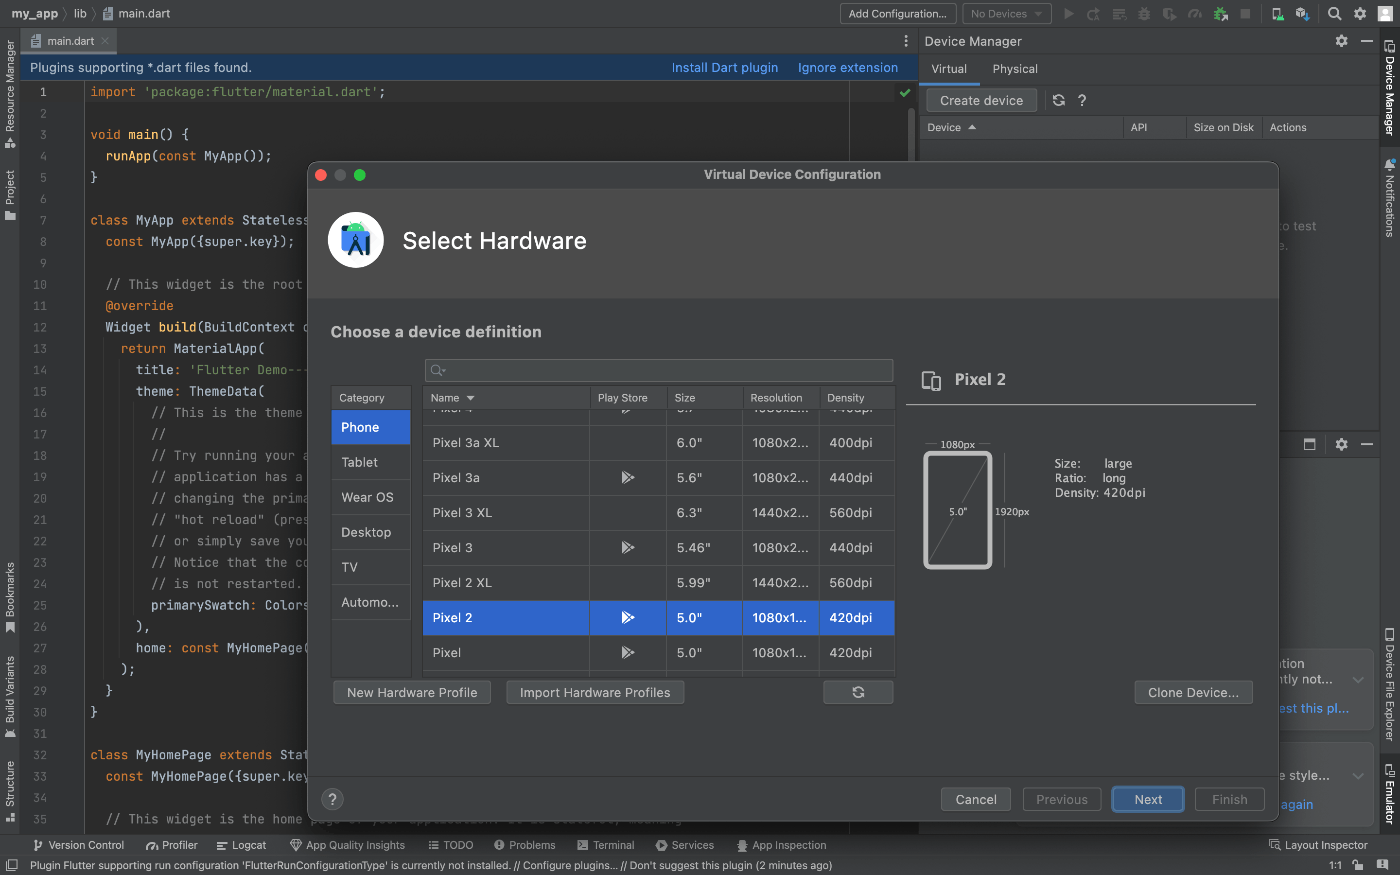
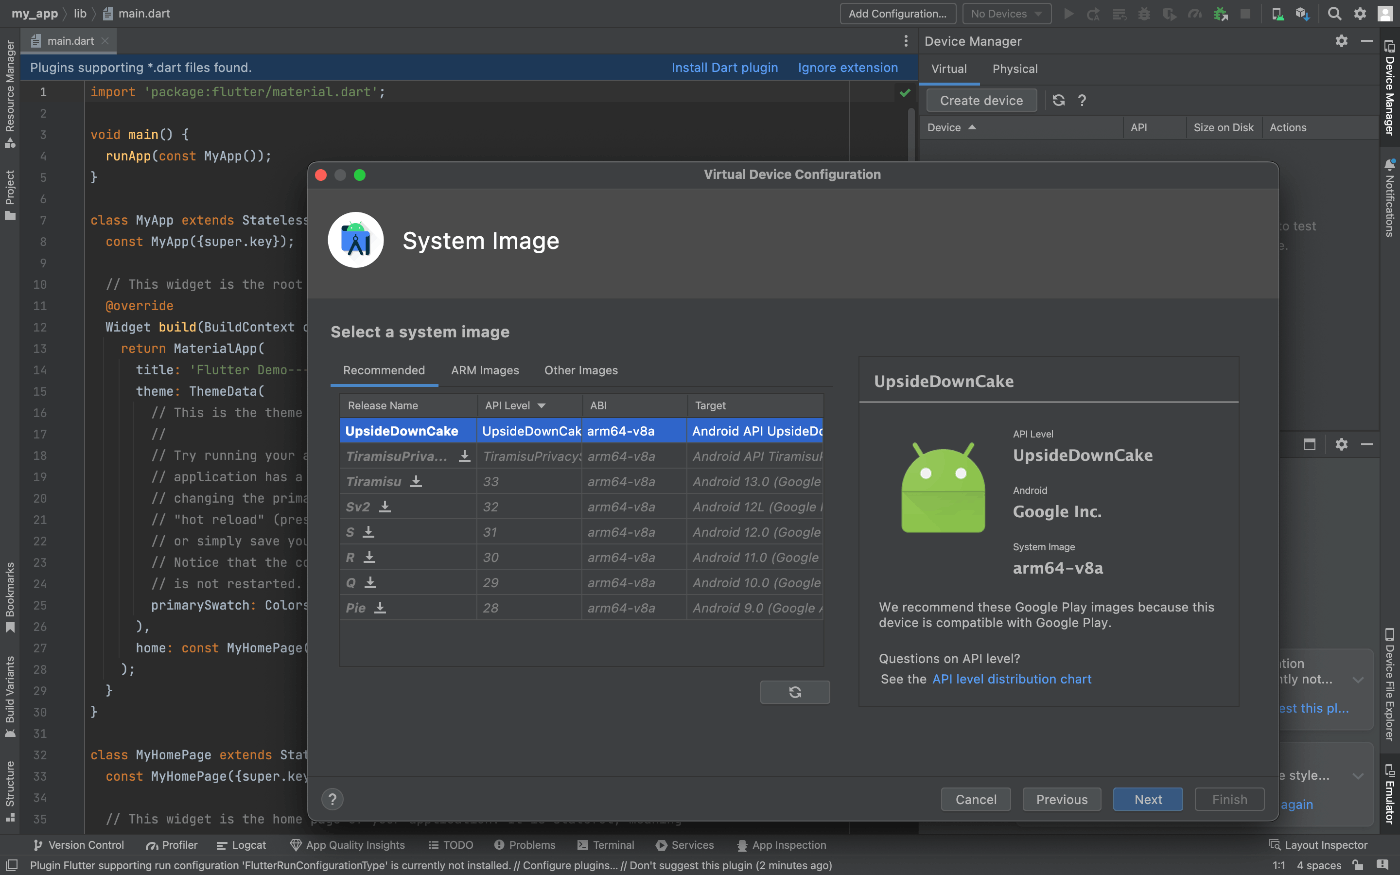
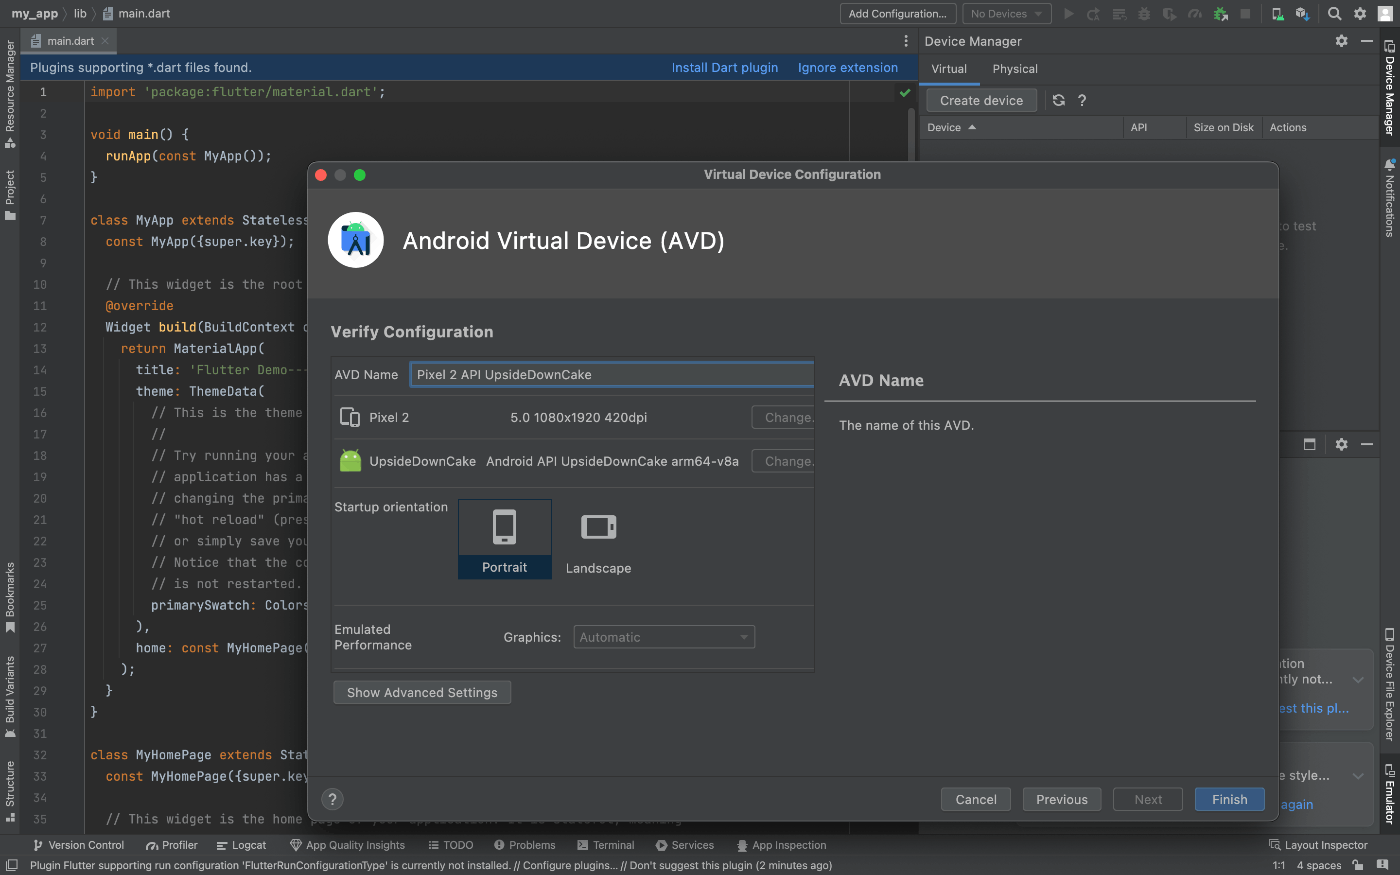
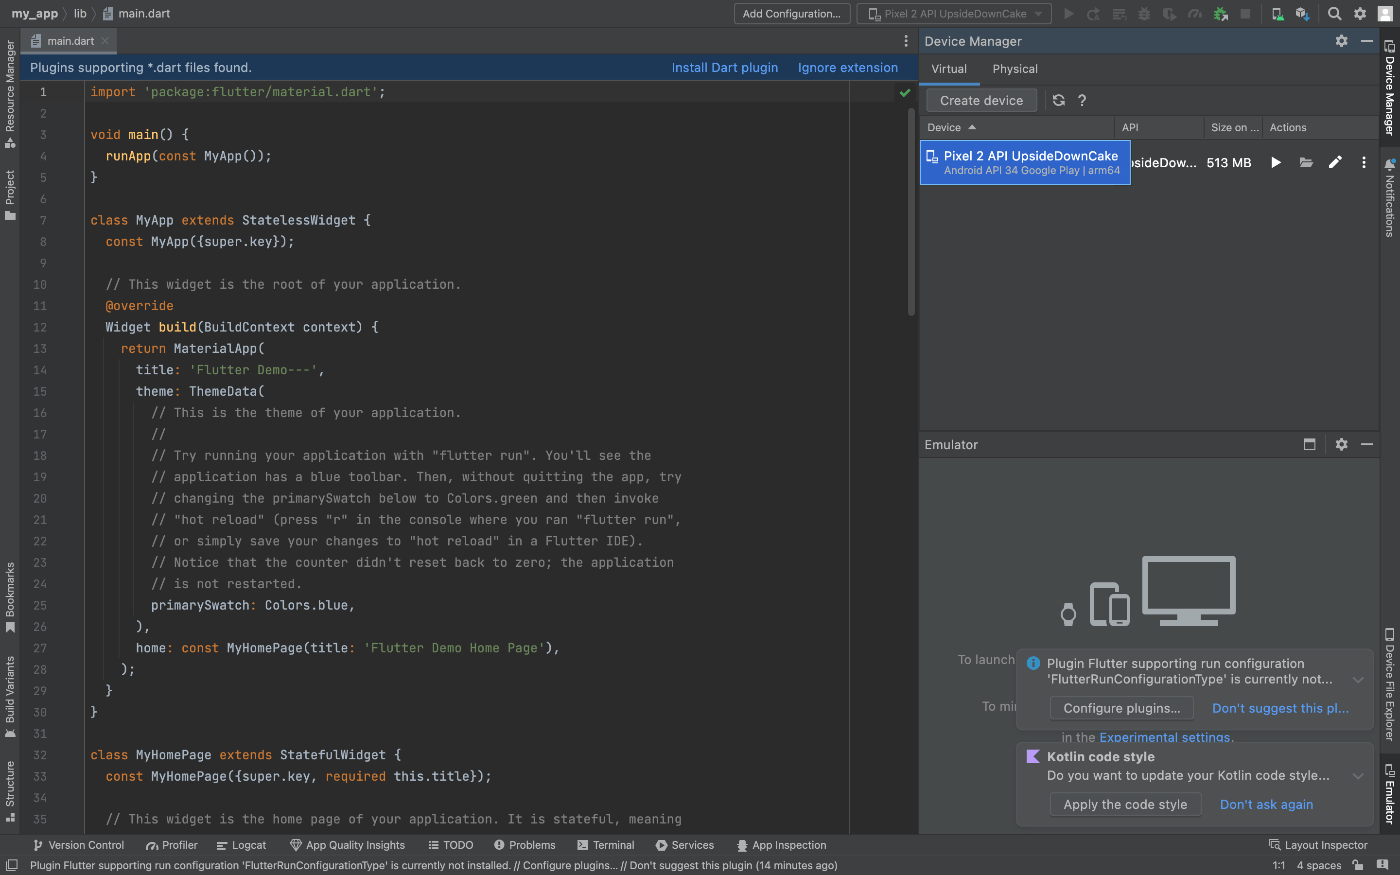
3.5. Set up the Android emulator
Launch 'Android Studio > Tools > Device Manager' and click the 'Create Device' button.

Discussion