👻
UnityのRenderGraphSystem(URP17)に対応した一番シンプルなCustom RPを作ってみる
はじめに
アウトプットが苦手なので練習もかねて、色々書いていこうと思い、記事投稿はじめました。
今回は、Unity2023.3でURPでもRenderGraphを有効化できるようになったので、RenderGraphSysteに対応した、シンプルなScriptableRenderPassの作成をしてみました。
この記事の内容
- URPのOpaquePass描画後に画面効果をかける
ScriptableRenderPass(ScriptableRendererFeature)を作成します・- 執筆時点で、
FullScreenPassRendererFeatureが標準で存在するため、特に作成物自体に意味はないので、そこは流してください。
- 執筆時点で、
- RenderGraph未対応(パッケージ内のコメントに合わせてnon-RG)の場合と、RenderGraph対応(同じくコメントに合わせてRG)の場合の実装両方を記載しています。
この記事で触れないこと
- URP、SRP自体の話。
- GameObject(何かしらRendererを持ったりなどの描画対象になり得る)を描画する場合のRenderGraph対応について(別記事で書くかもです)
- 触れないと言いつつ軽く触れると、
ScriptableRenderContext.DrawRenderersによる描画でなく、RendererListHandleを取得し、CommandBuffer.DrawRendererList(CommandBufferも目的に合わせた種類がいくつか用意されているので、RasterCommandBufferなどを使用)で記述するようになってます。 - RenderGraph同様少し前のバージョンから入っている
- 触れないと言いつつ軽く触れると、
記事で執筆時点での環境
- Unity 2023.3.0b7
- Universal RP 17.0.2
- Core RP 17.0.2
やってみた
使用するシーン
- Uinversal RPパッケージのSampleに含まれるLitシーンを使用します。
- UIだけ非表示にしてます。

- UIだけ非表示にしてます。
今回使用する画面効果のシェーダー
- 最初に画面に効果をかけるシェーダーを用意しておきます。
- シェーダーグラフで、彩度を操作するノード(saturtionノード)を挟むだけのシンプルなものになります。

RendererFeature
- RendererFeatureは従来の実装も、RenderGraph対応後も同様のため以下のものを使用します。
using UnityEngine;
using UnityEngine.Rendering.Universal;

namespace Sample.CustomRP
{
    public class CustomRendererFeature : ScriptableRendererFeature
    {
        [SerializeField] Material blitMaterial;

        CustomSamplePass customSamplePass = null;

        public override void Create()
        {
            if (customSamplePass != null) return;

            customSamplePass = new CustomSamplePass(RenderPassEvent.AfterRenderingOpaques, "CustomSamplePass", blitMaterial);
        }

        public override void AddRenderPasses(ScriptableRenderer renderer, ref RenderingData renderingData)
        {
            renderer.EnqueuePass(customSamplePass);
        }
    }

}
RenderGraphを使用しない従来の場合のRenderPass
using UnityEngine;
using UnityEngine.Rendering;
using UnityEngine.Rendering.Universal;
using ProfilingScope = UnityEngine.Rendering.ProfilingScope;

namespace Sample.CustomRP
{
    public class CustomSamplePass : ScriptableRenderPass
    {
        readonly Material blitMaterial;
        readonly string profilerTag;

        public CustomSamplePass(RenderPassEvent renderPassEvent, string profilerTag, Material blitMaterial)
        {
            this.renderPassEvent  = renderPassEvent;
            this.profilerTag      = profilerTag;
            this.profilingSampler = new ProfilingSampler(profilerTag);
            this.blitMaterial     = blitMaterial;
        }

        public override void Execute(ScriptableRenderContext context, ref RenderingData renderingData)
        {
            var commandBuffer = CommandBufferPool.Get(profilerTag);

            using (new ProfilingScope(commandBuffer, profilingSampler))
            {
                // 余談:RenderTargetのSwapまで行ってくれたBlitがObsoleteに……
                Blit(commandBuffer, ref renderingData, blitMaterial, 0);
            }

            context.ExecuteCommandBuffer(commandBuffer);
            commandBuffer.Clear();

            CommandBufferPool.Release(commandBuffer);
        }
    }
}
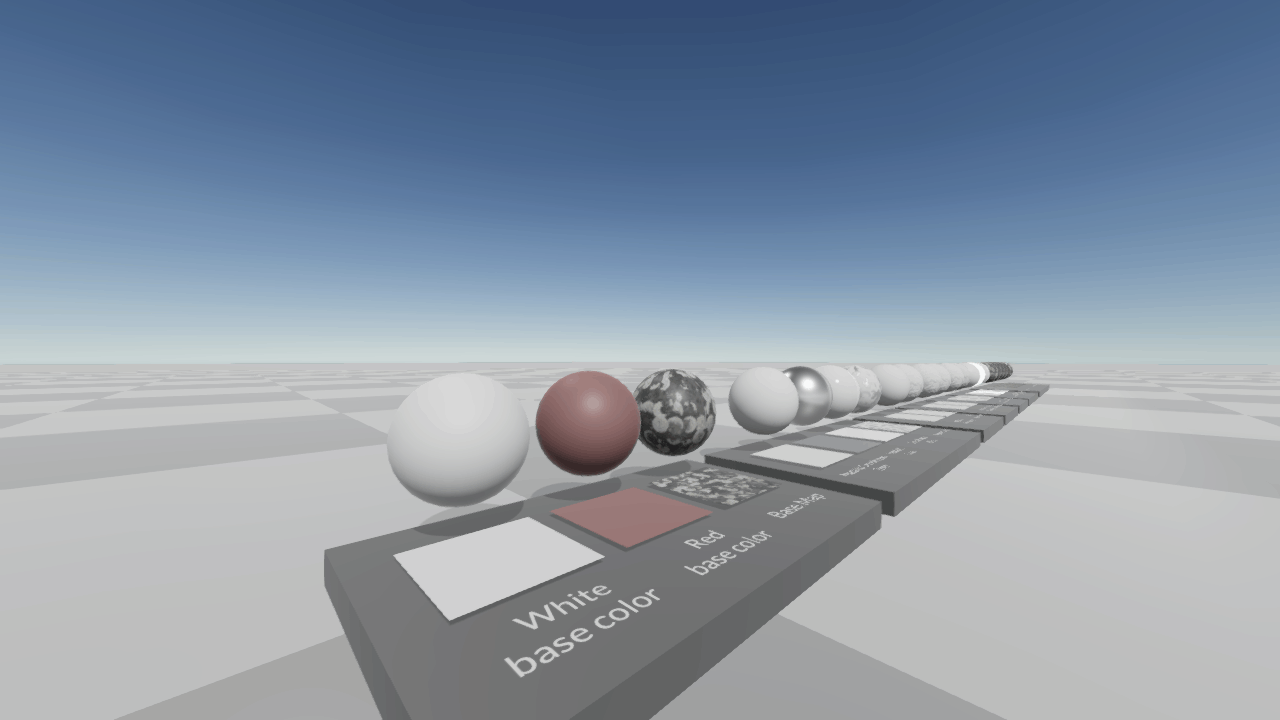
- 実行するとこんな感じに(saturation:0.2にしてます)
- Opaqueで描画されている球体と台座、地面だけ彩度が落とせています。

RenderGraphを使用する場合
using UnityEngine;
using UnityEngine.Rendering;
using UnityEngine.Rendering.RenderGraphModule;
using UnityEngine.Rendering.Universal;
using ProfilingScope = UnityEngine.Rendering.ProfilingScope;

namespace Sample.CustomRP
{
    public class CustomSamplePass : ScriptableRenderPass
    {
        readonly Material blitMaterial;
        readonly string profilerTag;

        public CustomSamplePass(RenderPassEvent renderPassEvent, string profilerTag, Material blitMaterial)
        {
            this.renderPassEvent = renderPassEvent;
            this.profilerTag     = profilerTag;
            profilingSampler   = new ProfilingSampler(profilerTag);
            this.blitMaterial    = blitMaterial;
        }

        // Passで使うデータを定義しておく
        internal class PassData
        {
            internal TextureHandle sourceHandle;
            internal TextureHandle tempCopy;

            internal Material material;
        }

        public override void RecordRenderGraph(RenderGraph renderGraph, ContextContainer frameData)
        {
            //  RenderingDataでなく、ContextContainerから自分で必要なデータを撮るようになった
            UniversalCameraData    cameraData    = frameData.Get<UniversalCameraData>();

            // IRenderGraphBuilderを使用して構築します
            // PassのないようによってRasterPassやUnsafePassなどを選択
            // 今回はUnsafePassで追加
            using (var builder = renderGraph.AddUnsafePass<PassData>(profilerTag, out var passData))
            {
                UniversalResourceData resourceData = frameData.Get<UniversalResourceData>();

                passData.material = blitMaterial;
                passData.sourceHandle = resourceData.activeColorTexture;

                // 今回は、CamearaのRenderTargetと同様のおのが欲しいので
                // RenderTargetDescripterからTextureHandleを作るものを使用した
                var desc = cameraData.cameraTargetDescriptor;
                desc.depthBufferBits = 0;
                passData.tempCopy    = UniversalRenderer.CreateRenderGraphTexture(renderGraph, desc, "_tempCopy", true);
                // 他にも
                // builder.CreateTransientTexture(in TextureDesc desc);
                // で、builderで作成する
                // renderGraph.ImportTexture(RTHandle rt);
                // などのRTHandleから作成する方法もある。外部管理してるRTHandle使う場合などはこちらのパターン

                // Pass中で使用する場合に宣言しておく
                builder.UseTexture(passData.tempCopy);


                // Passをかリングしないように設定
                builder.AllowPassCulling(false);
                builder.AllowGlobalStateModification(true);


                // UnsafePassの実行を関数を設定します(つまり旧来のExecuteで呼び出していたPassの描画周り)
                builder.SetRenderFunc((PassData data, UnsafeGraphContext context) =>
                {
                    using (new ProfilingScope(context.cmd, profilingSampler))
                    {
                        // Blitter.BlitCameraTextureが通常のCommandBufferを引数としているため用意されてるHelperで変換
                        // builder作成するときに、renderGraph.AddRenderPassを使用すれば、変換は不要だが、builder.UseTextureなどは使えない
                        var commandBuffer = CommandBufferHelpers.GetNativeCommandBuffer(context.cmd);

                        // RenderGraphではターゲットのSwap操作どうするのが良いのだろう?
                        // 一旦sourceをcopy
                        Blitter.BlitCameraTexture(commandBuffer, data.sourceHandle, data.tempCopy);
                        // Blit
                        Blitter.BlitCameraTexture(commandBuffer, data.tempCopy, data.sourceHandle, data.material, 0);
                    }
                });
            }
        }

    }
}
-
RenderGraphを有効化する必要があり、ProjectSettings>Graphics>URPのRender Graph Settings>Compatibility Mode (Render Graph Disabled)のチェックを外します。

-
実行結果は同様になると思います。
次の記事
所感
- まだ触り始めで慣れてない+旧来からの置き換え類などを全て把握できていない段階ですが、non-RGとRGでかなりの変更が入っているので、追うのが大変なので、こんなのあるぜ系を自分も教えて欲しいです。
RenderGraphに載せておけば、描画リソース(RenderTextureなど)の管理や、Pass自体の管理を自動で最適化してくてるようになるらしいので、恩恵をフルに受けられるように深掘りしていきたいと思うので、続きの記事も書くかと思います(今はまだ諸事情により書けないですが、作ってるゲームで実際にどう使っているかもいつか書きたい。作ってるゲーム、関わっているゲームについてはそのうち機会がきたら……)
Discussion