🙆
WPF-UIでダイアログを使用する方法(ContentDialogService)
WPF-UIの使用例などがあまりないため、以下では、Wpf.Ui ライブラリが提供する ContentDialogService を利用してダイアログを表示するサンプルアプリケーションの実装例をもとに、手順やポイントを解説します。今回のサンプルでは DialogService クラスを作成し、ViewModel からダイアログを簡単に呼び出せる仕組みを構築しています。
- Github
https://github.com/SakakitaniJunya/wpf-contentdialog - Document
https://wpfui.lepo.co/api/Wpf.Ui.Controls.ContentDialog.html
1. 全体の流れ
-
XAML上にダイアログの表示先(
ContentPresenter)を置く
ContentPresenterは、ダイアログを表示するための領域となります。 -
DialogServiceクラス で、
ContentDialogServiceを用いてダイアログを表示するメソッドを実装-
IDialogServiceインターフェイスを用いて抽象化 - 実際にダイアログを表示するのは
ContentDialogServiceクラス
-
-
ViewModel からダイアログを呼び出すために、
DialogServiceのインスタンスを設定 -
ボタン押下等のイベント で
DialogServiceのメソッドを呼び出し、ダイアログを表示
2. サンプルコードの解説
2.1 DialogService (IDialogServiceの実装)
using System;
using System.Threading;
using System.Threading.Tasks;
using System.Windows;
using System.Windows.Controls;
using Wpf.Ui.Controls;

namespace UiDesktopApp1.Services
{
    public class DialogService : IDialogService
    {
        private ContentPresenter _dialogHost;
        private ContentDialogService _contentDialogService;

        public DialogService()
        {
        }

        public DialogService(ContentPresenter dialogHost)
        {
            _dialogHost = dialogHost;
            _contentDialogService = new ContentDialogService();
            _contentDialogService.SetDialogHost(dialogHost);
        }

        public void SetContentPresenter(ContentPresenter dialogHost)
        {
            _dialogHost = dialogHost;
        }

        public async Task ShowDialogAsync(string title, string content)
        {
            await Application.Current.Dispatcher.InvokeAsync(async () =>
            {
                if (_contentDialogService == null)
                {
                    throw new InvalidOperationException("DialogHost was not set properly.");
                }

                var dialog = new ContentDialog
                {
                    Title = title,
                    Content = content,
                    CloseButtonText = "Close",
                };

                await _contentDialogService.ShowAsync(dialog, CancellationToken.None);
            });
        }
    }
}
ポイント
-
DialogServiceは、ダイアログ表示のための処理をカプセル化 するクラスです。 - コンストラクタで受け取った
ContentPresenter(ダイアログの表示先) をContentDialogServiceにセットしています。 -
ShowDialogAsyncメソッドでContentDialogを生成し、ShowAsyncで表示しています。 -
Application.Current.Dispatcher.InvokeAsync(...)を利用することで、UI スレッド上でダイアログを表示させています。
2.2 IDialogService (抽象化インターフェース)
using System.Threading.Tasks;
using System.Windows.Controls;

namespace UiDesktopApp1.Services
{
    public interface IDialogService
    {
        Task ShowDialogAsync(string title, string content);
        void SetContentPresenter(ContentPresenter dialogHost);
    }
}
ポイント
-
IDialogServiceは、ダイアログ表示を行うサービスのインターフェース です。 - これを用意することで、ViewModel などからは
ShowDialogAsyncというメソッド呼び出しのみでダイアログが表示できるようになり、実装を意識しなくてもよくなります。
2.3 XAML (DashboardPage) での ContentPresenter
<Page
    x:Class="UiDesktopApp1.Views.Pages.DashboardPage"
    xmlns="http://schemas.microsoft.com/winfx/2006/xaml/presentation"
    xmlns:x="http://schemas.microsoft.com/winfx/2006/xaml"
    xmlns:local="clr-namespace:UiDesktopApp1.Views.Pages"
    xmlns:d="http://schemas.microsoft.com/expression/blend/2008"
    xmlns:mc="http://schemas.openxmlformats.org/markup-compatibility/2006"
    xmlns:ui="http://schemas.lepo.co/wpfui/2022/xaml"
    mc:Ignorable="d"
    Title="DashboardPage"
    d:DesignHeight="450"
    d:DesignWidth="800">

    <Grid VerticalAlignment="Top">
        <Grid.ColumnDefinitions>
            <ColumnDefinition Width="Auto" />
            <ColumnDefinition Width="Auto" />
        </Grid.ColumnDefinitions>

        <!-- ダイアログを呼び出すためのボタンとカウント表示 -->
        <ui:Button
            Grid.Column="0"
            Command="{Binding ViewModel.CounterIncrementCommand, Mode=OneWay}"
            Content="Click me!"
            Icon="Fluent24" />
        <TextBlock
            Grid.Column="1"
            Margin="12,0,0,0"
            VerticalAlignment="Center"
            Text="{Binding ViewModel.Counter, Mode=OneWay}" />

        <!-- ダイアログの表示先 -->
        <ContentPresenter x:Name="ContentPresenterForDialogs" Panel.ZIndex="1" />
    </Grid>
</Page>
ポイント
-
<ContentPresenter x:Name="ContentPresenterForDialogs" />で、ダイアログを表示させる領域を指定しています。 -
Panel.ZIndex="1"を設定することで、他のコントロールより前面にダイアログが表示されるように指定しています。
2.4 DashboardPage のコードビハインド
using UiDesktopApp1.Services;
using UiDesktopApp1.ViewModels.Pages;
using Wpf.Ui.Controls;

namespace UiDesktopApp1.Views.Pages
{
    public partial class DashboardPage : INavigableView<DashboardViewModel>
    {
        public DashboardViewModel ViewModel { get; set; }

        public DashboardPage(DashboardViewModel viewModel)
        {
            ViewModel = viewModel;
            DataContext = this;

            InitializeComponent();
            Loaded += DealsManagerPage_Loaded;
        }

        private void DealsManagerPage_Loaded(object sender, RoutedEventArgs e)
        {
            // ページがロードされた時点でDialogServiceにContentPresenterを設定
            ViewModel.Initialize(new DialogService(ContentPresenterForDialogs));
        }
    }
}
ポイント
- ページのロード後 (
Loadedイベント) に、DialogServiceにContentPresenterForDialogsを渡して初期化しています。 - これにより
ViewModelでIDialogServiceのメソッドを使った際に正しくダイアログが表示されます。
2.5 DashboardViewModel (ダイアログ呼び出しの実装)
using UiDesktopApp1.Services;

namespace UiDesktopApp1.ViewModels.Pages
{
    public partial class DashboardViewModel : ObservableObject
    {
        private IDialogService _dialogService;

        [ObservableProperty]
        private int _counter = 0;

        [RelayCommand]
        private void OnCounterIncrement()
        {
            ShowConfirmationDialog();
            Counter++;
        }

        public void Initialize(IDialogService dialogService)
        {
            _dialogService = dialogService;
        }

        public async Task ShowConfirmationDialog()
        {
            await _dialogService.ShowDialogAsync("Dialog Test", "Have you checked?");
        }
    }
}
ポイント
-
InitializeメソッドでDialogServiceのインスタンスを受け取り、ローカル変数に保持しています。 -
OnCounterIncrementコマンドハンドラが呼ばれると、ShowConfirmationDialog()を通じてDialogServiceのShowDialogAsyncが呼ばれます。 - ダイアログ表示後にカウントを加算しているため、ダイアログを閉じてからカウンターがインクリメントされるようになっています。
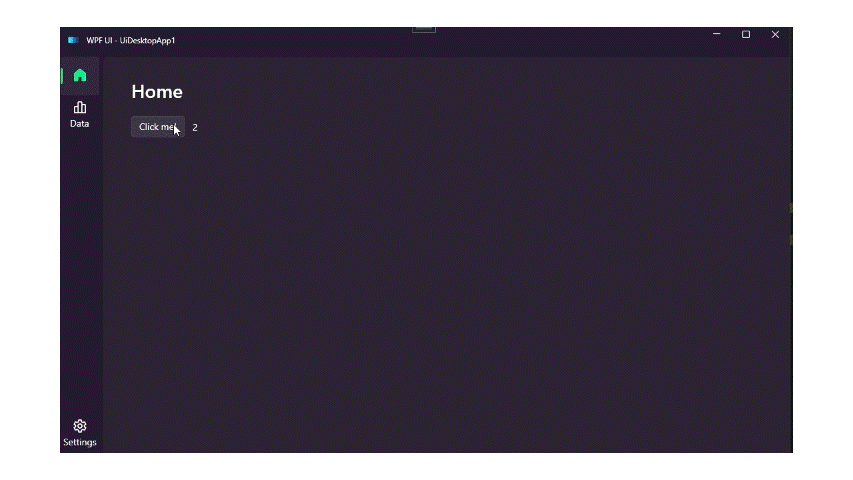
3. 実行イメージ
- アプリを起動し、DashboardPage を表示する。
- 「Click me!」ボタンを押すと、
-
OnCounterIncrement()→ShowConfirmationDialog()→ShowDialogAsync("Dialog Test", "Have you checked?")
が呼ばれ、画面上に「Dialog Test」というタイトル、本文「Have you checked?」、Closeボタンのついたダイアログが表示されます。
-
- ダイアログを閉じると、カウンターの値がインクリメントされ、TextBlock に反映されます。
4. まとめ
-
ContentDialogService は Wpf.Ui が提供するダイアログ制御用クラスで、
ContentPresenterをダイアログの表示先として指定します。 -
ContentDialogにタイトルやコンテンツ、ボタンを指定でき、ShowAsyncメソッドでダイアログ表示が可能です。 -
DialogServiceとIDialogServiceを用意し、ViewModel 側から簡潔な呼び出しができるようにする構成が便利です。 -
ContentPresenterForDialogsがダイアログの表示先となるため、ページ (またはウィンドウ) 上の XAML に忘れずに配置し、DialogServiceにセットする必要があります。
Discussion