🥑
tailwindcssで自己紹介ポートフォリオを作ってみた
はじめに
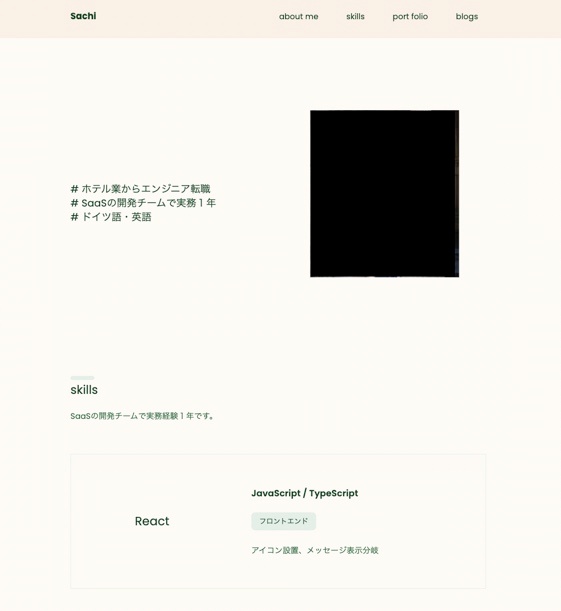
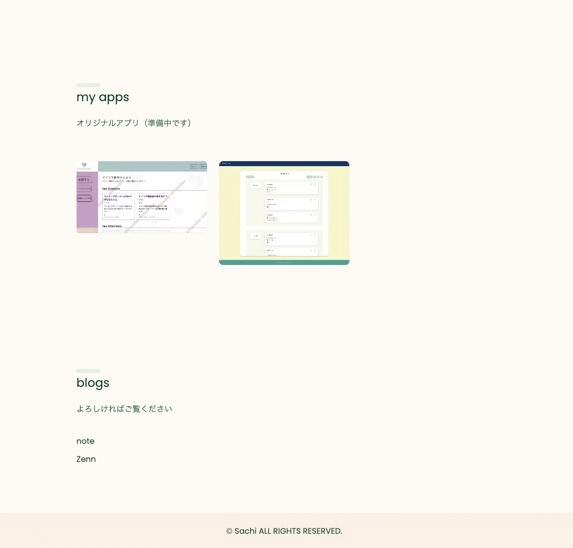
tailwindcssで、簡単な自己紹介ポートフォリオを作ってみました。
開発環境
tailwindcss:3.3.2
完成イメージ


余談ですが、色を決める際にこちらのサイトが参考になりました!
準備
以下の公式サイトの手順に沿って、tailwindcssをインストールします。
今回はTailwind CLI を使ってインストールを行います。
公式サイト:
(1)作業ディレクトリで以下のコマンドを実行します。
npm install -D tailwindcss
(Node.jsを事前にインストールしておく必要があります。)
※上記を実行してもpackage.jsonファイルが生成されなかったので、
npm init -yコマンドを実行して、package.jsonファイルを生成してからインストールしたら上手くいきました。
(2)下記のコマンドで、tailwind.configファイルを作成します。
npx tailwindcss init
tailwindcssを使う際にいろいろカスタマイズを書き込めるファイルです。
(3)tailwind.configファイルに、ファイルへのパスを追加します。
これによって、カスタマイズした内容を上記で指定したパスに適用させることができます。
tailwind.config.js
/** @type {import('tailwindcss').Config} */
module.exports = {
  content: ["./src/**/*.{html,js}"], ←ここに記載!!
  theme: {
    extend: {},
  },
  plugins: [],
}
(4)srcディレクトリを作成し、配下にinput.cssを作成します。
下記の内容を記載します。
src/input.css
@tailwind base;
@tailwind components;
@tailwind utilities;
(5)cssをビルドします。
distディレクトリとoutput.cssファイルが生成されます。
npx tailwindcss -i ./src/input.css -o ./dist/output.css --watch
以上で準備完了です。
実装
それぞれのセクションを実装していきます。
下記の3つのファイルをコーディングしていきます。
■index.htmlの作成
index.html
<!DOCTYPE html>
<html lang="ja">
<head>
<meta charset="UTF-8" />
<meta http-equiv="X-UA-Compatible" content="IE=edge" />
<meta name="viewport" content="width=device-width, initial-scale=1.0" />
<link href="/dist/output.css" rel="stylesheet" />
<title>PortFolio</title>
<link rel="preconnect" href="https://fonts.googleapis.com" />
<link rel="preconnect" href="https://fonts.gstatic.com" crossorigin />
<link
href="https://fonts.googleapis.com/css2?family=M+PLUS+Rounded+1c:wght@400;700&family=Noto+Sans+JP:wght@300;400;500;600;700&family=Poppins:wght@300;400;500;600;700&display=swap"
rel="stylesheet"
/>
</head>
<body class="font-poppins bg-body text-normal-text">
<!-- ナビゲーションバー -->
<header class="py-6 bg-header">
<div
class="container mx-auto flex justify-between items-center px-8 md:px-14 lg:px-24 w-full"
>
<div class="text-lg font-bold">Sachi</div>
<div class="space-x-6 hidden md:flex items-center">
<a
href="#aboutme"
class="px-4 py-2 rounded-lg hover:bg-selected-text transition-all duration-300"
>about me</a
>
<a
href="#skills"
class="px-4 py-2 rounded-lg hover:bg-selected-text transition-all duration-300"
>skills</a
>
<a
href="#portfolio"
class="px-4 py-2 rounded-lg hover:bg-selected-text transition-all duration-300"
>port folio</a
>
<a
href="#blogs"
class="px-4 py-2 rounded-lg hover:bg-selected-text transition-all duration-300"
>
blogs
</a>
</div>
<div class="md:hidden">
<i class="fa-solid fa-bars"></i>
</div>
</div>
</header>
<!-- ヒーローセクション -->
<div
id="aboutme"
class="container mt-36 flex justify-between items-center mx-auto px-8 md:px-14 lg:px-24 w-full"
>
<div class="flex flex-wrap md:flex-nowrap">
<div
class="md:my-36 lg:ml-30 justify-center md:justify-start mx-auto max-w-xl"
>
<h1 class="text-sm text-left md:text-lg lg:text-xl">
# ホテル業からエンジニア転職<br />
# SaaSの開発チームで実務1年<br />
# ドイツ語・英語
</h1>
</div>
<img
src="./images/myphoto.jpg"
alt="image"
class="md:absolute lg:top-50 lg:right-40 md:w-2/5 lg:w-1/4 w-8/12 mt-12 md:mt-0 right-6 ml-auto transform -translate-x-1/4 -translate-y-1/6"
/>
</div>
</div>
<!-- スキルセクション -->
<div
id="skills"
class="container mt-40 flex justify-between items-center mx-auto px-8 md:px-14 lg:px-24 w-full"
>
<section class="w-full">
<h2 class="secondary-title">skills</h2>
<p class="section-paragraph">SaaSの開発チームで実務経験1年です。</p>
<div class="my-16">
<div
class="w-full border border-theme p-16 lg:px-32 lg:py-16 flex justify-center lg:justify-start flex-wrap lg:space-x-32 hover:border-secondary transition-all duration-400"
>
<!-- 言語 -->
<div class="mb-6 lg:mb-0 self-center">
<h3 class="text-2xl">React</h3>
</div>
<!-- スキルの説明 -->
<div
class="text-center flex flex-wrap justify-center lg:text-left lg:block px-9"
>
<h3 class="text-lg font-semibold">JavaScript / TypeScript</h3>
<div
class="flex flex-wrap w-full justify-center gap-3 lg:w-auto lg:justify-start mt-6 mb-7"
>
<div class="badge rounded-lg">フロントエンド</div>
</div>
<p class="text-secondary">アイコン設置、メッセージ表示分岐</p>
</div>
</div>
</div>
<div class="my-16">
<div
class="w-full border border-theme p-16 lg:px-32 lg:py-16 flex justify-center lg:justify-start flex-wrap lg:space-x-32 hover:border-secondary transition-all duration-400"
>
<!-- 言語 -->
<div class="mb-6 lg:mb-0 self-center">
<h3 class="text-2xl">CakePHP</h3>
</div>
<!-- スキルの説明 -->
<div
class="text-center flex flex-wrap justify-center lg:text-left lg:block"
>
<h3 class="text-lg font-semibold">php</h3>
<div
class="flex flex-wrap w-full justify-center gap-3 lg:w-auto lg:justify-start mt-6 mb-7"
>
<div class="badge rounded-lg">バックエンド</div>
</div>
<p class="text-secondary">不具合修正、エラー・仕様調査</p>
</div>
</div>
</div>
<div class="my-16">
<div
class="w-full border border-theme p-16 lg:px-32 lg:py-16 flex justify-center lg:justify-start flex-wrap lg:space-x-32 hover:border-secondary transition-all duration-400"
>
<!-- 言語 -->
<div class="mb-6 lg:mb-0 self-center">
<h3 class="text-2xl">SQL</h3>
</div>
<!-- スキルの説明 -->
<div
class="text-center flex flex-wrap justify-center lg:text-left lg:block px-16"
>
<h3 class="text-lg font-semibold">MariaDB / MySQL</h3>
<div
class="flex flex-wrap w-full justify-center gap-3 lg:w-auto lg:justify-start mt-6 mb-7"
>
<div class="badge rounded-lg">データベース</div>
</div>
<p class="text-secondary">データ抽出、更新、削除</p>
</div>
</div>
</div>
<!-- 略 -->
</section>
</div>
<!-- PFセクション -->
<div
id="portfolio"
class="container mt-36 flex justify-between items-center mx-auto px-8 md:px-14 lg:px-24 w-full"
>
<section class="w-full">
<h2 class="secondary-title">my apps</h2>
<p class="section-paragraph pb-10">オリジナルアプリ(準備中です)</p>
<div class="grid lg:grid-cols-3 md:grid-cols-2 grid-cols-1 gap-6">
<img
src="./images/portfolio1.jpg"
alt=""
class="w-full md:h-40 lg:h-36 object-cover rounded-md"
/>
<img
src="./images/portfolio2.jpg"
alt=""
class="w-full md:h-60 lg:h-52 object-cover rounded-lg"
/>
</div>
</section>
</div>
<!-- ブログセクション -->
<div
id="blogs"
class="container mt-52 mb-24 flex justify-between items-center mx-auto px-8 md:px-14 lg:px-24 w-full"
>
<section class="w-full">
<h2 class="secondary-title">blogs</h2>
<p class="section-paragraph">よろしければご覧ください</p>
<div class="w-full mt-10">
<ul class="list-none space-y-3">
<li>
<a
href=""
class="py-1 rounded-lg hover:bg-selected-text transition-all duration-300"
>note</a
>
</li>
<li>
<a
href=""
class="py-1 rounded-lg hover:bg-selected-text transition-all duration-300"
>Zenn</a
>
</li>
</ul>
</div>
</section>
</div>
<!-- フッター -->
<footer class="py-6 bg-header items-center text-center">
<p>© Sachi ALL RIGHTS RESERVED.</p>
</footer>
</body>
</html>
■tailwind.configの設定
たとえば、カラーやフォントの設定などを記述します。
tailwind.config.js
/** @type {import('tailwindcss').Config} */
module.exports = {
  content: ["./src/**/*.{html,js}"],
  theme: {
    extend: {
      colors: {
        body: "#FDFAF6",
        "normal-text": "#064420",
        "selected-text": "#E4EFE7",
        header: "#FAF1E6",
        theme: "#E4EFE7",
        secondary: "#0e6332",
        badge: "#E4EFE7",
      },
    },
    fontFamily: {
      poppins: ["Poppins", "sans-serif"],
    },
  },
  plugins: [],
};
■input.cssの作成
HTML要素に適用したいCSSスタイルを記載していきます。
input.css
@tailwind base;
@tailwind components;
@tailwind utilities;

html,
body {
  scroll-behavior: smooth;
}

.secondary-title {
  @apply text-2xl;
}

.secondary-title::before {
  content: "";
  @apply block w-12 h-2 bg-theme rounded-full mb-1;
}

.section-paragraph {
  @apply text-secondary my-6 w-full max-w-3xl;
}

.badge {
  @apply px-4 py-2 text-sm bg-badge;
}
以上で実装完了です!


Discussion