🐍
【Flutter】CustomPainterを使って曲線形状のWidgetを作成し、変形させる
今回やること

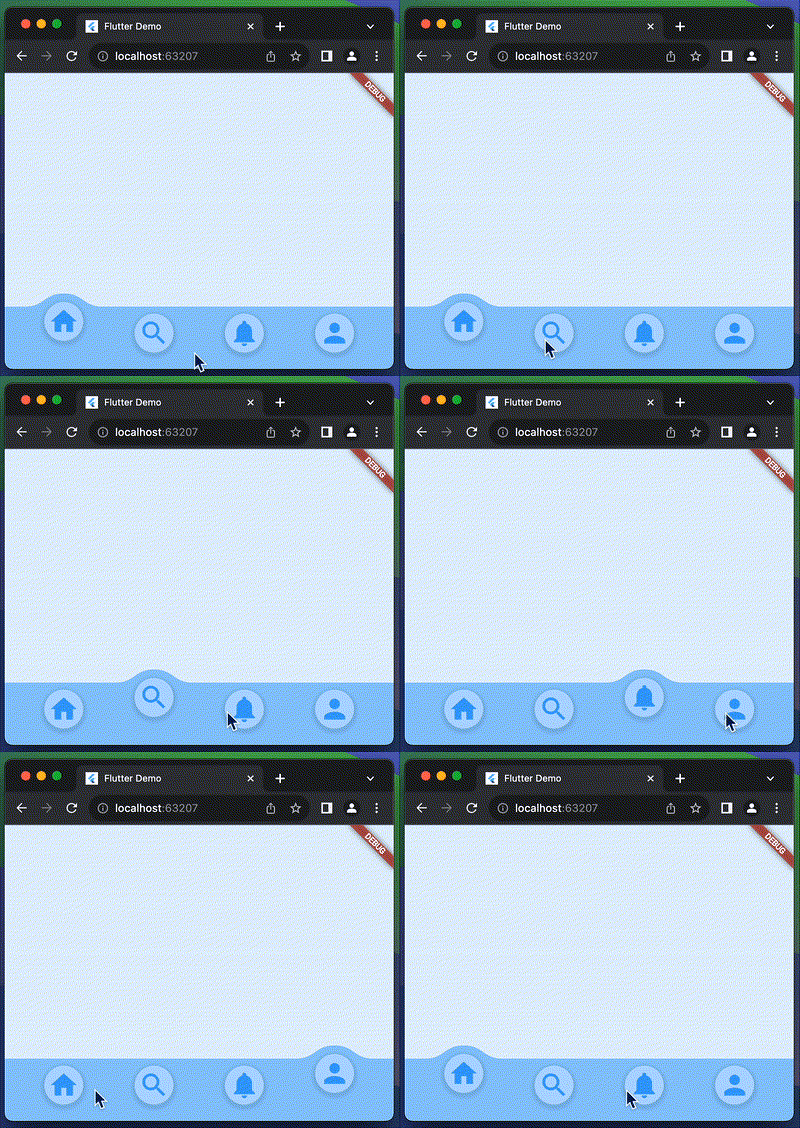
このような BottomNavigationBar を作ったのですが、Icon を上下に動かすのは AnimatedBuilder などを使って Transform や Positioned で座標を動かしてあげれば実装できます。
ポイントとなるのがにゅっと形状が変形する部分です。
今回は形状をアニメーションを使って変形させる部分を解説します。
CustomPainter を使って曲線形状を作成する

CustomPainter には様々な形状を作成するメソッドが用意されていますが、今回は cubicTo()を使って上記のようなベジェ曲線を作成します。
cubicTo()では 3 点を指定する事で曲線が作成されます。上記の図では p1~p3、p4~p6 の 2 つの曲線を作成しています。
各点の座標(1マス10)
// yは上がマイナス、下がプラスの値
const Offset p1 = Offset(20, 0);
const Offset p2 = Offset(20, -30);
const Offset p3 = Offset(40, -30);
const Offset p4 = Offset(60, -30);
const Offset p5 = Offset(60, 0);
const Offset p6 = Offset(80, 0);
各点を元にpathを生成
final path = Path();
path.cubicTo(p1.dx,p1.dy,p2.dx,p2.dy,p3.dx,p3.dy,);
path.cubicTo(p4.dx,p4.dy,p5.dx,p5.dy,p6.dx,p6.dy,);
この path を描画するために paint()で描画スタイルを指定する。
今回は、色が青、太さ 2.0 の線とします。
最後に drawPath()でキャンバスに path を描画する。
paint定義
final paint = Paint()
    ..color = Colors.blue
    ..style = PaintingStyle.stroke
    ..strokeWidth = 2.0;
キャンバスへ描画
canvas.drawPath(path, paint);
描画されたものがこちらです。

形状を変形させる
なんとなく分かると思いますが、上で指定した座標の y を全て 0 とすると直線になります。
つまり、この y の値を animation で変化させてやればそうアレになる訳です。
動的な座標
// animateValue(0〜1)は親から受け取る
const double peakHeight = 30; // 変形する高さの最大値
final double animatedHeight = peakHeight * animateValue; // 変形する高さ

const Offset p1 = Offset(20, 0);
Offset p2 = Offset(20, -animatedHeight);
Offset p3 = Offset(40, -animatedHeight);
Offset p4 = Offset(60, -animatedHeight);
const Offset p5 = Offset(60, 0);
const Offset p6 = Offset(80, 0);
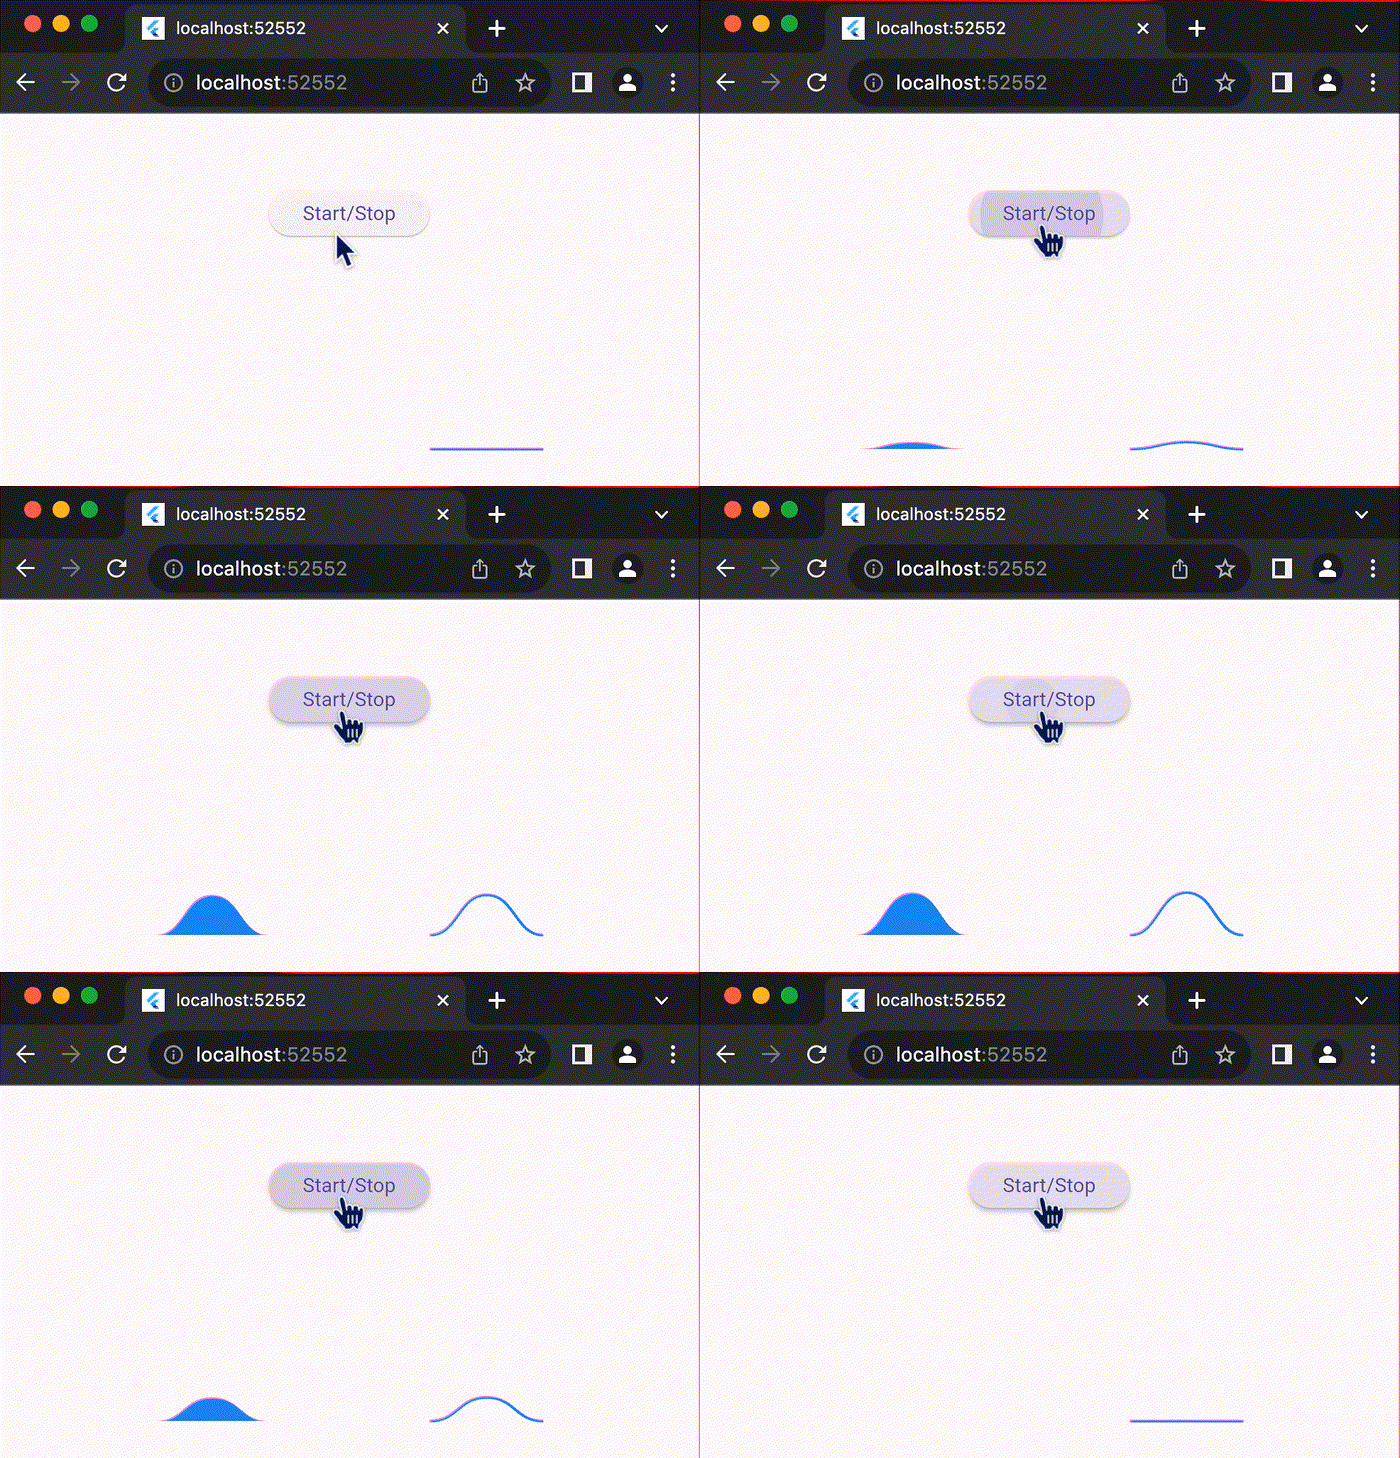
実際の動きがこちら。にゅっとなっています。
左側は塗りつぶしバージョン

塗りつぶし
final paint = Paint()
    ..color = Colors.blue
    ..style = PaintingStyle.fill // 塗りつぶし
    ..strokeWidth = 2.0;
CustomPainter全文
class MyCustomPainter extends CustomPainter {
MyCustomPainter({required this.animateValue, required this.style});
final double animateValue; // アニメーションの値
final PaintingStyle style; // PaintingStyle.fill or PaintingStyle.stroke
void paint(Canvas canvas, Size size) {
const double peakHeight = 30; // 変形する高さの最大値
final double animatedHeight = peakHeight * animateValue; // 変形する高さ
const Offset p1 = Offset(20, 0);
Offset p2 = Offset(20, -animatedHeight);
Offset p3 = Offset(40, -animatedHeight);
Offset p4 = Offset(60, -animatedHeight);
const Offset p5 = Offset(60, 0);
const Offset p6 = Offset(80, 0);
final paint = Paint()
..color = Colors.blue
..style = style
..strokeWidth = 2.0;// ペイントのスタイルを設定
final path = Path();
path.cubicTo(p1.dx,p1.dy,p2.dx,p2.dy,p3.dx,p3.dy,);
path.cubicTo(p4.dx,p4.dy,p5.dx,p5.dy,p6.dx,p6.dy,);
canvas.drawPath(path, paint);// キャンバスに描画
}
bool shouldRepaint(covariant CustomPainter oldDelegate) {
return false;
}
}
終わりに
このように path を指定して独自形状の Widget を作成できます。
また、path や座標を動的に扱うことでさらにカスタマイズで来ます。
正直なところ、複雑な path を実装したい場合は figma などの GUI でポチポチやりたいですが...
最初に紹介した CustomBottomNavigationBar のにコードを参考に貼っておきます。
参考記事

Discussion