【Flutter】flutter_portal の説明するよ、やくめだから
はじめに
ご覧いただきありがとうございます。ganです。
この記事ではflutter_portal というパッケージについて解説していきます。
flutter_portal とは
まずflutter_portal というのは何か?ということで、flutter_portal とはFlutter に元々含まれているOverlay/OverlayEntry というつくりをより使いやすい形に更新したものです。
Overlay/OverlayEntry というのはそれぞれ標準で備わっているクラスのことで、ボタンを押した時などにウィジェットを重ねたりするのに使われます。

「Overlay/OverlayEntry を使った書き方だといろいろ不便だよね」となり、新たに作られたのがflutter_portal になります。
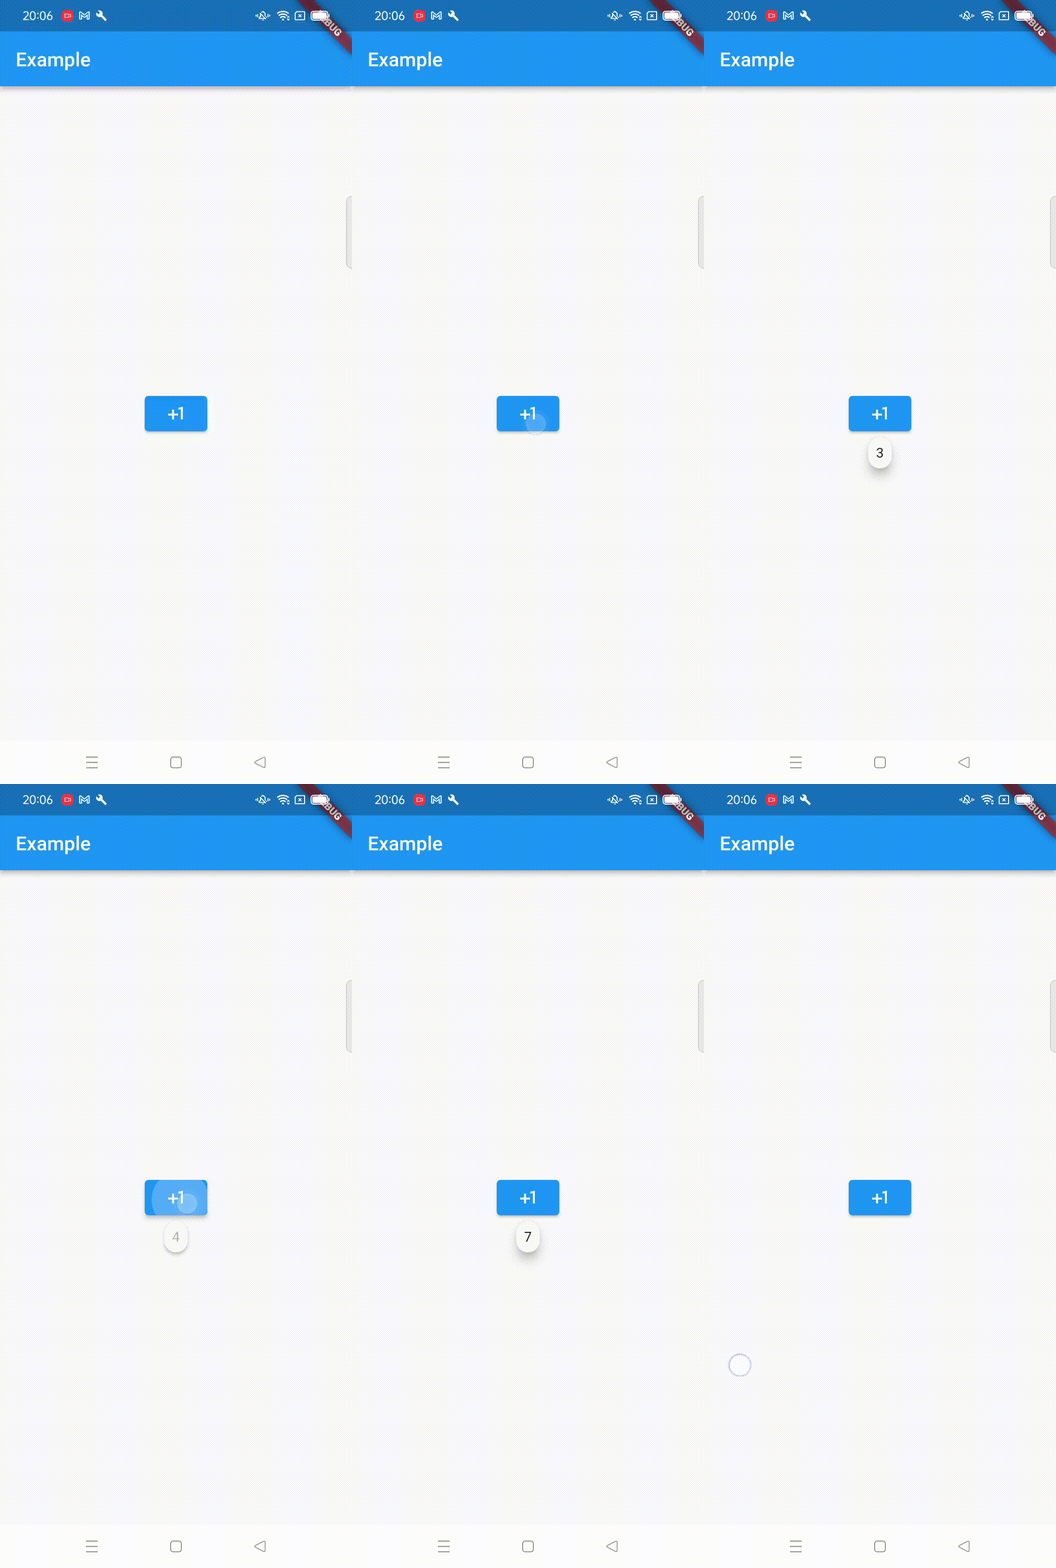
例として以下のようなものを参考に見ていきます。

flutter_portal のメリット
公式パッケージより以下の3点が挙げられます。
1. 宣言的に書ける。
Overlay/OverlayEntry を使用した書き方は命令的であり、Flutter でUI を組んでいく際には、命令的ではなく宣言的であってほしいと言うことです。
Overlay/OverlayEntry を使用した場合、OverlayEntry というクラスの中でOverlayState を変更して実装することになります。この時の変更は関数であり、あるWidget に対して関数で命令しているので命令的であるということになります。それに対してflutter_portal を使えばOverlay をWidget として実装できます。Flutter におけるText やColumn は宣言的であるのでコードがとても見やすくなる、というのがメリットになります。
Declarative, not imperative: Like everything else in the Flutter world, overlays (portals) are declarative now. Simply put your floating UI in the normal widget tree. Compare: The OverlayEntry is not a widget, and is manipulated imperatively using .insert() etc.
2. 配置に関するコードが簡単に書ける。
こちらの詳細は実際の例の方で書きます。簡単に書けるのでなんでも書けるわけではありませんが、Widget の配置に関しては十分書きやすいです。
Alignment, done easily: Built-in support for aligning an overlay next to a UI component. Compare: A custom contextual menu from scratch in a few lines of code; while Overlay makes it nontrivial to align the tooltip/menu next to a widget.
3. context が直感的である。
この部分は自分も詳しくは理解できていません。ただおそらく、Overlay/OverlayEntry を使用した場合にはOverlayState とOverlayEntry を使用する際にcontextを引数に持たせる必要があるため、使用したいWidget とOverlay に関する処理でcontext が遠くなってしまう、ということだと思います。context が離れてしまうことのデメリットは詳しくは説明できません。すいません。
The intuitive Context: The overlay entry is build with its intuitive parent as its context. Compare The Overlay approach uses the far-away overlay as its context.
flutter_portal の使用例
次に実際のコードを見ていきます。重要な点のみ下で解説します。
ちなみにflutter_portal をインストールandpub getして以下のコードをmain.dartにコピペしれば動きます。
全体のコード
import 'dart:async';
import 'package:flutter/material.dart';
import 'package:flutter_portal/flutter_portal.dart';
// This implements Medium's clap button
void main() => runApp(const MyApp());
class MyApp extends StatelessWidget {
const MyApp({Key? key}) : super(key: key);
Widget build(BuildContext context) {
return Portal(
child: MaterialApp(
home: Scaffold(
appBar: AppBar(
title: const Text('Example'),
),
body: const Center(
child: ClapButton(),
),
),
),
);
}
}
class ClapButton extends StatefulWidget {
const ClapButton({Key? key}) : super(key: key);
ClapButtonState createState() => ClapButtonState();
}
class ClapButtonState extends State<ClapButton> {
// クリック回数
int clapCount = 0;
// クリックした回数の表示・非表示
bool hasClappedRecently = false;
// 2秒後にクラップを消すためのTimer
Timer? resetHasClappedRecentlyTimer;
Widget build(BuildContext context) {
return PortalTarget(
// 表示・非表示
visible: hasClappedRecently,
// クラップの位置
anchor: const Aligned(
// follower の位置に対するクラップの位置
target: Alignment.bottomCenter,
// クラップを表示する際に必要な基準線(ボタンの境界orボタンの中心に配置できる)
follower: Alignment.topCenter,
),
// クラップが消える時にかかる時間(デフォルトは0秒)
closeDuration: kThemeChangeDuration,
// 表示するWidget(ここではクラップ)
portalFollower: TweenAnimationBuilder<double>(
// 今回はOpacity を制御しているのでbegin が0、endが1
// hasClappedRecently がfalse になるときに消えるようなアニメーションにするために
// "hasClappedRecently ? 1 : 0 "とする
tween: Tween(begin: 0, end: hasClappedRecently ? 1 : 0),
// クラップが表示されるまでにかかる時間(必須パラメータ)
duration: kThemeChangeDuration,
builder: (context, progress, child) {
return Material(
elevation: 8 * progress,
animationDuration: Duration.zero,
borderRadius: const BorderRadius.all(Radius.circular(40)),
child: Opacity(
opacity: progress,
child: child,
),
);
},
child: Padding(
padding: const EdgeInsets.all(8),
child: Text('$clapCount'),
),
),
child: ElevatedButton(
onPressed: _clap,
child: const Icon(
Icons.plus_one,
),
),
);
}
// ボタンが押された時の処理
void _clap() {
// 進行中のタイマーをリセット
resetHasClappedRecentlyTimer?.cancel();
// 2秒後にクラップを非表示
resetHasClappedRecentlyTimer = Timer(
const Duration(seconds: 2),
() => setState(() => hasClappedRecently = false),
);
setState(() {
hasClappedRecently = true;
clapCount++;
});
}
}
その他にパッケージのReadme の方でも、
Medium clap
↑今回使用した例はこれ
とGithub のリポジトリも充実しています。ぜひ参考にしてみてください。
配置に関して
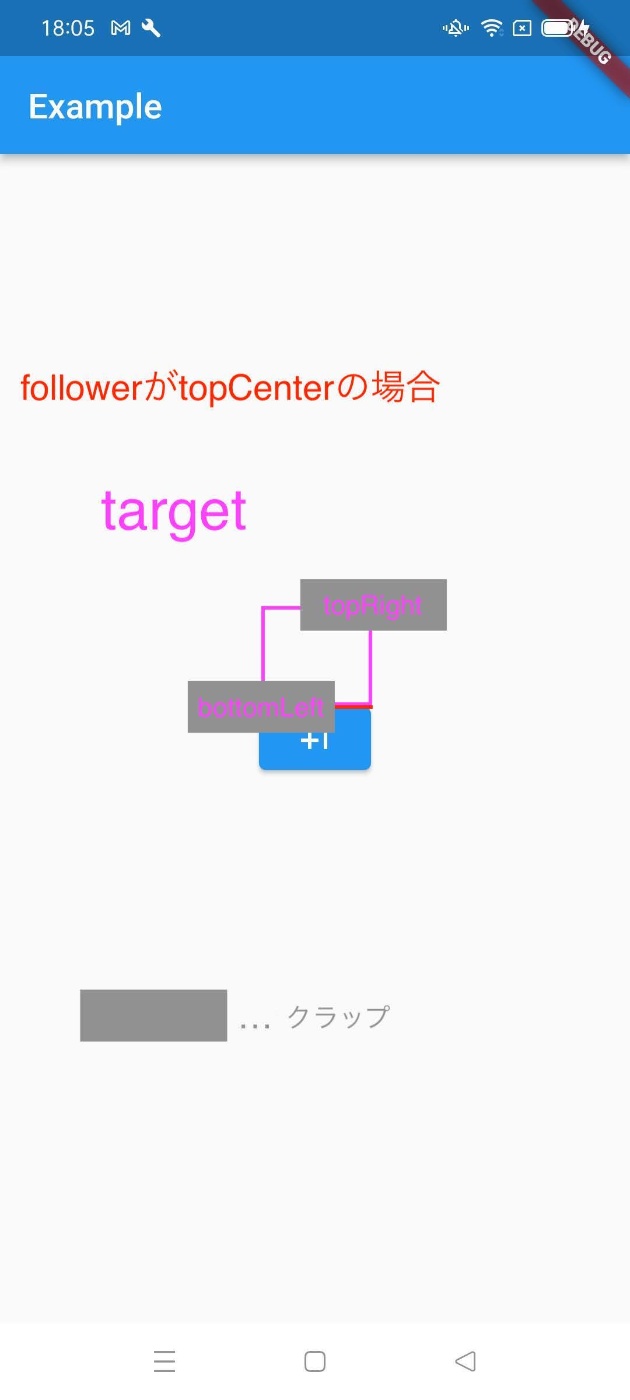
個人的にPortalTarget クラスのanchor という引数が初めに理解しにくいと思ったので解説します。以下のコードを上より抜粋します。
return PortalTarget(
    // クリップの位置
    anchor: const Aligned(
        // follower の位置に対するクリップの位置
        target: Alignment.bottomCenter,
        // クリップを表示する際に必要な基準線(ボタンの境界orボタンの中心に配置できる)
        follower: Alignment.topCenter,
    ),
follower
follower というので、子Widget に対しての基準を決めます。Alignment型のものを返してください。

target
target はfollower 位置に対してのクラップの位置を指定します。こちらもAlignment型のものを返してください。
もしfollower の値がAlignment.bottom〇〇だったとしてもtargetの向きは反転しません。top はtop です。

まとめ
今回はflutter_portal というパッケージに関しての細かい使い方を解説しました。いろいろな応用例があると思うのでぜひ活用してみてください。
最後まで読んでいただきありがとうございます!
参考記事
- 宣言的? Declarative?どういうこと?
- Implementing overlays in Flutter
Discussion