cdktfについて
はじめに
最近 Terraform をよく触っていますが冗長に記述する部分があったり、IDE周りの機能が弱く感じたため、Terraformの公式サイトでも紹介されているCDKTFを触ってみました。 https://developer.hashicorp.com/terraform/cdktf
CDKTF (CDK for Terraform) とは
CDKTFとは CDK(AWS Cloud Development Kit)を利用して Terraform コードの生成やデプロイを行えるツールです。
CDK はAWS CloudFormationのコードをTypeScriptやJavaなどの言語で記述できるツールで、最近Terraformの対応も進んできているようです。
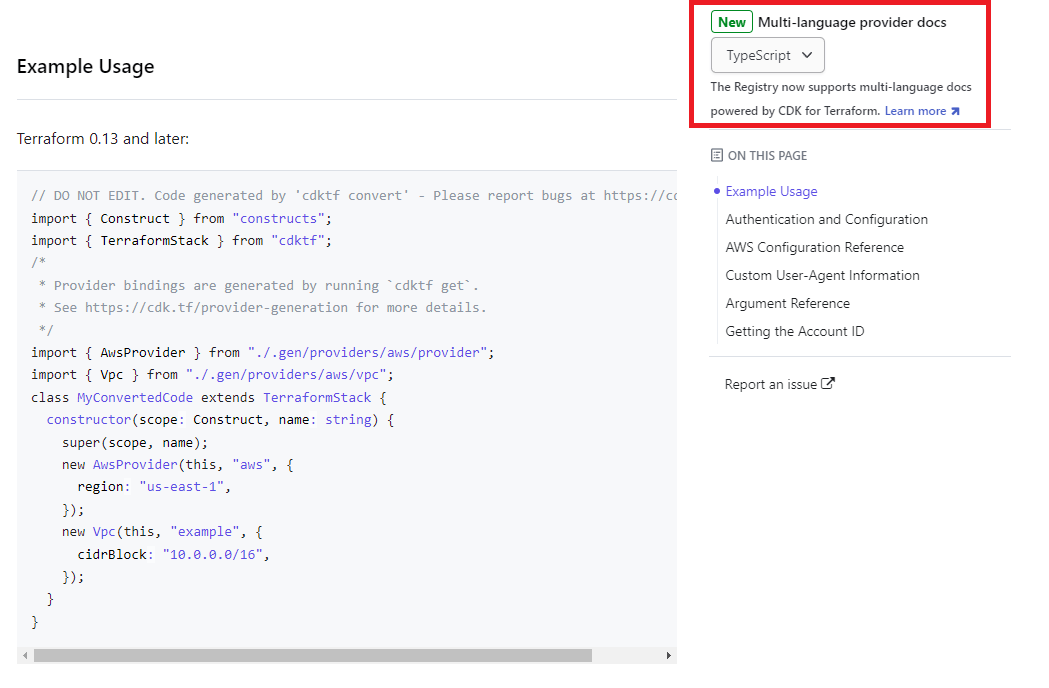
なお、最近のTerraformの各リソースのドキュメントにもCDKTF (Typescriptなど) のドキュメントもあり、CDKTFのドキュメント不足も改善されつつあります。
環境
- Ubuntu 22.04 (WSL2)
- terraform v1.6.5
- node.js v20.10.0
- npm 10.2.3
インストール手順
まずはcdktfのインストールをします。
cdktfに必要要件として以下がインストールされている必要があります。
- terraform cli: 1.2以上
- Node.js と npm: 1.6以上
cdktfはnpmパッケージで提供されているので今回npmでインストールします。(Homebrewでもインストール可能です。)
$ npm install --global cdktf-cli@latest
インストールが正常にできているかを確認しておきます。
$ cdktf --version
0.19.1
これで利用できる状態になりました。(terraform cliもインストールしておきましょう)
今回実装する構成について
公式にAWSでのチュートリアルがあるのでそれに沿って進めようと思います。
構築
まずcdktfに必要なファイル群を生成します。
初期化処理は cdktf init コマンドを実行します。
今回は記述言語をTypescriptで記述するため、以下のコマンドで初期化処理を行います。
(また tfstateファイルはローカルに保存するようにしています)
cdktf init --local --template="typescript" --providers="aws@~>4.0" --cdktf-version="0.19.1"
実行すると以下のような処理が出力されていきます。
$ cdktf init --local --template="typescript" --providers="aws@~>4.0" --cdktf-version="0.19.1"
Note: By supplying '--local' option you have chosen local storage mode for storing the state of your stack.
This means that your Terraform state file will be stored locally on disk in a file 'terraform.<STACK NAME>.tfstate' in the root of your project.
? Project Name <--- 任意のプロジェクト名を入力
? Project Description <--- プロジェクトの説明を記載
? Do you want to start from an existing Terraform project? no <-- 既にあるterraformプロジェクトをインポートするかどうか(今回はno)
? Do you want to send crash reports to the CDKTF team? no <-- エラー生じた時にクラッシュレポートをCDKTFチーム送るかどうか(今回はno)

added 2 packages, and audited 57 packages in 3s

7 packages are looking for funding
  run `npm fund` for details

found 0 vulnerabilities

added 313 packages, and audited 370 packages in 30s

38 packages are looking for funding
  run `npm fund` for details

found 0 vulnerabilities
========================================================================================================

  Your CDKTF TypeScript project is ready!

  cat help                Print this message

  Compile:
    npm run get           Import/update Terraform providers and modules (you should check-in this directory)
    npm run compile       Compile typescript code to javascript (or "npm run watch")
    npm run watch         Watch for changes and compile typescript in the background
    npm run build         Compile typescript

  Synthesize:
    cdktf synth [stack]   Synthesize Terraform resources from stacks to cdktf.out/ (ready for 'terraform apply')

  Diff:
    cdktf diff [stack]    Perform a diff (terraform plan) for the given stack

  Deploy:
    cdktf deploy [stack]  Deploy the given stack

  Destroy:
    cdktf destroy [stack] Destroy the stack

  Test:
    npm run test        Runs unit tests (edit __tests__/main-test.ts to add your own tests)
    npm run test:watch  Watches the tests and reruns them on change

  Upgrades:
    npm run upgrade        Upgrade cdktf modules to latest version
    npm run upgrade:next   Upgrade cdktf modules to latest "@next" version (last commit)

 Use Providers:

  You can add prebuilt providers (if available) or locally generated ones using the add command:

  cdktf provider add "aws@~>3.0" null kreuzwerker/docker

  You can find all prebuilt providers on npm: https://www.npmjs.com/search?q=keywords:cdktf
  You can also install these providers directly through npm:

  npm install @cdktf/provider-aws
  npm install @cdktf/provider-google
  npm install @cdktf/provider-azurerm
  npm install @cdktf/provider-docker
  npm install @cdktf/provider-github
  npm install @cdktf/provider-null

  You can also build any module or provider locally. Learn more https://cdk.tf/modules-and-providers

========================================================================================================

[2023-12-01T18:02:19.808] [INFO] default - Checking whether pre-built provider exists for the following constraints:
  provider: aws
  version : ~>4.0
  language: typescript
  cdktf   : 0.19.1

[2023-12-01T18:02:23.215] [INFO] default - Pre-built provider does not exist for the given constraints.
[2023-12-01T18:02:23.215] [INFO] default - Adding local provider registry.terraform.io/hashicorp/aws with version constraint ~>4.0 to cdktf.json
Local providers have been updated. Running cdktf get to update...
Generated typescript constructs in the output directory: .gen
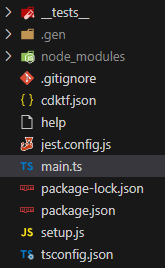
すると次のような構成ファイルが生成されています。
あとTypeScriptから呼び出しやすくするように下記パッケージも追加します。
npm install @cdktf/provider-aws
これで環境準備は終わりです。
main.ts を開くと次のようなTypescriptのコードなっています。
import { Construct } from "constructs";
import { App, TerraformStack } from "cdktf";

class MyStack extends TerraformStack {
  constructor(scope: Construct, id: string) {
    super(scope, id);

    // define resources here
  }
}

const app = new App();
new MyStack(app, "infra");
app.synth();
main.ts を開き、必要なリソースを記述していきます。
アプリケーションコードの定義
ガイドに沿ってconstructorの間にコードを記述していきます。
ガイドではEC2インスタンスを1つ立てるだけなので以下のようなコードになります。
import { Construct } from "constructs";
import { App, TerraformOutput, TerraformStack, Token } from "cdktf";

import { AwsProvider } from "@cdktf/provider-aws/lib/provider";
import { DataAwsAmi } from "@cdktf/provider-aws/lib/data-aws-ami";
import { Instance } from "@cdktf/provider-aws/lib/instance";

class MyStack extends TerraformStack {
  constructor(scope: Construct, id: string) {
    super(scope, id);

    // Provider definition
    new AwsProvider(this, "aws", {
      region: "ap-northeast-1",
    });

    // EC2
    const ec2Instance = new Instance(this, "compute", {
      ami: "ami-012261b9035f8f938",
      instanceType: "t2.micro",
      tags: {
        Name: "test-instance"
      }
    });

    // Output
    new TerraformOutput(this, "public_ip", {
      value: ec2Instance.publicIp,
    });
  }
}

const app = new App();
new MyStack(app, "infra");
app.synth();
記述ができたら、terraform実行用コードに生成できるか cdktf synth を実行して確認します。以下のような出力であればデプロイ可能なコードとなっています。
$ cdktf synth

Generated Terraform code for the stacks: infra
このまま続けてEC2をデプロイします。 cdktf deploy と実行します。
$ cdktf deploy
実行すると terraform apply と同様にデプロイを本当に実施するかの質問が出力されます。
Please review the diff output above for infra
❯ Approve  Applies the changes outlined in the plan.
  Dismiss
  Stop
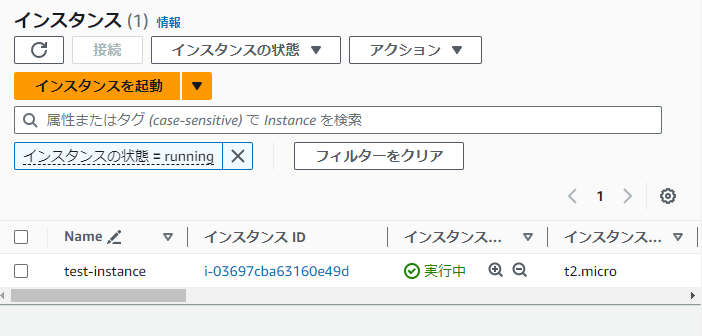
"Approve"を選択して、処理を進めるとEC2インスタンスが作成されています。
※処理は terraform apply の処理が実行されています。
またコンソールには下記のように TerraformOutput で設定した値が出力されています。
infra
       Apply complete! Resources: 1 added, 0 changed, 0 destroyed.

       Outputs:
infra  public_ip = "54.238.105.77"

  infra
  public_ip = 54.238.105.77
デプロイ前に差分を確認したい場合は cdktf diff を使うことでterraformの差分結果が表示されます。
$ cdktf diff
cdktf diff 実行ログ
もう少し進んだ書き方
もう少しサンプルをいじってみましょう
今はAMIがハードコードになっているので、dataリソースから最新のAMIが取得できるようにしてみます。
以下のように書き換えてみました。
import { Construct } from "constructs";
import { App, TerraformOutput, TerraformStack, Token } from "cdktf";

import { AwsProvider } from "@cdktf/provider-aws/lib/provider";
import { DataAwsAmi } from "@cdktf/provider-aws/lib/data-aws-ami";
import { Instance } from "@cdktf/provider-aws/lib/instance";

class MyStack extends TerraformStack {
  constructor(scope: Construct, id: string) {
    super(scope, id);

    // Provider definition
    new AwsProvider(this, "aws", {
      region: "ap-northeast-1",
      defaultTags: [
        {tags: {"ManagedBy": "CDKTF"}},
      ],
    });

    // EC2
    const amiImage = new DataAwsAmi(this, "ami", {
      filter: [
        {
          name: "architecture",
          values: ["x86_64"],
        },
        {
          name: "name",
          values: ["al2023-ami-2023*"],
        },
      ],
      mostRecent: true,
      owners: ["amazon"],
    });
    const ec2Instance = new Instance(this, "compute", {
      ami: Token.asString(amiImage.id),
      instanceType: "t2.micro",
      tags: {
        Name: "test-instance"
      }
    });

    // Output
    new TerraformOutput(this, "public_ip", {
      value: ec2Instance.publicIp,
    });
  }
}

const app = new App();
new MyStack(app, "infra");
app.synth();
まず以下のコードですが、terraformでのdefault_tagsを追加しています。
    new AwsProvider(this, "aws", {
      region: "ap-northeast-1",
      defaultTags: [
        {tags: {"ManagedBy": "CDKTF"}},
      ],
    });
次にcdktfでdataリソースを呼び出し、AMIを動的に取得できるようにしています。
    const amiImage = new DataAwsAmi(this, "ami", {
      filter: [
        {
          name: "architecture",
          values: ["x86_64"],
        },
        {
          name: "name",
          values: ["al2023-ami-2023*"],
        },
      ],
      mostRecent: true,
      owners: ["amazon"],
    });
最後にAMIの値をハードコードな記述からdataリソース取得した値をセットするように変えます。
    const ec2Instance = new Instance(this, "compute", {
      ami: Token.asString(amiImage.id),
      instanceType: "t2.micro",
      tags: {
        Name: "test-instance"
      }
    });
なおここで、Token.asString() を使用しているのは、dataリソースから取得した値は構成を適用するまで値が確定せず、正しくTerraformのコードが出力されない可能性があります。
安全にTerraformのコードが出力できるように Token.asString() を使用しています。
これを cdktf deploy するとdataリソースからAMIのIDを取得して、EC2が生成されるようになります。
さいごに
さいごに後片付けとして今回作ったリソースは削除します。
コマンドは cdktf destroy となります。
$ cdktf destroy
実行ログ
こんな形でterraformの定義をTypescriptで作っていくことができます。
作っていてよかった点は、Typescriptなど既存の言語機能を使用できるため、エコシステムが整っており、コードを書いていて楽しかったです。
また今回は短いコードでしたが、リソースが複数あるようなケースはファイル構成もやりやすそうだなと感じました。
弱い点は、結局インフラは設定値が決まっていたりもするので Terraform のような宣言的記述のほうが理解しやすい人が多いのかな、というところと
事例が少ないのでドキュメントや情報が見つけにくいところかなと思います。(Terraform公式でもチュートリアルが拡充されていて改善されつつはあります)
今後も楽しみなツールで適時新しい情報を仕入れていきたいなと思います。
こういった機能がほしいなとかあればこちらの ConstructHub で公開されている機能でよりインフラ構築がやりやすくなるかもしれません。
Discussion