🗺️
[SwiftUI]MapKitでMapとピンを表示する
SwiftUIで使用できるMap
SwiftUIでは、
MapKitのMap(UIViewRepresentableに準拠しない)
UIKitのMKMapView(UIViewRepresentableに準拠する)
のどちらかを使用して、Mapを表示できます。
MapKitのMapはUIKitのMKMapViewに比べて、
現在の向いている方向を表示できない、Mapの回転ができないなどの制限がありますが、
特定の領域を表示したい場合などは、手軽に使用できます。
今回はMapKitのMapの使い方をまとめました。
表示領域を指定したMapの手順
1. MapKitをインポート
import MapKit
2. 表示領域を定義
- Mapの表示領域をmで指定する方法
@State private var region = MKCoordinateRegion(
    //Mapの中心の緯度経度
    center: CLLocationCoordinate2D(latitude: 37.334900,
                                   longitude: -122.009020),
    //緯度の表示領域(m)
    latitudinalMeters: 750,
    //経度の表示領域(m)
    longitudinalMeters: 750
)
- Mapの表示領域を縮尺で指定する方法
@State private var region = MKCoordinateRegion(
    //Mapの中心の緯度経度
    center: CLLocationCoordinate2D(latitude: 37.334900,
                                   longitude: -122.009020),
    //表示領域の縮尺
    span: MKCoordinateSpan(latitudeDelta: 0.008,
                           longitudeDelta: 0.008)
)
3. Mapを表示
- もっともシンプルな引数
var body: some View {
    Map(coordinateRegion: $region)
}
- オプションの引数を指定(マーカー関係は後述)
var body: some View {
    Map(coordinateRegion: $region,
        //Mapの操作の指定
        interactionModes: .pan,
        //現在地の表示
        showsUserLocation: false
    )
}
interactionModes
Mapで許可するGestureを下記の4つから選択できます。
- .all
.panと.zoom両方の許可 - .pan
スワイプでの移動の許可 - .zoom
ピンチなどでの拡大・縮小の許可 - []
タッチ操作を受け付けない
showsUserLocation
ユーザーが位置情報へのアクセスを許可した場合に現在地が表示されます。
アクセスの要求の仕方は後述するユーザーの位置情報へのアクセスを要求をご覧ください。
4. 完成🎉

ここまでのコード
ContentView
import SwiftUI
import MapKit

struct ContentView: View {

    @State private var region = MKCoordinateRegion(
        //Mapの中心の緯度経度
        center: CLLocationCoordinate2D(latitude: 37.334900,
                                       longitude: -122.009020),
        //緯度の表示領域(m)
        latitudinalMeters: 750,
        //経度の表示領域(m)
        longitudinalMeters: 750
    )

    var body: some View {
        Map(coordinateRegion: $region,
            //Mapの操作の指定
            interactionModes: .pan,
            //現在地の表示
            showsUserLocation: false
        )
    }
}
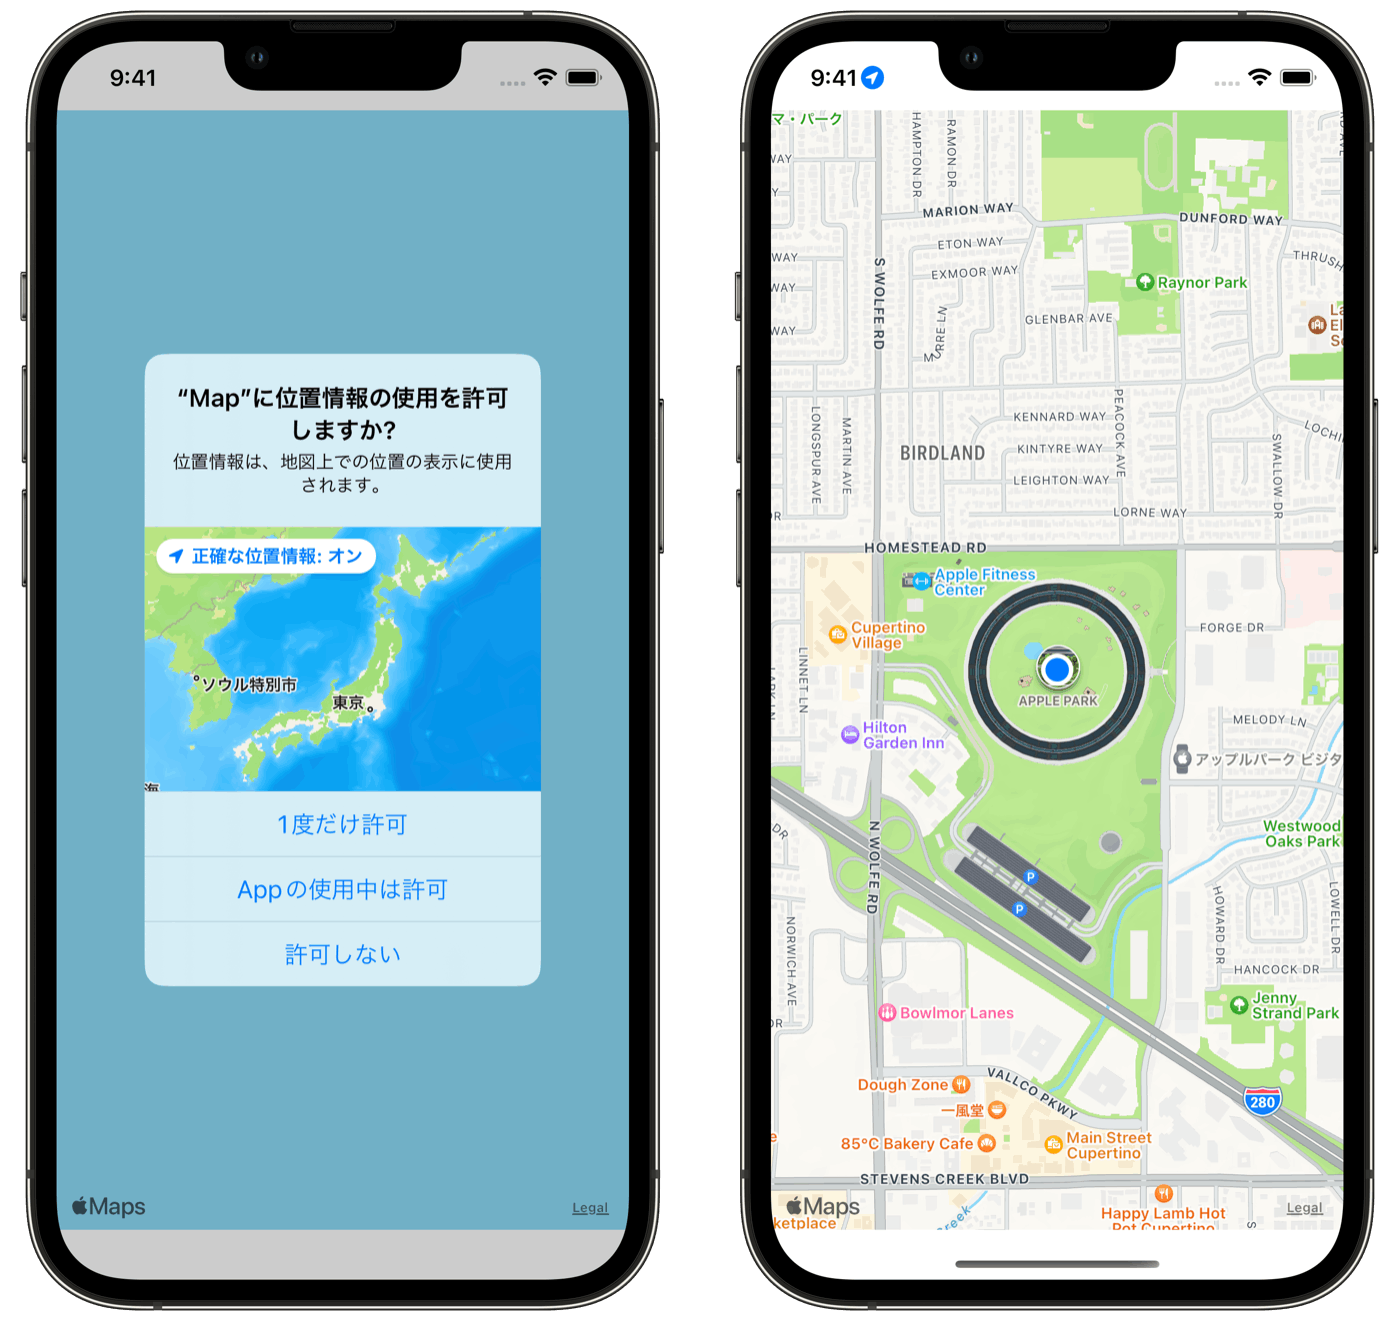
現在地を追従するMapの手順
1. MapKitをインポート
import MapKit
2.表示領域を定義
@State private var region = MKCoordinateRegion()
3. Mapを表示
var body: some View {
    Map(coordinateRegion: $region,
        //Mapの操作の指定
        interactionModes: .zoom,
        //現在地の表示
        showsUserLocation: true,
        //現在地の追従
        userTrackingMode: .constant(MapUserTrackingMode.follow)
    )
}
interactionModes
Mapで許可するGestureを下記の4つから選択できます。
- .all
.panと.zoom両方の許可 - .pan
スワイプでの移動の許可 - .zoom
ピンチなどでの拡大・縮小の許可 - []
タッチ操作を受け付けない
userTrackingMode
Mapの中心を、現在地の移動に合わせて追従させるかを選択できます。
- .follow
追従を許可 - .none
追従を許可しない
4. ユーザーの位置情報へのアクセスを要求
1. Info.plistにKeyとValueの追加
Key
Privacy - Location When In Use Usage Description
Valueには下記のような利用用途を記載します。
位置情報は、地図上での位置の表示に使用されます。
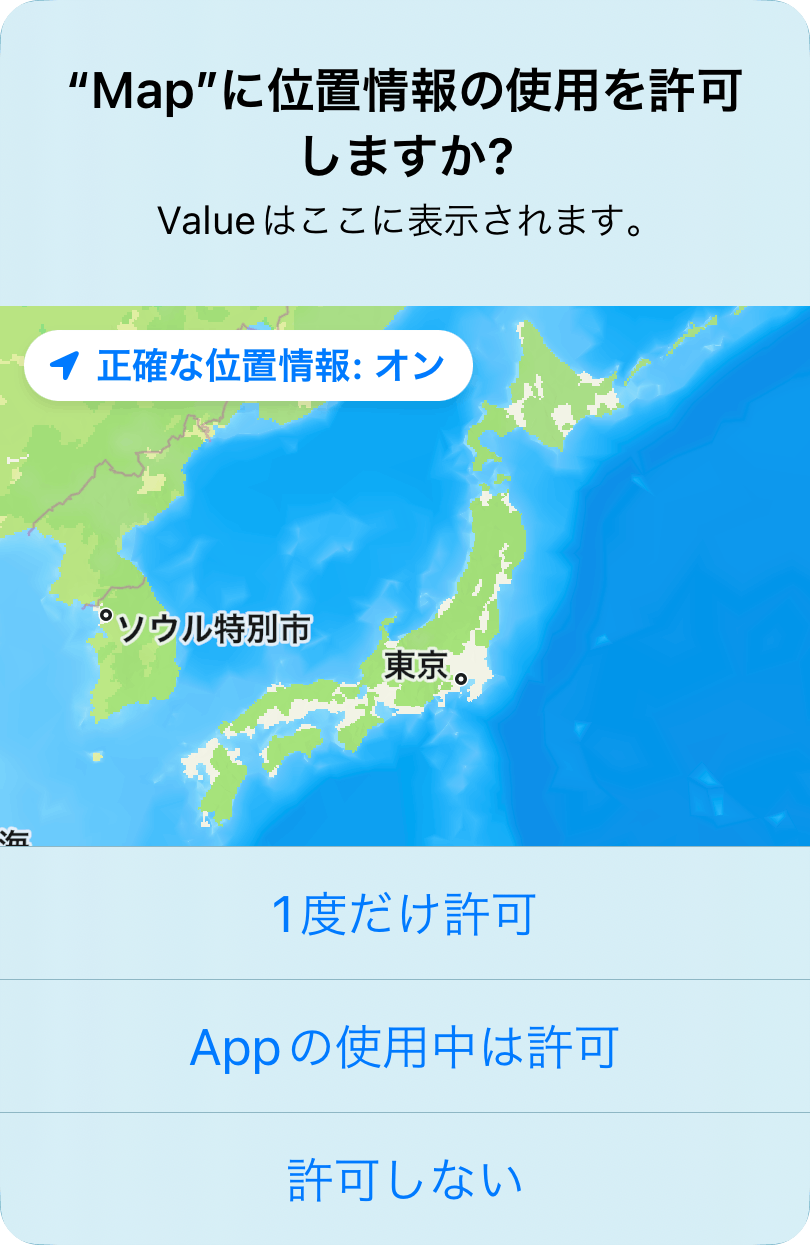
2. 位置情報へのアクセスを要求
 var body: some View {
     Map(coordinateRegion: $region,
         //Mapの操作の指定
         interactionModes: .zoom,
         //現在地の表示
         showsUserLocation: true,
         //現在地の追従
         userTrackingMode: .constant(MapUserTrackingMode.follow)
     )
+    .task(){
+        //位置情報へのアクセスを要求
+        let manager = CLLocationManager()
+        manager.requestWhenInUseAuthorization()
+    }
 }
5. 完成🎉
ここまでのコード
ContentView
import SwiftUI
import MapKit

struct ContentView: View {

    @State private var region = MKCoordinateRegion()

    var body: some View {
        Map(coordinateRegion: $region,
            //Mapの操作の指定
            interactionModes: .zoom,
            //現在地の表示
            showsUserLocation: true,
            //現在地の追従
            userTrackingMode: .constant(MapUserTrackingMode.follow)
        )
        .task(){
            //位置情報へのアクセスを要求
            let manager = CLLocationManager()
            manager.requestWhenInUseAuthorization()
        }
    }
}
マーカーを表示する手順
1. Mapを表示
ここからの手順は、"表示領域を指定したMapの手順"の完成形に、
マーカーを表示させるコードを追加していきます。
ここまでのコード
ContentView
import SwiftUI
import MapKit

struct ContentView: View {

    @State private var region = MKCoordinateRegion(
        //Mapの中心の緯度経度
        center: CLLocationCoordinate2D(latitude: 37.334900,
                                       longitude: -122.009020),
        //緯度の表示領域(m)
        latitudinalMeters: 750,
        //経度の表示領域(m)
        longitudinalMeters: 750
    )

    var body: some View {
        Map(coordinateRegion: $region,
            //Mapの操作の指定
            interactionModes: .pan,
            //現在地の表示
            showsUserLocation: false
        )
    }
}
2. マーカーの構造体を作成
struct IdentifiablePlace: Identifiable {
    let id: UUID
    let location: CLLocationCoordinate2D
    init(id: UUID = UUID(), lat: Double, long: Double) {
        self.id = id
        self.location = CLLocationCoordinate2D(
            latitude: lat,
            longitude: long)
    }
}
3. マーカーの場所を定義
let place = [IdentifiablePlace(lat: 37.334900, long: -122.009020),
             IdentifiablePlace(lat: 37.33089, long: -122.00746)]
4. マーカーを表示
マーカーは2種類のデザインから選択するか、自分で作成することができます。
-
MapPin(Deprecated)
iOS16~Deprecatedになりました。

指定する名前が違うだけで後述するMapMarkerの使い方とまったく同じです。
MapPin(coordinate: place.location,
       tint: Color.orange)
- MapMarker

 var body: some View {
     Map(coordinateRegion: $region,
         //Mapの操作の指定
         interactionModes: .pan,
         //現在地の表示
         showsUserLocation: false,
+        //マーカの指定
+        annotationItems: place)
+    { place in
+        MapMarker(coordinate: place.location,
+                  tint: Color.orange)
+    }
 }
tint
マーカーの色を指定しています。
指定できる色の一覧は下記のURLから確認できます。
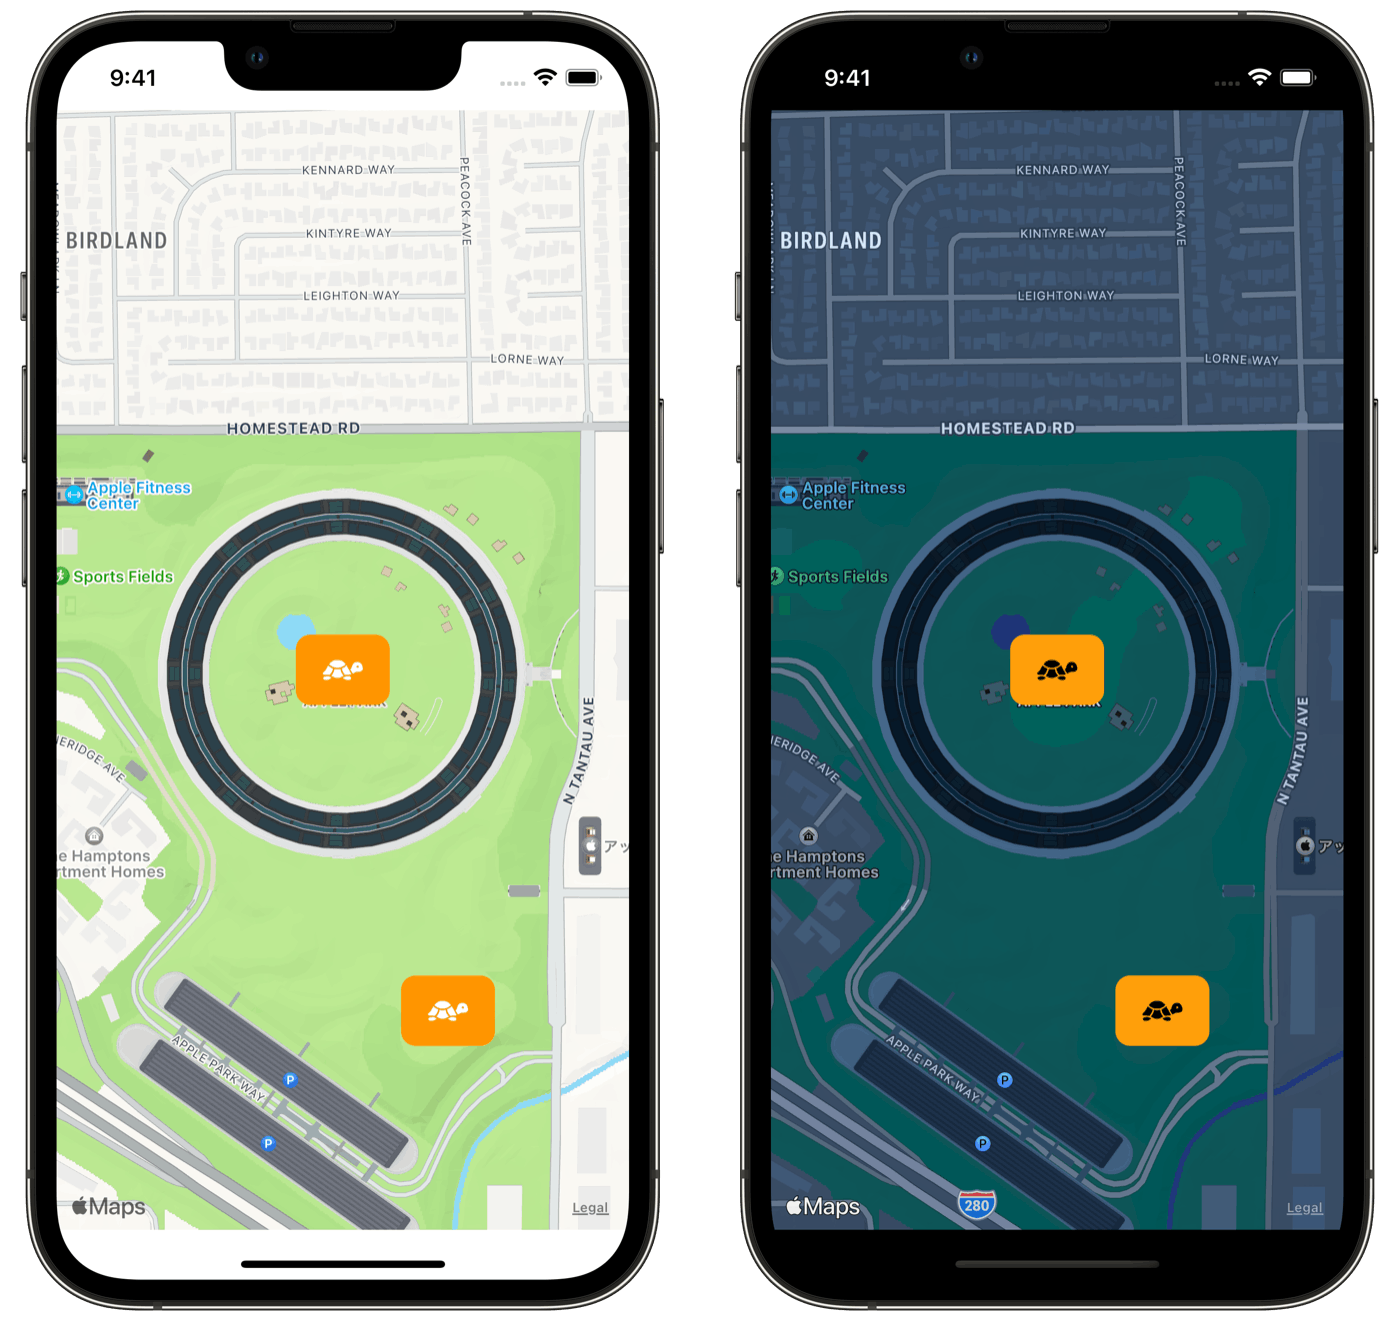
- MapAnnotation
自分でマーカーのデザインを作成できます。

 var body: some View {
     Map(coordinateRegion: $region,
         //Mapの操作の指定
         interactionModes: .pan,
         //現在地の表示
         showsUserLocation: false,
+        //マーカの指定
+        annotationItems: place)
+    { place in
+        MapAnnotation(coordinate: place.location) {
+            Image(systemName: "tortoise.fill")
+                .foregroundColor(Color(UIColor.systemBackground))
+                .padding()
+                .background(Color.orange.cornerRadius(10))
+        }
+    }
 }
5. 完成🎉
ここまでのコード
ContentView
import SwiftUI
import MapKit

struct IdentifiablePlace: Identifiable {
    let id: UUID
    let location: CLLocationCoordinate2D
    init(id: UUID = UUID(), lat: Double, long: Double) {
        self.id = id
        self.location = CLLocationCoordinate2D(
            latitude: lat,
            longitude: long)
    }
}

struct PinMapView: View {

    let place = [IdentifiablePlace(lat: 37.334900, long: -122.009020),
                 IdentifiablePlace(lat: 37.33089, long: -122.00746)]

    @State private var region = MKCoordinateRegion(
        //Mapの中心の緯度経度
        center: CLLocationCoordinate2D(latitude: 37.334900,
                                       longitude: -122.009020),
        //緯度の表示領域(m)
        latitudinalMeters: 750,
        //経度の表示領域(m)
        longitudinalMeters: 750
    )

    var body: some View {
        Map(coordinateRegion: $region,
            //Mapの操作の指定
            interactionModes: .pan,
            //現在地の表示
            showsUserLocation: false,
            //マーカの指定
            annotationItems: place)
        { place in
            MapAnnotation(coordinate: place.location) {
                Image(systemName: "tortoise.fill")
                    .foregroundColor(Color(UIColor.systemBackground))
                    .padding()
                    .background(Color.orange.cornerRadius(10))
            }
        }
    }
}
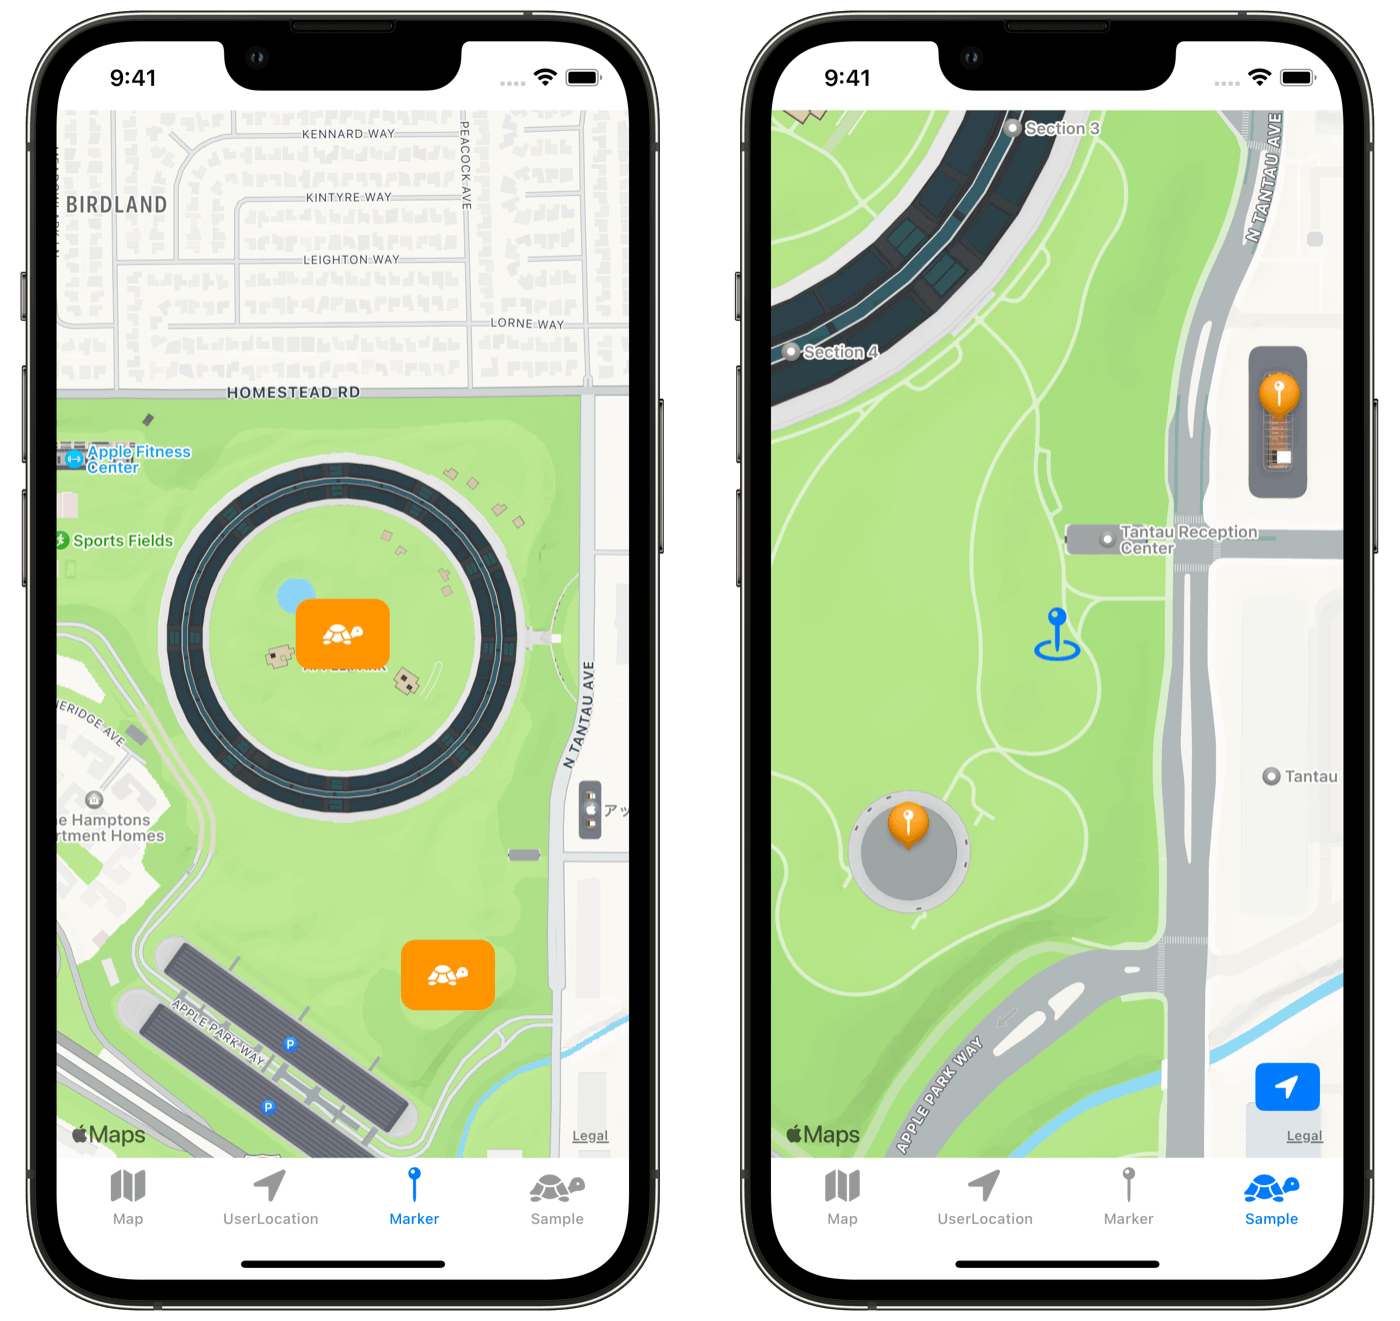
Mapを使用したサンプルアプリ
この記事で紹介した、
- 表示領域を指定したMapの手順
- 現在地を追従するMapの手順
- マーカーを表示する手順
それぞれの完成形のコードと、上記の機能組み合わせたサンプルをGitHubに公開しました。
"現在地に戻る"ボタンや、マーカーを追加する機能なども実装しています。
豆知識
純正Mapを開くためのURLスキームのリファレンスがAppleから提供されています。
Discussion