Flutter + Riverpod + FreezedでListオブジェクトを状態管理
Flutterで状態管理を行う選択肢としていくつかあるようですが、記事を執筆している2023年1月時点ではRiverpodが標準的に使われているようです。
ということで、Riverpodの勉強を始めたのですが、簡単なStringデータの例はすぐに理解できたのですが、List形式でデータを保持させて、Riverpodで管理させようとするとデータを変更したのにWidgetに反映されない、など理解するために時間がかかったので、記事としてまとめてみました。
flutter + Riverpodで簡単なTodo管理アプリの作成を行なってみました。
作成するアプリ
説明をシンプルにするため見た目はとりあえず置いといて、最低限機能する以下のTodoアプリを作ります。
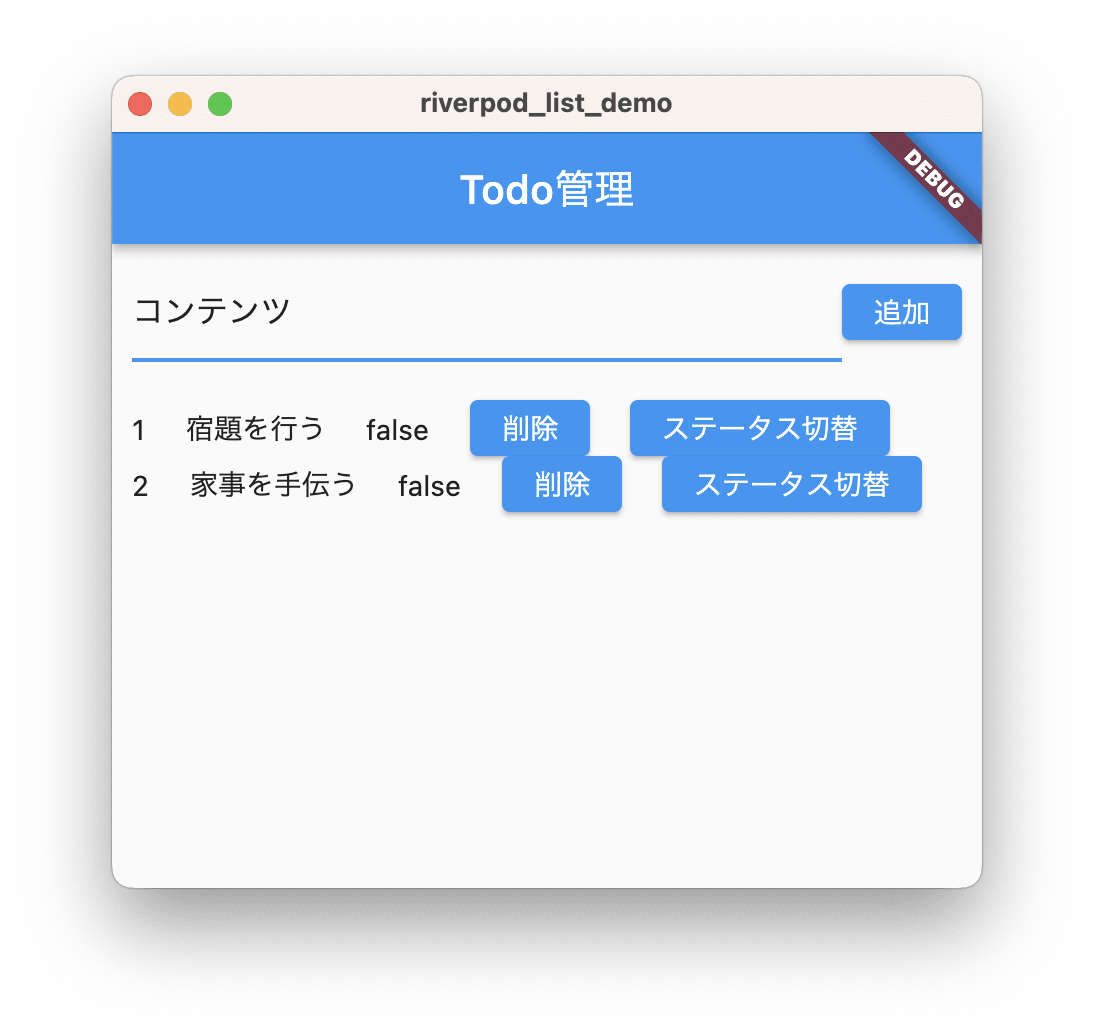
機能としては、
- Todoアイテムを追加
- Todoアイテムを削除
- Todoアイテムの完了ステータスを切替(false <-> true)
主なオブジェクト
今回ポイントとなるオブジェクトは以下の通りです。

Riverpodでは用途に応じて複数のProviderが用意されていますが、今回はStateNotifierProviderを使っています。
データの管理自体はStateNotifierが担っており、StateNotifierはイミュータブルなオブジェクトを管理します。
イミュータブルというところが重要で、イミュータブルであるためオブジェクトが保持するデータは変更できません。
そこで、データを変更して、Widgetに変更を反映させるためには、イミュータブルなオブジェクトを新規に作成して、StateNotifierで管理させるオブジェクトを入れ替える必要があります。
StateNotifierはstate変数に管理するオブジェクトへの参照を格納しており、state変数の参照先が変更されることで状態変更を検知し、StateNotifierProviderを介して、Widgetに変更を通知し再描画を行います。
データを変更する際はWidgetからStateNotifierで実装するメソッドを呼び出すことで行います。
このメソッドを実装する際に新規にオブジェクトを作成して、stateを変更するようにします。
Freezedパッケージ
上記で説明したイミュータブルなオブジェクトは一から開発しても良いのですが、
Riverpodの開発者がFreezedというイミュータブルなクラスを作成するためのパッケージを開発されているので、そちらを使用しています。
今回作成したソースコードの格納場所
今回作成したソースコードはGitHubに公開しています。
アプリの開発手順
では、実際にアプリを作成していきます。
新規flutterプロジェクト作成
Android Studioを使用して、riverpod_list_demoという新規にプロジェクトを作成します。
今回はこちらで生成されたソースファイル群を前提に説明をしています。
packageインストール
必要なパッケージをインストールします。
pubspec.yamlに以下を追加して、Pub getします。
バージョンは記事執筆時点(2023年1月)の最新版を指定しています。
dependencies:
  flutter_riverpod: ^2.1.3
  freezed_annotation: ^2.2.0

dev_dependencies:
  freezed: ^2.3.2
  build_runner: ^2.3.3
flutter_riverpodはRiverpodを使用するためのパッケージで、それ以外はFreezedを使用してイミュータブルなクラスを開発するために必要なパッケージとなります。
FreezedによるイミュータブルなTodoクラスの作成
今回はTodoクラスにTodoの情報を持たせることにします。
このTodoクラスのオブジェクトのListを状態として管理します。
TodoクラスはFreezedを使用して実装します。
Todoクラスのソースを以下の通り新規に作成します。
ただし、コンパイルエラーが出ますが、ここでは一旦無視します。
このあと、ソースを自動生成することでコンパイルエラーは解消されます。
import 'package:freezed_annotation/freezed_annotation.dart';
part 'todo.freezed.dart';
class Todo with _$Todo {
const factory Todo({
required int id,
required String content,
required bool completed,
}) = _Todo;
}
Freezedクラスの自動生成
上記のクラスで@freezedというアノテーションを付与しましたが、このアノテーションが付与されたクラスをもとに自動でソースコードを生成するコマンドbuild_runnerが用意されています。
プロジェクトのルートから以下のコマンドを実行することで、@freezedが付与されたクラスと同じディレクトリにソースコードが生成されます。
flutter pub run build_runner build
成功すれば、コンソールに以下の通り出力され、todo.freezed.dartファイルが生成され、コンパイルエラーが解消されます。
% flutter pub run build_runner build
[INFO] Generating build script...
[INFO] Generating build script completed, took 225ms

[INFO] Precompiling build script......
[INFO] Precompiling build script... completed, took 3.6s

[INFO] Initializing inputs
[INFO] Building new asset graph...
[INFO] Building new asset graph completed, took 429ms

[INFO] Checking for unexpected pre-existing outputs....
[INFO] Checking for unexpected pre-existing outputs. completed, took 0ms

[INFO] Running build...
[INFO] Generating SDK summary...
[INFO] 1.2s elapsed, 0/3 actions completed.
[INFO] 2.4s elapsed, 0/3 actions completed.
[INFO] Generating SDK summary completed, took 2.6s

[INFO] Running build completed, took 3.0s

[INFO] Caching finalized dependency graph...
[INFO] Caching finalized dependency graph completed, took 16ms

[INFO] Succeeded after 3.0s with 1 outputs (3 actions)
なお、Freezedを使ってJsonを扱う機能も実装しておくのが定石のようですが、今回は話を簡単にするためにあえて省略しています。
StateNotifierクラスの作成
データを管理するためのStateNotifierを継承させたクラスTodoListNotifierを実装します。
また、同じソースにStateNotifierProviderオブジェクトも定義します。
import 'package:flutter_riverpod/flutter_riverpod.dart';
import 'package:riverpod_list_demo/todo.dart';

final todoListProvider =
    StateNotifierProvider<TodoListNotifier, List<Todo>>((ref) {
  return TodoListNotifier();
});

class TodoListNotifier extends StateNotifier<List<Todo>> {
  TodoListNotifier() : super([]);

  void addTodo(Todo todo) {
    state = [...state, todo];
  }

  void removeTodo(int id) {
    state = state.where((todo) => todo.id != id).toList();
  }

  void toggleCompleted(int id) {
    state = state
        .map((todo) => Todo(
              id: todo.id,
              content: todo.content,
              completed: (id != todo.id) ? todo.completed : !todo.completed,
            ))
        .toList();
  }
}
TodoListNotifierクラスで実装しているメソッドが今回のポイントで、Listデータを更新せずに、現在管理しているListデータをもとに新しいListオブジェクトを生成して、state変数に設定しています。
ComsumerWidgetを作成
Todoデータを変更したり、変更の通知を受け取り再描画するConsumerWidgetを継承したTodoListPageクラスを作成します。
今回は画面に描画する内容をまるっとこのクラスに含めてしまっており、データが変更されると全体が再描画されてしまいます。
きちんとアプリを作成する際はスコープ等を考慮してください。
import 'package:flutter/material.dart';
import 'package:flutter_riverpod/flutter_riverpod.dart';
import 'package:riverpod_list_demo/todo.dart';
import 'package:riverpod_list_demo/todo_provider.dart';
class TodoListPage extends ConsumerWidget {
final todoContentTextController = TextEditingController();
final todoContentTextFocusNode = FocusNode();
TodoListPage({super.key});
Widget build(BuildContext context, WidgetRef ref) {
// TodoListProvider
    List<Todo> todoList = ref.watch(todoListProvider);
    TodoListNotifier todoListNotifier = ref.read(todoListProvider.notifier);
// 追加ボタン押下
onPressedAddButton() {
String content = todoContentTextController.text;
todoContentTextController.clear();
// 新規TodoアイテムのidはListの最後の要素のid+1とする。ただし、空の場合は1とする。
int id = (todoList.isEmpty) ? 1 : todoList.last.id + 1;
// 新規Todoアイテム
Todo todo = Todo(
id: id,
content: content,
completed: false,
);
todoListNotifier.addTodo(todo);
// Todoリストを追加したあと、TextFieldにFocusを移動
FocusScope.of(context).requestFocus(todoContentTextFocusNode);
}
// 削除ボタン押下
onPressedDeleteButton(int index) {
todoListNotifier.removeTodo(todoList[index].id);
}
// 切替ボタン押下
onPressedToggleButton(int index) {
todoListNotifier.toggleCompleted(todoList[index].id);
}
return Scaffold(
appBar: AppBar(
title: const Text('Todo管理'),
),
body: Padding(
padding: const EdgeInsets.all(10.0),
child: Column(
children: [
Row(
children: [
Expanded(
child: TextField(
controller: todoContentTextController,
focusNode: todoContentTextFocusNode,
),
),
ElevatedButton(
onPressed: onPressedAddButton,
child: const Text('追加'),
),
],
),
const SizedBox(
height: 20,
),
Expanded(
child: ListView.builder(
itemCount: todoList.length,
itemBuilder: (BuildContext context, int index) {
return Row(
children: [
Text(todoList[index].id.toString()),
const SizedBox(width: 20),
Text(todoList[index].content),
const SizedBox(width: 20),
Text(todoList[index].completed.toString()),
const SizedBox(width: 20),
ElevatedButton(
onPressed: () => onPressedDeleteButton(index),
child: const Text('削除'),
),
const SizedBox(width: 20),
ElevatedButton(
onPressed: () => onPressedToggleButton(index),
child: const Text('ステータス切替'),
),
],
);
},
),
),
],
),
),
);
}
}
ポイントは以下で、先に作成したStateNotifierProviderとStateNotifierを参照するように以下で定義しています。
1行目は状態(データ)を参照し、変更された場合は通知を受けてWidgetを再描画するためのものです。
2行目はStateNotifierクラスで定義した変更用のメソッドを使って状態(データ)を変更するためのものです。
List<Todo> todoList = ref.watch(todoListProvider);
TodoListNotifier todoListNotifier = ref.read(todoListProvider.notifier);
main.dartの修正
自動生成されたmain.dartを以下の通り修正します。
import 'package:flutter/material.dart';
import 'package:flutter_riverpod/flutter_riverpod.dart';
import 'package:riverpod_list_demo/todo_list_page.dart';
void main() {
runApp(const ProviderScope(child: MyApp()));
}
class MyApp extends StatelessWidget {
const MyApp({super.key});
// This widget is the root of your application.
Widget build(BuildContext context) {
return MaterialApp(
theme: ThemeData(
primarySwatch: Colors.blue,
),
home: TodoListPage(),
);
}
}
ポイントは以下の行で、Widget全体をProviderScopeでラップして、Riverpodを使えるようにしています。
runApp(const ProviderScope(child: MyApp()));
今回の記事は以上となります。
一度理解できればそれほど複雑ではありませんが、一番最初は各サイト等を調べつつ苦戦したので自身の整理のために記事として残してみましたが、同じような方の参考となれば幸いです。
また、理解が不足している箇所がありそうで、間違っている箇所があれば指摘頂けると幸いです。
Discussion