Closed15
Next.js+Mantineをやっていく
MantineProviderを使うことでカラー設定やフォント設定などが行えるみたい
import { AppProps } from "next/app";
import Head from "next/head";
import { MantineProvider } from "@mantine/core";

export default function App(props: AppProps) {
  const { Component, pageProps } = props;

  return (
    <>
      <Head>
        <title>Page title</title>
        <meta
          name="viewport"
          content="minimum-scale=1, initial-scale=1, width=device-width"
        />
      </Head>

      <MantineProvider
        withGlobalStyles
        withNormalizeCSS
        theme={{
          colorScheme: "light",
          fontFamily: "Klee One",
        }}
      >
        <Component {...pageProps} />
      </MantineProvider>
    </>
  );
}
細かなスタイリングに関して
createStylesを使ってcssを作成していくといいみたい
- クラスの競合を予防
- CSS in JS だから簡単に変数も使える
- この中でtailwindライクなcss用のプロパティも使える?多分
createStylesの第一引数に書いてあるthemeを使えばいけそう
import { createStyles } from '@mantine/core';

const useStyles = createStyles((theme, _params, getRef) => ({
  wrapper: {
    // subscribe to color scheme changes right in your styles
    backgroundColor: theme.colorScheme === 'dark' ? theme.colors.dark[5] : theme.colors.gray[1],
    maxWidth: 400,
    width: '100%',
    height: 180,
    display: 'flex',
    alignItems: 'center',
    justifyContent: 'center',
    marginLeft: 'auto',
    marginRight: 'auto',
    borderRadius: theme.radius.sm,

    // Dynamic media queries, define breakpoints in theme, use anywhere
    [`@media (max-width: ${theme.breakpoints.sm}px)`]: {
      // Type safe child reference in nested selectors via ref
      [`& .${getRef('child')}`]: {
        fontSize: theme.fontSizes.xs,
      },
    },
  },

  child: {
    // assign ref to element
    ref: getRef('child'),
    backgroundColor: theme.colorScheme === 'dark' ? theme.colors.dark[8] : theme.white,
    padding: theme.spacing.md,
    borderRadius: theme.radius.sm,
    boxShadow: theme.shadows.md,
    color: theme.colorScheme === 'dark' ? theme.white : theme.black,
  },
}));

function Demo() {
  const { classes } = useStyles();

  return (
    <div className={classes.wrapper}>
      <div className={classes.child}>createStyles demo</div>
    </div>
  );
}
chart.js を入れてみる
npm install --save chart.js react-chartjs-2
- グラフコンポーネント作成
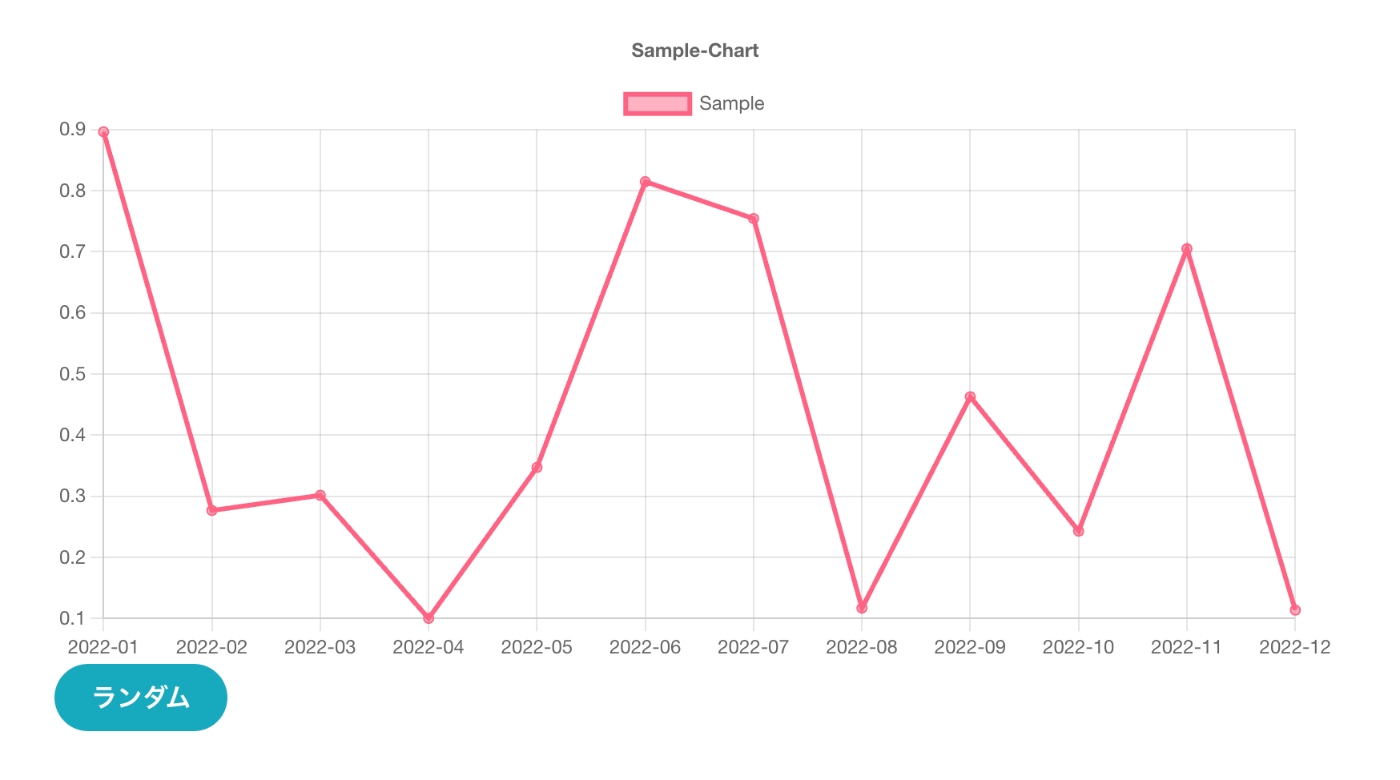
「ボタンを押すとランダムな値に更新されて再描画されるグラフ」を作成してみる
import React, { useState, useEffect } from "react";
import { Btn } from "./Button";
import { Line } from "react-chartjs-2";

import {
  Chart as ChartJS,
  CategoryScale,
  LinearScale,
  PointElement,
  LineElement,
  Title,
  Tooltip,
  Legend,
} from "chart.js";

ChartJS.register(
  CategoryScale,
  LinearScale,
  PointElement,
  LineElement,
  Title,
  Tooltip,
  Legend
);

function SampleChart(props) {
  // グラフ用ラベルの設定
  const labels = [
    "2022-01",
    "2022-02",
    "2022-03",
    "2022-04",
    "2022-05",
    "2022-06",
    "2022-07",
    "2022-08",
    "2022-09",
    "2022-10",
    "2022-11",
    "2022-12",
  ];

  // グラフ用データの設定
  const GraphData = {
    labels: labels,
    datasets: [
      {
        label: "Sample",
        data: props.data,
        borderColor: "rgb(255, 99, 132)",
        backgroundColor: "rgba(255, 99, 132, 0.5)",
      },
    ],
  };

  // グラフのオプション設定
  const options = {
    maintainAspectRatio: false,
    responsive: true,
    plugins: {
      legend: {
        position: "top",
      },
      title: {
        display: true,
        text: "Sample-Chart",
      },
    },
  };

  return (
    <div className="Chart">
      <Line options={options} data={GraphData} height={400} width={800} />
    </div>
  );
}
export const LineChart = () => {
  // stateを設定
  const [data, setData] = useState();

  const generateData = () => {
    console.log("called generateData");
    let random_data = [];
    for (let i = 0; i < 12; i++) {
      random_data.push(Math.random());
    }
    setData(random_data);
  };
  useEffect(() => {
    generateData();
  }, []);

  return (
    <div className="App">
      <SampleChart data={data} />
      <Btn onClick={generateData} text="ランダム"></Btn>
    </div>
  );
};
- ボタンコンポーネント作成
import { Button } from "@mantine/core";

interface BtnProps {
  text: string;
  onClick: () => void;
}

export const Btn = (props: BtnProps) => {
  const { text, onClick } = props;
  return (
    <Button color="cyan" radius="xl" size="md" onClick={onClick}>
      {text}
    </Button>
  );
};
ログイン機能を作ってみる
- ログインページ作成
import { TextInput, Checkbox, Group, Box, Title } from "@mantine/core";
import { Btn } from "./Button";
import { useForm } from "@mantine/form";
import { useEffect } from "react";

type Form = {
  username: string;
  password: string;
  termsOfService: boolean;
};

export const LoginForm = () => {
  const test = "123";
  const form = useForm<Form>({
    initialValues: {
      username: "",
      password: "",
      termsOfService: false,
    },

    validate: {
      username: (value) =>
        value.length < 2 ? "Name must have at least 2 letters" : null,
      password: (value) =>
        value.length < 4 ? "Name must have at least 4 letters" : null,
    },
  });
  useEffect(() => {
    // Update the document title using the browser API
    console.log(form);
  }, []);

  return (
    <Box sx={{ maxWidth: 300, margin: 100 }} mx="auto">
      <Title order={1}>Login</Title>
      <form onSubmit={form.onSubmit(() => form.validate())}>
        <TextInput
          required
          label="username"
          placeholder=""
          {...form.getInputProps("username")}
        />
        <TextInput
          required
          type="password"
          label="Password"
          {...form.getInputProps("password")}
        />
        <Checkbox
          mt="md"
          label="利用規約に同意する"
          {...form.getInputProps("termsOfService", { type: "checkbox" })}
        />
        <Group position="right" mt="md">
          <Btn
            type="submit"
            text="Login"
            disabled={!form.values.username || !form.values.password}
          ></Btn>
        </Group>
      </form>
    </Box>
  );
};
- ログインページでloginボタンを押したときindexedDBにトークン格納、トークンをmiddlewareで判断してログインできるか認証する
Dexie.jsをインストール
npm install dexie
npm install dexie-react-hooks
db.tsを作成
import Dexie, { Table } from "dexie";

// テーブルの型定義
export interface User {
  id?: number;
  username: string;
}

export class MySubClassedDexie extends Dexie {
  users!: Table<User>;
  constructor() {
    super("myDatabase");
    this.version(1).stores({
      users: "++id, username",
    });
  }
}

export const db = new MySubClassedDexie();
データを追加してみる
import { useState } from "react";
import { db } from "../db.ts";

const AddUserForm = () => {
  const [user, setUser] = useState("");
  const [status, setStatus] = useState("");

  async function addUser() {
    try {
      // データをDBへ追加
      const id = await db.users.add({
        user,
      });

      setStatus(`User ${user} successfully added. Got id ${id}`);
      setUser("");
    } catch (error) {
      setStatus(`Failed to add ${user}: ${error}`);
    }
  }

  return (
    <>
      <p>{status}</p>
      User:
      <input
        type="text"
        value={user}
        onChange={(ev) => setUser(ev.target.value)}
      />
      <button onClick={addUser}>Add</button>
    </>
  );
};
export default AddUserForm;
middleware.tsを作成して、indexedDBに値がない場合は/loginにリダイレクトするように設定してみる
// middleware.ts
import { NextResponse } from "next/server";
import type { NextRequest } from "next/server";
import { db } from "./db";
import { useLiveQuery } from "dexie-react-hooks";

// This function can be marked `async` if using `await` inside
const middleware = (request: NextRequest) => {
  console.log("middleware called.");
  const db = useLiveQuery(async () => await db.users.toArray());

  if (!db) {
    return NextResponse.redirect("/login");
  }

  return NextResponse.next();
};

export default middleware;
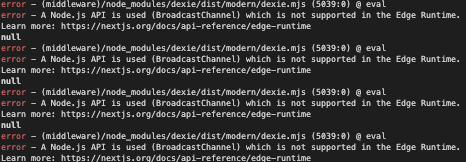
...なんかmiddleware内ではevalが無効らしく、dexie.jsを使用できないエラーが発生
代替案としてuseEffectを使用し、認証コンポーネントを作成してみる
import { db } from "../db";
import { useLiveQuery } from "dexie-react-hooks";
import { useLayoutEffect } from "react";
import { useRouter } from "next/router";

export const AuthProvider: NextPage = ({ children }) => {
  // ルーター定義
  const router = useRouter();
  const pathname = router.pathname;

  // DBからデータを取得
  const dbData = useLiveQuery(async () => await db.users.toArray());
  console.log(dbData);

  useLayoutEffect(() => {
    // /login以外のページにアクセス時、ユーザー情報がDBにない場合は/loginにリダイレクト
    !dbData && pathname !== "/login" && router.push("/login");
  }, []);

  return <>{children}</>;
};
...DBの情報が正しく取得できない。1回呼び出された内の1回目で取得できないので、認証が通らない状態

Swiper.jsをインストールしてみる
ログイン制御は一旦置き
npm i swiper
- cssを
_app.tsxでimport
index.tsx
// Import Swiper React components
import { GeneralCard } from "../components/Card";
import { Swiper, SwiperSlide } from "swiper/react";

export default () => {
  const items = [1, 2, 3, 4, 5, 6, 7, 8, 9, 10];
  return (
    <Swiper slidesPerView={3.5} spaceBetween={50}>
      {items.map((item) => {
        return (
          <SwiperSlide key={item}>
            <GeneralCard />
          </SwiperSlide>
        );
      })}
    </Swiper>
  );
};
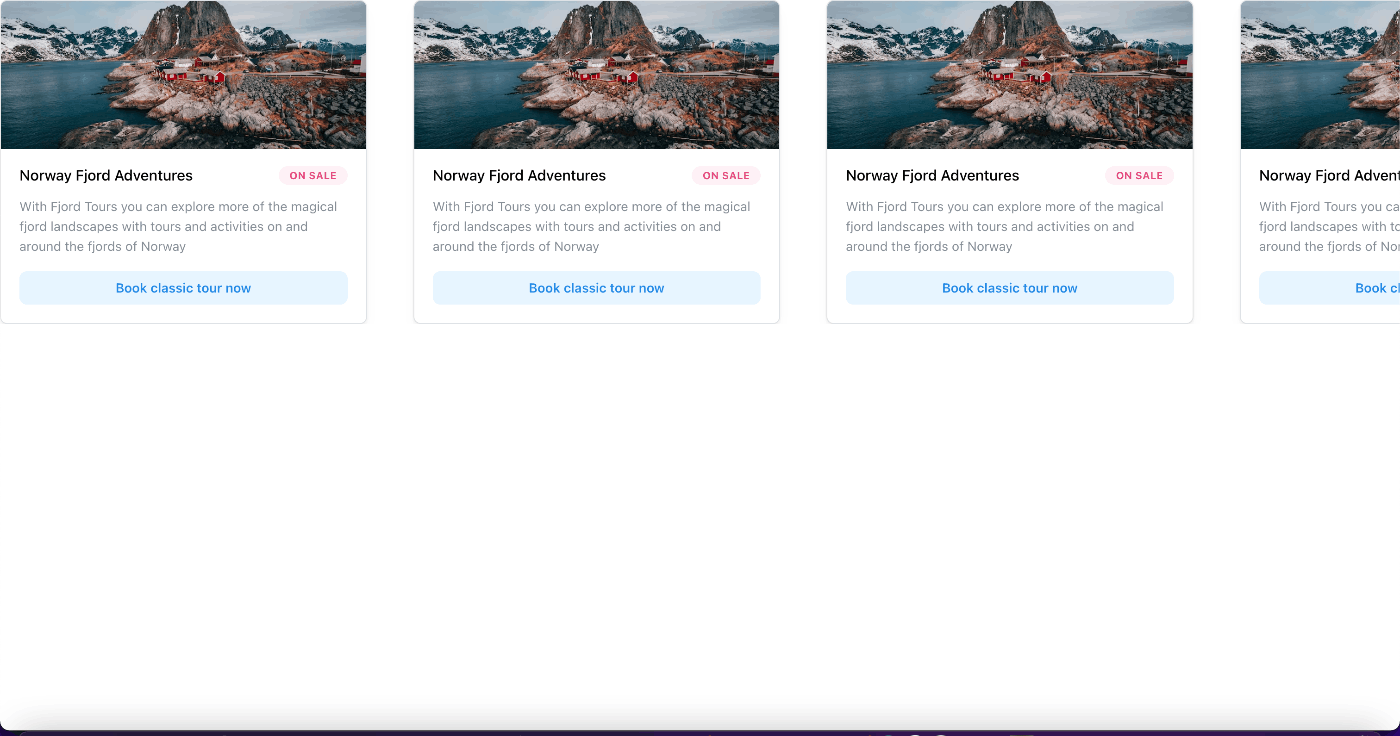
1ページにつき3.5個表示される
Swiperに余白を設定
- Mantineの
createStylesを使用し、styleを作成 - Mantineの基本機能であるsxPropやComponentPropsは、Mantineのコンポーネントでしか機能しないため
- emotionを素で使おうとしたらエラーでうまくいかなかった

emotionで出たエラー
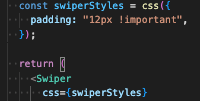
ちゃんと書いてるはずなのに...
index.tsx
import { GeneralCard } from "../components/Card";
import { Swiper, SwiperSlide } from "swiper/react";
import { createStyles } from "@mantine/core";

export default () => {
  const items = [1, 2, 3, 4, 5, 6, 7, 8, 9, 10];
  const slidesPerView = 3.5;

  const useStyles = createStyles(() => ({
    swiper: {
      padding: "12px !important",
    },
  }));
  const { classes } = useStyles();

  return (
    <Swiper
      className={classes.swiper}
      slidesPerView={slidesPerView}
      spaceBetween={50}
    >
      {items.map((item) => {
        return (
          <SwiperSlide key={item}>
            <GeneralCard />
          </SwiperSlide>
        );
      })}
    </Swiper>
  );
};
上手くいった!
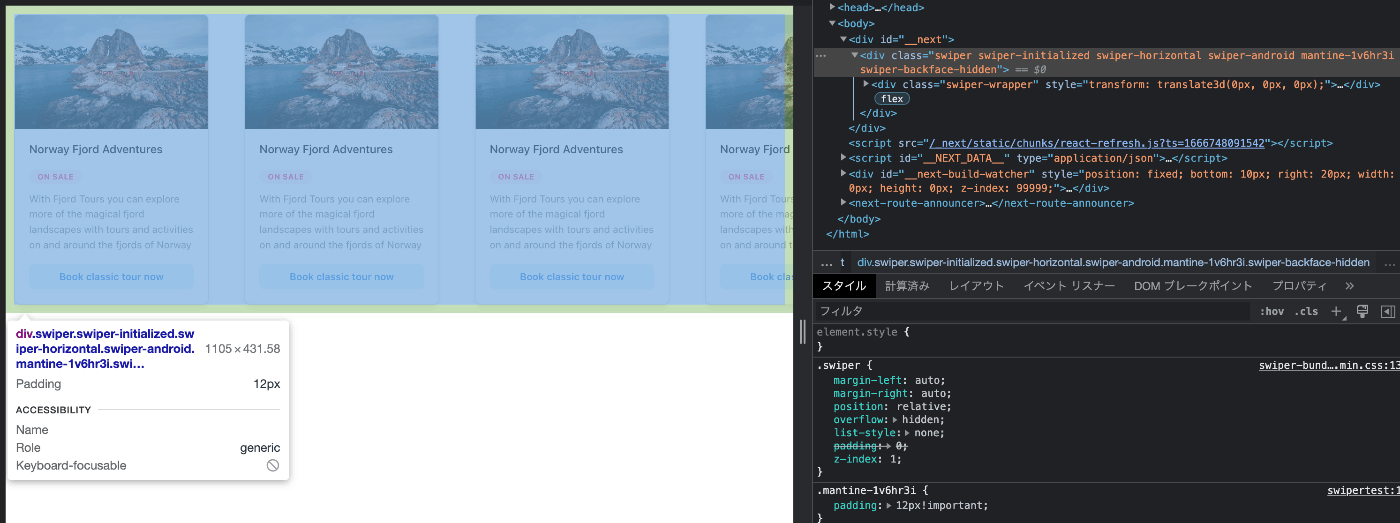
レスポンシブ設定
-
createStylesを使用して、theme.fnでメディアクエリ代わりにする
Card.tsx
import { Card, Image, Text, Badge, Button, Group } from "@mantine/core";
import { createStyles } from "@mantine/core";

export const GeneralCard = () => {
  const useStyles = createStyles((theme) => ({
    card: {
      // smサイズより小さい場合はカードの色を変更する
      [theme.fn.smallerThan("sm")]: {
        backgroundColor: theme.colors.pink[6],
      },
    },
  }));
  const { classes } = useStyles();

  return (
    <Card shadow="sm" p="lg" radius="md" withBorder className={classes.card}>
      <Card.Section>
        <Image
          src="https://images.unsplash.com/photo-1527004013197-933c4bb611b3?ixid=MnwxMjA3fDB8MHxwaG90by1wYWdlfHx8fGVufDB8fHx8&ixlib=rb-1.2.1&auto=format&fit=crop&w=720&q=80"
          height={160}
          alt="Norway"
        />
      </Card.Section>

      <Group position="apart" mt="md" mb="xs">
        <Text weight={500}>Norway Fjord Adventures</Text>
        <Badge color="pink" variant="light">
          On Sale
        </Badge>
      </Group>

      <Text size="sm" color="dimmed">
        With Fjord Tours you can explore more of the magical fjord landscapes
        with tours and activities on and around the fjords of Norway
      </Text>

      <Button variant="light" color="blue" fullWidth mt="md" radius="md">
        Book classic tour now
      </Button>
    </Card>
  );
};

export default GeneralCard;
PWA設定
- PWAインストール
npm i next/pwa
- PWA Manifest作成
-
next.config.js編集
next.config.js
/** @type {import('next').NextConfig} */

const withPWA = require("next-pwa")({
  dest: "public",
});

module.exports = withPWA({
  // https://ja.reactjs.org/docs/strict-mode.html参照
  reactStrictMode: false,
  swcMinify: true,
});
- インストールアイコン表示されるので、インストールできるかチェック
開発時にtsのエラーを出す方法
- Nuxt.jsの時はtsを選択しただけでホットリロード時にtsエラーを検出できた(はず)が、Next.jsにはデフォルトでないみたい
- build時にのみエラー検出できるが、毎回buildコマンドで検出するのは時間がかかりそう
tsc-watchを使用して解決する
- tsc-watchをインストール
npm i tsc-watch
-
package.jsonのscriptsに下記追加
"watch": "tsc-watch"
- ターミナルを分割してdevとwatchで分ける
- エラー検出できていることがわかる
- ただ、ローカルサーバーではエラー検出ないので注意

左がdev、右がwatch
長くなってきたので一旦ここで締め
このスクラップは2022/10/27にクローズされました