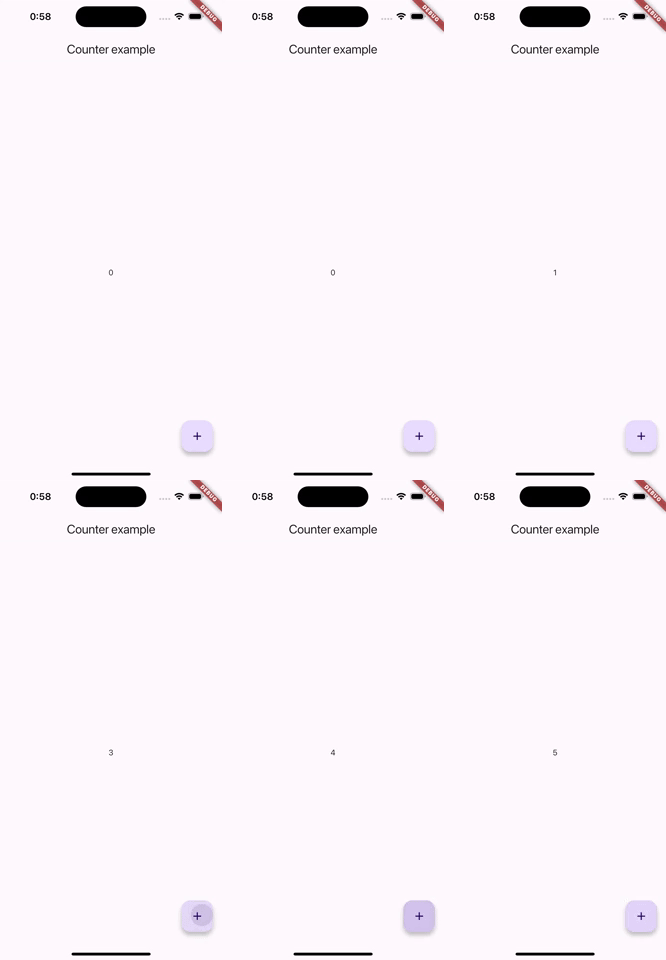
Riverpod公式のカウンターアプリを解説する
はじめに
本記事では、Riverpodの公式からカウンターアプリのサンプルのソースコードを解説していきます。
Riverpod公式のカウンターアプリのサンプルコード
環境
- FVM: 3.2.1
- Flutter: 3.24.4
- Dart: 3.5.4
パッケージのインストール
下記でプロジェクトに使用するパッケージをインストールします。
flutter pub add flutter_riverpod riverpod_annotation dev:riverpod_generator dev:build_runner dev:custom_lint dev:riverpod_lint
実装
Riverpodをアプリで有効化
まず、ProviderScopeをアプリのルートに追加することで、Riverpodをアプリ全体で有効にします。
void main() {
  runApp(
    const ProviderScope(child: MyApp()),
  );
}
アプリのエントリーポイントとなるWidgetを定義します。
class MyApp extends StatelessWidget {
const MyApp({super.key});
Widget build(BuildContext context) {
return MaterialApp(home: Home());
}
}
カウンターアプリのUI
次に、アプリの詳細をRiverpodを使わず、StatelessWidgetを用いて、定義していきます。
現状、アプリは静的で、カウンターの値はハードコードされており、+ボタンを押してもカウンターの状態は変更されません。
あと実施することは以下の3点です。
- Riverpodを用いてカウンターの状態を管理する。
- 現時点のカウンターの状態が画面の真ん中に表示される。
- +ボタンを押すと、カウンターの状態が1つ増加する。
class Home extends StatelessWidget {
Widget build(BuildContext context) {
return Scaffold(
appBar: AppBar(title: const Text('Counter example')),
body: Center(
// TODO: Riverpodで管理しているカウンターの状態を使用する
child: Text('0'),
),
floatingActionButton: FloatingActionButton(
// TODO: Riverpodで管理しているカウンターの状態を1増やす
onPressed: () {},
child: const Icon(Icons.add),
),
);
}
}
Riverpodでカウンターの状態を管理
まずは、Riverpodを用いてカウンターの状態を管理する方法を見ていきましょう。
Riverpodで状態を扱う場合、providerを使用します。
providerは、単なるグローバルなDartオブジェクトと覚えておいてください。
providerの定義は、注釈付きの関数と注釈付きのクラスによる方法の2つあります。
カウンターのように状態を変更したい場合は、注釈付きのクラスを使用します。
クラスは「@riverpod」で注釈し、「_$クラス名」を継承させます。
このようなクラスをNotifierと呼びます。
@riverpodが付与されたクラスを元に、Riverpodに関連するパッケージ(riverpod_generator)がproviderを生成します。
class Counter extends _$Counter {
// ...
}
次にカウンターの初期値を定義します。
カウンターの初期値が0の場合は、buildメソッドをoverrideして、以下のように定義します。
class Counter extends _$Counter {
int build() => 0; // カウンターの状態を初期化
}
最後にカウンターを1ずつ増加させるメソッドを追加することで、カウンターオブジェクトをRiverpodで表現します。
class Counter extends _$Counter {
int build() => 0;
void increment() => state++; // カウンターの状態を1増加させる
}
main.dartに「part 'main.g.dart';」を以下のように追加して、「dart run build_runner build」をTerminalで実行することで、カウンターのproviderが生成されます。
providerの名前は、「クラス名(小文字) + Provider」となります。
今回の例では、「counterProvider」というproviderが生成されているはずです。
part 'main.g.dart'; // コードの生成先
class Counter extends _$Counter {
int build() => 0;
void increment() => state++;
}
カウンターを画面に表示
次に、現時点のカウンターの状態が画面の真ん中に表示されるようにしていきましょう。
先程の、カウンターの状態をRiverpodで表現したcounterProviderを使用します。
counterProviderとやりとりするには、refオブジェクトを取得する必要があります。
refオブジェクトにアクセスするための1つの解決策はConsumerクラスを使用することです。
Consumerクラスは、providerをリッスンして、widget treeを再構築します。
class Home extends StatelessWidget {
Widget build(BuildContext context) {
return Consumer(
builder: (context, ref, child) {
return Scaffold(
appBar: AppBar(title: const Text('Counter example')),
body: Center(
// TODO: Riverpodで管理しているカウンターの状態を使用する
child: Text('0'),
),
floatingActionButton: FloatingActionButton(
// TODO: Riverpodで管理しているカウンターの状態を1増やす
onPressed: () {},
child: const Icon(Icons.add),
),
);
},
);
}
}
Consumerクラスのrefを参照できるようになったので、現時点のカウンターの状態を表示しましょう。
ref.watchを使用するとproviderを監視できます。
そして、Consumerクラスと組み合わせることで、counterProviderの値が変更されるたびに、widget treeが再構築されるようになり、現在のカウンターの状態がUIに反映される挙動を実現できます。
class Home extends StatelessWidget {
Widget build(BuildContext context) {
return Consumer(
builder: (context, ref, child) {
return Scaffold(
appBar: AppBar(title: const Text('Counter example')),
body: Center(
child: Text('${ref.watch(counterProvider)}'), // カウンターの状態を監視
),
floatingActionButton: FloatingActionButton(
// TODO: Riverpodで管理しているカウンターの状態を1増やす
onPressed: () {},
child: const Icon(Icons.add),
),
);
},
);
}
}
同様のコードは、ConsumerWidgetクラスを用いて、以下のようにも書けます。
class Home extends ConsumerWidget {
Widget build(BuildContext context, WidgetRef ref) {
return Scaffold(
appBar: AppBar(title: const Text('Counter example')),
body: Center(
child: Text('${ref.watch(counterProvider)}'),
),
floatingActionButton: FloatingActionButton(
// TODO: Riverpodで管理しているカウンターの状態を1増やす
onPressed: () {},
child: const Icon(Icons.add),
),
);
}
}
カウンターを増加させる
最後に、+ボタンを押すと、カウンターの状態が1つ増加するようにしていきます。
Counterクラスの中で定義したincrementメソッドは、ref.readとcounterProviderを用いて、下記のように呼び出します。
class Home extends ConsumerWidget {
Widget build(BuildContext context, WidgetRef ref) {
return Scaffold(
appBar: AppBar(title: const Text('Counter example')),
body: Center(
child: Text('${ref.watch(counterProvider)}'),
),
floatingActionButton: FloatingActionButton(
onPressed:
ref.read(counterProvider.notifier).increment, // カウンターの状態を1増やす
child: const Icon(Icons.add),
),
);
}
}
おしまい

解説は以上です。
とても単純なアプリでしたが、調べる点がいくつかあって良い勉強になりました!
次は、Riverpodの公式から提供されているTodoアプリのソースコードを解説します。
Riverpod公式のTodoアプリのサンプルコード
Discussion