Remixのチュートリアルで入門してみる Part 1
テンプレートから雛形を作る
 npx create-remix@latest --template remix-run/remix/templates/remix-tutorial


 remix   v2.3.1 💿 Let's build a better website...

   dir   Where should we create your new project?
         ./my-remix-app

      ◼  Template: Using remix-run/remix/templates/remix-tutorial...
      ✔  Template copied

   git   Initialize a new git repository?
         Yes

  deps   Install dependencies with npm?
         Yes

      ✔  Dependencies installed

      ✔  Git initialized

  done   That's it!

         Enter your project directory using cd ./my-remix-app
         Check out README.md for development and deploy instructions.

         Join the community at https://rmx.as/discord
下記で、開発環境を立ち上げます。
cd remix-tutorial
npm run dev
The Root Route
app/root.tsxRootRouteと呼び、UIで最初にレンダリングサれるコンポーネント。
通常はページのグローバルレイアウトを含む。
linksへスタイルを追加する
CSSをJSに直接インポートできる。
appstylesを追加する。
+import type { LinksFunction } from "@remix-run/node";
// existing imports

+import appStylesHref from "./app.css";

+export const links: LinksFunction = () => [
+  { rel: "stylesheet", href: appStylesHref },
+];
appStylesHrefを
連絡先のルーティングを作成する。
サイドバーの/contacts/1 /contacts/2を動くように修正します。
Remixファイルルーティングでは、.はURLに/を作り、$はセグメントを動的にする。
下記は、/contacts/123 /contacts/abcなどに対応するファイルを作成することになります。
mkdir app/routes
touch app/routes/contacts.\$contactId.tsx
ComponentUIを作成します。
追加するファイル(サイトと同じため折りたたみ)
import { Form } from "@remix-run/react";
import type { FunctionComponent } from "react";

import type { ContactRecord } from "../data";

export default function Contact() {
  const contact = {
    first: "Your",
    last: "Name",
    avatar: "https://placekitten.com/g/200/200",
    twitter: "your_handle",
    notes: "Some notes",
    favorite: true,
  };

  return (
    <div id="contact">
      <div>
        <img
          alt={`${contact.first} ${contact.last} avatar`}
          key={contact.avatar}
          src={contact.avatar}
        />
      </div>

      <div>
        <h1>
          {contact.first || contact.last ? (
            <>
              {contact.first} {contact.last}
            </>
          ) : (
            <i>No Name</i>
          )}{" "}
          <Favorite contact={contact} />
        </h1>

        {contact.twitter ? (
          <p>
            <a
              href={`https://twitter.com/${contact.twitter}`}
            >
              {contact.twitter}
            </a>
          </p>
        ) : null}

        {contact.notes ? <p>{contact.notes}</p> : null}

        <div>
          <Form action="edit">
            <button type="submit">Edit</button>
          </Form>

          <Form
            action="destroy"
            method="post"
            onSubmit={(event) => {
              const response = confirm(
                "Please confirm you want to delete this record."
              );
              if (!response) {
                event.preventDefault();
              }
            }}
          >
            <button type="submit">Delete</button>
          </Form>
        </div>
      </div>
    </div>
  );
}

const Favorite: FunctionComponent<{
  contact: Pick<ContactRecord, "favorite">;
}> = ({ contact }) => {
  const favorite = contact.favorite;

  return (
    <Form method="post">
      <button
        aria-label={
          favorite
            ? "Remove from favorites"
            : "Add to favorites"
        }
        name="favorite"
        value={favorite ? "false" : "true"}
      >
        {favorite ? "★" : "☆"}
      </button>
    </Form>
  );
};
上記を追加しても、まだコンテンツが表示されません。
ネストされたルーティングとアウトレット
RemixはReact Routerの上に構築されているので、ネストされたルーティングをサポートしています。
子ルートが親レイアウトの内部でレンダリングされるようにするには、親でアウトレットをレンダリングする必要があります。
app/root.tsxを開き、内部でアウトレットをレンダリングします。
<Outlet />をRootへ追加する。
// existing imports
import {
  Form,
  Links,
  LiveReload,
  Meta,
+  Outlet,
  Scripts,
  ScrollRestoration,
} from "@remix-run/react";

// existing imports & code

export default function App() {
  return (
    <html lang="en">
      {/* other elements */}
      <body>
        <div id="sidebar">{/* other elements */}</div>
+        <div id="detail">
+         <Outlet />
+        </div>
        {/* other elements */}
      </body>
    </html>
  );
}
rootへ<Outlet />を追加したことで、routes/contacts.$contactId.tsxの内容が表示されます。

Client Side Routing
現状の実装では、サイドバーのリンクをクリックすると、URLのフルドキュメントリクエストを行っています。
ClientSideRoutingを実装することによって、アプリはサーバーにリクエストすることなくURLを更新できます。
<a href> を <Link to>に変換します。
// existing imports
import {
+  Link,
} from "@remix-run/react";

export default function App() {
  return (
      {/* other elements */}
          <nav>
            <ul>
              <li>
+                <Link to={`/contacts/1`}>Your Name</Link>
              </li>
              <li>
+               <Link to={`/contacts/2`}>Your Friend</Link>
              </li>
            </ul>
          </nav>
        {/* other elements */}
  );
}
データの読み込み
URLセグメント、レイアウト、データは、多くの場合、3重結合するパターンが多い。
| URL Segment | Component | Data |
|---|---|---|
| / | <Root> | list of contacts |
| contacts/:contactId | <Contact> | individual contact |
これらの3つを自然に結合させるために、Remixはルートコンポーネントにデータを簡単に取り込むためのデータ規約を持っています。
データをロードするために、loaderとuseLoaderDataという2つのAPIを使います。まず、ルートルートにloader関数を作成してエクスポートし、データをレンダリングします。
+ import { json } from "@remix-run/node";
import {
+  useLoaderData,
} from "@remix-run/react";

// 用意されているデータです。
import { getContacts } from "./data";

+ export const loader = async () => {
+  const contacts = await getContacts();
+ return json({ contacts });
+};

export default function App() {
+  const { contacts } = useLoaderData();

  return (
    <html lang="en">
      {/* other elements */}
      <body>
        <div id="sidebar">
          {/* other elements */}
          <nav>
+            {contacts.length ? (
+             <ul>
+                {contacts.map((contact) => (
+                 <li key={contact.id}>
+                   <Link to={`contacts/${contact.id}`}>
+                      {contact.first || contact.last ? (
+                        <>
+                          {contact.first} {contact.last}
+                        </>
+                      ) : (
+                        <i>No Name</i>
+                      )}{" "}
+                      {contact.favorite ? (
+                        <span>★</span>
+                      ) : null}
+                    </Link>
+                  </li>
+                ))}
+              </ul>
+            ) : (
+              <p>
+                <i>No contacts</i>
+             </p>
            )}
          </nav>
        </div>
        {/* other elements */}
      </body>
    </html>
  );
}
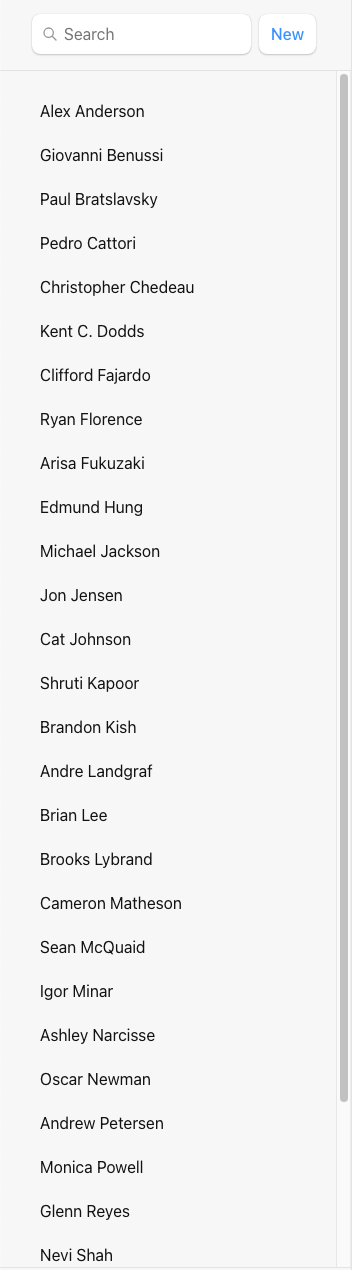
サイドバーにデータが表示されるようになります。
型推論
次のようにして、簡単なアノテーションを追加して、データに関する型推論を取得できますtypeof loader。
export default function App() {
+  const { contacts } = useLoaderData<typeof loader>();

  // existing code
}
LoaderのURLパラメーター
loaderの処理でparamsからcontactIdを取得し、データを参照するように修正します。
+ import { json } from "@remix-run/node";
+ import { Form, useLoaderData } from "@remix-run/react";
// existing imports

+ import { getContact } from "../data";

+ export const loader = async ({ params }) => {
+  const contact = await getContact(params.contactId);
+  return json({ contact });
+};

export default function Contact() {
+  const { contact } = useLoaderData<typeof loader>();

  // existing code
}
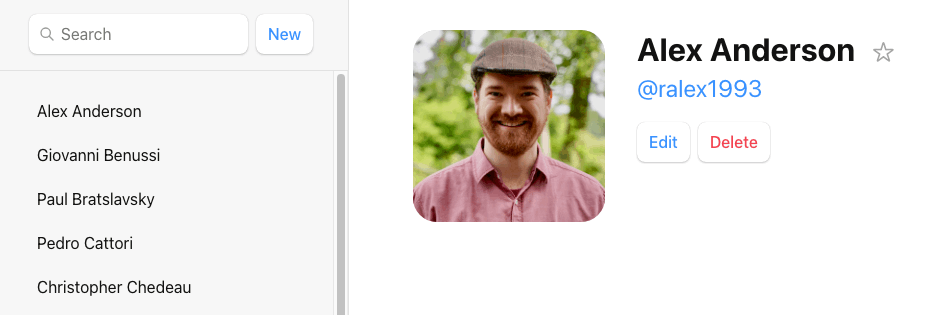
paramsのcontactIdからローカルのjsonのデータを表示するようになったので、サイドバーで各ページへ移動すると、それぞれの名前と画像が表示されるようになりました。
パラメータの検証と404
ユーザーが見つからない場合の処理を追加する。
+ import type { LoaderFunctionArgs } from "@remix-run/node";
+ import invariant from "tiny-invariant";

+ export const loader = async ({
+   params,
+ }: LoaderFunctionArgs) => {
+   invariant(params.contactId, "Missing contactId param");
  const contact = await getContact(params.contactId);
+  if (!contact) {
+    throw new Response("Not Found", { status: 404 });
+  }
  return json({ contact });
};