5.データベース(Room)を作る
Roomの依存関係
Roomの最新バージョンを確認。
今は2.7.0のようですね。(2025年4月20日現在)
非同期処理をするので、ついでにコルーチンとコイルも設定しておきます。
ライブラリの設定
libs.versions.tomlに以下を追加。
[versions]
kotlinx-coroutines = "1.10.1"
coil = "2.7.0"
androidx-room = "2.6.1"
ksp = "2.1.10-1.0.31"

[libraries]
kotlinx-coroutines-core = { group = "org.jetbrains.kotlinx", name = "kotlinx-coroutines-core", version.ref = "kotlinx-coroutines" }
kotlinx-coroutines-android = { group = "org.jetbrains.kotlinx", name = "kotlinx-coroutines-android", version.ref = "kotlinx-coroutines" }
coil-compose = { group = "io.coil-kt", name = "coil-compose", version.ref = "coil" }
androidx-room-runtime = { group = "androidx.room", name = "room-runtime", version.ref = "androidx-room" }
androidx-room-ktx = { group = "androidx.room", name = "room-ktx", version.ref = "androidx-room" }
androidx-room-compiler = { group = "androidx.room", name = "room-compiler", version.ref = "androidx-room" }

[plugins]
google-devtools-ksp = { id = "com.google.devtools.ksp", version.ref = "ksp" }
→Sync Now!!!!
依存関係設定
build.gradle.kts(Project)に以下を追加
plugins {
    alias(libs.plugins.google.devtools.ksp) apply false //Room
}
build.gradle.kts(app)に以下を追加。
plugins {
    alias(libs.plugins.google.devtools.ksp) //Room
}
//省略
dependencies {
    //Room
    implementation(libs.androidx.room.runtime)
    implementation(libs.androidx.room.ktx)
    ksp(libs.androidx.room.compiler)

    //コルーチン
    implementation(libs.kotlinx.coroutines.android)
    implementation(libs.kotlinx.coroutines.core)

    //コイル
    implementation(libs.coil.compose)
→Sync Now!!!!
テーブル(Entity)作成
ルートパッケージの直下にdataフォルダを作って、その中にEntityを作っていきます。
Entityとはデータベースのテーブルみたいな意味。
※テーブルが複数ある場合は、dataフォルダの下にentityフォルダを作り、
その中にファイルを作った方がいい。

上記例では3つのEntityを作ってます。
- @Entityで宣言し、かっこの中にRoomのテーブル名を書く
- 必ずプライマリキー(@PrimaryKey)を1つ作成
@Entity(tableName = "user_profiles")    //かっこの中はRoomのテーブル名
data class UserProfile(
    @PrimaryKey val id: String =UUID.randomUUID().toString(),   //IDはランダム生成
    val name: String,
    val drillLevel: Int,
    val avatarColor: Int,
)
Daoを作成
Daoとは?
DAO(Data Access Object)は、「データベースとアプリの橋渡しをする役割を持つクラス」のこと。
アプリがデータベースに直接アクセスするのではなく、DAOを通じてデータの保存・取得・更新・削除(CRUD操作)を行うのが基本。
DAOを使うことで、以下メリットがあります!
- データベースの操作コードを1か所にまとめられる
- アプリのほかの部分と分離できるので管理しやすい
- データベースの変更にも柔軟に対応できる
Daoインタフェースを作成
dataフォルダの下にdaoフォルダを作成し、その中にdaoを作成します。
DAOはインタフェースで作成します!

- Insert:レコード追加
OnConfilectはキーが重複したときの処理を表す- REPLACE・・・新しいもので置き換える(上書きする)
- IGNORE・・・新しいデータの挿入を無視します。既存のデータは変更されない。
- ABORT:・・・トランザクションを中止し、エラーを発生。
- FAIL・・・トランザクションを失敗させる。
- ROLLBACK・・・トランザクションをロールバック(挿入前の状態に戻す)。
- Update:レコード更新
- Delete:レコード削除
- Query:かっこの中のSQLを実行。SELECTの場合、戻り値が必要
@Dao
interface UserProfileDao {
    @Insert(onConflict = OnConflictStrategy.REPLACE)    //競合したときは上書き
    suspend fun insert(userProfile: UserProfile)

    @Update
    suspend fun update(userProfile: UserProfile)

    @Delete
    suspend fun delete(userProfile: UserProfile)

    @Query("SELECT * FROM user_profiles")
    fun getAll(): Flow<List<UserProfile>>

    @Query("SELECT * FROM user_profiles WHERE id = :id")
    fun getById(id: Int): Flow<UserProfile>
}
- データベースに対するアクション(Insert、Update、Delete)はUIから監視する必要がないので、Flowはつけない。
- アクションではない選択クエリはUIから監視し、変更があればUIを更新しなければならないのでFlowをつける。
- 全レコードを取得するタイプのgetAllは並び替え(Order by)を入れた方がいいかも
データベース作成
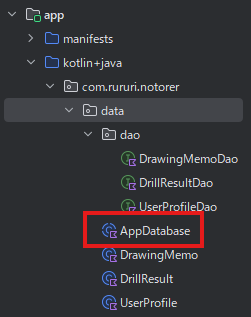
dataフォルダの直下にAppDatabaseクラスを作成。
※画像のEntityは「entityフォルダ」を作成し、移動させました。
-
@Databaをつけてデータベースということを宣言。
かっこの中身は、以下の通り- entities・・・テーブルの一覧
- version・・・最初は「1」。以降2,3,4・・・
- exportSchema・・・現在のデータベーススキーマを記述したJSONファイルを指定されたディレクトリに出力する(true)かしないか(false)。
デフォルトはtrue。
-
クラスはabstract class(抽象クラス)で作成。
-
コンパニオンオブジェクトを作って、Roomを初期化(getDatabase)
@Database(
    entities = [DrawingMemo::class, DrillResult::class, UserProfile::class],
    version = 1,
    exportSchema = false    //todo: あとでexportSchemaをtrueに変更
)
abstract class AppDatabase: RoomDatabase() {
    abstract fun drawingMemoDao(): DrawingMemoDao
    abstract fun drillResultDao(): DrillResultDao
    abstract fun userProfileDao(): UserProfileDao

    companion object {
        const val DATABASE_NAME = "app_database"

        @Volatile
        private var Instance: AppDatabase? = null

        fun getDatabase(context:Context):AppDatabase {
            return Instance ?: synchronized(this) {
                Room.databaseBuilder(
                    context.applicationContext,
                    AppDatabase::class.java,
                    DATABASE_NAME
                )
                    .build().also { Instance = it }
            }
        }
    }
}
@Volatileについて
書き込みの即時反映:対象変数への書き込みは、比較的すぐにメインメモリに反映される
読み込みの最新値保証: 対象変数を読み込む際、インメモリから最新の値を取得
これにより、複数のスレッドが同じ @Volatile 変数を読み書きする際に、あるスレッドが行った変更が他のスレッドから正しく「見える」ことが保証。
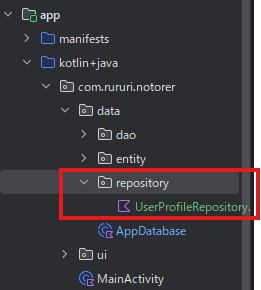
リポジトリ作成
リポジトリはdaoとUIの中間でデータのやり取りをする「倉庫」の役割。
dataフォルダの下にrepositoryフォルダを作成し、その中にファイルを作成します。
リポジトリはインタフェースで作成してから実装!
インタフェースを作らずに、直接実装しても問題はないのだけど、将来の拡張性やテストの容易性を考えこうするのがいいと結論。
//インタフェース
interface UserProfileRepository {
    suspend fun insert(userProfile: UserProfile)
    suspend fun update(userProfile: UserProfile)
    suspend fun delete(userProfile: UserProfile)
    fun getAll(): Flow<List<UserProfile>>
    fun getById(id: Int): Flow<UserProfile>
}

//オーバーライド
class UserProfileRepositoryImpl(private val dao: UserProfileDao): UserProfileRepository {
    override suspend fun insert(userProfile: UserProfile) = dao.insert(userProfile)
    override suspend fun update(userProfile: UserProfile) = dao.update(userProfile)
    override suspend fun delete(userProfile: UserProfile) = dao.delete(userProfile)
    override fun getAll(): Flow<List<UserProfile>> = dao.getAll()
    override fun getById(id: Int): Flow<UserProfile> = dao.getById(id)
}
AppContainerを作成
AppContainerとは?
RoomDatabase, Repository, などのインスタンスを一括管理する仕組み
将来的に Hilt を導入すると置き換えやすくなるし、今はシンプルに手動でできるのが強み!
AppContainer作成
ルートパッケージの直下に「di」フォルダを作り、孫赤にAppContainer.ktを作成。

リポジトリと同じような感じで、インタフェースを作ってから、実装。
//インターフェース
interface AppContainer {
    val drawingMemoRepository: DrawingMemoRepository
    val drillResultRepository: DrillResultRepository
    val userProfileRepository: UserProfileRepository
}

//オーバーライド
class DefaultAppContainer(private val context: Context): AppContainer {
    private val database = AppDatabase.getDatabase(context)
    override val drawingMemoRepository: DrawingMemoRepository by lazy {
        DrawingMemoRepositoryImpl(database.drawingMemoDao())
    }
    override val drillResultRepository: DrillResultRepository by lazy {
        DrillResultRepositoryImpl(database.drillResultDao())
    }
    override val userProfileRepository: UserProfileRepository by lazy {
        UserProfileRepositoryImpl(database.userProfileDao())
    }
}
アプリケーション作成
MainActivityと同じ位置にアプリと同じ名前を持つApplicationを作成。

中身はcontainer変数に先ほど設定したコンテナを設定
class NoToreApplication:Application() {
    val container:AppContainer by lazy {
        DefaultAppContainer(this)
    }
}
マニフェストにアプリケーションを登録
app>manifests>AndroidManifest.xmlを開く

application欄に先ほど設定したアプリケーションの名前を追加
<manifest xmlns:android="http://schemas.android.com/apk/res/android"
    xmlns:tools="http://schemas.android.com/tools">

    <application
        android:name=".NoToreApplication"
んん---?
ViewModel作成
viewModelを先に作らないと、Factoryの設定ができない。
uiフォルダの直下にviewModelsフォルダを作成し、その中にviewModel作成。

viewModelは以下の通り、コンストラクタの中にリポジトリの設定が必要!
この設定がないとFactoryでエラーになる。
class UserProfileViewModel(private val repository: UserProfileRepository):ViewModel() {

}
Factory提供
このアプリ全体のViewModelのインスタンスを作成するためのFactoryを提供。
ファイルはui>viewModelsフォルダの下に作ります。
- オブジェクトを作成
viewModelFactoryというAPIを利用。
initializerの中で描くviewModelをどのように作るかを定義できる。
object AppViewModelProvider {
    val Factory = viewModelFactory {
        initializer {  }  //エラーになるけど後で解消
    }
}
- CreationExtrasの拡張関数を作成
1のinitializerでアプリケーションオブジェクトを簡単に作成するため。fun CreationExtras.getApplication(): NoToreApplication { val application = this[ViewModelProvider.AndroidViewModelFactory.APPLICATION_KEY] requireNotNull(application) { "APPLICATION_KEY is missing in CreationExtras" } return application as? NoToreApplication ?: throw IllegalStateException("APPLICATION_KEY is not of type NoToreApplication") } - エラーになっていたinitializerの中身を設定
ViewModelが増えたら、initializer{・・・}をどんどん増やす!object AppViewModelProvider { val Factory = viewModelFactory { initializer { val application = this.getApplication() UserProfileViewModel(application.container.userProfileRepository) } } }