Closed5
Next.js初めまして学習
チュートリアルを進めていく 日本語で解説されている↓を見ながら
重要なことメモ
環境構築
- ↓のコマンドでアプリケーションを作成
npx create-next-app nextjs-blog --use-npm --example "https://github.com/vercel/next-learn/tree/master/basics/learn-starter"
いろんな特徴
- Fast Refresh:ファイルを保存した瞬間に即時反映される
- ページベースのルーティング:pagesディレクトリ配下のページファイルのパス配置がそのままURLのパスに対応する
- client-side navigation:ページ遷移をJavaScriptが表示ページとURLをクライアント側だけで変更するもので、通常のページ遷移よりも高速で行える
-
画像サイズの最適化やレイジーロード:Next.jsではImageコンポーネントを使うことで自動でこれらを行うことができる
→→ちなみにレイジーロードとは、画像の遅延読み込みを行うためのJavaScriptライブラリで、遅延読み込みは画像の読み込みに時間差を設けて表示させ、画面表示の高速化を図るしくみのことを指す - Headコンポーネント:<head>タグの代わりに<Head>を使える
<Head>
    <title>Create Next App</title>
    <link rel="icon" href="/favicon.ico" />
</Head>
-
scriptコンポーネント:
strategyにlazyloadを指定すると画像の時と同じようにスクリプトのレイジーロードを行える
onLoad部分はスクリプトが読み込まれた後に実行する関数を実行している
<Script
        src="https://connect.facebook.net/en_US/sdk.js"
        strategy="lazyOnload"
        onLoad={() =>
             console.log(`script loaded correctly, window.FB has been populated`)
        }
/>
- styled-jsx:CSS-in-JSライブラリを使用したもので、これによりReactコンポーネント内でCSSを記述できるようになるもの
<style jsx>{`
  …
`}</style>
-
Layoutコンポーネント:CSSモジュールを使うことができる
first-post.jsでlayout.jsを読み込んで、Layoutコンポーネントの中身をChildrenとして、layout.js内でその子要素たちを<div>で囲んだものを返すとしている
そのdivにclassName={styles.container}と指定してあり、import styles from './layout.module.css'で読み込んでいるcssファイルに定義されているcontainerのデザインが当たるようになっている
このdivタグには一意のclassが自動で付与されるようになっているclass="layout_container__fbLkO"とか
first-post.js
import Layout from '../../components/layout';

export default function FirstPost() {
    return (
        <Layout>
            <Head>
                <title>First Post</title>
            </Head>
            <h1>First Post</h1>
            <h2>
                <Link href="/">Back to home</Link>
            </h2>
        </Layout>
    );
}
layout.js
import styles from './layout.module.css'

export default function Layout({ children }) {
  return <div className={styles.container}>{children}</div>
}
layout.module.css
.container {
    max-width: 36rem;
    padding: 0 1rem;
    margin: 3rem auto 6rem;
}
次は↓から
重要なことメモ
CSS
- Global CSS:CSSモジュールはコンポーネント単位にCSSを設定できるが、Global CSSはすべてのページに適用できる
-
Appコンポーネント:
pages/_app.jsを追加し、_app.jsの中身を↓のようにして、importのところに前ページに適用したいcssを入れる
_app.js
import '../styles/globals.css'

export default function App({ Component, pageProps }) {
  return <Component {...pageProps} />
}
ここで、変更を取り入れるためにターミナルの再起動を行う必要がある
cntrl + cで再起動
-
homeの条件判定:
first-post.jsでは、layout.jsを読み込んで、Layoutコンポーネントは↓のようになっている

一方で、Home画面に相当するindex.jsではLayoutコンポーネントにhomeがある
両方のjsで読み込んでいるlayout.jsではhomeという引数を使ってhomeがあるときは~の処理をして、ないときは~みたいな感じで条件分岐をすることでlayout.jsを一般化できるようにしている
layout.js
import Head from 'next/head';
import Image from 'next/image';
import styles from './layout.module.css';
import utilStyles from '../styles/utils.module.css';
import Link from 'next/link';

const name = 'Your Name';
export const siteTitle = 'Next.js Sample Website';

export default function Layout({ children, home }) {
  return (
    <div className={styles.container}>
      <Head>
        <link rel="icon" href="/favicon.ico" />
        <meta
          name="description"
          content="Learn how to build a personal website using Next.js"
        />
        <meta
          property="og:image"
          content={`https://og-image.vercel.app/${encodeURI(
            siteTitle,
          )}.png?theme=light&md=0&fontSize=75px&images=https%3A%2F%2Fassets.vercel.com%2Fimage%2Fupload%2Ffront%2Fassets%2Fdesign%2Fnextjs-black-logo.svg`}
        />
        <meta name="og:title" content={siteTitle} />
        <meta name="twitter:card" content="summary_large_image" />
      </Head>
      <header className={styles.header}>
        {home ? (
          <>
            <Image
              priority
              src="/images/profile.jpg"
              className={utilStyles.borderCircle}
              height={144}
              width={144}
              alt=""
            />
            <h1 className={utilStyles.heading2Xl}>{name}</h1>
          </>
        ) : (
          <>
            <Link href="/">
              <Image
                priority
                src="/images/profile.jpg"
                className={utilStyles.borderCircle}
                height={108}
                width={108}
                alt=""
              />
            </Link>
            <h2 className={utilStyles.headingLg}>
              <Link href="/" className={utilStyles.colorInherit}>
                {name}
              </Link>
            </h2>
          </>
        )}
      </header>
      <main>{children}</main>
      {!home && (
        <div className={styles.backToHome}>
          <Link href="/">← Back to home</Link>
        </div>
      )}
    </div>
  );
}
重要なことメモ
静的HTMLのデータ取得方法
-
getSTtaticProps:これを使うことでデータとして他のファイルから取得でき、それをHomeページのデータとして載せることができる(外部データを取得する必要があるページでもStatic Generation(SSG)を使える)
今回のindex.jsのようなページ以外のファイルからはexportできないので注意
index.js
import { getSortedPostsData } from '../lib/posts'
export async function getStaticProps() {
const allPostsData = getSortedPostsData();
return {
props: {
allPostsData,
},
};
}
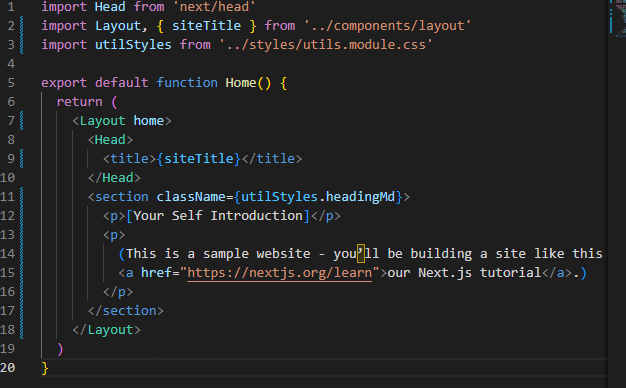
export default function Home({ allPostsData }) {
return (
<Layout home>
<Head>
<title>{siteTitle}</title>
</Head>
<section className={`${utilStyles.headingMd} ${utilStyles.padding1px}`}>
<h2 className={utilStyles.headingLg}>Blog</h2>
<ul className={utilStyles.list}>
{allPostsData.map(({ id, date, title }) => (
<li className={utilStyles.listItem} key={id}>
{title}
<br />
{id}
<br />
{date}
</li>
))}
</ul>
</section>
</Layout>
)
}
lib/posts.js
import fs from 'fs';
import path from 'path';
import matter from 'gray-matter';

const postsDirectory = path.join(process.cwd(), 'posts');

export function getSortedPostsData() {
  // Get file names under /posts
  const fileNames = fs.readdirSync(postsDirectory);
  const allPostsData = fileNames.map((fileName) => {
    // Remove ".md" from file name to get id
    const id = fileName.replace(/\.md$/, '');

    // Read markdown file as string
    const fullPath = path.join(postsDirectory, fileName);
    const fileContents = fs.readFileSync(fullPath, 'utf8');

    // Use gray-matter to parse the post metadata section
    const matterResult = matter(fileContents);

    // Combine the data with the id
    return {
      id,
      ...matterResult.data,
    };
  });
  // Sort posts by date
  return allPostsData.sort((a, b) => {
    if (a.date < b.date) {
      return 1;
    } else {
      return -1;
    }
  });
}
- 外部APIのフェッチ
export async function getSortedPostsData() {
  // Instead of the file system,
  // fetch post data from an external API endpoint
  const res = await fetch('..');
  return res.json();
}
動的URLの作成
-
Dynamic Routes:Next.jsではブログ投稿のidに応じてURLを作成したい場合など、動的なURL(ページ)生成が可能になる
方法として、pages配下の適当なディレクトリに[id(なんでもいい)].jsを作成する
このように[で始まり]で終わるページはリクエストされたURLに応じてにより動的にページが返されるようになる
posts.js内のgetAllPostIds()でブログのid(タイトル部分)をとってくるメソッドを作る
[id].js内でgetStaticPaths()を定義し、↓のような感じでpathsを返すようにしている

lib/posts.js
// これを追加
export function getAllPostIds() {
  const fileNames = fs.readdirSync(postsDirectory);

  // Returns an array that looks like this:
  // [
  //   {
  //     params: {
  //       id: 'ssg-ssr'
  //     }
  //   },
  //   {
  //     params: {
  //       id: 'pre-rendering'
  //     }
  //   }
  // ]
  return fileNames.map((fileName) => {
    return {
      params: {
        id: fileName.replace(/\.md$/, ''),
      },
    };
  });
}
pages/posts/[id].js
import Layout from '../../components/layout';
import { getAllPostIds } from '../../lib/posts';

export async function getStaticPaths() {
    const paths = getAllPostIds()
    return {
      paths,
      fallback: false
    }
  }

export default function Post() {
  return <Layout>...</Layout>;
}
-
getStaticProps:各ページのpropsとして返すものを定義する関数
この例では、post.js内のgetPostData(id)メソッドでidに紐づいたブログデータを取得でき、[id].jsのgetStaticProps({ params })内でpropsとして定義したいもの(今回でいうとブログデータ)を設定している
post.js
export function getPostData(id) {
  const fullPath = path.join(postsDirectory, `${id}.md`);
  const fileContents = fs.readFileSync(fullPath, 'utf8');

  // Use gray-matter to parse the post metadata section
  const matterResult = matter(fileContents);

  // Combine the data with the id
  return {
    id,
    ...matterResult.data,
  };
}
[id].js
import { getAllPostIds, getPostData } from '../../lib/posts'

export async function getStaticPaths() {
    const paths = getAllPostIds();
    return {
        paths,
        fallback: false,
    };
}

export async function getStaticProps({ params }) {
    const postData = getPostData(params.id)
    return {
        props: {
            postData
        }
    }
}

export default function Post({ postData }) {
    return (
        <Layout>
            {postData.title}
            <br />
            {postData.id}
            <br />
            {postData.date}
        </Layout>
    );
}
- マークダウンを使ったコンテンツをHTMLにして表示する
npm install remark remark-htmlインストールする
post.jsにインポートとgetPostData(id)メソッド内にHTML取得の処理を追加する
[id].jsにマークダウンをHTMLに変換したものを追加する
ここで、dangerouslySetInnerHTMLを使用してcontentHtmlをレンダリングすることにより、Reactから安全にHTMLを生成できるようになっている
post.js
// これを最初にインポートする
import { remark } from 'remark';
import html from 'remark-html';

// asyncしてawaitできるようにする
export async function getPostData(id) {
  const fullPath = path.join(postsDirectory, `${id}.md`);
  const fileContents = fs.readFileSync(fullPath, 'utf8');

  // Use gray-matter to parse the post metadata section
  const matterResult = matter(fileContents);

  // Use remark to convert markdown into HTML string
  const processedContent = await remark()
    .use(html)
    .process(matterResult.content);
  const contentHtml = processedContent.toString();

  // Combine the data with the id
  return {
    id,
    contentHtml,
    ...matterResult.data,
  };
}
[id].js
export default function Post({ postData }) {
    return (
        <Layout>
            {postData.title}
            <br />
            {postData.id}
            <br />
            {postData.date}
            <br />
            // ↓を追加する
            <div dangerouslySetInnerHTML={{ __html: postData.contentHtml }} />
        </Layout>
    );
}
-
Dateのフォーマット変更:
npm install date-fnsインストール
components配下にdate.jsを作成
[id].jsにDateをインポートしてコンポーネントを使う
date.js
import { parseISO, format } from 'date-fns'

export default function Date({ dateString }) {
  const date = parseISO(dateString)
  return <time dateTime={dateString}>{format(date, 'LLLL d, yyyy')}</time>
}
[id].js
export default function Post({ postData }) {
    return (
        <Layout>
            <Head>
                <title>{postData.title}</title>
            </Head>
            {postData.title}
            <br />
            {postData.id}
            <br />
            <Date dateString={postData.date} />  // これに変更
            <br />
            <div dangerouslySetInnerHTML={{ __html: postData.contentHtml }} />
        </Layout>
    );
}
デプロイした
完成したページ↓
Vercelというホスティングサービスを使った
このスクラップは2022/12/11にクローズされました