Dockerのコンテナ内でFirebase Emulatorを動かしたい
背景
自社サービス開発時に認証システムとしてFirebase Authenticationを使用することになりました。ただ、アカウントごとに権限を分けて自社サービスを運用する必要があるため、開発時にはFirebase Emulatorを使用することを決定しました。その際、Dockerコンテナ内でFirebase Emulatorを動かした際に学んだ内容をまとめました。
実装
ディレクトリ構成
記事用に作った構成のためDockerを使うような構成ではありませんが、ご了承ください
.
├── README.md
├── docker
│   ├── emulators
│   └── frontend
├── docker-compose.yml
├── eslint.config.js
├── firebase-debug.log
├── firebase.json
├── index.html
├── package-lock.json
├── package.json
├── public
│   └── vite.svg
├── src
│   ├── App.css
│   ├── App.tsx
│   ├── assets
│   ├── firebase
│   ├── index.css
│   ├── main.tsx
│   └── vite-env.d.ts
├── tsconfig.app.json
├── tsconfig.json
├── tsconfig.node.json
└── vite.config.ts
Firebaseプロジェクト作成
今回はFirebaseプロジェクトが作成されていることが前提の構築になるためDockerの構築前にプロジェクトを作成していきます
下記から作成をしてください
Firebase CLIをインストール
Firebase CLIがインストールされていない場合、以下のコマンドを実行してください。
npm install -g firebase-tools
ローカル上でログイン
ローカル上でFirebaseにログインしてください
firebase login
Firebaseプロジェクト初期化
以下のコマンドを実行し、Firebaseプロジェクトの初期化を行います。
firebase init
基本的にご自身のプロジェクトに合わせて設定を選んで問題ないですが、本記事のメインの一つであるEmulatorsは選んでください
Emulators Setupもご自身のプロジェクトに合わせてください
今回はAuthentication Emulatorのみにしています
     ######## #### ########  ######## ########     ###     ######  ########
     ##        ##  ##     ## ##       ##     ##  ##   ##  ##       ##
     ######    ##  ########  ######   ########  #########  ######  ######
     ##        ##  ##    ##  ##       ##     ## ##     ##       ## ##
     ##       #### ##     ## ######## ########  ##     ##  ######  ########

You're about to initialize a Firebase project in this directory:

  /Users/roll1226/personalDevelopment/study-firebase-emulator

? Which Firebase features do you want to set up for this directory? Press Space to select features, then Enter to confirm your choices. Emulators: Set up local emulators for Firebase products

=== Project Setup

First, let's associate this project directory with a Firebase project.
You can create multiple project aliases by running firebase use --add,
but for now we'll just set up a default project.

? Please select an option: Use an existing project
? Select a default Firebase project for this directory: test-firebase-emulators-7de0a (test-firebase-emulators)
i  Using project test-firebase-emulators (test-firebase-emulators)

=== Emulators Setup
? Which Firebase emulators do you want to set up? Press Space to select emulators, then Enter to confirm your choices. Authentication Emulator
? Which port do you want to use for the auth emulator? 9099
? Would you like to enable the Emulator UI? Yes
? Which port do you want to use for the Emulator UI (leave empty to use any available port)?
? Would you like to download the emulators now? Yes

i  Writing configuration info to firebase.json...
i  Writing project information to .firebaserc...
i  Writing gitignore file to .gitignore...

✔  Firebase initialization complete!
firebase.jsonの設定変更
初期設定が完了したら、firebase.jsonを編集して、Docker内のFirebase Emulatorにローカル環境からアクセス可能にします。
{
  "emulators": {
    "auth": {
-      "port": 9099
+      "port": 9099,
+      "host": "0.0.0.0"
    },
    "ui": {
-      "enabled": true
+      "enabled": true,
+      "host": "0.0.0.0"
    },
    "singleProjectMode": true
  }
}
フロントを整える
プロジェクト作成
簡単に実装するためReact + viteで整えていきます
npm create vite@latest .
✔ Current directory is not empty. Please choose how to proceed: › Remove existing files and continue
✔ Select a framework: › React
✔ Select a variant: › TypeScript + SWC

Scaffolding project in /Users/roll1226/personalDevelopment/study-firebase-emulator...

Done. Now run:

  npm install
  npm run dev
Firebaseのライブラリをインストールしていきます
npm install firebase
ポート設定
開発サーバーのポートを固定するため、vite.config.tsを以下のように編集します。
import react from "@vitejs/plugin-react-swc";
import { defineConfig } from "vite";

// https://vite.dev/config/
export default defineConfig({
+  server: {
+    port: 3000,
+    host: "0.0.0.0",
+  },
  plugins: [react()],
});
.env作成
.envを整えていきます
今回はFirebase Emulatorのみ使用するので必要ない可能性はあります
ただ、実運用も考えた場合は記載しとくのが吉です
touch .env
VITE_FIREBASE_API_KEY="my_api_key"
VITE_FIREBASE_AUTH_DOMAIN="my_auth_domain"
VITE_FIREBASE_PROJECT_ID="my_project_id"
VITE_FIREBASE_STORAGE_BUCKET="my_storage_bucket"
VITE_FIREBASE_MESSAGING_SENDER_ID="my_messaging_sender_id"
VITE_FIREBASE_APP_ID="my_app_id"
Firebaseの初期化コード
Firebaseディレクトリを作成し、初期化コードを記述します。
mkdir src/firebase && touch src/firebase/index.ts
以下のコードを記載してください。
import { initializeApp } from "firebase/app";
import { connectAuthEmulator, getAuth } from "firebase/auth";

const firebaseConfig = {
  apiKey: import.meta.env.VITE_FIREBASE_API_KEY,
  authDomain: import.meta.env.VITE_FIREBASE_AUTH_DOMAIN,
  projectId: import.meta.env.VITE_FIREBASE_PROJECT_ID,
  storageBucket: import.meta.env.VITE_FIREBASE_STORAGE_BUCKET,
  messagingSenderId: import.meta.env.VITE_FIREBASE_MESSAGING_SENDER_ID,
  appId: import.meta.env.VITE_FIREBASE_APP_ID,
};

const app = initializeApp(firebaseConfig);
const auth = getAuth(app);

if (process.env.NODE_ENV === "development") {
  connectAuthEmulator(auth, "http://localhost:9099");
}

export { auth };
tsxを整える
確認がしやすいように表示部分も整えていきます
import {
  createUserWithEmailAndPassword,
  signInWithEmailAndPassword,
} from "@firebase/auth";
import { useCallback, useState } from "react";
import "./App.css";
import { auth } from "./firebase";

function App() {
  const [email, setEmail] = useState("");
  const [password, setPassword] = useState("");

  const singUpHandler = useCallback(async () => {
    await createUserWithEmailAndPassword(auth, email, password)
      .then((r) => console.log(r))
      .catch((e) => console.error(e));
  }, [email, password]);

  const signInHandler = useCallback(async () => {
    await signInWithEmailAndPassword(auth, email, password)
      .then((r) => console.log(r))
      .catch((e) => console.error(e));
  }, [email, password]);

  return (
    <>
      <label>
        メールアドレス
        <input type="email" onChange={(e) => setEmail(e.target.value)} />
      </label>
      <br />
      <label>
        パスワード
        <input type="password" onChange={(e) => setPassword(e.target.value)} />
      </label>
      <br />
      <button onClick={singUpHandler}>新規登録</button>
      <button onClick={signInHandler}>ログイン</button>
    </>
  );
}

export default App;
Dockerの設定を整える
初めにdocker-compose.ymlを作成していきます
docker-compose.yml
touch docker-compose.yml
作成出来たら処理を書いていきます
services:
  frontend:
    build:
      context: .
      dockerfile: docker/frontend/Dockerfile
    ports:
      - "3000:3000"
    environment:
      - VITE_FIREBASE_API_KEY=${VITE_FIREBASE_API_KEY:-null}
      - VITE_FIREBASE_AUTH_DOMAIN=${VITE_FIREBASE_AUTH_DOMAIN:-null}
      - VITE_FIREBASE_PROJECT_ID=${VITE_FIREBASE_PROJECT_ID:-null}
      - VITE_FIREBASE_STORAGE_BUCKET=${VITE_FIREBASE_STORAGE_BUCKET:-null}
      - VITE_FIREBASE_MESSAGING_SENDER_ID=${VITE_FIREBASE_MESSAGING_SENDER_ID:-null}
      - VITE_FIREBASE_APP_ID=${VITE_FIREBASE_APP_ID:-null}
    volumes:
      - ./:/frontend
      - frontend_node_modules:/frontend/node_modules

  emulators:
    build:
      context: .
      dockerfile: docker/emulators/Dockerfile
    ports:
      - "4000:4000"
      - "9099:9099"
    volumes:
      - ./:/emulators
      - ./docker/emulators/bin/:/root/.cache:cached
      - ./docker/emulators/config/:/root/.config:cached

volumes:
  frontend_node_modules:
Dockerfile
次はDockerfileを整えていきます
emulators用とfrontend用の二種類を用意しています
mkdir -p docker/emulators && touch docker/emulators/Dockerfile
mkdir docker/frontend && touch docker/frontend/Dockerfile
emulators用Dockerfile
FROM node:20.10.0-slim

WORKDIR /emulators

RUN npm install -g firebase-tools

COPY . .

# Firebase Emulator UI Port
EXPOSE 4000
# Firebase Emulator Auth Port
EXPOSE 9099

CMD ["npx", "firebase", "emulators:start"]
frontend用Dockerfile
FROM node:20.10.0-slim AS builder
WORKDIR /frontend
COPY ./package*.json ./
RUN npm ci
COPY . .
FROM node:20.10.0-slim
EXPOSE 3000
WORKDIR /frontend
COPY /frontend /frontend
CMD ["npm", "run", "dev"]
起動準備
ここまで出来たら起動準備をしていきます
初めにDockerのコンテナ内でFirebaseでログインするため下記をターミナルで実行してください
docker compose run --rm emulators firebase login --no-localhost
実行すると下記内容がターミナルに表示されるはずです

表示されたら2. Visit the URL below on any device and follow the instructions to get your code:に表示されているURLにアクセスしてください
アクセスするとアカウントを選択する画面に移ります
firebase login時と同じアカウントを選んでください

選択したアカウントで問題なければ「次へ」を押してください

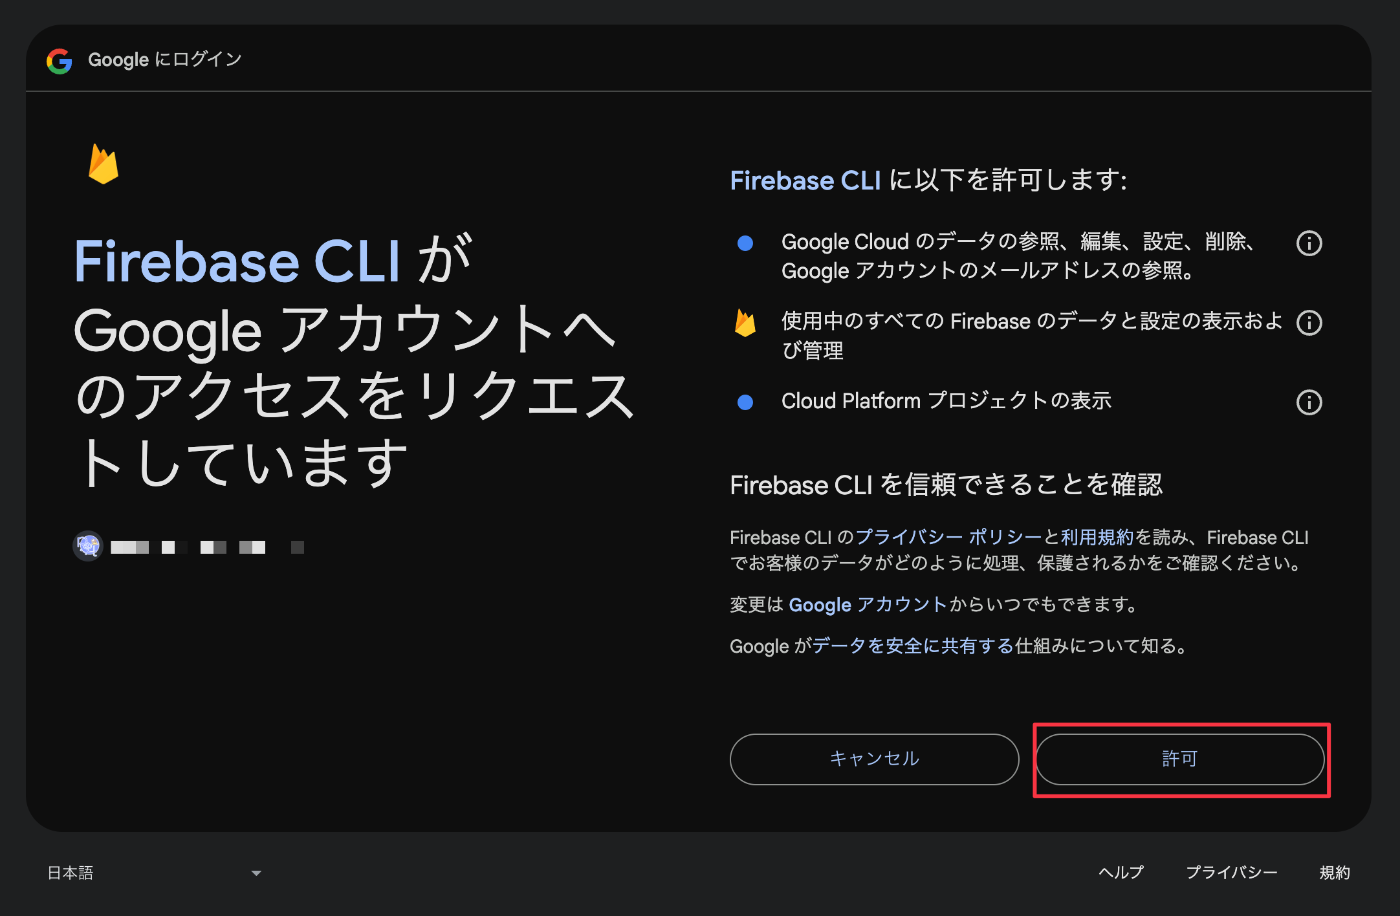
アクセス許可を聞かれるので問題なければ「許可」を押してください
すると画面が移り変わりfirebase login --no-localhostを実行したか、を聞いてくるので「Yes, I Just ran this command」を押してください

次に表示されているsessionIDがターミナルの1. Take note of your session ID:に表示されているsessionID一致しているか確認してきます
一致していれば「Yes, this is my session ID」を押してください

最後にauthorization codeが表示されるのでコピーしてターミナルの3. Paste or enter the authorization code below once you have it:にペースト・Enterを押してください
✔ Success! Logged in as {ご自身のメールアドレス}がターミナル上に表示されれば完了です

起動
下記コマンドを実行してください
docker compose up --build -d
起動後が下記localhostにアクセスして問題なく表示されたら起動完了です
サインアップ・サインイン処理を行うと実際のプロジェクトではなくFirebase Emulatorにアカウントが作成されるはずです


余談
Firebase EmulatorでFirebase authenticationを使用する際、データを永続化したいという方もいるかと思います
自分もその一人になります
Dockerを使用しないローカルのみでFirebase Emulatorを使用する場合は下記のように実行すると思います
firebase emulators:start --import data --export-on-exit
ただ、Dockerを使用して同じコマンドで実行しても再起動時に上手くデータを永続化することは出来ませんでした
そこで定期的にデータをexportすることにしました
シェルスクリプト
export用のシェルスクリプトを書いていきます
mkdir command && touch command/export.sh
#!/bin/bash

max_retries=10
retry_count=0

while true; do
  if curl --silent --head http://localhost:4000 | grep "200 OK" > /dev/null; then
    echo "Firebase Auth Emulator is running at http://localhost:4000"
    break
  else
    retry_count=$((retry_count + 1))
    echo "Waiting for Firebase Auth Emulator to start at http://localhost:4000... (Attempt $retry_count/$max_retries)"

    if [ "$retry_count" -ge "$max_retries" ]; then
      echo "Failed to detect Firebase Auth Emulator after $max_retries attempts. Exiting."
      exit 1
    fi

    sleep 5
  fi
done

while true; do
  export_dir="./export"

  firebase emulators:export $export_dir --only auth --force

  echo "Firebase Auth Emulator data exported to $export_dir"

  sleep 10
done
Dockerfile・package.json
作成したシェルスクリプトに合わせてDockerfileとpackage.jsonを整えていきます
FROM node:20.10.0-slim

WORKDIR /emulators

+ RUN apt-get update && apt-get install -y curl \
+   && apt-get clean \
+   && rm -rf /var/lib/apt/lists/*

RUN npm install -g firebase-tools

COPY . .

# Firebase Emulator UI
EXPOSE 4000
# Firebase Emulator Auth
EXPOSE 9099

- CMD ["npx", "firebase", "emulators:start"]
+ CMD ["npm", "run", "emulators"]
{
  "name": "study-firebase-emulator",
  "private": true,
  "version": "0.0.0",
  "type": "module",
  "scripts": {
    "dev": "vite",
    "build": "tsc -b && vite build",
    "lint": "eslint .",
    "preview": "vite preview",
+    "emulators": "npx firebase emulators:start --import ./export --export-on-exit & sh ./commands/export.sh"
  },
  "dependencies": {
    "firebase": "^11.1.0",
    "react": "^18.3.1",
    "react-dom": "^18.3.1"
  },
  "devDependencies": {
    "@eslint/js": "^9.17.0",
    "@types/react": "^18.3.18",
    "@types/react-dom": "^18.3.5",
    "@vitejs/plugin-react-swc": "^3.5.0",
    "eslint": "^9.17.0",
    "eslint-plugin-react-hooks": "^5.0.0",
    "eslint-plugin-react-refresh": "^0.4.16",
    "globals": "^15.14.0",
    "typescript": "~5.6.2",
    "typescript-eslint": "^8.18.2",
    "vite": "^6.0.5"
  }
}
再ビルド
最後に再ビルドをして実行してみてください
docker compose up --build
下記のようなログが出力されてexportというディレクトリにデータが作らているはずです
これによりDockerを再起動時してもデータを永続化が出来ます
emulators-1  |
emulators-1  | > study-firebase-emulator@0.0.0 emulators
emulators-1  | > npx firebase emulators:start --import ./export --export-on-exit & sh ./commands/export.sh
emulators-1  |
emulators-1  | Waiting for Firebase Auth Emulator to start at http://localhost:4000... (Attempt 1/10)
emulators-1  | i  emulators: Starting emulators: auth
emulators-1  | Waiting for Firebase Auth Emulator to start at http://localhost:4000... (Attempt 2/10)
emulators-1  |
emulators-1  | ┌─────────────────────────────────────────────────────────────┐
emulators-1  | │ ✔  All emulators ready! It is now safe to connect your app. │
emulators-1  | │ i  View Emulator UI at http://127.0.0.1:4000/               │
emulators-1  | └─────────────────────────────────────────────────────────────┘
emulators-1  |
emulators-1  | ┌────────────────┬──────────────┬────────────────────────────┐
emulators-1  | │ Emulator       │ Host:Port    │ View in Emulator UI        │
emulators-1  | ├────────────────┼──────────────┼────────────────────────────┤
emulators-1  | │ Authentication │ 0.0.0.0:9099 │ http://127.0.0.1:4000/auth │
emulators-1  | └────────────────┴──────────────┴────────────────────────────┘
emulators-1  |   Emulator Hub running at 127.0.0.1:4400
emulators-1  |   Other reserved ports: 4500
emulators-1  |
emulators-1  | Issues? Report them at https://github.com/firebase/firebase-tools/issues and attach the *-debug.log files.
emulators-1  |
emulators-1  | Firebase Auth Emulator is running at http://localhost:4000
emulators-1  | i  Found running emulator hub for project test-firebase-emulators-7de0a at http://127.0.0.1:4400
emulators-1  | i  Creating export directory /emulators/export
emulators-1  | i  Exporting data to: /emulators/export
emulators-1  | i  emulators: Received export request. Exporting data to /emulators/export.
emulators-1  | ✔  emulators: Export complete.
emulators-1  | ✔  Export complete
emulators-1  | Firebase Auth Emulator data exported to ./export
参考
Discussion