【Flutter】画像のBlur(ぼかし)を5種類比較してみた
はじめに
iOSではコントロールセンターやホーム画面など様々なデザインに利用されているblur(ぼかし)。

Flutterにはいくつものぼかし処理が存在する。今回は以下の5種類の方法を試す。
・【ウィジェット】BackdropFilter
・【ウィジェット】ImageFiltered
・【パッケージ】blur
・【パッケージ】image > gaussianBlur
・【パッケージ】flutter_blurhash
【ウィジェット】BackdropFilter
BackdropFilter BackdropFilter({
  Key? key,
  required ImageFilter filter,
  Widget? child,
  BlendMode blendMode = BlendMode.srcOver,
})
// ぼかし処理をするためにImageFilterにはblurを使用
ImageFilter ImageFilter.blur({
  double sigmaX = 0.0, // X方向(横方向)のぼかしの強さ
  double sigmaY = 0.0, // Y方向(縦方向)のぼかしの強さ
  TileMode tileMode = TileMode.clamp,
})
ぼかしはBackdropFilterのchildではなく親ウィジェットまたは祖先ウィジェットのクリップ内のすべての領域に適用される。クリップがない場合、フィルターは全画面に適用される。
Flutterウィジェットのため外部パッケージ不要で利用可能である。
【ウィジェット】ImageFiltered
ImageFiltered ImageFiltered({
  Key? key,
  required ImageFilter imageFilter,
  Widget? child, // ぼかし対象
  bool enabled = true,
})
If all you want to do is apply an ImageFilter to a single widget (as opposed to applying the filter to everything beneath a widget), use ImageFiltered instead. For that scenario, ImageFiltered is both easier to use and less expensive than BackdropFilter.
(訳)ウィジェットの下にあるすべてのものにフィルターを適用するのではなく、単一のウィジェットにImageFilterを適用するだけの場合は、代わりにImageFilteredを使用する。このシナリオでは、ImageFilteredの方がBackdropFilterよりも使いやすく、コストもかからない。
【パッケージ】blur
Blur blurred({
  double blur = 5, // ぼかしの強さ
  Color blurColor = Colors.white, // colorOpacity>0の場合、blurが指定した色になる
  BorderRadius? borderRadius, // blur対象の角丸設定
  double colorOpacity = 0.5, // blurColorの透過率
  Widget? overlay, // 上に重ねるWidget(これにblurは適用されない)
  AlignmentGeometry alignment = Alignment.center, // overlayの位置
})
blurパッケージのBlurクラスの内部を見てみる。
class Blur extends StatelessWidget {
const Blur({
Key? key,
required this.child,
this.blur = 5,
this.blurColor = Colors.white,
this.borderRadius,
this.colorOpacity = 0.5,
this.overlay,
this.alignment = Alignment.center,
}) : super(key: key);
final Widget child;
final double blur;
final Color blurColor;
final BorderRadius? borderRadius;
final double colorOpacity;
final Widget? overlay;
final AlignmentGeometry alignment;
Widget build(BuildContext context) {
return ClipRRect(
borderRadius: borderRadius ?? BorderRadius.zero,
child: Stack(
children: [
child,
Positioned.fill(
// 注目
child: BackdropFilter(
filter: ImageFilter.blur(sigmaX: blur, sigmaY: blur),
child: Container(
decoration: BoxDecoration(
color: blurColor.withOpacity(colorOpacity),
),
alignment: alignment,
child: overlay,
),
),
),
],
),
);
}
}
このように、BackdropFilterに色付きのContainerを重ねて「ぼかしに色を付けたような効果」を作り出している。
必要最低限の機能で問題ない場合にはシンプルで扱いやすいが、その分カスタム性が低い。
【パッケージ】image > gaussianBlur
Image gaussianBlur(
  Image src, {
  required int radius, // ぼかしの強さ
  Image? mask, // maskChannelを有効にするための画像データ。ぼかしをどの範囲や強度で適用するかを制御する。
  Channel maskChannel = Channel.luminance, // ぼかしを適用する際に使用するマスク画像の色チャンネルを変更できる。
// 選択肢:red, green, blue, alpha, luminance
})
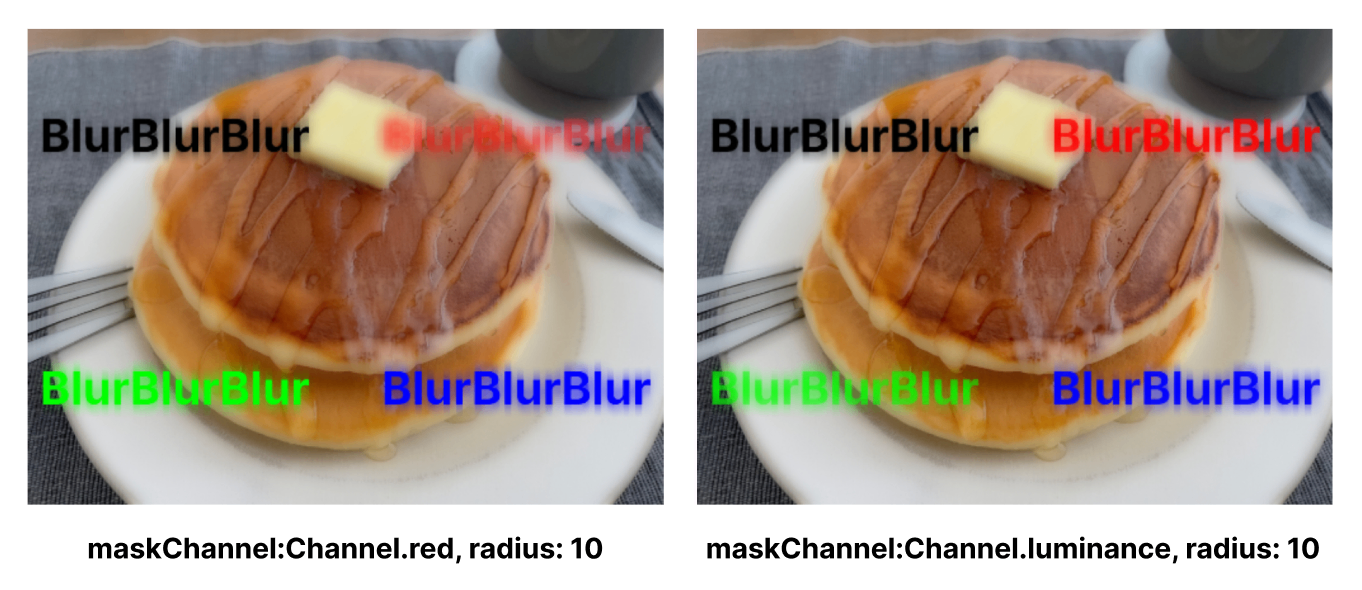
マスク画像のどのチャンネル(色成分)を利用するかを指定するmaskChannelを引数にもつ。
【例】maskChannelをredにすると(左)赤のぼかしが強く現れる

リアルタイム処理に非対応で、事前に画像を加工する用途に向いている。
画像が高解像度である場合、ぼかし画像を生成するのに時間がかかる。
ぼかし画像を直接表示させるものではないため、ローカルやメモリに画像データを保存し、それを表示させる必要がある。
【パッケージ】flutter_blurhash
BlurHash BlurHash({
  required String hash, //ハッシュ文字列。 画像がリモートからロードされるまでの間に表示するぼやけた画像(BlurHash画像)を生成するために使用。
  Key? key,
  Color color = Colors.blueGrey, // BlurHash画像のデコード中に表示される背景色
  BoxFit imageFit = BoxFit.fill,
  int decodingWidth = _DEFAULT_SIZE,
  int decodingHeight = _DEFAULT_SIZE,
  String? image, // ネットワーク上にあるリモート画像。nullだとずっとBlurHash画像のまま
  void Function()? onDecoded, // BlurHash画像のデコード時に呼ばれる
  void Function()? onDisplayed, // BlurHash画像からダウンロードしたリモート画像に表示が切り替わった時に呼ばれる
  void Function()? onReady, // リモート画像のロード完了時に呼ばれる
  void Function()? onStarted, // リモート画像のロード開始時に呼ばれる
  Duration duration = const Duration(milliseconds: 1000), // BlurHash画像からリモート画像へのフェードインアニメーションの時間
  Map<String, String> httpHeaders = const {},
  Curve curve = Curves.easeOut, // フェードインアニメーションの速度とタイミングを調整
  Widget Function(BuildContext, Object, StackTrace?)? errorBuilder,
})

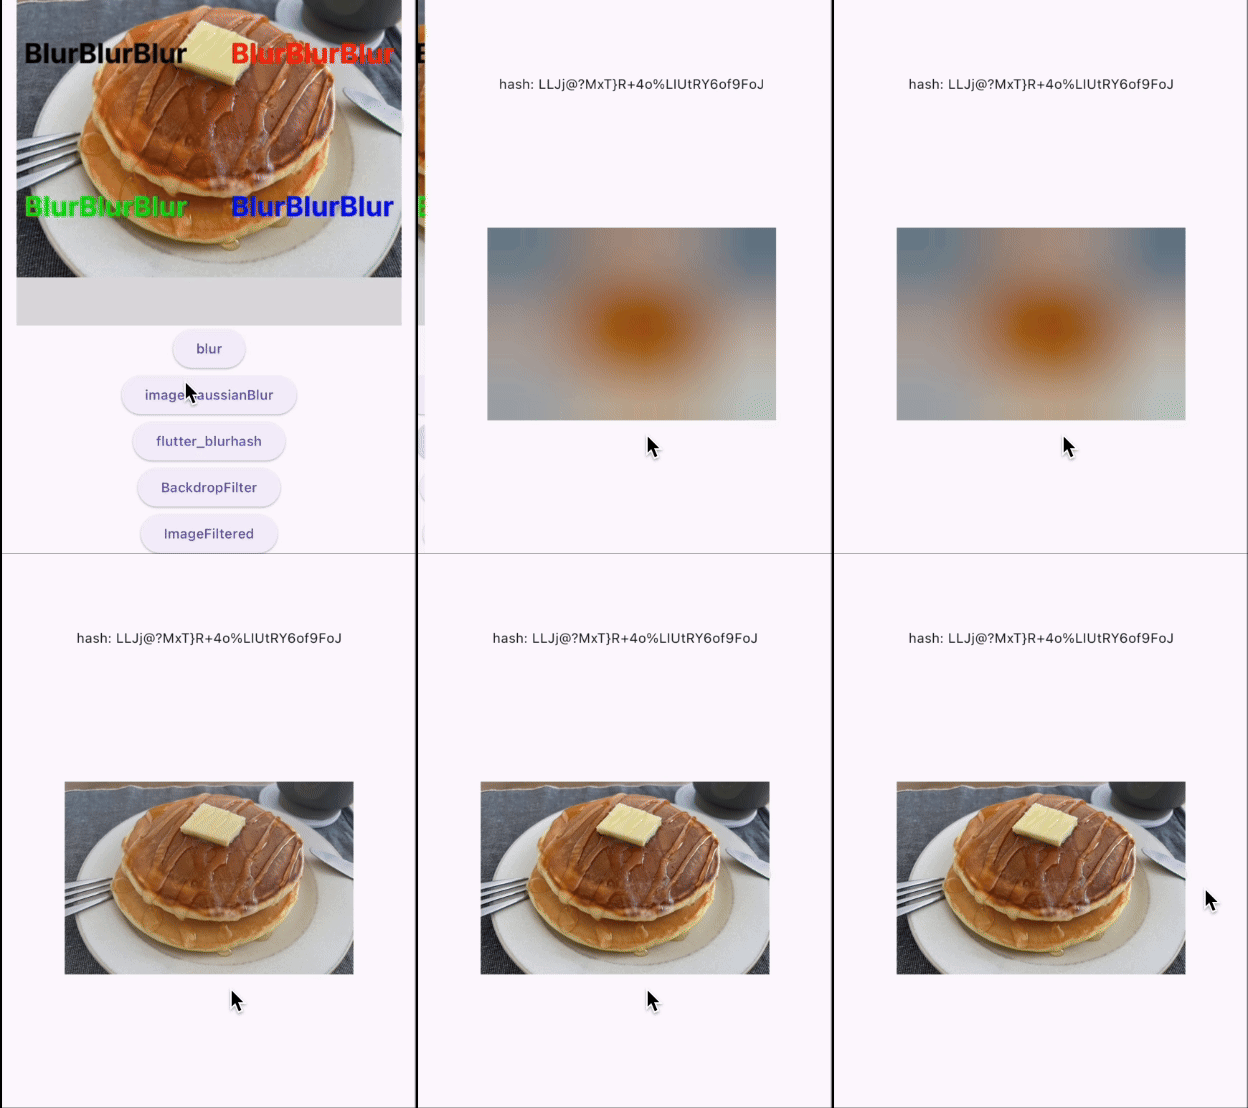
String? imageを指定した場合、ネットワーク上にある画像をダウンロードしている間、ハッシュ文字列から表現したぼかし画像を表示される。ダウンロード完了次第、その画像に切り替わる。
これまでに紹介した4つと異なり、画像ではなくハッシュ文字列をもとにぼかし画像が生成される。
画像の構造を大まかに表現するため、元の画像に比べて精度が低い。
flutter_blurhash自体にハッシュ文字列を生成する機能はないため、https://blurha.sh/ などを用いて別途生成する必要がある。
パッケージの最終更新(2023/11/18)から1年以上経過している。※2024/12時点
比較
| BackdropFilter | ImageFiltered | blur | gaussianBlur | flutter_blurhash | |
|---|---|---|---|---|---|
| 特徴 | ウィジェットの背景にあるものをぼかす | さまざまなフィルタ効果(ぼかし、色変換、回転など)が存在 | BackdropFilterでできている | データの保存が可能 | 画像読み込み中のUX向上として活躍 |
| 長所 | Flutterのウィジェット | 単一ウィジェットをぼかすならBackdropFilterよりおすすめ | シンプル | チャネルの指定やマスクなど柔軟 | 必要なデータ(ハッシュ文字列)は軽量 |
| 短所 | 複雑だとパフォーマンスが落ちる | 背景ぼかしや複雑なデザインには不向き | カスタマイズの制限 | 高解像度画像は時間がかかる | 画像をぼかすものではない |
選ぶ際に考慮したい点
・ぼかしたい画像が高解像度か
・ぼかした画像を背景に使用するか
・ぼかした画像にウィジェットを重ねたり複雑な動きを持たせるか
・ぼかした画像をロード中のサムネイルとして使用するか
・ぼかし方(方向、強度、色など)について細かく指定するか
・ぼかす範囲について細かく指定するか
・動的なぼかしが必要か
→ 静的な場合、gaussianBlurでぼかした画像をローカルに保存し、Image.asset()で表示させる方法も
使用したコード
Discussion