JavaScriptで始めるProtocol Buffers(protobuf)
この記事について
Protocol Buffers(protobuf)は元々はGoogleが開発した基盤技術で、現在ではオープンソース化されている。
そのprotobufを使ったバイナリ形式へのencode(シリアライズ)とdecodeを、JavaScriptでの実装を通して学ぶための記事です。

- Client側: React.jsで作成した簡易的なWebアプリ
- Backend側: node.js(express利用)で作成した簡易的なAPIサーバー
□ Client/Backend APIの両方でJavaScriptを利用してprotobuf(Protocol Buffers)を使う。
□ Clientでprotobufの定義を使いencode(シリアライズ)し、Backend APIでprotobufの定義を使ってdecodeする。
protobufとは
最初の理解に関わるポイントのみ記載。
□ .protoファイルの定義内容に基づき、データをバイナリ形式にencode(シリアライズ)可能。
もちろんencodeしたデータのdecode(デシリアライズ)もできる。
□ バイナリ形式にencodeする場合、.protoファイルが必要であり、encode・decodeするシステムが別システムならば、両方のシステムで定義ファイル(.protoファイル)を保持する必要がある。
□ Protocol Buffersは元々は Google が開発したもの。
※詳細な解説は公式サイトや色々なサイトで説明されているので割愛。
protobufを使えると嬉しいこと
□ encodeされたデータは軽量なため、API利用時など通信時のデータサイズを小さくできる。
通信コストが厳しく問われる場合、protobufの使用を検討するメリットがある。
□ XMLやJSONを使う場合よりも処理時間が高速。
□ 様々な言語で利用できるので、言語依存しない。
手順
ソースコード
完成形のソースコードは下記のレポジトリに入っています。
必要に応じて参照してください。
□ Client
□ Backend
□ 利用したライブラリ
エンコードとデコードには https://github.com/protobufjs/protobuf.js を利用しました。
protobufjsはJavscriptでProtobufを扱えるようにしたライブラリです。
1.backend側を作成する
1-1.事前準備
□ 任意のフォルダを作成し、Visual Studio Codeで開く。
□ expressをinstallする
手軽にシンプルなAPIサーバーを作りたいため、expressを今回は利用する。
(APIの構築というよりも、protobufを使うことに重きを置いているため)
yarn add express
□ protobufjsをinstallする。
yarn add protobufjs
□ package.jsonとyarn.lockファイルが作成されていることを確認。

1-2.expressでサーバーを立ち上げ、動作確認用のAPIを作成
expressを使ったAPIの作り方の理解のため、簡単なGETのAPIを作成する。
ここでは単純なexpressを使ったサーバーの動作確認のみで、まだprotobufは使用していません。
□ backend.jsという名称で新規ファイルを作成する。
// backend.js
const express = require('express')
const app = express()
const port = 3001;

app.listen(port, () => {
    console.log(`Example app listening on port ${port}`)

})

/** 動作確認用の簡単なGETのAPI */
app.get('/hello_world', function (req, res, next) {
    res.send("hello_world!! こんにちは!!")
})

□ terminalで下記を実行し、expressでサーバー起動
node backend.js
□ 作成したhello_worldのAPI (http://localhost:3001/hello_world)をPostmanで実行してみる。

1-3.データをprotobufでencodeするAPIを作成する
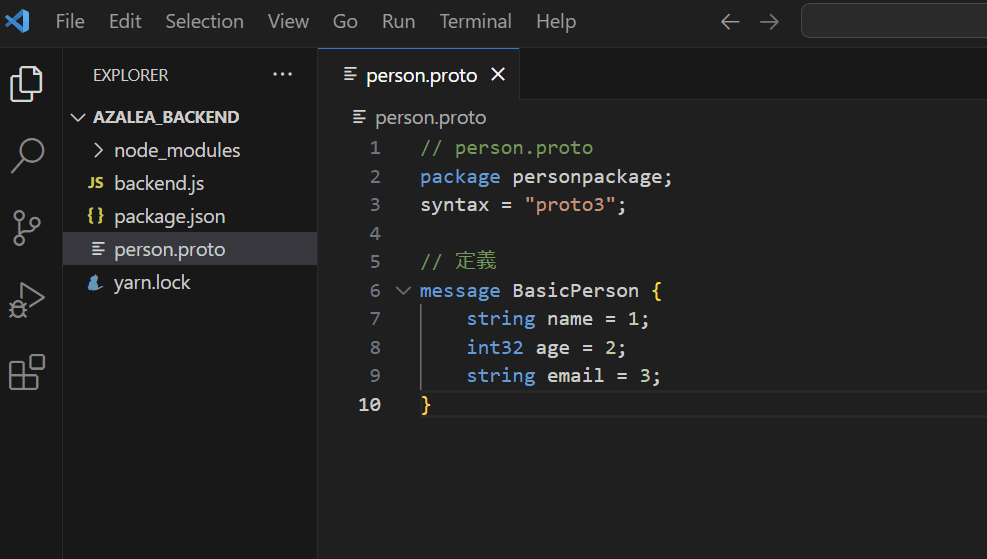
□ person.proto の名称でファイルを新規作成する。
// person.proto
package personpackage;
syntax = "proto3";

// 定義
message BasicPerson {
    string name = 1;
    int32 age = 2;
    string email = 3;
}
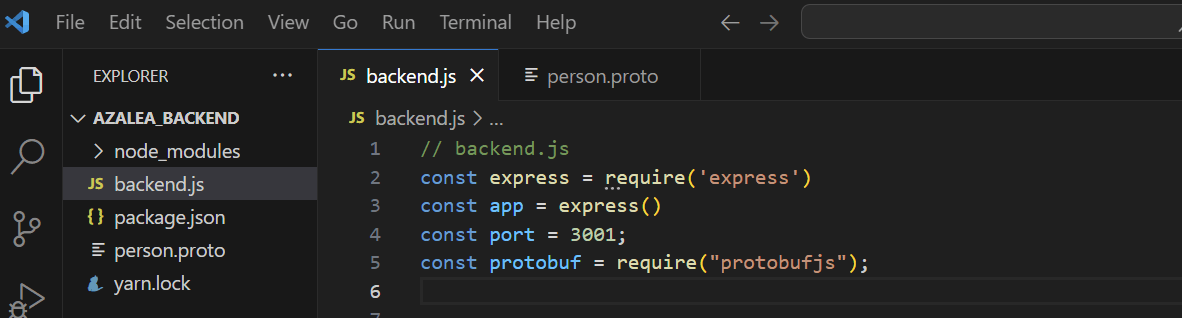
□ backend.jsにライブラリの読み込みを追加する
// backend.js
const express = require('express')
const app = express()
const port = 3001;

// 追加
const protobuf = require("protobufjs");
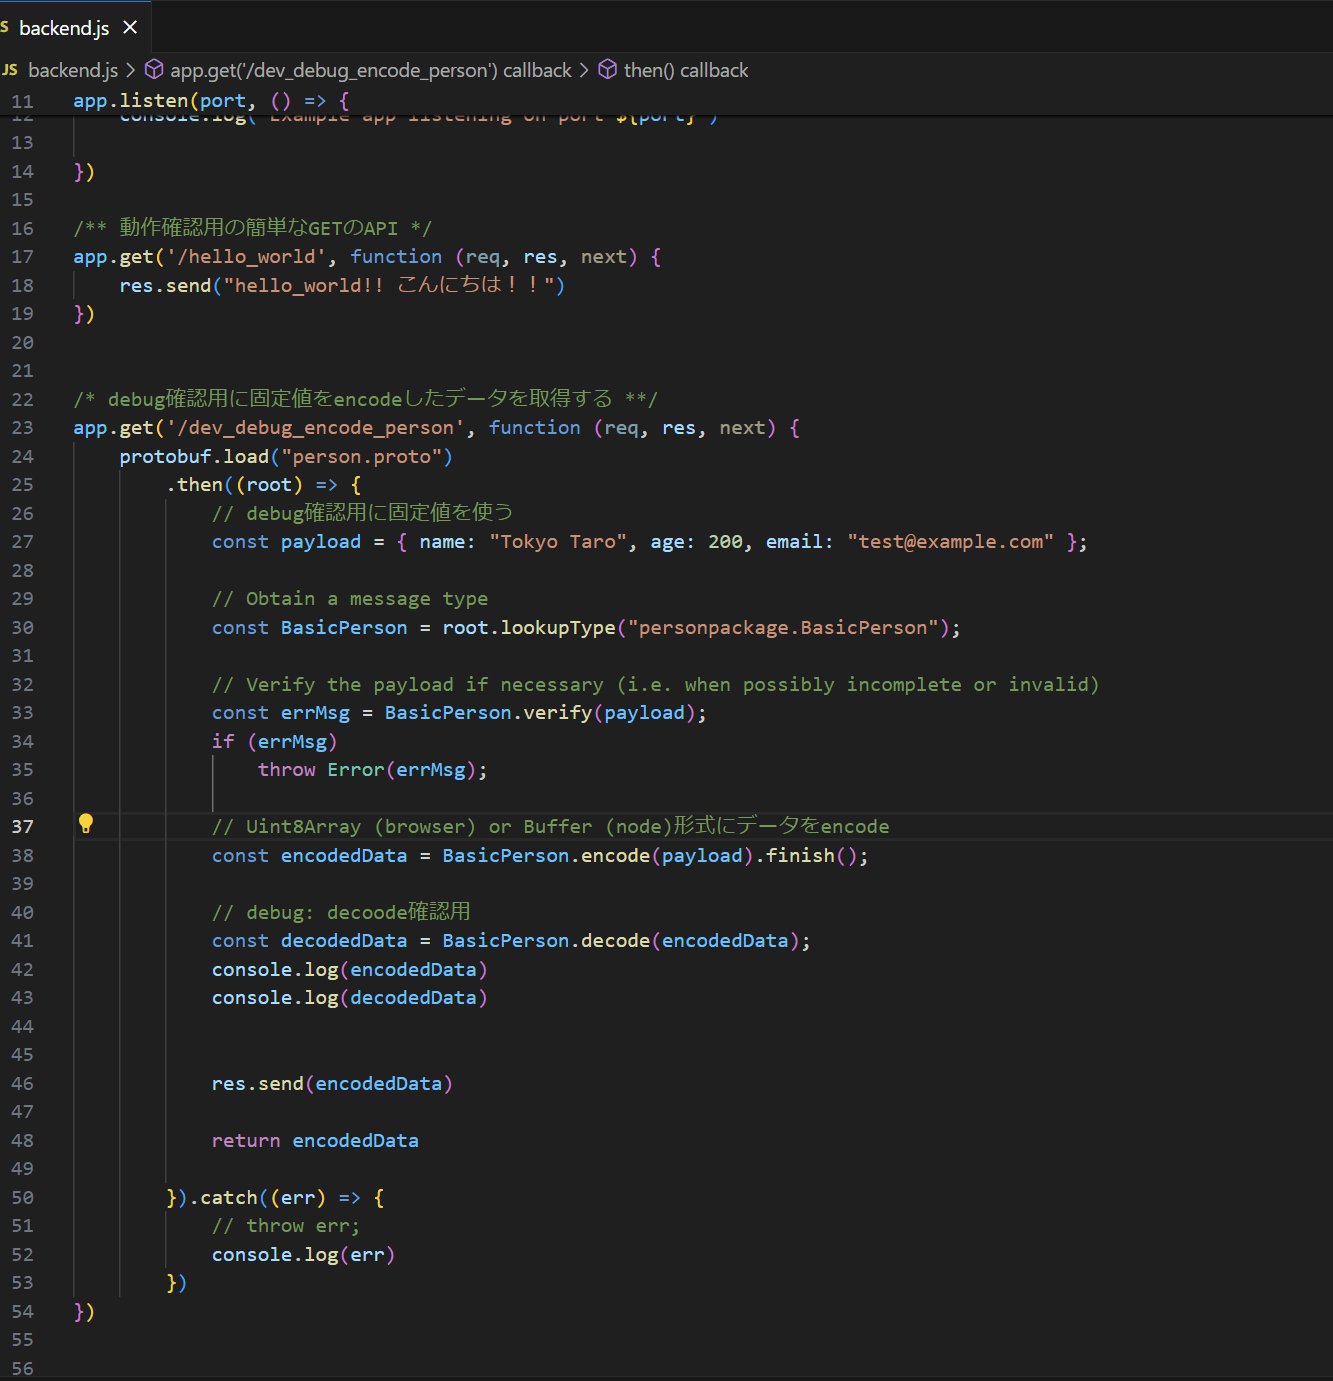
□ 固定値をprotobufでencodeしたデータを取得するAPIを作成(debug確認用API)
backend.jsに下記を追加する。
/* debug確認用に固定値をencodeしたデータを取得する **/
app.get('/dev_debug_encode_person', function (req, res, next) {
    protobuf.load("person.proto")
        .then((root) => {
            // debug確認用に固定値を使う
            const payload = { name: "Tokyo Taro", age: 200, email: "test@example.com" };

            // Obtain a message type
            const BasicPerson = root.lookupType("personpackage.BasicPerson");

            // Verify the payload if necessary (i.e. when possibly incomplete or invalid)
            const errMsg = BasicPerson.verify(payload);
            if (errMsg)
                throw Error(errMsg);

            // Uint8Array (browser) or Buffer (node)形式にデータをencode
            const encodedData = BasicPerson.encode(payload).finish();

            // debug: decoode確認用
            const decodedData = BasicPerson.decode(encodedData);
            console.log(encodedData)
            console.log(decodedData)


            res.send(encodedData)

            return encodedData

        }).catch((err) => {
            // throw err;
            console.log(err)
        })
})
□ terminalで下記を実行し、expressでサーバー起動
node backend.js
□ API をPostmanからリクエストし確認 (http://localhost:3001/dev_debug_encode_person)
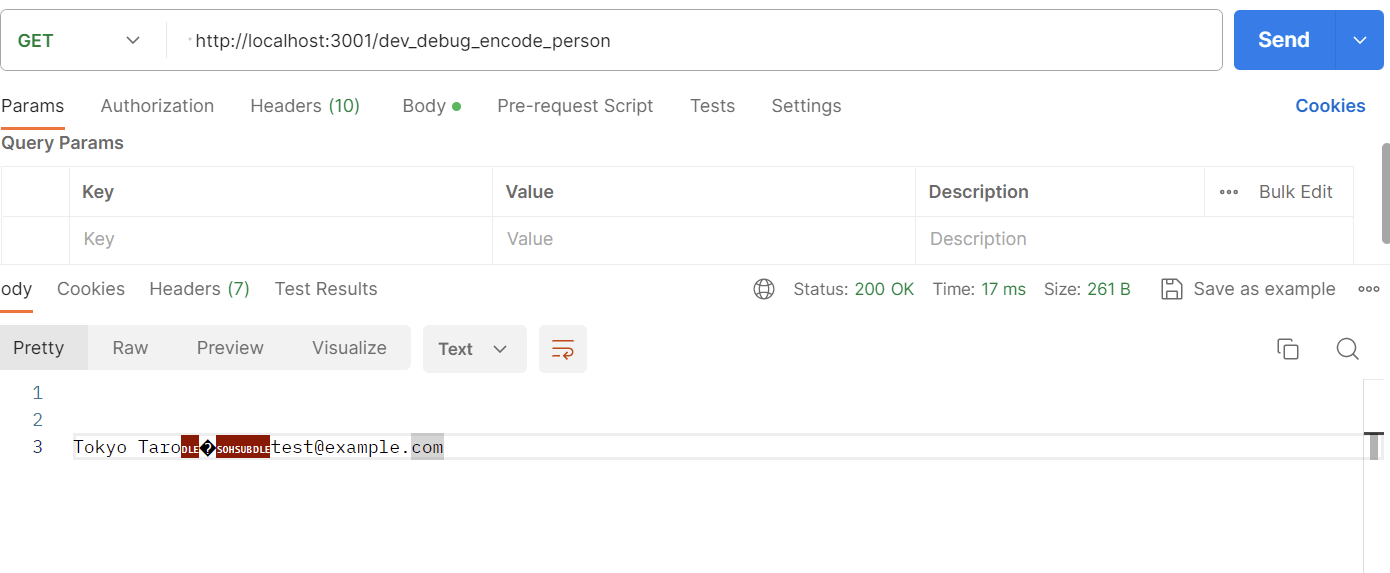
□ APIをChromeからリクエストし確認 (http://localhost:3001/dev_debug_encode_person)
ファイルがdownloadされるので、取っておく。
ダウンロードされたファイルを後の動作確認で使用するためです。
1-4.protobufを使ってデータをdecodeするAPIを作成する
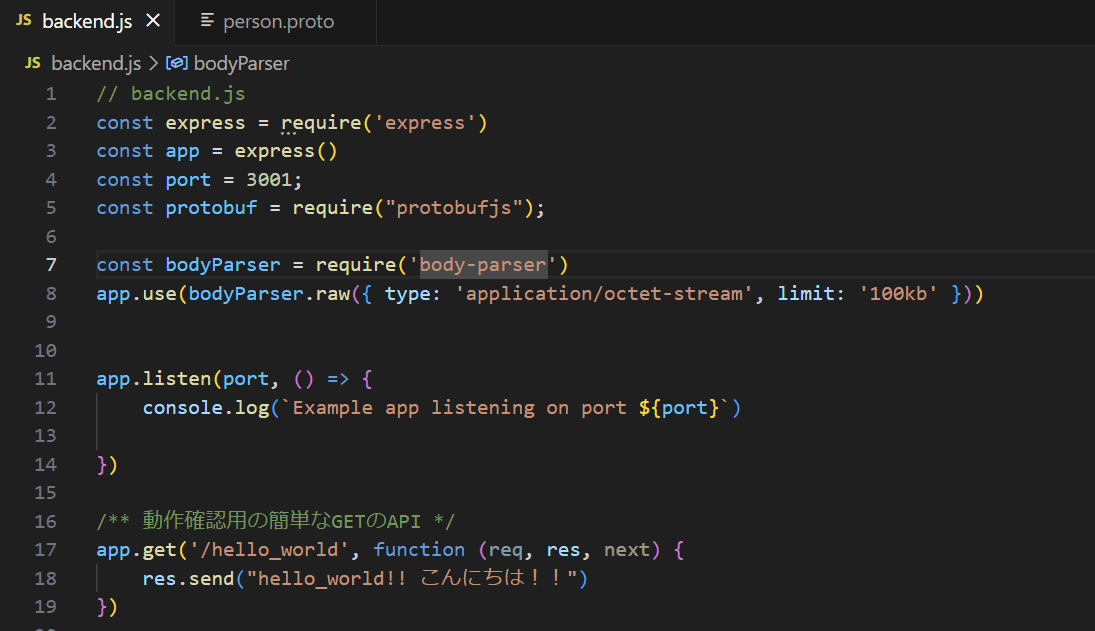
□ backend.jsにbodyParserとapp.useの定義を追加する
// backend.js
const express = require('express')
const app = express()
const port = 3001;
const protobuf = require("protobufjs");

// 追加
const bodyParser = require('body-parser')
app.use(bodyParser.raw({ type: 'application/octet-stream', limit: '100kb' }))
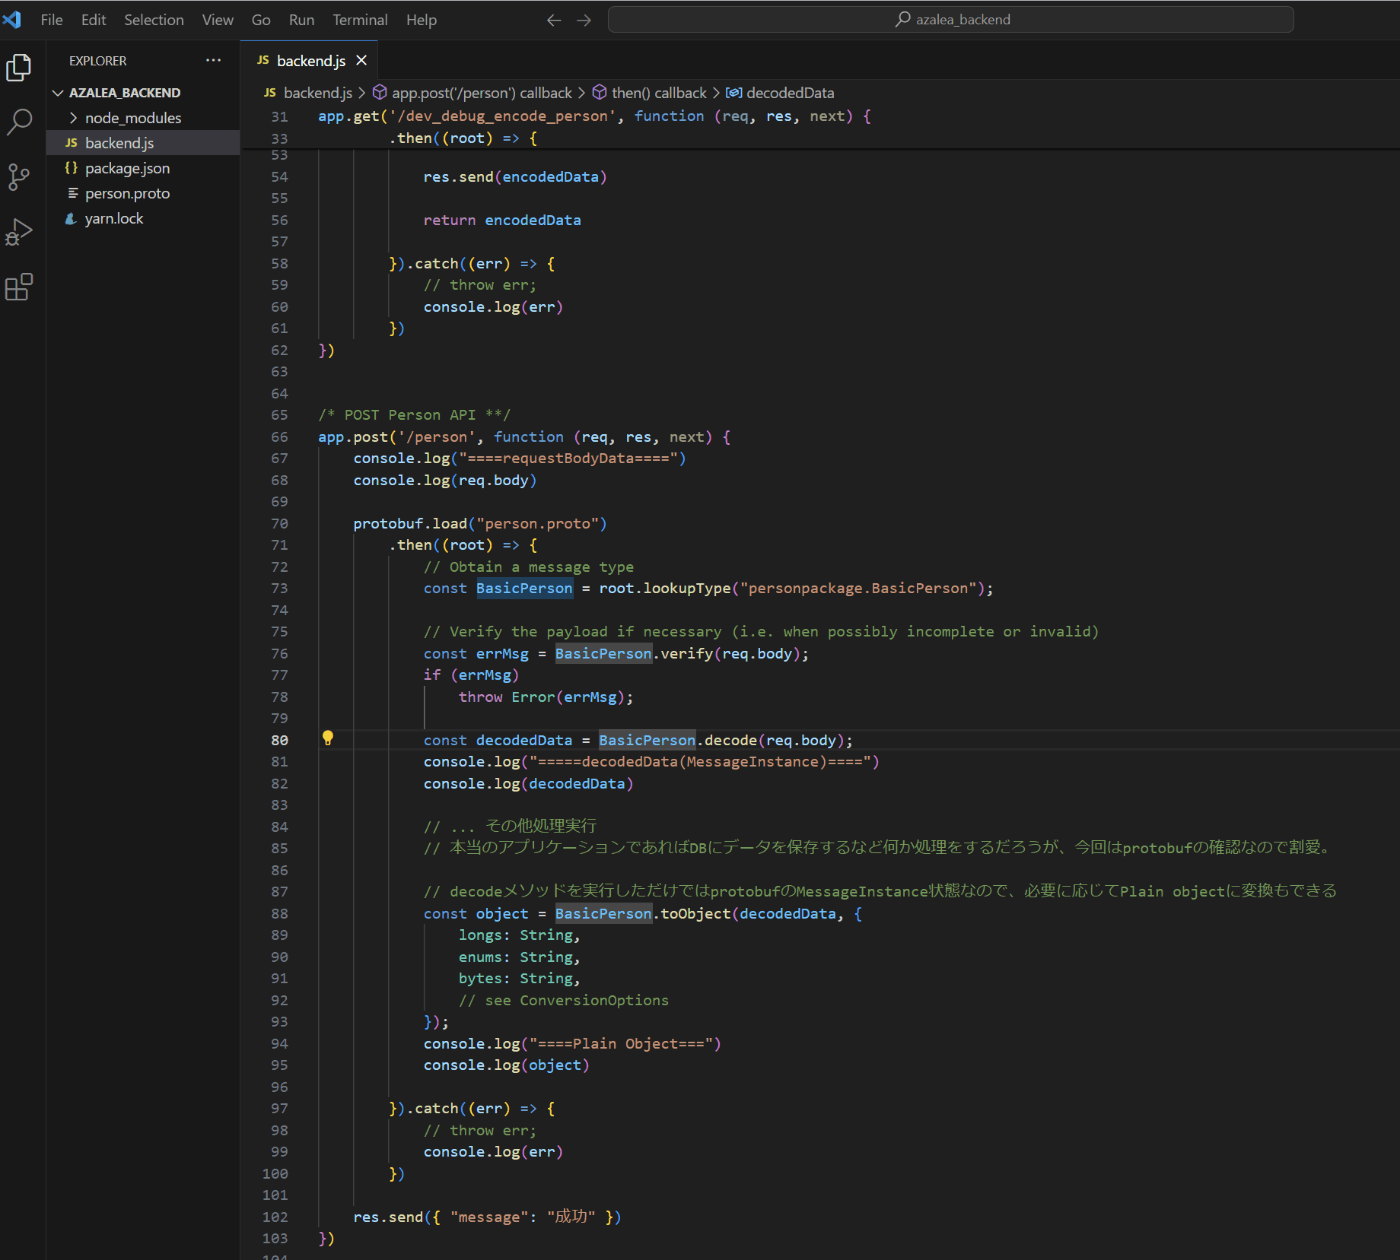
□ データをprotobufでdecodeするAPIを作成する
backend.jsに下記の定義を追加する。
/* POST Person API **/
app.post('/person', function (req, res, next) {
    console.log("====requestBodyData====")
    console.log(req.body)

    protobuf.load("person.proto")
        .then((root) => {
            // Obtain a message type
            const BasicPerson = root.lookupType("personpackage.BasicPerson");

            // Verify the payload if necessary (i.e. when possibly incomplete or invalid)
            const errMsg = BasicPerson.verify(req.body);
            if (errMsg)
                throw Error(errMsg);

            const decodedData = BasicPerson.decode(req.body);
            console.log("=====decodedData(MessageInstance)====")
            console.log(decodedData)

            // ... その他処理実行
            // 本当のアプリケーションであればDBにデータを保存するなど何か処理をするだろうが、今回はprotobufの確認なので割愛。

            // decodeメソッドを実行しただけではprotobufのMessageInstance状態なので、必要に応じてPlain objectに変換もできる
            const object = BasicPerson.toObject(decodedData, {
                longs: String,
                enums: String,
                bytes: String,
                // see ConversionOptions
            });
            console.log("====Plain Object===")
            console.log(object)

        }).catch((err) => {
            // throw err;
            console.log(err)
        })

    res.send({ "message": "成功" })
})
□ terminalで下記を実行し、expressでサーバー起動
node backend.js
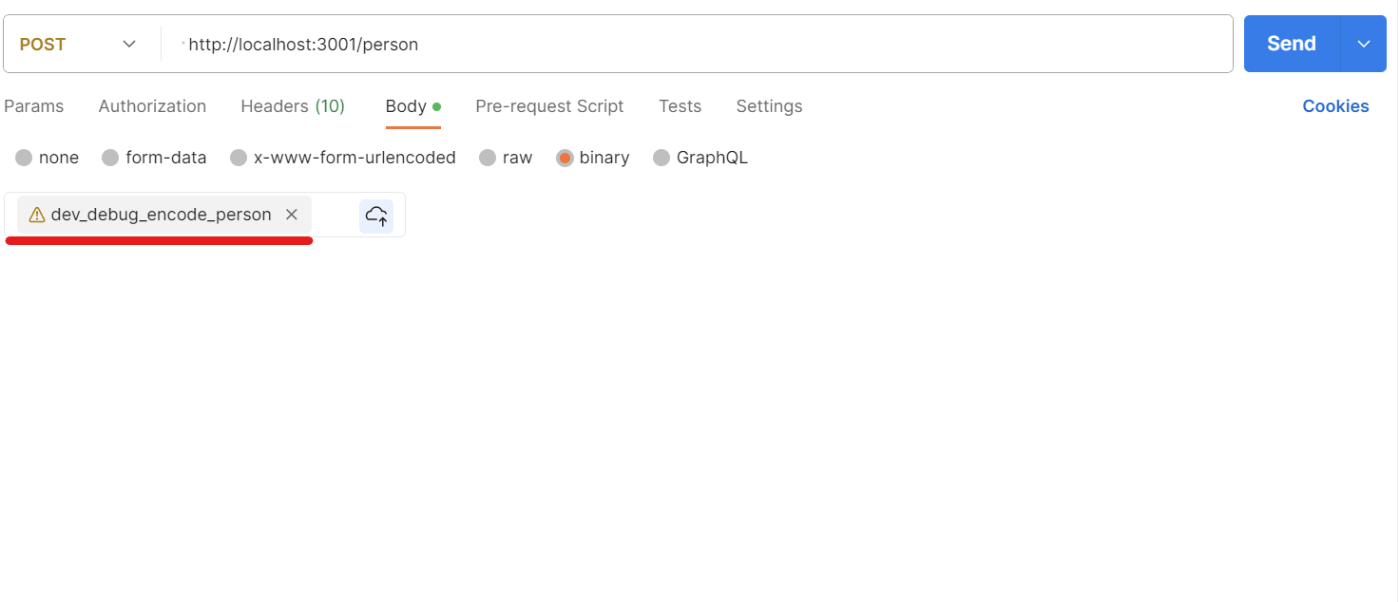
□ API をPostmanからリクエストし確認 (http://localhost:3001/person)
・ bodyタブでbinaryを選択
・ 手順1-3でdownloadしたファイル利用する。
downloadしていない人は、ブラウザで http://localhost:3001/dev_debug_encode_person をURL入力しenterを押すとファイルがdownloadされるので、そのファイルを利用する。

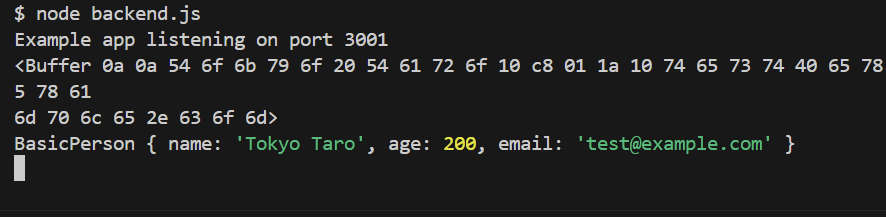
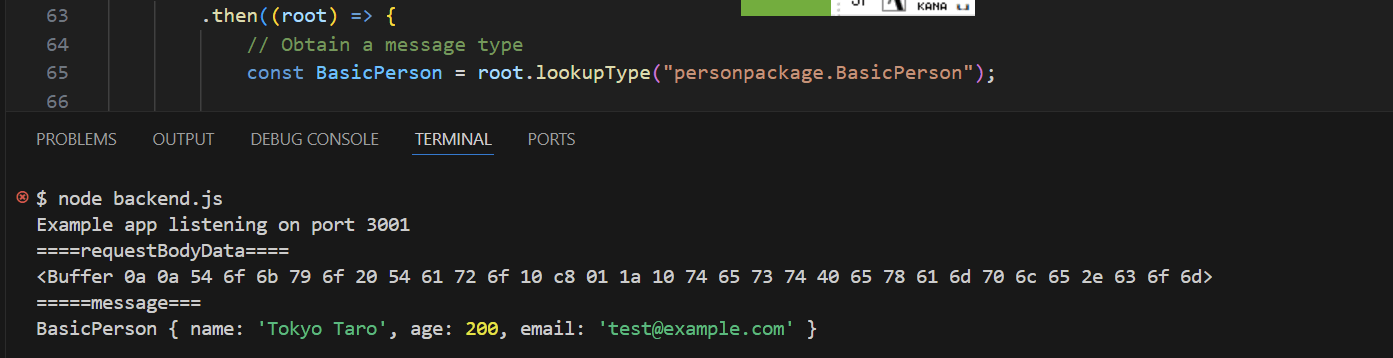
□ exporessサーバーのログをterminalで確認する
下記のようなログに、requestしたデータとdecodeされたデータが出力されていることを確認する。
// terminalで確認したlog
====requestBodyData====
<Buffer 0a 0a 54 6f 6b 79 6f 20 54 61 72 6f 10 c8 01 1a 10 74 65 73 74 40 65 78 61 6d 70 6c 65 2e 63 6f 6d>
=====message===
BasicPerson { name: 'Tokyo Taro', age: 200, email: 'test@example.com' }
□ /person APIにCORSの設定を追加する。
2.Client側を作成する
2-1.React.jsを使用してWebアプリを作成
□ 任意のフォルダをvisual studio codeで開き、下記をterminalで実行する。
npx create-react-app protobuf_azalea
□ 作成されたprotobuf_azaleaフォルダをvisual studio codeで開き直す
□ Visual Studio Codeのterminalで下記を実行し、初期状態のReact.jsのWebアプリを起動する。
※単純な動作確認のために実施。
npm start
□ 確認が終わったら、Ctrl + Cで、Webアプリを停止する。
□ protobufjsをinstall
Visual Studio Codeのterminalで下記を実行
yarn add protobufjs
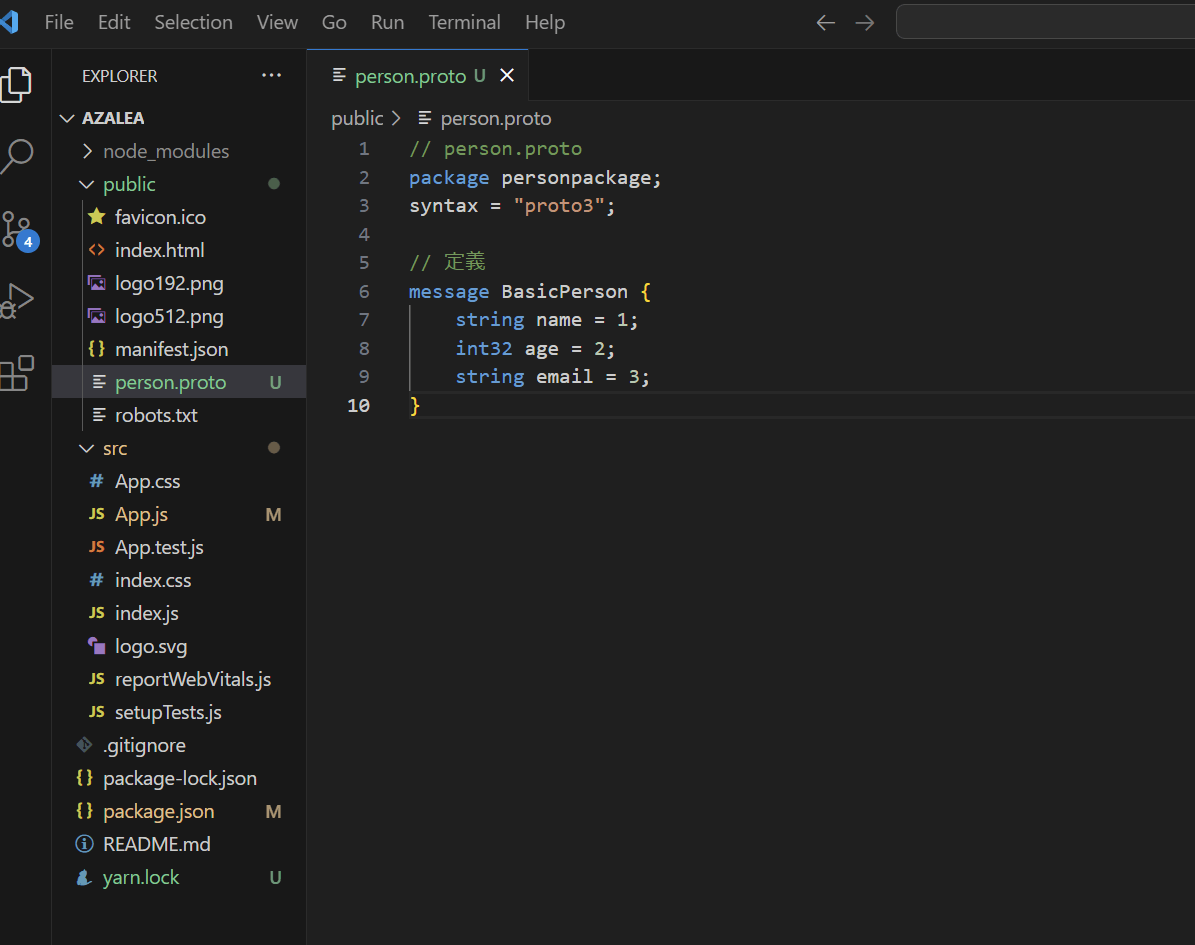
□ protobufの定義ファイルを作成し、publicフォルダに配置する。
// person.proto
package personpackage;
syntax = "proto3";

// 定義
message BasicPerson {
    string name = 1;
    int32 age = 2;
    string email = 3;
}
2-2.protobufでのエンコードとAPI呼び出しを実装
□ srcフォルダ内のApp.jsを下記のように編集し、http://localhost:3000 読み込み時にAPIリクエストが行われるように設定。
// App.js
import logo from './logo.svg';
import './App.css';
import React, { useEffect } from 'react'

const protobuf = require("protobufjs");

function App() {
  /** BackendのAPIにpostする*/
  async function postBinaryData(data) {
    const req = new XMLHttpRequest();
    req.open("POST", "http://localhost:3001/person", true);
    req.setRequestHeader('content-type', 'application/octet-stream');
    req.send(data);
  }

  /** protobufを利用してデータをbinary形式にencodeする */
  async function encodeData(payload) {
    const buffer = protobuf.load("./person.proto")
      .then((root) => {
        // Obtain a message type
        const BasicPerson = root.lookupType("personpackage.BasicPerson");

        // Verify the payload if necessary (i.e. when possibly incomplete or invalid)
        const errMsg = BasicPerson.verify(payload);
        if (errMsg)
          throw Error(errMsg);

        // Create a new message
        let data = BasicPerson.create(payload);

        // Uint8Array (browser) or Buffer (node)形式にデータをencode
        const encodedData = BasicPerson.encode(data).finish();

        // debug: decoode確認用
        const decodedData = BasicPerson.decode(encodedData);
        console.log(encodedData)
        console.log(decodedData)


        return encodedData

      }).catch((err) => {
        throw err;
      })
    return buffer
  }


  useEffect(() => {
    const getData = async () => {
      // Exemplary payload: 今回は確認用に固定値で設定
      const payload = { name: "Tokyo Taro", age: 120, email: "test@example.com" };

      // protobufを利用してbinary形式にencode
      const encodedData = await encodeData(payload);
      // backendのAPIにencodeしたデータをpostする
      await postBinaryData(encodedData)
    };
    getData(); //関数の実行
  }, []);


  return (
    <div className="App">
      <header className="App-header">
        <img src={logo} className="App-logo" alt="logo" />
        <p>
          Edit <code>src/App.js</code> and save to reload.
        </p>
        <a
          className="App-link"
          href="https://reactjs.org"
          target="_blank"
          rel="noopener noreferrer"
        >
          Learn React
        </a>
      </header>
    </div>
  );
}

export default App;
上記でやっていることは、
・encodeDataメソッドで、データをprotobufでencode。
・postBinaryDataメソッドで、encodeしたデータと一緒にbackend APIにリクエストする。
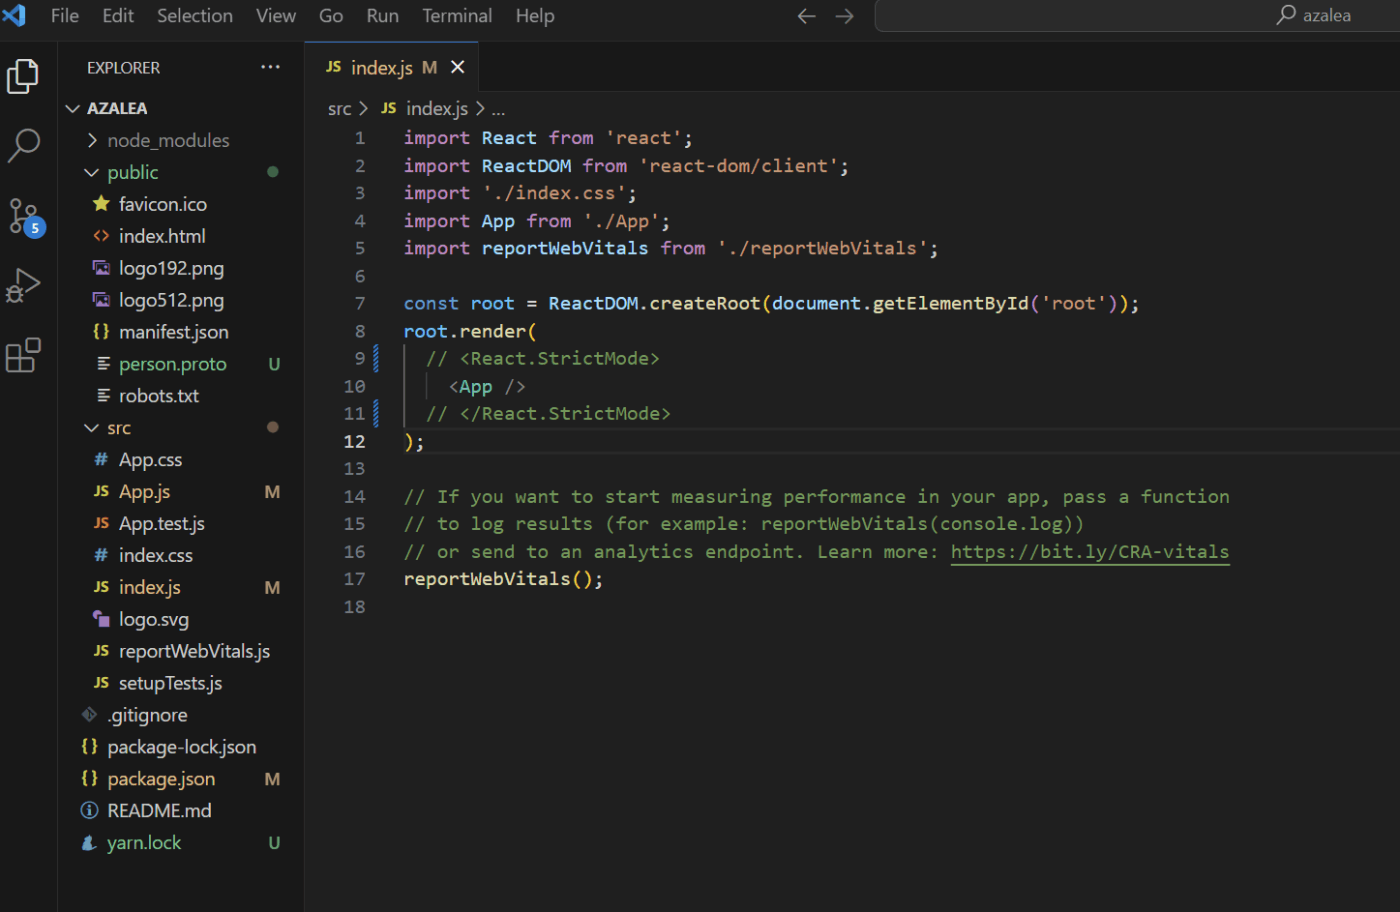
□ console.logを確認しやくするするために、React.StrictModeをコメントアウトにする
index.jsを下記のように変更し、React.StrictModeをコメントアウト。
import React from 'react';
import ReactDOM from 'react-dom/client';
import './index.css';
import App from './App';
import reportWebVitals from './reportWebVitals';

const root = ReactDOM.createRoot(document.getElementById('root'));
root.render(
  // <React.StrictMode>
    <App />
  // </React.StrictMode>
);

// If you want to start measuring performance in your app, pass a function
// to log results (for example: reportWebVitals(console.log))
// or send to an analytics endpoint. Learn more: https://bit.ly/CRA-vitals
reportWebVitals();
2-3.backendのAPIにCORSの設定を追加
このままだとReactからAPIを呼び出せないので、API側のbackend.jsでCORSの設定を追加する。
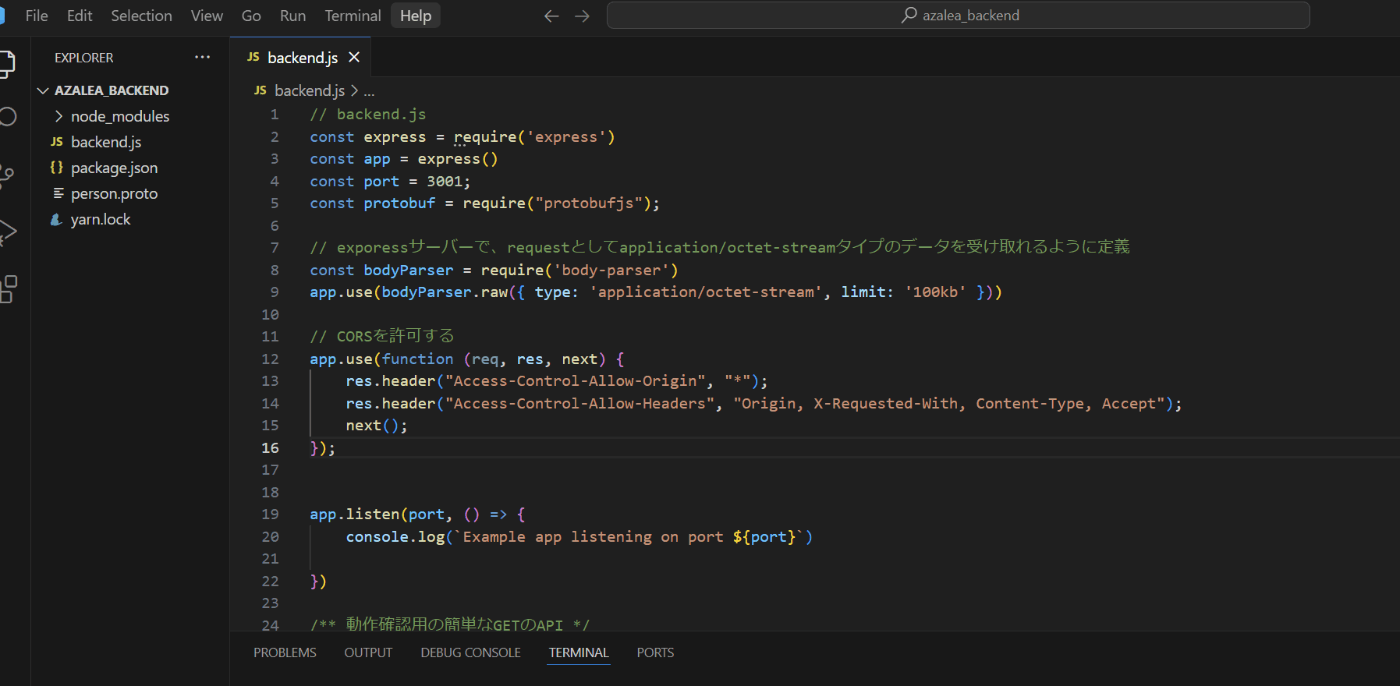
□ backend.jsに下記の追加部分を記載する。
// backend.js
const express = require('express')
const app = express()
const port = 3001;
const protobuf = require("protobufjs");

// exporessサーバーで、requestとしてapplication/octet-streamタイプのデータを受け取れるように定義
const bodyParser = require('body-parser')
app.use(bodyParser.raw({ type: 'application/octet-stream', limit: '100kb' }))


// 追加: CORSを許可する
app.use(function (req, res, next) {
    res.header("Access-Control-Allow-Origin", "*");
    res.header("Access-Control-Allow-Headers", "Origin, X-Requested-With, Content-Type, Accept");
    next();
});
2-4.Client側からAPIを呼び出してみる
□ React.js側のVisual Studio Codeを開き、Webアプリを起動。
npm start
□ express側のVisual Studio Codeを開き、APIサーバーを起動。
node backend.js
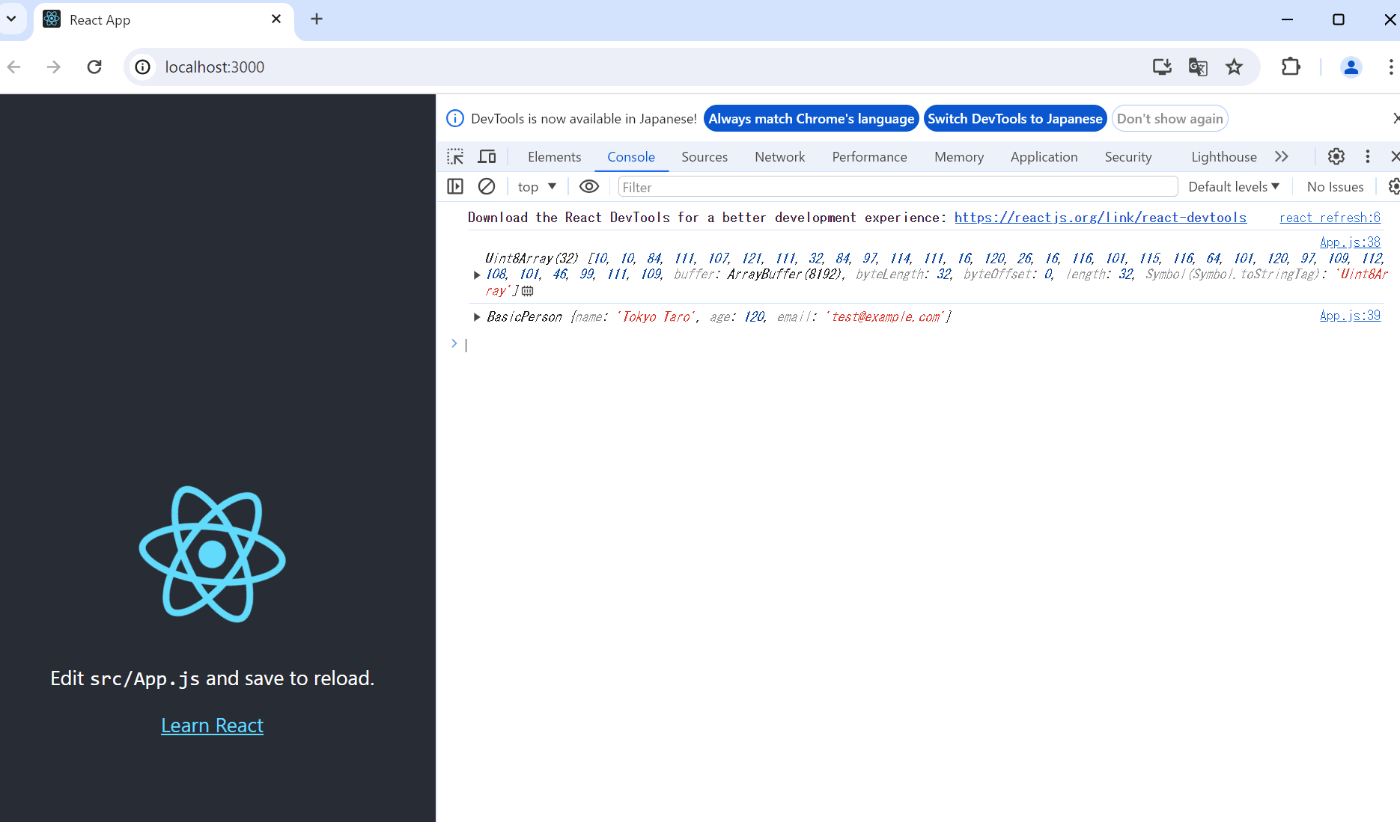
□ ブラウザで開発者ツールのconsoleが表示された状態で、http://localhost:3000 にアクセス。
□ ブラウザのconsoleのログに、encodeしたデータが表示されていることを確認する。
※debug用にdecodeしたログも今回は出力しています。
□ expressのAPIサーバー側のログもVisual Studio Codeで確認する。
リクエスト内容とdecodeされたデータが出力されていることを確認する。

手順は以上です。
protobufを使った動作確認ができました!
2-5.(参考)Plain Object・MessageInstance・Bufferの関係
protobufjsでの、Plain Object・MessageInstance・Bufferと、encode・decodeの関係は下記の図を参照すると分かりやすいです。

画像出典: https://github.com/protobufjs/protobuf.js
3.encode後のバイナリデータを紐解く
□ Backend.jsのログには16進数表記で出力されている。
0a 0a 54 6f 6b 79 6f 20 54 61 72 6f 10 78 1a 10 74 65 73 74 40 65 78 61 6d 70 6c 65 2e 63 6f 6d
□ protobufはフォーマット仕様としてWireTypeという内容で下記を定義している。
データを見る前に、まずprotobufのフォーマット仕様として存在するWire Typeの定義を確認する必要がある。
| WireType(ID) | Name | Used For |
|---|---|---|
| 0 | VARINT | int32, int64, uint32, uint64, sint32, sint64, bool, enum |
| 1 | I64 | fixed64, sfixed64, double |
| 2 | LEN | string, bytes, embedded messages, packed repeated fields |
| 3 | SGROUP | group start (deprecated) |
| 4 | EGROUP | group end (deprecated) |
| 5 | I32 | fixed32, sfixed32, float |
https://protobuf.dev/programming-guides/encoding/#structure より引用。
詳細は上記サイトの内容を確認するのが手っ取り早いです。
□ 上記をもとに、出力された16進数の意味を紐解くと下記になる。
| Buffer (16進数) |
0a | 0a | 54 | 6f | 6b | 79 | 6f | 20 | 54 | 61 | 72 | 6f |
|---|---|---|---|---|---|---|---|---|---|---|---|---|
| 2進数 | 0000 1010 | 0000 1010 | ||||||||||
| 意味 | 先頭は最上位ビット(MSB)なのでskip。 ・0001は1(10進数) ・010は2(10進数) |
10(10進数) | T | o | k | y | o | T | a | r | o | |
| 解説 | 1(10進数): ➡ protoのstring name = 1としたときの1。 2(10進数): ➡ wire typeが2(LEN)であること示す。 ➡つまり.protoのstring name = 1を示す |
nameに設定されたデータサイズが10byteであることを示す。 (Tokyo Taroは10byte) |
| Buffer (16進数) |
10 | 78 |
|---|---|---|
| 2進数 | 0001 0000 | 0111 1000 |
| 意味 | 0010は2(10進数), 000は0(10進数) | 0111 1000 = 120(10進数) |
| 解説 | 先頭は最上位ビット(MSB)なのでskip。 2(10進数): ➡ protoのint32 age = 2としたときの2。 0(10進数): ➡ wire typeが0(VARINT)であること示す。 ➡ つまり.protoのint32 age = 2を示す |
ageに設定した値である120を示す。 |
| Buffer (16進数) |
1a | 10 | 74 | 65 | 73 | 74 | 40 | 65 | 78 | 61 | 6d | 70 | 6c | 65 | 2e | 63 | 6f | 6d |
|---|---|---|---|---|---|---|---|---|---|---|---|---|---|---|---|---|---|---|
| 2進数 | 0001 1010 | 0001 0000 | ||||||||||||||||
| 意味 | 0011は3(10進数), 010は2(10進数) | 16(10進数) | t | e | s | t | @ | e | x | a | m | p | l | e | . | c | o | m |
| 解説 | 先頭は最上位ビット(MSB)なのでskip。 1(10進数): ➡ protoのstring email = 3としたときの3。 ➡ 2(10進数): wire typeが2(LEN)であること示す。 ➡つまり.protoのstring email = 3を示す |
emailに設定されたデータサイズが、 16byteであることを示す。 (test@example.comは16byte) |
参考: protobufjs以外の選択肢
□ protobufjs以外にもprotobuf-esというライブラリもあります。
ライブラリの信頼性が求められる場合などはprotobuf-esが選択肢にあがります。
protobufの仕様をもとにしたテストカバー率が高いです。
Discussion
gRPCを導入することにあたって、Web Client対応が大きい壁でした。
私はこの場合GrpcWebを使って対応しました。
モバイルアプリケーションはgRPCが使えるのでgRPCサーバ事態は使えたほうが良かったです。
根本的にはgRPC全体的なEcoSystemよりはProtobufによる効率化が目的であればREST + Protobufもかなり良い選択だと思います。
素晴らしい記事ありがとうございます。
まだFramework上主要機能としてサポートされているUsecaseでは無いからEngineering team全体がProtobufのProcessをしっかり理解しないといけない壁はまだあると思います。ただ、Http1の仕様で満足出来る環境だったりStreamingが不要なケースにおいてはProtobuf採用だけでも得られるメリットがあると思うのでこの部分も広がってほしいな〜と思うところです。
特にBatch向けのAPIやFileの交換にも使えるし、CDNにもいかせるとかgRPCが過大だったりできないものが補充出来ると思います。