イチカラOAuthとOIDC理解#3 - 認証の仕組みを体験してみる (OIDC編)
OIDCを利用するサイトを実際に作ってみよう
色んな本が出ているが初めてOAuthやOIDC(OpenID Connect)に触れる人にはアーキテクチャの世界観が掴みにくい。
体験してみて少しずつ理解をしてくための備忘録。
手順
0.やることのイメージ
まずは広く使われている認可コードフローを実際に確認してみる。
認可コードフローを利用して、OpenID Connectがどのような遷移を行なっているのか体験してみることが目的。
-
Auth0を「OpenID Provider(認可サーバー)」として利用し、クライアントアプリケーションにはReact.jsを利用する。
※ 一連の認可コードフローを体験してみることが目的であり、認可サーバーを作成することが目的では無いため、既に存在しているサービスであるAuth0を利用する。 -
フローはOAuth2.0で定義されている認可コードフローを利用する。

1.Auth0のアカウントを作成する。
-
以下サイトより作成する。
https://auth0.com/jp -
補足: Auth0はOpenID Provider(OIDC)に認定を受けた認証サービス。
詳細は下記リンクを参照。
https://openid.net/certification/
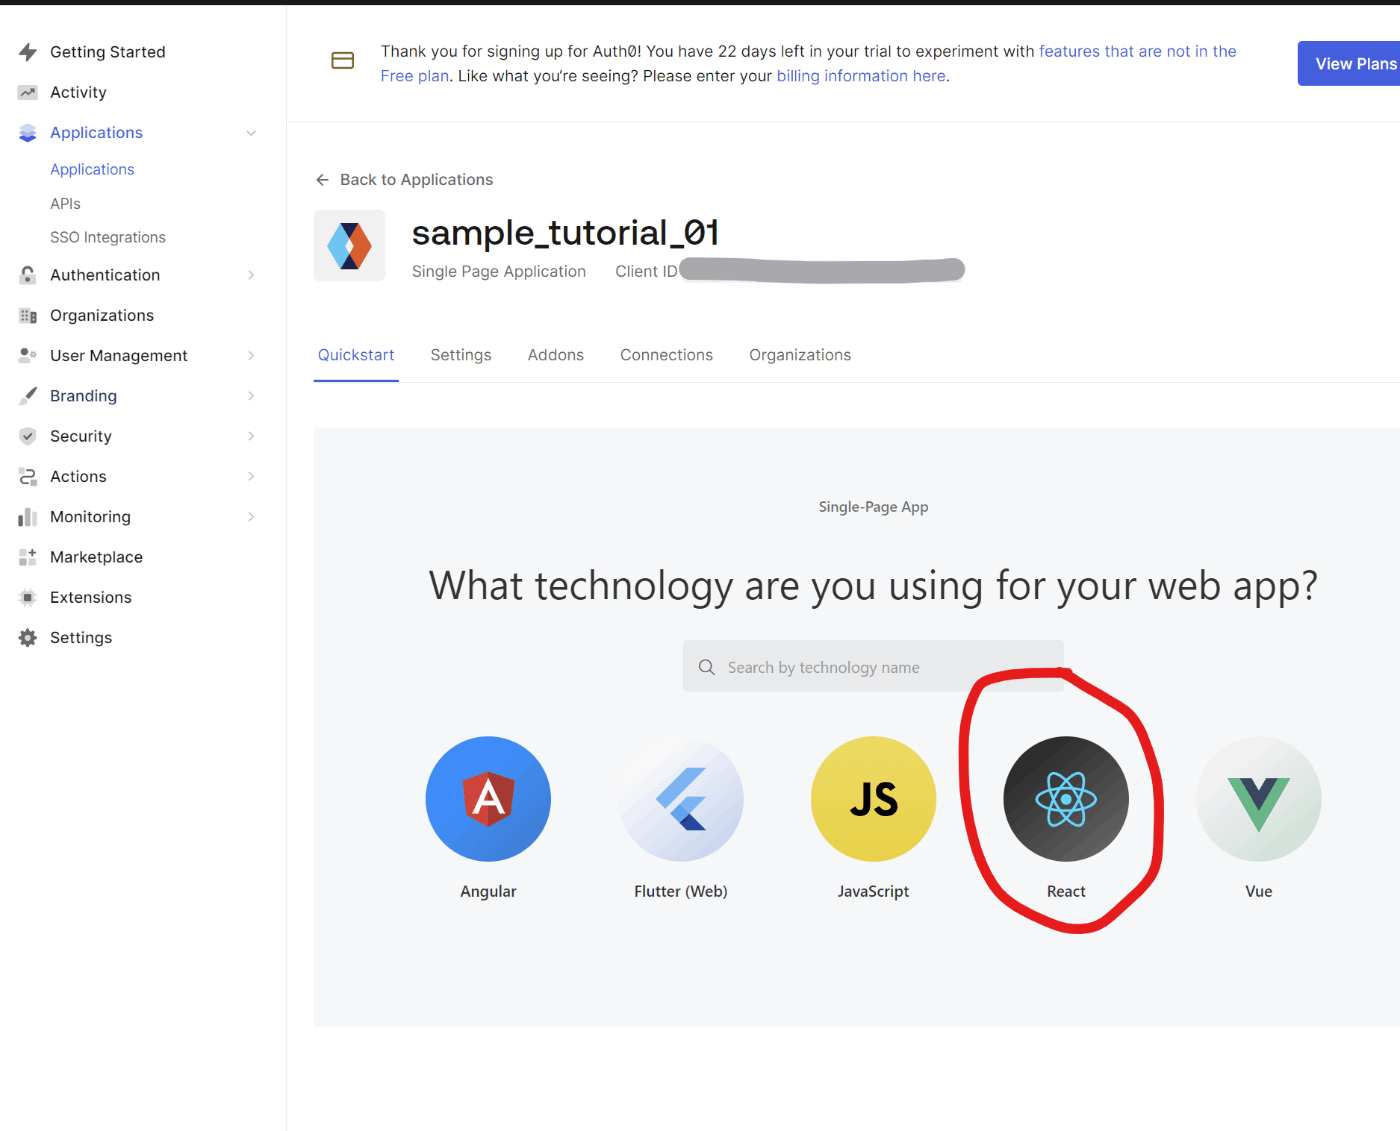
2.Auth0でクライアントアプリケーションを登録する。
今回利用するReact.jsはSPAとして利用するため、Single Page Applicationを利用する。
(OIDC理解のために、開発者コンソールからAPI通信を確認しやすくするためSPAを今回は利用)
- Auth0上に今回利用するクライアントアプリケーション情報を登録する。


- サンプルをダウンロードし、解凍する。

3.クライアントアプリケーションのサンプルを開く
-
エディターとしてvisual studio codeを利用するため以下サイトよりダウンロードする。
https://code.visualstudio.com/ -
手順2でダウンロードしたサンプルコードを開く。

-
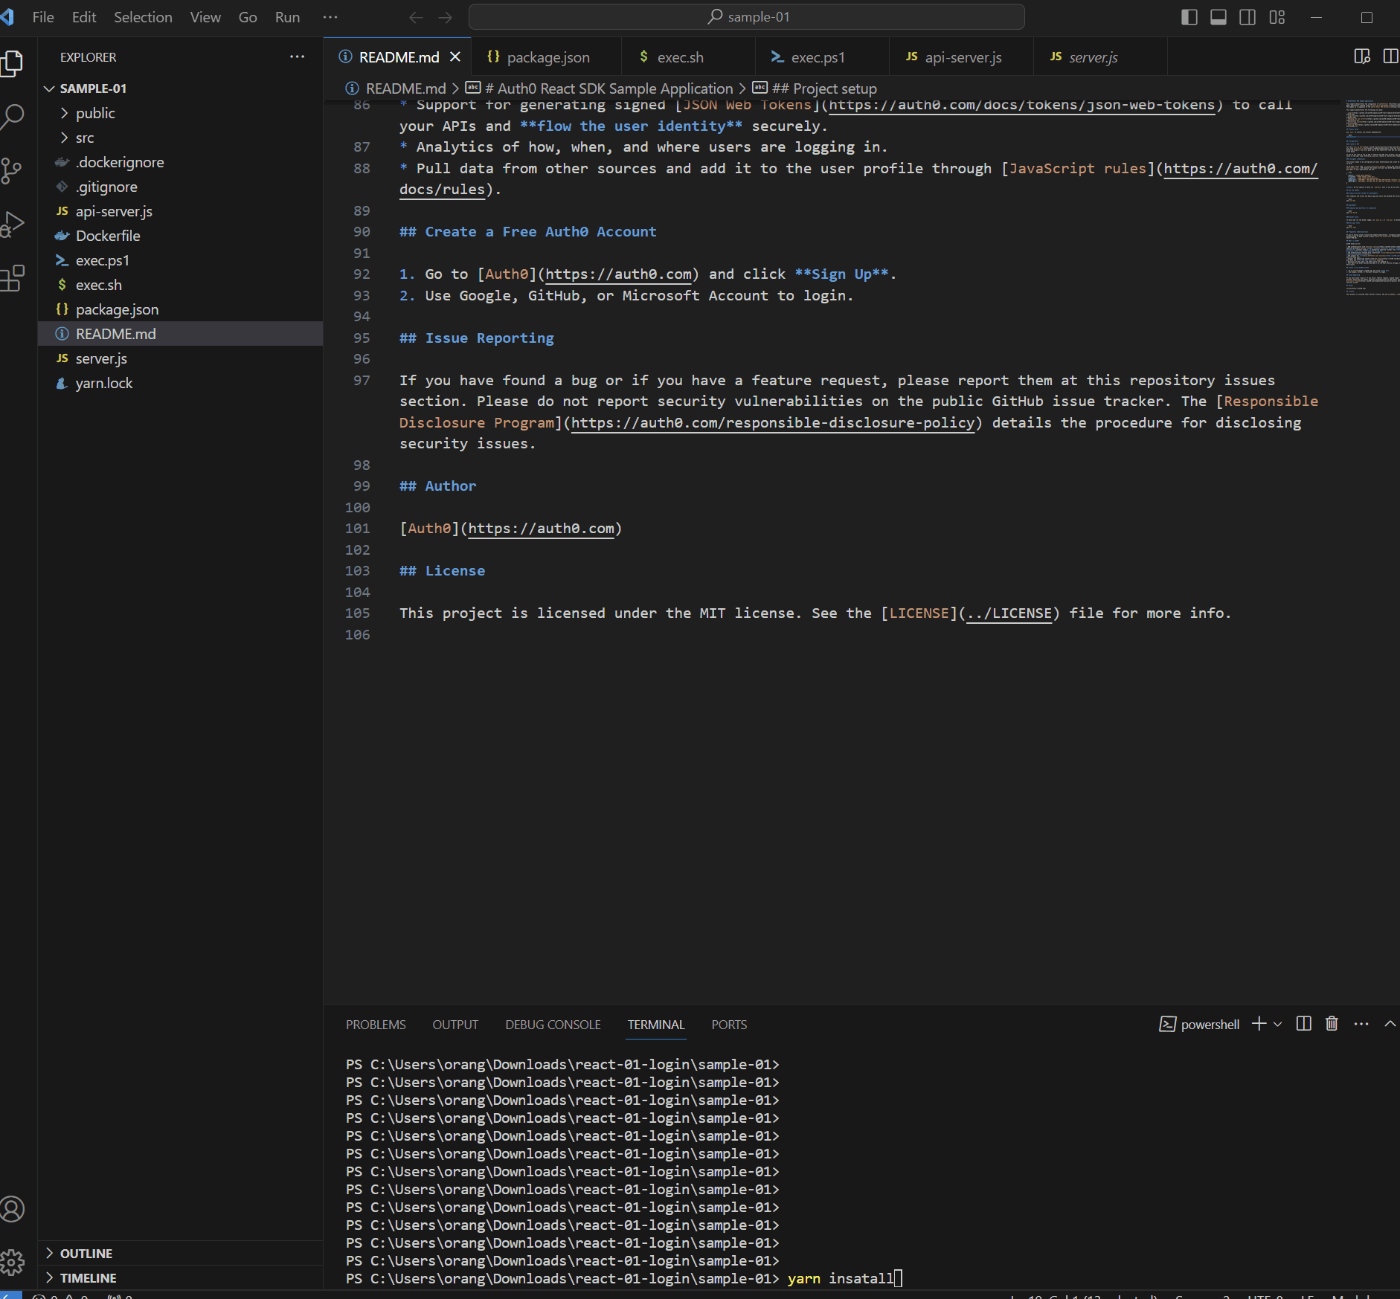
ctrlキーと@キーを押して、Visual Studio Code上でTERMINALを開く。 -
yarn installを実行
※yarnコマンドが入っていない場合はnpm installでもOK。
※ npmも入っていない場合は、npmをインストールしてください。
または

4.Auth0のアプリケーションの設定を行なう。
-
手順2で作成したAuth0のアプリケーションのSettingsを開く。
-
Allowed Callback URLsに
http://localhost:3000を入れる。 -
Allowed Logout URLsに
http://localhost:3000を入れる。 -
Allowed Web Originsに
http://localhost:3000を入れる。
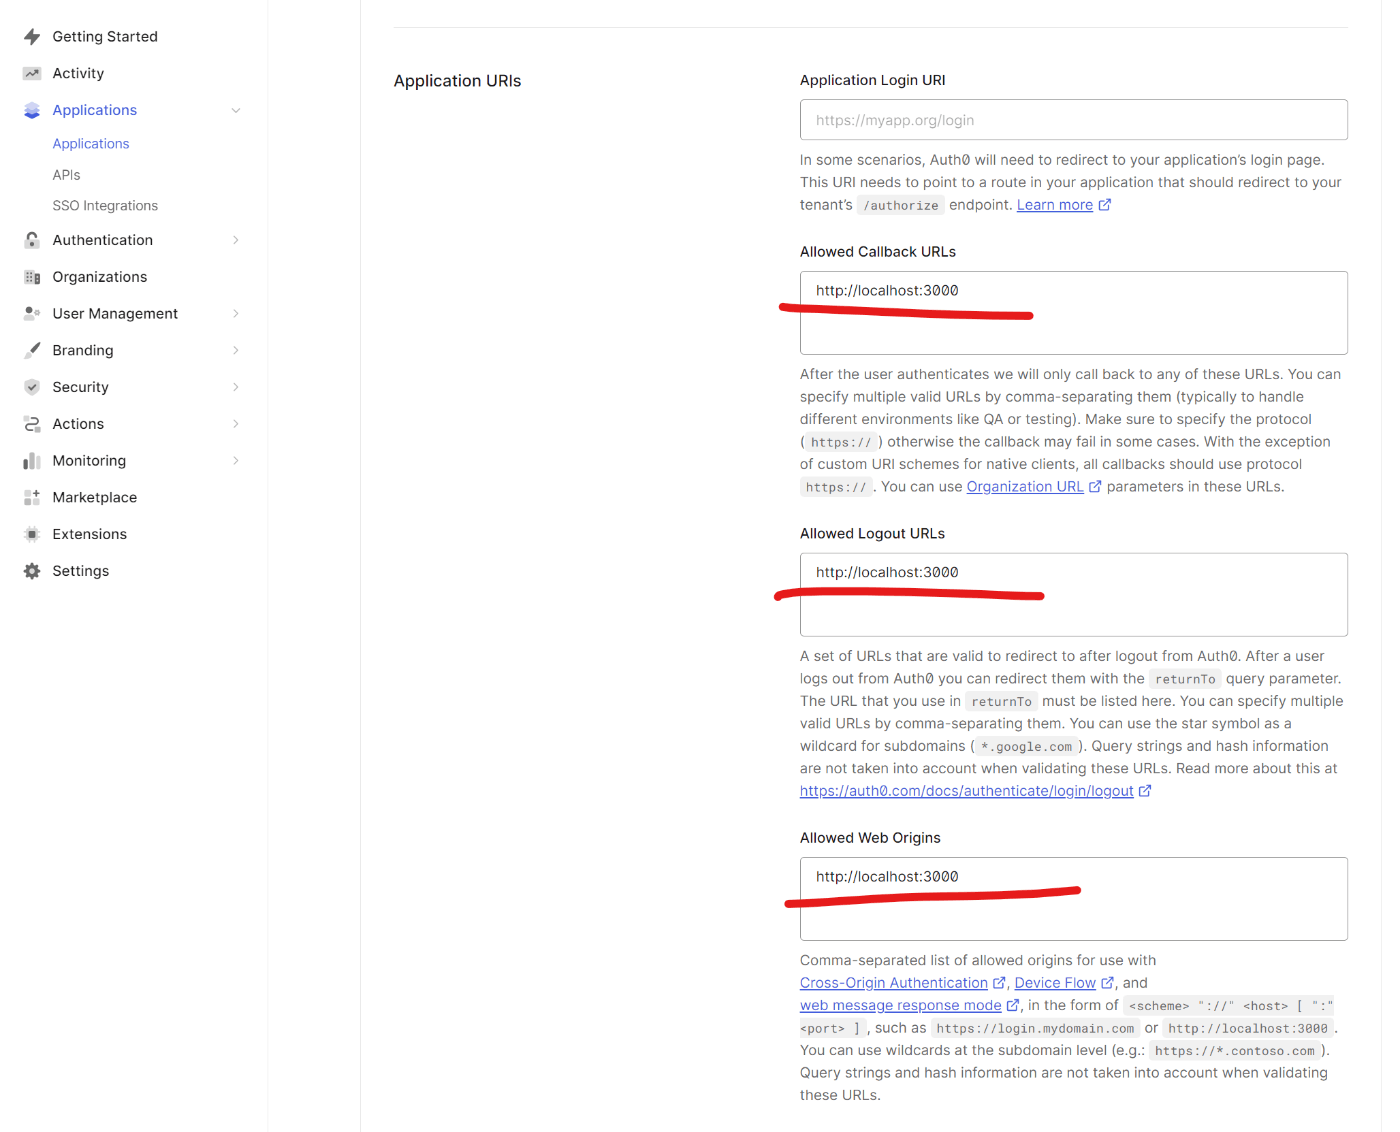
- ページ下部の「Save Changes」ボタンを押して保存する。
5.Auth0で認識するAPIの設定を行なう.
Auth0で認証することでアクセスができるリソースサーバーのAPIをAuth0に登録する
- 左メニューから
APIsを開き、Create APIをクリックする。 - 項目を入れ、Createを押す。
Name: resource_server_API_sample_01
Identifier: http://localhost:3001
Signing Algorithm: RS256

6.クライアントアプリケーションのサンプルコードを開き準備を行なう。
-
もし、
package.jsonに@auth0/auth0-reactが無かった場合のみ、npm install @auth0/auth0-reactをTERMINALで実行する。 -
srcディレクトリの中にあるauth_config.jsonを確認する。- Auth0のアプリケーションのSettingsに記載がある値が設定されていなければ、値を設定する。
- audienceには手順5で作成したAPI情報のIdentifierを設定する。
{
  "domain": "Auth0のアプリケーションのSettingsに記載がある値",
  "clientId": "Auth0のアプリケーションのSettingsに記載がある値",
  "audience": "手順5で作成したAPI情報のIdentifier"
}
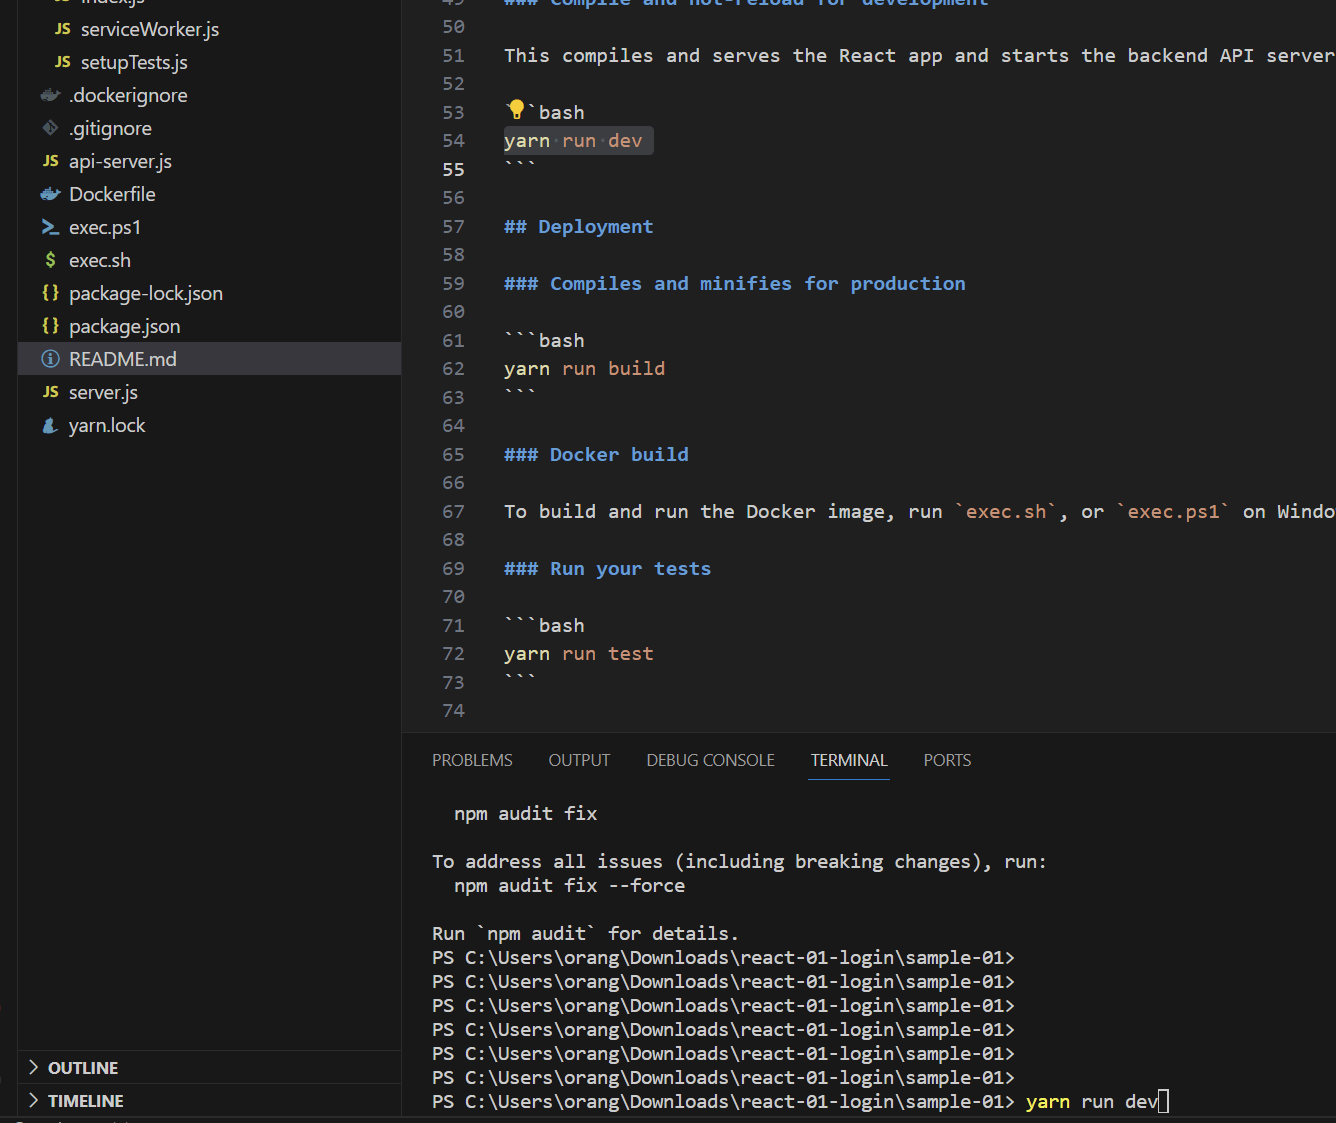
7.クライアントアプリケーションの起動を行なう。
-
yarnコマンドが入っている場合は
yarn run dev、npmコマンドの場合はyarn run devをTERMINALで実行する。例:
-
http://localhost:3000/がブラウザで開けることを確認する。
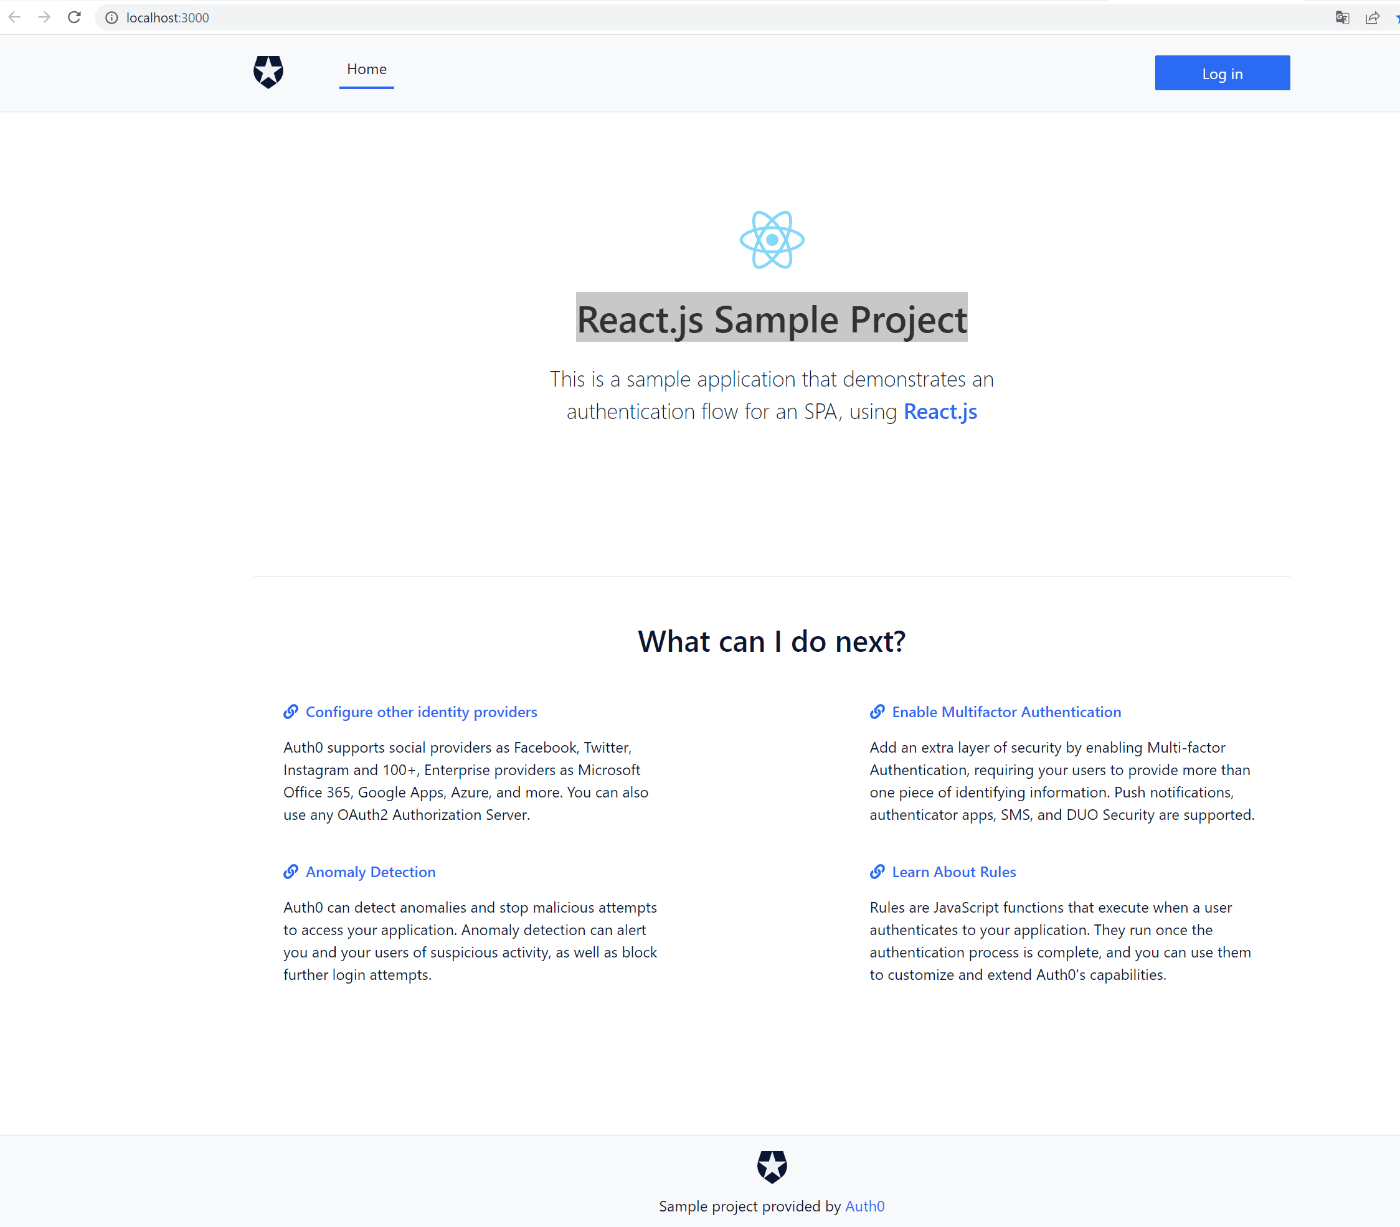
8.クライアントアプリケーションでアカウント登録を実行してみる
-
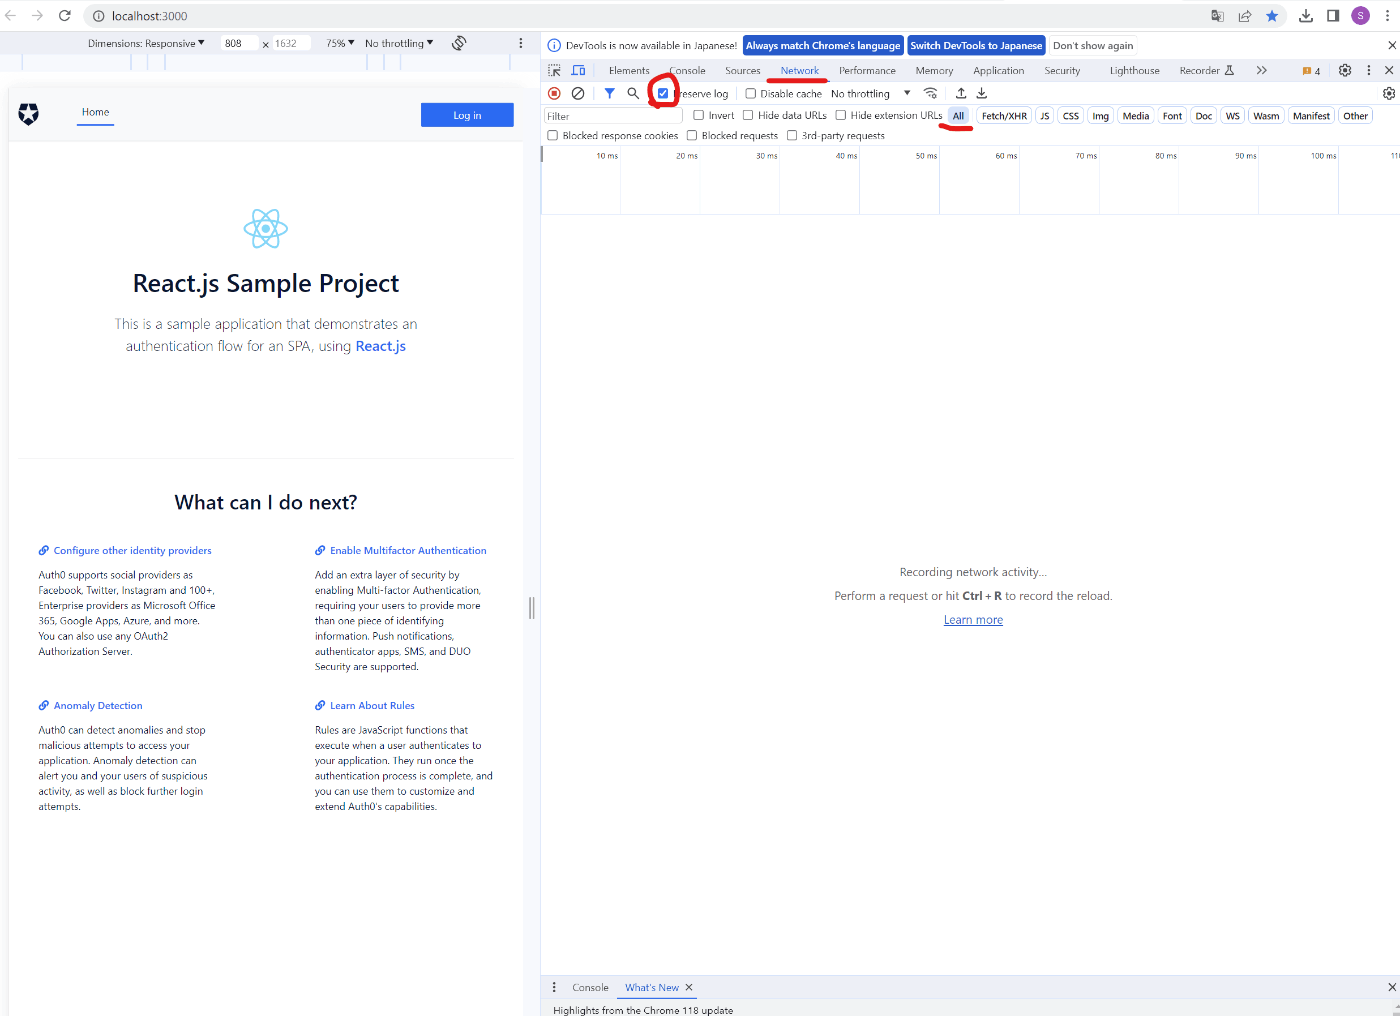
Auth0との通信の状態を確認したいため、
http://localhost:3000/が開いた状態でfnキーとF12キーを押して、開発者コンソールを開く。 -
Networkタブを選択し、Preserve Logのチェックボックスにチェックを入れる。
-
ALLが選択されていることを確認する。
-
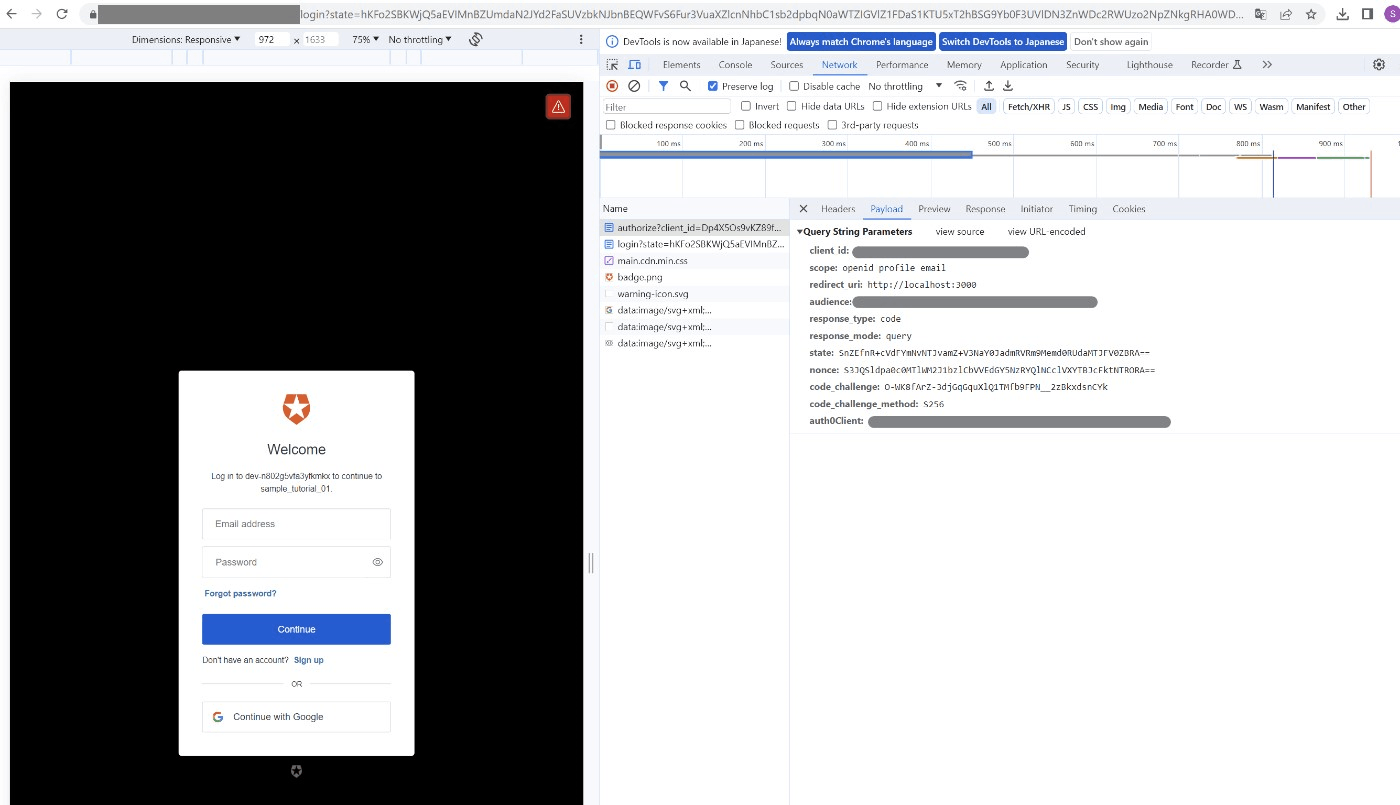
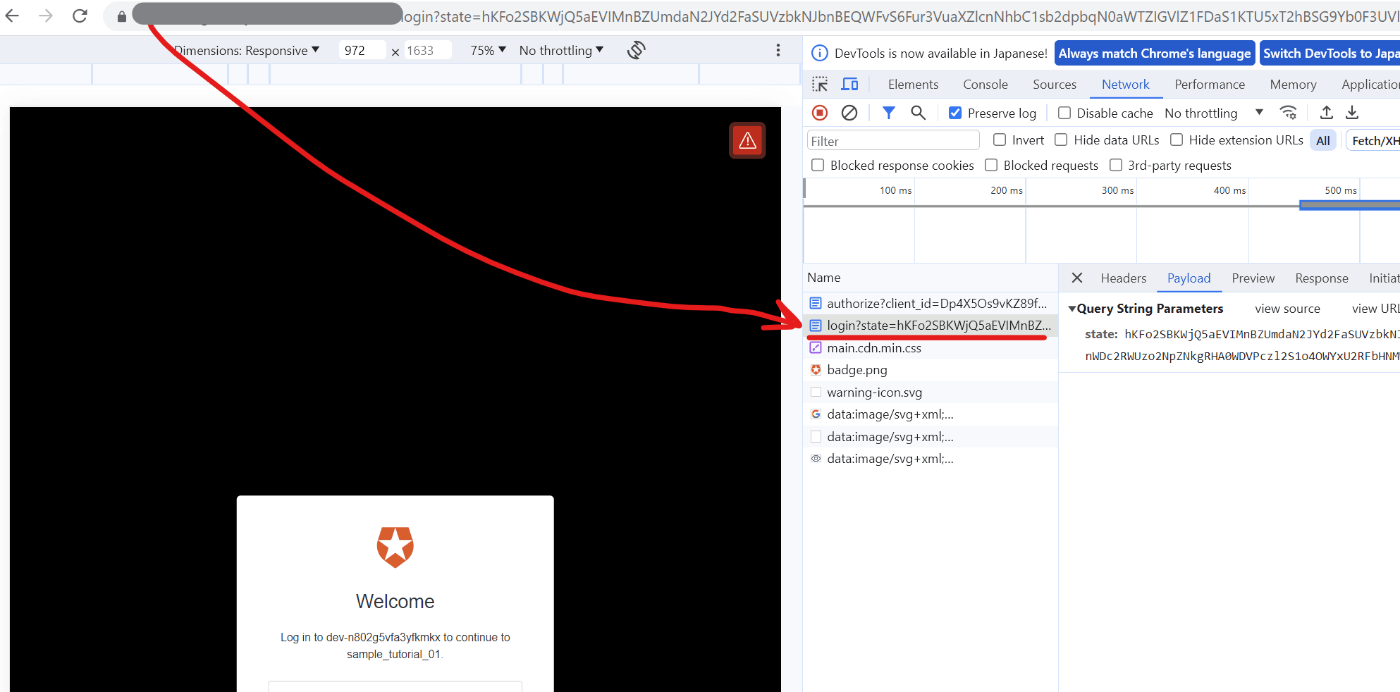
Log Inボタンを押下する。
OAuth2.0の認可コードフローでいう認証エンドポイント(/authorize)にアクセスが行なわれ、認証画面(/login)が返却されていることを開発者コンソールから確認ができる.
-
Sign Upを押し、アカウントを登録する。
-
同意画面が表示されるが、これはクライアントアプリケーションがAuth0に登録したユーザー情報に得ることに同意を与えるかどうかの画面である。Acceptを押す。

-
クライアントアプリケーション側にredirectされ、OAuth2.0の認可コードフローでいう認可コードが返却されていることを確認できる。画像の
code。

-
取得した認可コードを利用し、OAuth2.0の認可コードフローでいうトークンエンドポイント(
/token)にアクセスが行なわれ、access_tokenとid_tokenを取得していることが分かる。
ここでAuth0で行なっているのは認証のため、id_tokenも返却される。-
/tokenへのリクエスト

-
/tokenからのレスポンス

ここで発行されたaccess_tokenは手順5で登録したAPIに対して発行されたaccess_tokenである。
※手順5で登録した情報はあくまでリソースサーバーに該当するAPIの情報であって、APIそのものを作成したわけではない。
※次の投稿でaccess_tokenを利用してアクセスする先のAPI作成を行なう。
-
補足:PKCEについて
上記のフローは認可コードフロー with PKCEの処理になっている。
PKCEとは、Proof Key for Code Exchangeのことであり、認可コード横取り攻撃への対策として登場した、OAuth2.0の拡張仕様を指す。
PKCEを取り入れたフローで追加で登場するのは以下のパラメーター。
code_verifier
code_challenge
code_challenge_method
詳しくは下記を参照。
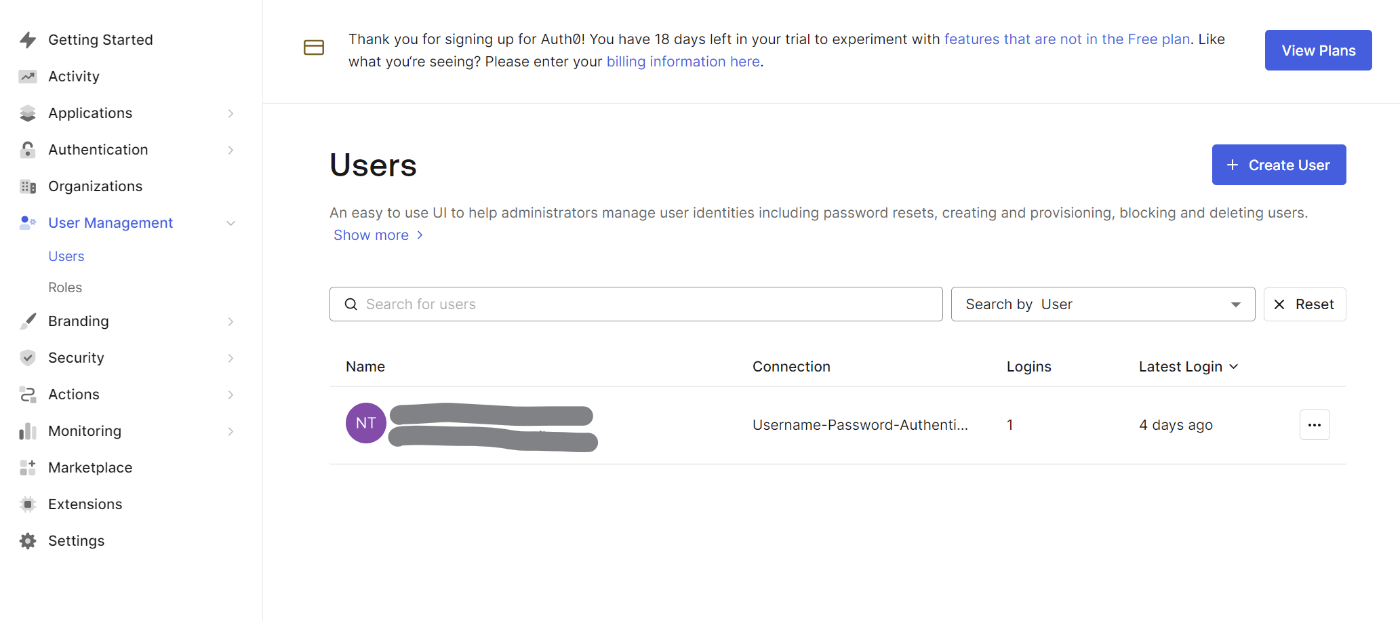
補足: サインアップが完了するとAuth0にユーザーが登録される
User Management > Usersから登録されているUserを確認できる。
9.取得したAccess TokenとID Tokenの中身を確認してみる。
Auth0が提供しているhttps://jwt.io/にアクセスする。
access_tokenのaudにはこのaccess_tokenでアクセスが可能なAPIの識別子が入っている。
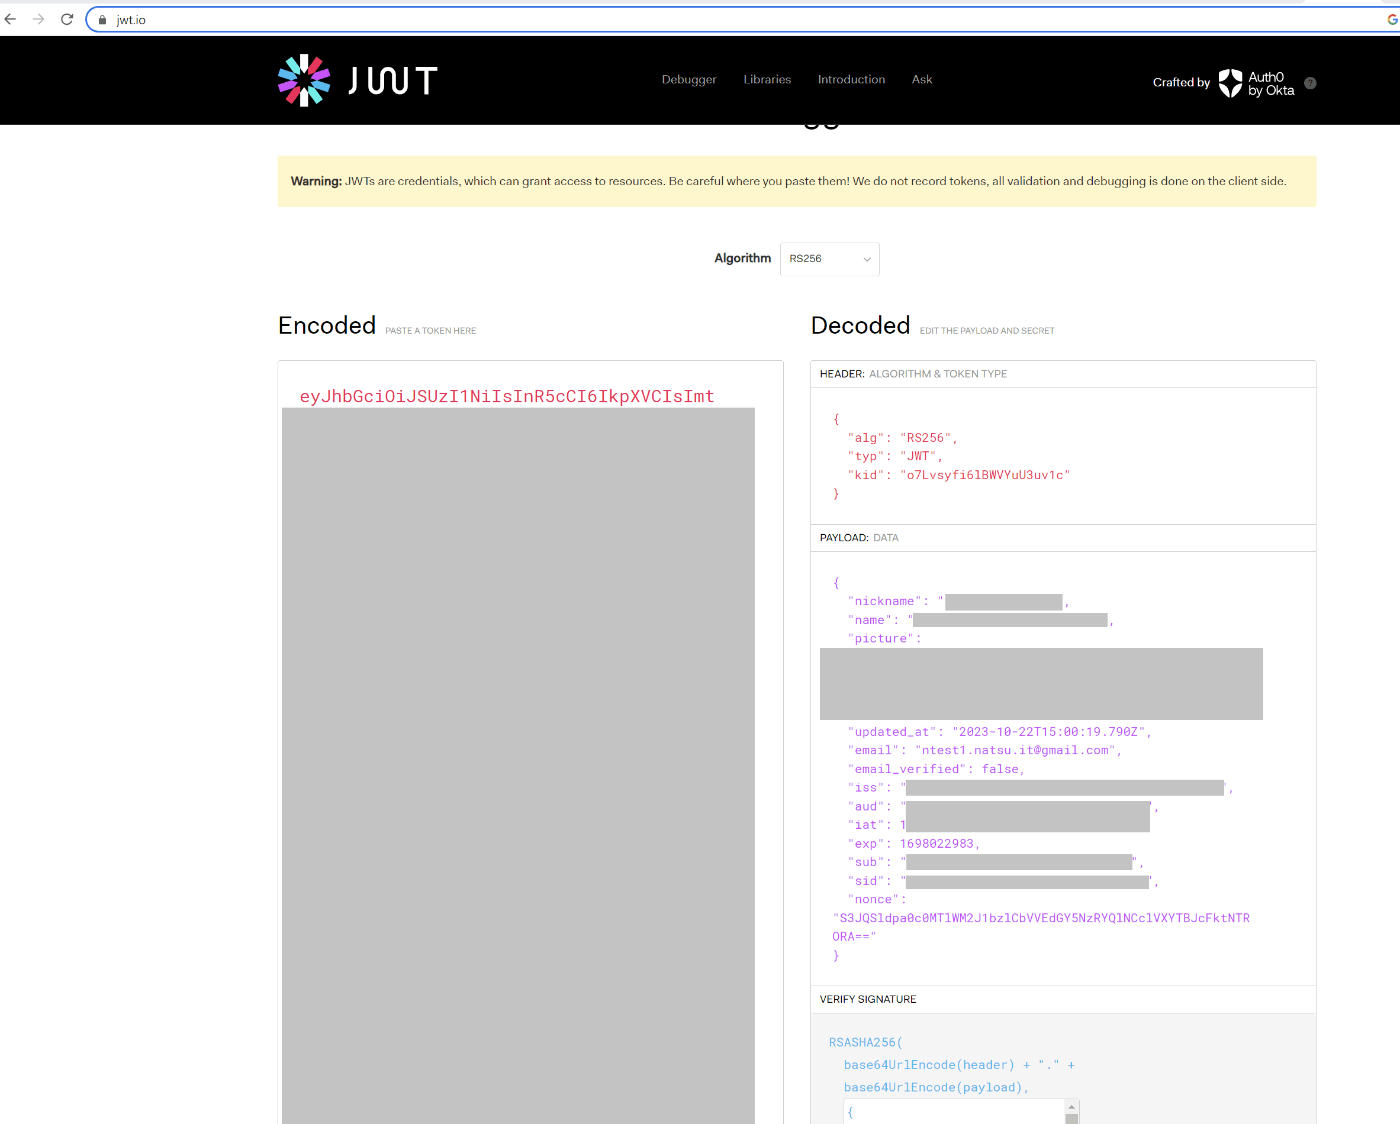
id_tokenの方にはuserのemailや名前などユーザーの情報が入っていることを確認できる。
-
access_token
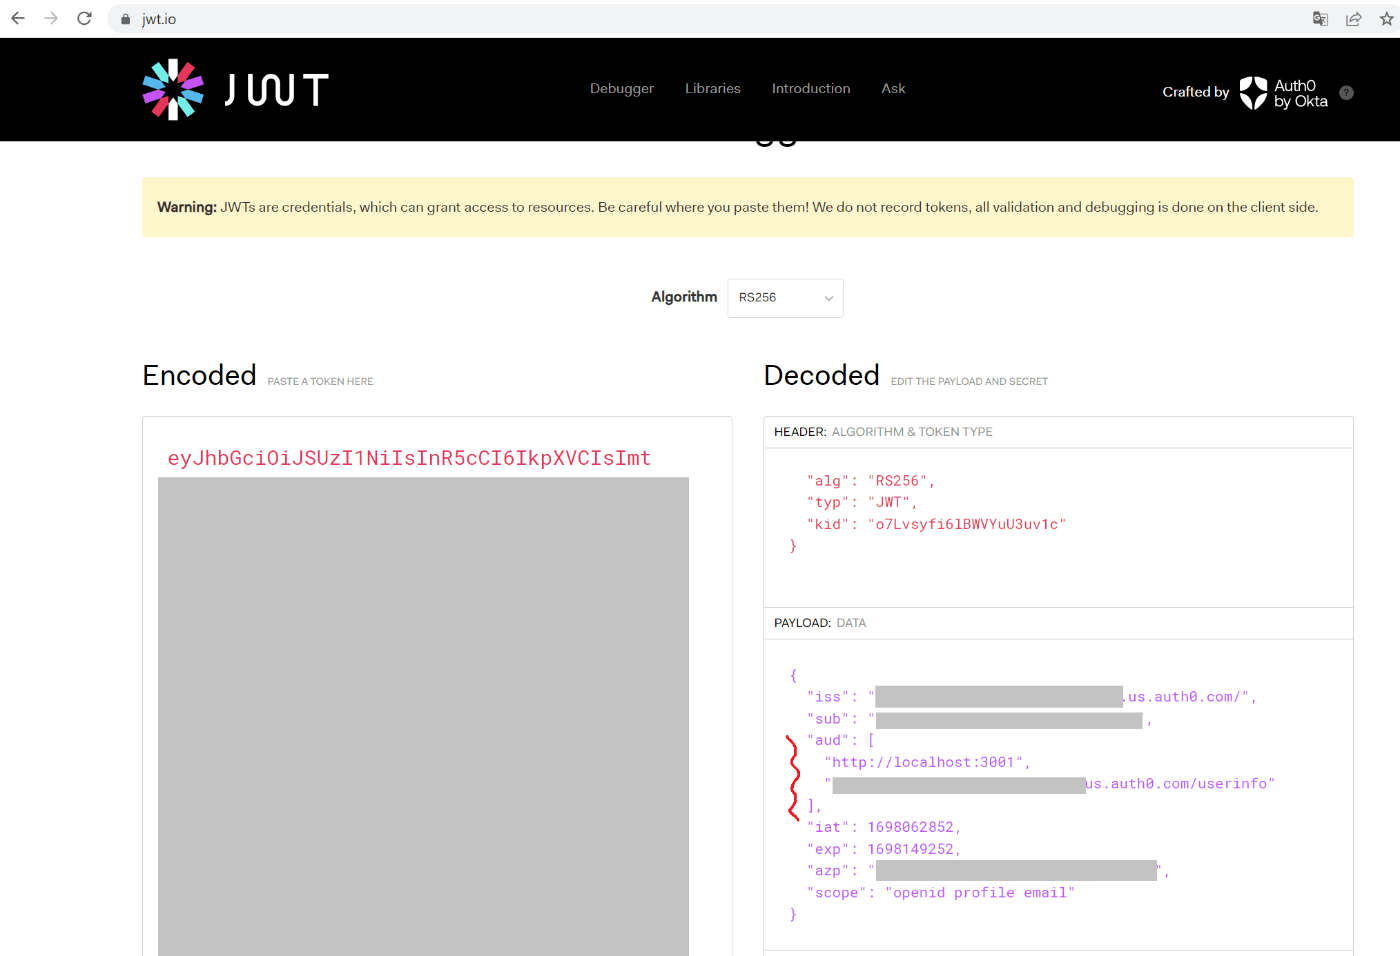
-
id_token
-
補足:
iatやexpの値はUNIXタイムスタンプ。このためプログラムでトークンを受け取ったときに有効期限切れか判定などの処理が行いやすい。PCで値がどの時刻を指示しているか確認したい場合は以下サイトよりUNIXタイムスタンプを日本時刻に変換できる。
https://keisan.casio.jp/exec/system/1526004418
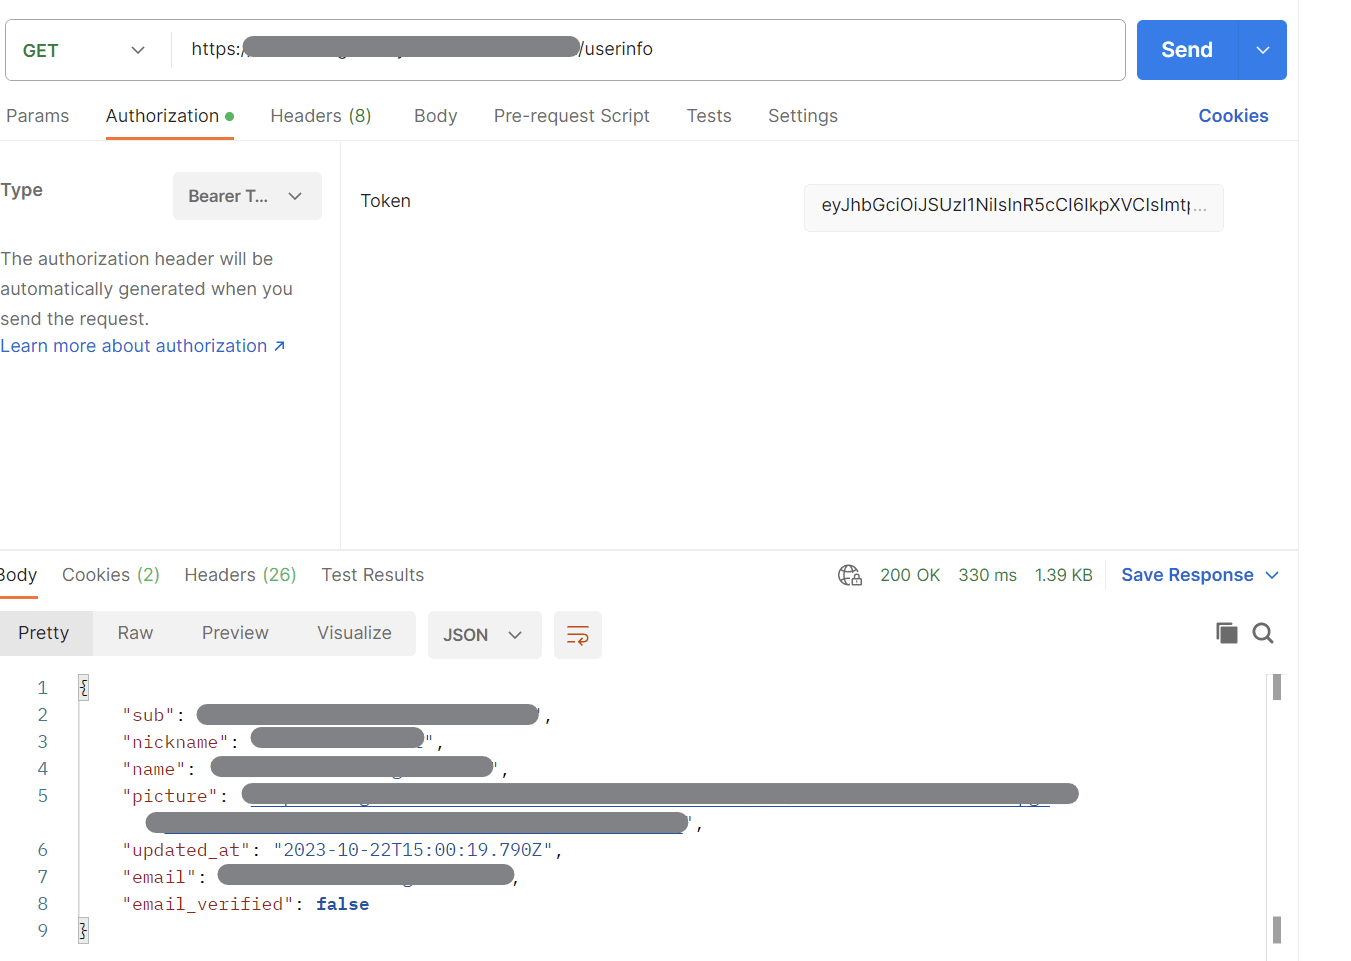
10.UserInfoエンドポイントにリクエストを行なってみる。
手順
-
Postmanを開き、GET
https://xxxxxxxxxxxx.us.auth0.com/userinfo設定する。

-
Authorizationタブをクリックし、Typeを
Bearer Tokenを選択し、取得したaccess_tokenを入力する。
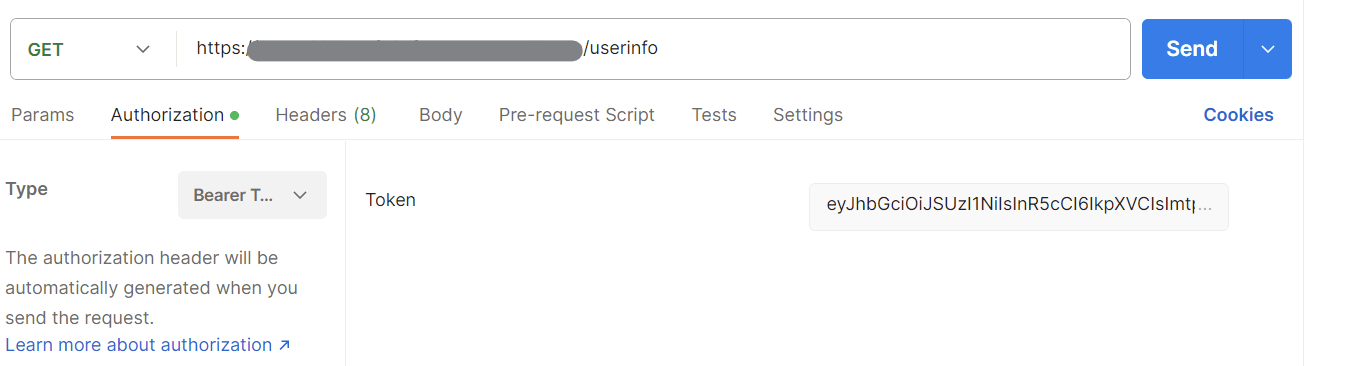
- Sendボタンを押すと、ユーザー情報がレスポンスとして返ってくる。
補足
取得したaccess_tokenでアクセスが可能なリソースサーバーはhttp://localhost:3001とhttps://xxxxxxxxxxxx.us.auth0.com/userinfoの2つ。
http://localhost:3001は後続の手順で作成するAPIのため、Auth0が提供している/userinfoエンドポイントにリクエストを行なう
※ /userinfoエンドポイントはユーザー情報を返す保護リソースとしてOIDCで定義がされている。
認可コードフロー with PKCEのシーケンスを確認する
認可コードフローシーケンス概要図

認証エンドポイント(/authorized)へのパラメーター
今までの手順で実施した開発者コンソールで確認した値を参考にしながら、リクエストパラメーターの項目の意味を確認する。
| Parameter Name | Description |
|---|---|
| response_type | Denotes the kind of credential that Auth0 will return (code or token). For this flow, the value must be code. |
| client_id | Your application's Client ID. You can find this value in your Application Settings. |
| redirect_uri | The URL to which Auth0 will redirect the browser after authorization has been granted by the user. The Authorization Code will be available in the code URL parameter.You must specify this URL as a valid callback URL in your Application Settings. Warning: Per the OAuth 2.0 Specification, Auth0 removes everything after the hash and does not honor any fragments. |
| scope | Specifies the scopes for which you want to request authorization, which dictate which claims (or user attributes) you want returned.These must be separated by a space.You can request any of the standard OpenID Connect (OIDC) scopes about users, such as profile or email, custom claims conforming to a namespaced format, or any scopes supported by the target API (e.g., read:contacts).Include offline_access to get a refresh token (make sure that the Allow Offline Access field is enabled in the Application Settings). |
| audience | The unique identifier of the API your web app wants to access.Use the Identifier value on the Settings tab for the API you created as part of the prerequisites for this tutorial. |
| state | (recommended) An opaque arbitrary alphanumeric string your app adds to the initial request that Auth0 includes when redirecting back to your application.To see how to use this value to prevent cross-site request forgery (CSRF) attacks, see Mitigate CSRF Attacks With State Parameters. |
| organization | (optional) ID of the organization to use when authenticating a user.When not provided, if your application is configured to Display Organization Prompt, the user will be able to enter the organization name when authenticating. |
| invitation | (optional) Ticket ID of the organization invitation.When inviting a member to an Organization, your application should handle invitation acceptance by forwarding the invitation and organization key-value pairs when the user accepts the invitation. |
トークンエンドポイント(/token)へのパラメーター
今までの手順で実施した開発者コンソールで確認した値を参考にしながら、リクエストパラメーターの項目の意味を確認する。
| Parameter Name | Description |
|---|---|
| grant_type | Set this to authorization_code. |
| code | The authorization_code retrieved in the previous step of this tutorial. |
| client_id | Your application's Client ID. You can find this value in your Application Settings. |
| client_secret | Your application's Client Secret. You can find this value in your Application Settings.To learn more about available application authentication methods, read Application Credentials. |
| redirect_uri | The valid callback URL set in your Application settings.This must exactly match the redirect_uri passed to the authorization URL in the previous step of this tutorial. Note that this must be URL encoded. |
参考:内包型アクセストークン、識別子型アクセストークンについて
Auth0から取得できるaccess_tokenとid_tokenは内包型アクセストークンである。
内包型と識別子型の違いについて詳しくは下記リンクより。
Discussion