ArgoCDにGoogleアカウントでログインできるようにする(OAuth・OIDC)
記事の内容
ArgoCDにGoogleアカウントを使ってログインできるように設定します。
記事を読むと得られるもの
- ArgoCDにGoogleログインを導入できます
対象読者
- ArgoCDユーザー
- ArgoCDにGoogle Loginを導入したい人
記事の長さ
3分で読めます
ArgoCDにGoogleログインを実装する
ArgoCDを準備する
ArgoCD自体をKubernetesに導入するフローは割愛致します。上記記事に、以前、GKE上でArgoCDを導入する方法をまとめましたので、クラスター自体がまだない人は参照してください。
GCP Project上でOAuthの準備をする
OAuth Consent Screenを設定する
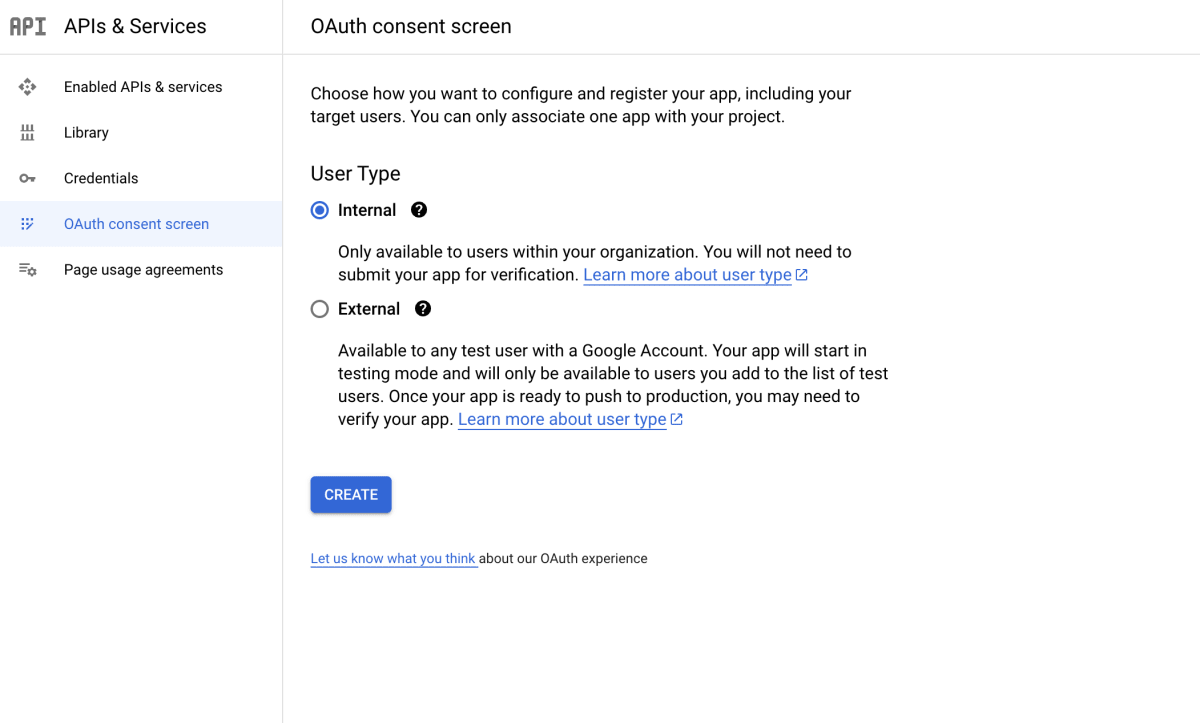
GCP上でOAuthの設定を行います。(上記リンクをクリックすると、OAuthの設定画面に飛びますので、このページで設定を進めます。)
OAuth consent screen画面
上記の設定(Internal or External)を進めると、Oauth consent screenを設定する画面に進みます。

- App Name
- User Support Email
- Developer contact information
等は自由に入力していただき、
- Authorized domains
に許可したいドメイン名を入力してください。もし、example.devというドメインを許可した場合、taro@example.dev や hanako@example.dev といったメールアドレスがログイン対象になります。
Scopes画面
OAuth consent screen画面の設定を終えると、Scopes画面に遷移します。

ADD OR REMOVE SCOPESボタンを押し、以下の二つを選択します。
.../auth/userinfo.profileopenid
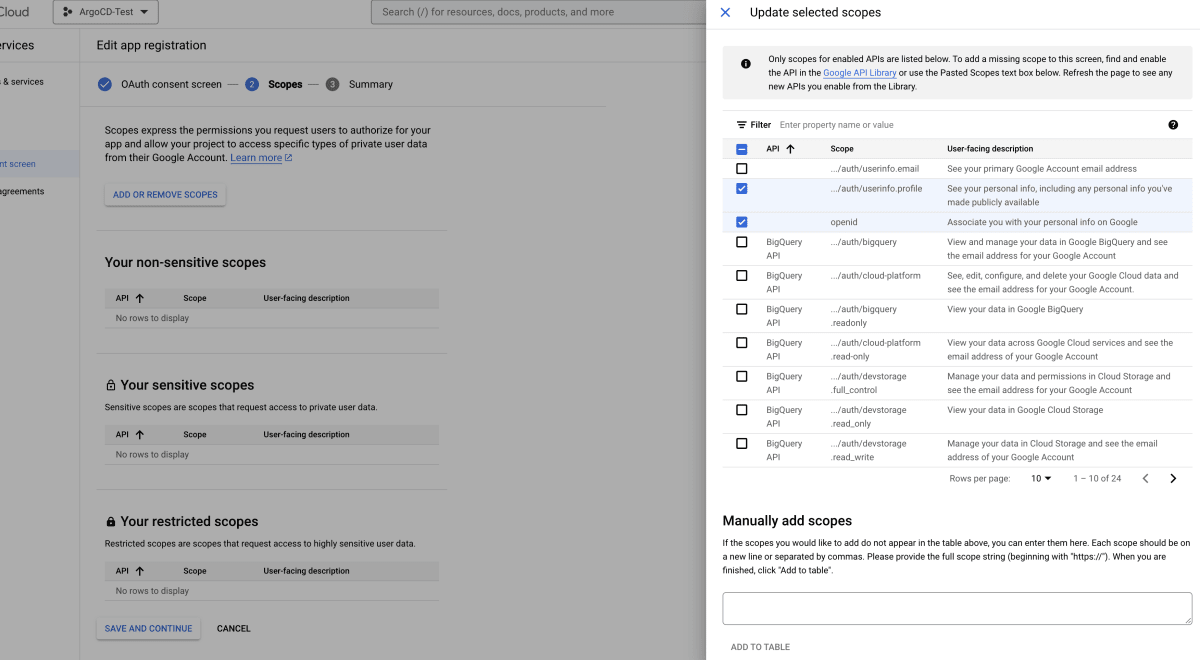
以上にて、GCP Project上のOAuth consent screenの設定は完了です。
OAuth Client IDを設定する
次に、再度GCP上で、OAuth Client IDを設定します。
こちらにアクセスし、Create Credentials ボタンをクリック、OAuth client ID を選択します。

-
Application typeはWeb applicationを選択 -
Nameは任意の値を入力 -
Authorized JavaScript originsにArgoCDのDashboardのURLを入力(ローカルの場合は、https://localhost:8080) -
Authorized redirect URIsには、URL+/api/dex/callbackを入力(ローカルの場合は、https://localhost:8080/api/dex/callback)
上記設定にて、作成します。

作成すると、ClientIDやClientSecretが画面に表示されるため、メモしておきます(後ほど利用します)
ArgoCDにOpenID Connectを設定する
GCP上で作成したClientIDとClientSecretをArgoCD上に設定していきます。
OIDCをArgoCDに適用するために、argocd-cmという名称のConfigMapに以下のValueを追加します。
data:
  url: https://localhost:8080
  dex.config: |
    connectors:
    - config:
        issuer: https://accounts.google.com
        clientID: XXXXXXXXXXXXX.apps.googleusercontent.com
        clientSecret: XXXXXXXXXXXXX
      type: oidc
      id: google
      name: Google
直接、クラスターの中の値を変更する場合、以下のようなコマンドで実行可能です。
$ kubectl edit configmaps argocd-cm -n argocd

# Please edit the object below. Lines beginning with a '#' will be ignored,
# and an empty file will abort the edit. If an error occurs while saving this file will be
# reopened with the relevant failures.
#
apiVersion: v1
kind: ConfigMap
metadata:
  name: argocd-cm
  namespace: argocd
  ...
# 以下にOIDCの設定を追加する(URLとclientIDとclientSecretは要件に合わせて変更する)
data:
  dex.config: |
    connectors:
    - config:
        issuer: https://accounts.google.com
        clientID: XXXXXX.apps.googleusercontent.com
        clientSecret: XXXX
      type: oidc
      id: google
      name: Google
  url: https://localhost:8080
上記設定が正しく反映されると、以下の画像のように、LOG IN VIA GOOGLEというボタンが表示されます。

Loginしてみる
LOG IN VIA GOOGLEというボタンをクリックして、ドメインに登録したメールアドレスでGoogle認証を行うと、無事ログインできることが確認できます。
$ kubectl logs deployments/argocd-dex-server -n argocd
...
time="2023-10-04T02:42:51Z" level=info msg="login successful: connector \"google\", username=\"Name\", preferred_username=\"\", email=\"y.sakakibara@<domain name>\", groups=[]"
※ドメインに登録していないメールアドレスでログインを試みると失敗します。
Google以外のログインを禁止する
data:
  admin.enabled: "false"
を、argocd-cmConfigmapに追加すると、useridとpasswordによるログインができなくなります。

note
勉強法やキャリア構築法など、エンジニアに役立つ記事をnoteで配信しています。
Discussion