👻
[環境構築]React+TypeScriptでWebAssembly001。Windowsで、WebAssemblyを初めてみた。
React+TypeScriptでWebAssembly002 ->
Abstract
※windowsだと環境構築できんかった~。
React+TypescriptでQRコードを読込みをいろいろ頑張ったけど、やっぱ遅!!
検出するだけなら大丈夫だけど、トラッキングもしたいと思ってんだよね。
何はともあれ、windowsでWebAssemblyの開発環境を構築してみた。
前提
- gitインストール済。[環境構築]Windowsに、Gitインストール。
- pythonインストール済。Windows版Pythonのインストール
ざっくり手順
- Emscriptenのインストールのため、SSL証明書の検証に必要なCertifiのpythonライブラリインストール
- 環境変数にSSL_CERT_FILEを追加するため、certifiのパスを調べる。
- 環境変数にSSL_CERT_FILEを追加、certifiのパスを設定する。
- emscriptenのインストール手順を順に実行
- git clone https://github.com/emscripten-core/emsdk.git
- cd emsdk
- git pull
- emsdk.bat install latest
- emsdk.bat activate latest
- emsdk_env.bat
- HelloWorld作成 -> ビルド
- 実行
手順詳細
手順1. Emscriptenのインストールのため、SSL証明書の検証に必要なCertifiのpythonライブラリインストール
```shell:
pip3 install --upgrade certifi
```
手順2. 環境変数にSSL_CERT_FILEを追加するため、certifiのパスを調べる。
```shell:
C:\Users\xxx>python
>>> import certifi
>>> certifi.where()
'C:\\Users\\xxx\\AppData\\Local\\Programs\\Python\\Python312\\Lib\\site-packages\\certifi\\cacert.pem'
```
手順3. 環境変数にSSL_CERT_FILEを追加する。
変数名 : SSL_CERT_FILE
変数値 : C:\Users\xxx\AppData\Local\Programs\Python\Python312\Lib\site-packages\certifi\cacert.pem
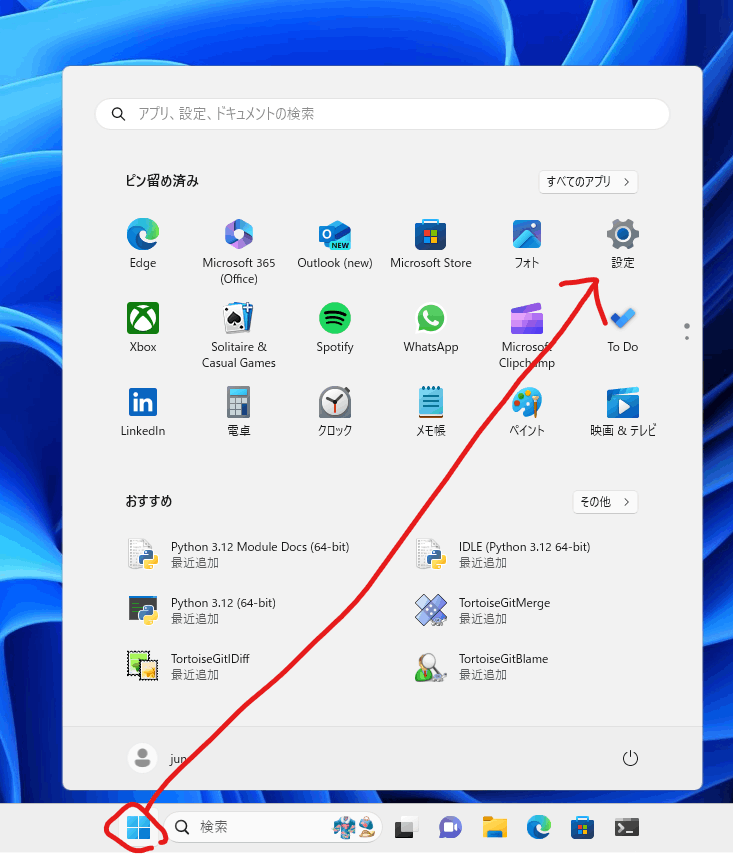
↓
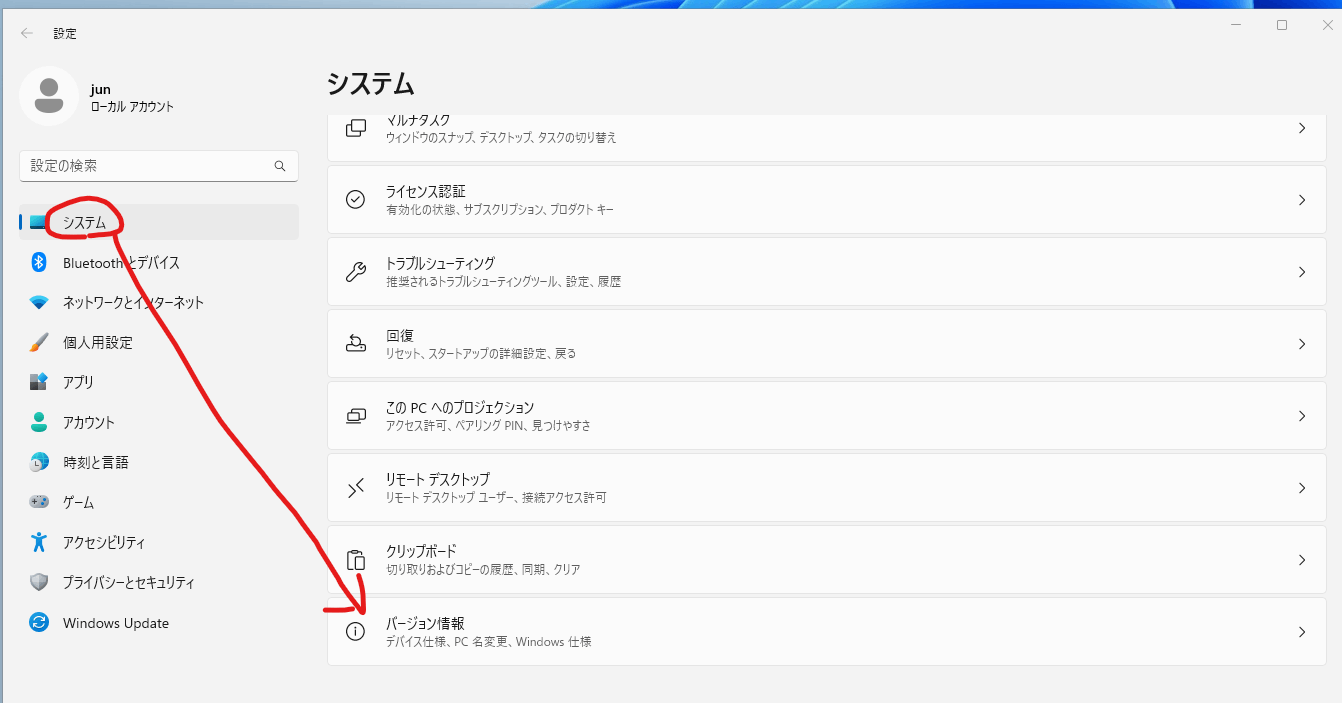
↓

↓
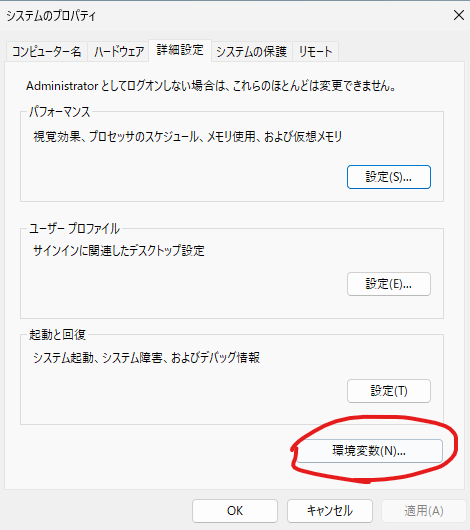
↓

↓

※ファイルの参照を押下してパスに移動するかチェックしとくと幸せになれます。
↓
OK->OK->OK押下
↓
再起動
手順4. emscriptenのインストール手順を順に実行
1. git clone https://github.com/emscripten-core/emsdk.git
2. cd emsdk
3. git pull
4. emsdk.bat install latest
5. emsdk.bat activate latest
6. emsdk_env.bat
インストール完了。
手順5. サンプルコードを作成 -> ビルド
適当なフォルダに、下記ファイルを作成して置く。
hello.cpp
#include <stdio.h>

int main() {
    printf("Hello World\n");
    return 0;
}
↓
ビルド
em++ hello.cpp -s WASM=1 -o hello.html
- -s WASM=1
ビルド後にwasmファイルを出力する - -o
コードを実行するhtmlファイルを出力する
↓
hello.htmlが出力される。
手順6. 実行
ビルド
emrun hello.html
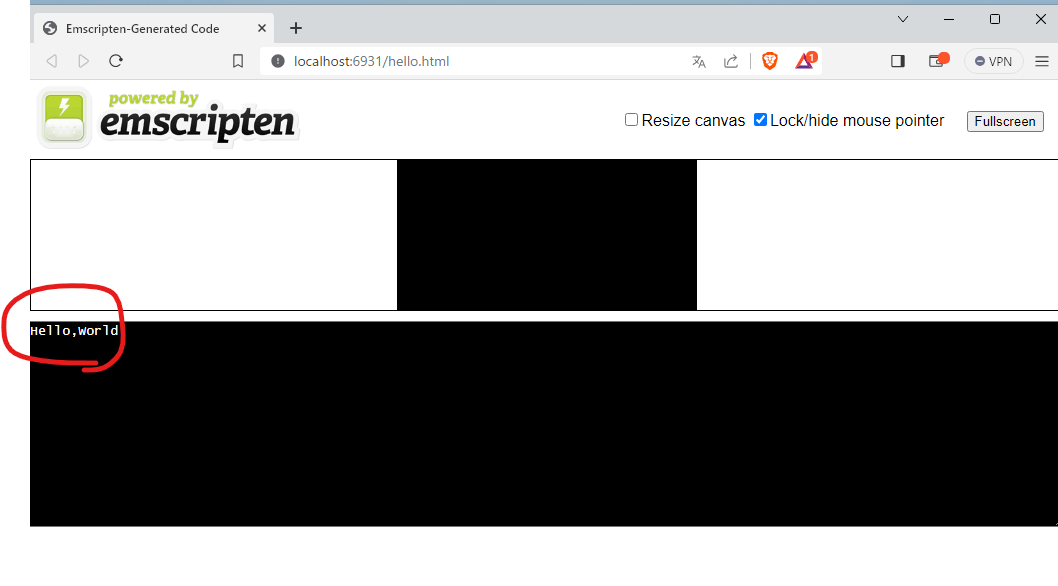
出来た!!

ふぃ~。
公式の手順そのままじゃ動かんし。苦労したばい。
※PCの電源落としたとかで、再度始める時は、emsdk_env.batを実行してからじゃないとだめみたい。
ついでに。
ここの手順もやってみる。
- サンプルコードを作成 -> ビルド
適当なフォルダに、下記ファイルを作成して置く。↓hello.cpp#include <stdio.h> #include <emscripten/emscripten.h> int main() { printf("Hello World\n"); return 0; } #ifdef __cplusplus #define EXTERN extern "C" #else #define EXTERN #endif EXTERN EMSCRIPTEN_KEEPALIVE void myFunction(int argc, char ** argv) { printf("MyFunction Called\n"); }
git clone で取ってきた、emsdkリポジトリから、shell_minimal.htmlを探す。
C:\Products\emsdk\upstream\emscripten\src\shell_minimal.html
↓
shell_minimal.htmlをhello3.cppと同じフォルダにコピー
↓
shell_minimal.htmlを修正↓shell_minimal.html~略~ <textarea class="emscripten" id="output" rows="8"></textarea> <hr> + <button id="mybutton">Run myFunction</button> <script type='text/javascript'> ~略~ }; }; +document.getElementById("mybutton").addEventListener("click", () => { + alert("check console"); + const result = Module.ccall( + "myFunction", // name of C function + null, // return type + null, // argument types + null, // arguments + ); +}); </script>
ビルド↓ビルドem++ hello3.cpp -s WASM=1 -o hello3.html --shell-file shell_minimal.html -s NO_EXIT_RUNTIME=1 -s "EXPORTED_RUNTIME_METHODS=['ccall']"
hello3.htmlが出力される。 - 実行ビルド
emrun hello3.html
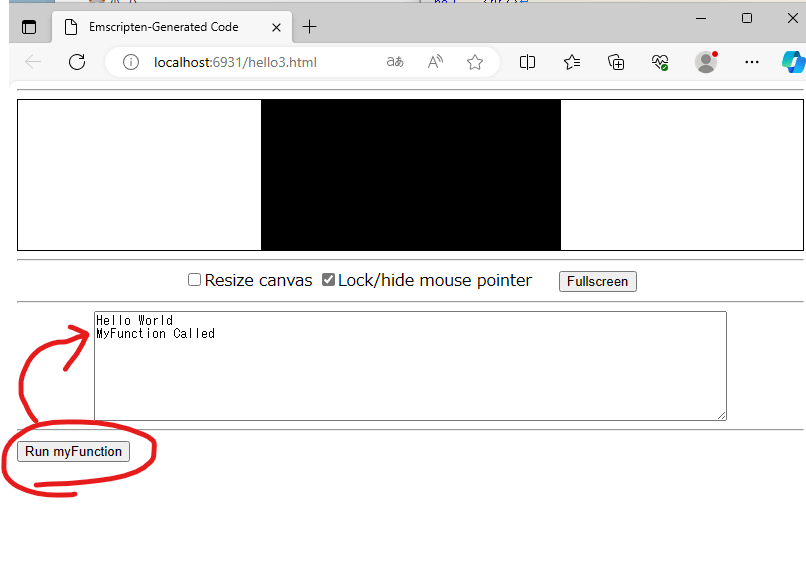
出来た!!
Discussion