📝
React+TypeScriptなWebアプリで、R3Fのtutorial20。(Lerpで簡単移動処理)

Abstract
今回の参考はここ(Lerp)。
線形補完の意味なんだけど、目的地まで、カメラ位置とか、3Dモデル位置とかをだんだんゆっくりに移動させてくれるやつ。
結論
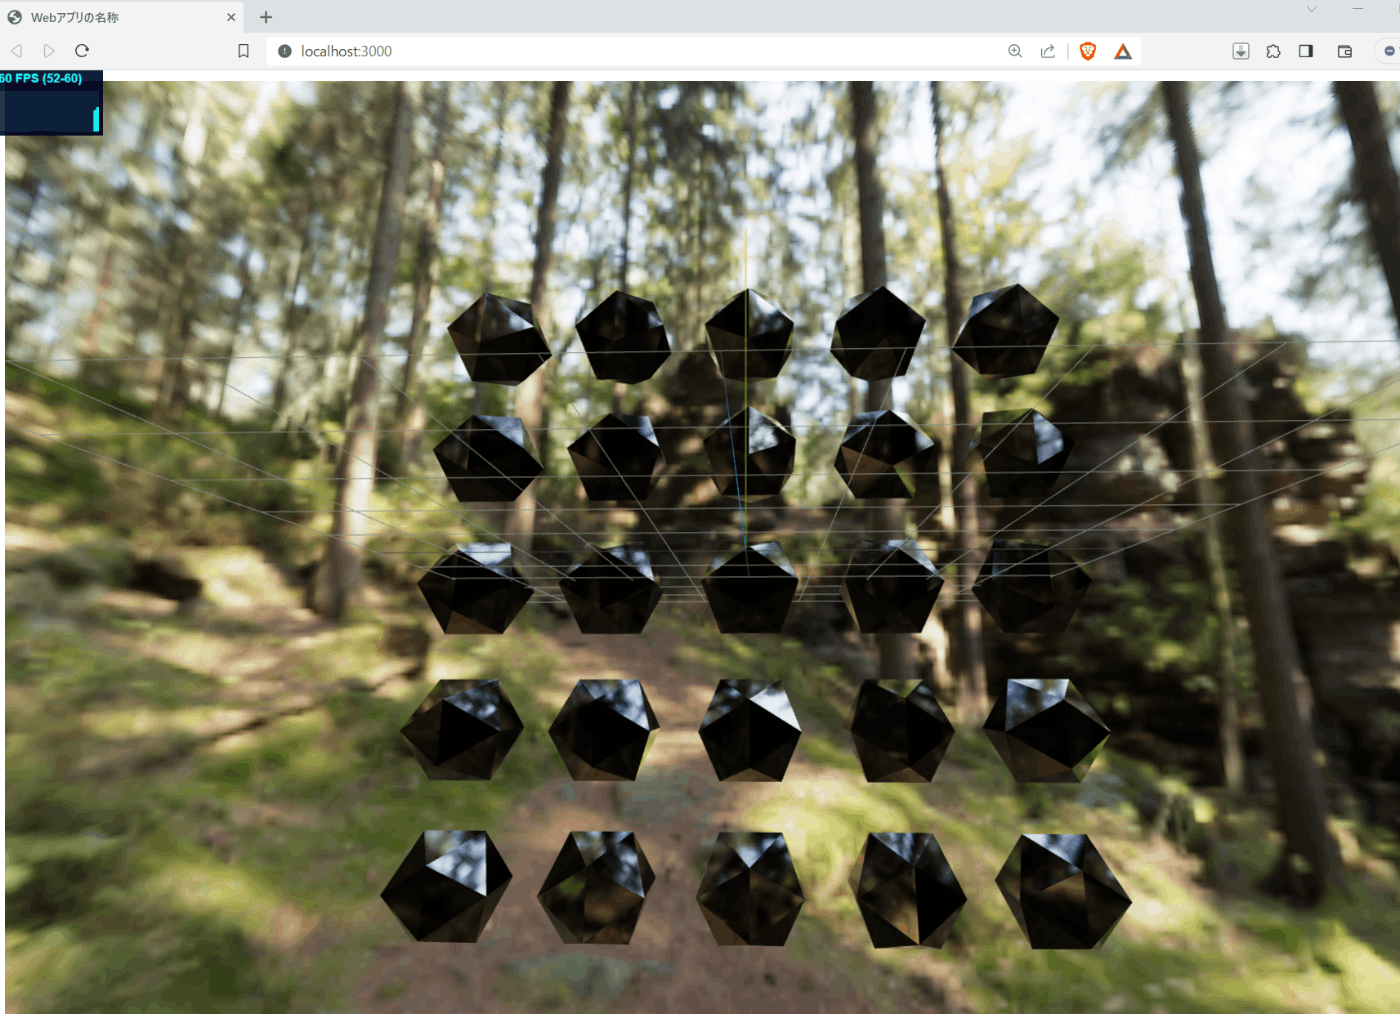
今回の成果物はココ↓
Lerp使用箇所の要点 :
- 起動すぐのカメラ移動。(Rigタグ)
- 3Dオブジェクトタッチで、位置移動、色変更。
前提
- React+Typescriptの開発環境は構築済 [環境構築]WindowsにVSCode+React+TypeScriptの開発環境を構築してみた。
- このスケルトンコードから始める。react-r3f-base-onebox
手順
1.プロジェクト生成 -> VSCodeで開く
めんどいから、このスケルトンコードから始める。react-r3f-base-onebox
で、下記コマンドでフォルダ名とか整備する。
フォルダリネームとか
$ D:
$ cd .\Products\React.js\            # ご自身の適当なフォルダで。
$ rd /q /s react-r3f-base-onebox
$ git clone https://github.com/aaaa1597/react-r3f-base-onebox.git
$ rd /q /s react-r3f-base-onebox/.git
$ ren react-r3f-base-onebox react-r3f-tutorial020
$ cd react-r3f-tutorial020
2.必要ライブラリのインストール
$ npm install --save three
$ npm install --save @types/three
$ npm install --save @react-three/fiber
$ npm install --save @react-three/drei
.eslintrc.jsを修正
エラーになるので、ignoreに追加
.eslintrc.js
-        "react/no-unknown-property": ['error', { ignore: ['css', "args", 'wireframe', 'rotation-x', 'rotation'] }],
+        "react/no-unknown-property": ['error', { ignore: ['css', "args", 'wireframe', 'rotation-x', 'rotation', 'roughness', 'metalness', 'thickness', 'ior', 'transmission'] }],
tsconfig.jsonを修正
エラーになるので、downlevelIterationを追加
tsconfig.json
 {
   "compilerOptions": {
+    "downlevelIteration": true,
     "target": "es5",
     "lib": [
       "dom",
App.tsx
全体。
App.tsx
-import React, {useRef} from 'react';
+import React, {useMemo, useRef, useState} from 'react';
import './App.css';
-import { Canvas, useFrame, MeshProps  } from '@react-three/fiber'
+import { Canvas, useFrame, MeshProps } from '@react-three/fiber'
import * as THREE from 'three'
-import { OrbitControls, Environment } from '@react-three/drei'
+import { OrbitControls, Environment, Center, Stats } from '@react-three/drei'

-const Box = (props: MeshProps) => {
+const Button = (props: MeshProps) => {
  const ref = useRef<THREE.Mesh>(null!)
+  const refMat = useRef<THREE.MeshPhysicalMaterial>(null!)
+  const [hovered, setHovered] = useState(false)
+  const [selected, setSelected] = useState(false)
+  const colorTo = useMemo(() => new THREE.Color(Math.floor(Math.random() * 16777216)),[])

  useFrame((_, delta) => {
-    ref.current.rotation!.x += 1 * delta
-    ref.current.rotation!.y += 0.5 * delta
+    ref.current.rotation.x = hovered
+      ? THREE.MathUtils.lerp(ref.current.rotation.x, -Math.PI * 2, 0.025)
+      : THREE.MathUtils.lerp(ref.current.rotation.x, 0, 0.025)
+
+    ref.current.position.z = selected
+      ? THREE.MathUtils.lerp(ref.current.position.z, 0, 0.025)
+      : THREE.MathUtils.lerp(ref.current.position.z, -3, 0.025)
+
+      refMat.current.color.lerp(selected ? colorTo : new THREE.Color(0x000000), 0.025)
})

  return (
-    <mesh {...props} ref={ref}>
-      <boxGeometry />
-      <meshNormalMaterial />
+    <mesh {...props} ref={ref}
+      onPointerDown={() => {setSelected(!selected)}}
+      onPointerOver={() => {setHovered(true)}}
+      onPointerOut={() => {setHovered(false)}} >
+      <icosahedronGeometry />
+      <meshPhysicalMaterial ref={refMat}
+        roughness={0} metalness={0} thickness={3.12} ior={1.74} transmission={1.0}/>
     </mesh>
  )
}

+const vec = new THREE.Vector3()
+const Rig = () => {
+  return useFrame(({camera, mouse}) => {
+    vec.set(mouse.x * 2, mouse.y * 2, camera.position.z)
+    camera.position.lerp(vec, 0.025)
+    camera.lookAt(0, 0, 0)
+  })
+}
+

const App = () => {
  return (
-   <div style={{ width: "99vw", height: "75vh" }}>
+   <div style={{ width: "100vw", height: "75vh" }}>
-     <Canvas camera={{ position: [3, 1, 2] }}>
+     <Canvas camera={{ position: [0, 0, 8] }}>
        <Environment preset="forest" background />
+       <Center>
+         {[...Array(5).keys()].map((x) =>
+           [...Array(5).keys()].map((y) => {
+             return <Button key={y*5 + x} position={[x*2.5, y*2.5, 0]}/>
+           })
+         )}
+       </Center>
        <OrbitControls />
        <axesHelper args={[5]} />
        <gridHelper />
+       <Rig />
        <Stats/>
      </Canvas>
    </div>
  );
}

export default App;
で、実行。

出来た!!
ポイント
1. <Rig />関数コンポーネント
この関数で空間全体の姿勢を変更している。
実際は、全体Cameraの位置を変更-> (0,0,0)位置を向くように再計算している。
<Rig/>
camera.position.lerp(vec, 0.025)
camera.lookAt(0, 0, 0)
2. <Button />関数コンポーネント
meshタグにonPointerDown/onPointerOver/onPointerOutをくっつけて、イベント制御している。
各イベントで各変数を変更して、useFrame()の中で、各変数に合わせて自分の位置と色を変更している。
色を変更するためには、meshの参照でなく、meshPhysicalMaterialの参照を保持っとく必要があるので、refMatに設定している。
以上。
Discussion