はじめに
tokadevです。札幌からリモートで開発しています。
チームでは Cypress を使ってコンポーネントテストを書いていますが、これまであまりコンポーネントテストを書いてこなかったのでその中で学んだことを hands-on 形式で紹介していきたいと思います。
Cypress とは?
Cypress はフロントエンド向けのテスティングフレームワークです。
E2Eテストや結合テストなども行えますが、今回はコンポーネントテストを行うために使用します。
準備
コンポーネントテストを動かすためのプロジェクトを用意します。
pnpm + vite でスキャフォルド、 cypress もインストールしておきます。
# create project
pnpm create vite@latest

? Project name: » my-project

? Select a framework: » - Use arrow-keys. Return to submit.
  Vanilla
> Vue
  React
..

? Select a variant: » - Use arrow-keys. Return to submit.
  JavaScript
> TypeScript
..

cd my-project
pnpm install

# cypress install
pnpm add cypress -D
構成
テストする対象は components/ 直下に2ファイル。
テストするコンポーネントと同じ階層にテストコード用のディレクトリを用意します。
.
└── my-project/
    └── src/
        ├── App.vue
        ├── main.ts
        └── components/
            ├── ParentComponent.vue
            ├── ChildComponent.vue
            └── __tests__/
                ├── ParentComponent.cy.ts
                └── ChildComponent.cy.ts
コンポーネントを追加
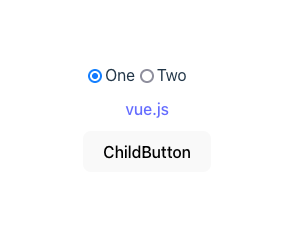
ParentComponent にはラジオボタンとテキストリンクを追加、ChildComponent にはボタンを追加します。
<template>
  <div>
    <div class="radio">
      <input v-model="checked" type="radio" id="one" name="one" value="1" />
      <label for="one">One</label>

      <input v-model="checked" type="radio" id="two" name="two" value="2" />
      <label for="two">Two</label>
    </div>

    <div>
      <a href="https://vuejs.org/" target="_blank">vue.js</a>
    </div>

    <Child name="ChildButton" @clickButton="clickButton"/>
  </div>
</template>

<script setup lang="ts">
import { ref } from 'vue';
import Child from '@/components/ChildComponent.vue';

const checked = ref(1);
const clickButton = () => console.info('clicked!');
</script>

<style scoped>
div { margin: 10px; }
.radio { display: flex; }
</style>
<template>
  <button @click="clickHandler">{{ props.name }}</button>
</template>

<script setup lang="ts">
const props = defineProps<{
  name: string;
}>();

const emit = defineEmits<{
  (e: 'click-button'): void;
}>();

const clickHandler = () => emit('click-button');
</script>
これで準備完了。次はテストコードを書いていきます。
テストの準備
- テスト作成
テストは .cy.ts 形式で作成、 vue ファイルをマウントします。
import ParentComponent from '@/components/ParentComponent.vue';

beforeEach(() => {
  cy.mount(ParentComponent, {});
});
import ChildComponent from '@/components/ChildComponent.vue';

beforeEach(() => {
  cy.mount(ChildComponent, {});
});
-
data-cy属性を追加
data-cy は Cypress でテストする際に使用するDOM指定のための属性です。
改修によって id や class が変更になった場合にテストが壊れないようにする他、テスト対象の要素が明示的になるメリットがあるので、基本的には data-cy 属性を使います。
今回はラジオボタン、リンク、ボタンをテストするため、それぞれ data-cy を追加します。
 <template>
+  <div data-cy="parent-component">
-  <div>
     <div class="radio">
+      <input v-model="checked" type="radio" id="one" name="one" value="1" data-cy="radio-one" />
-      <input v-model="checked" type="radio" id="one" name="one" value="1" />
       <label for="one">One</label>

+      <input v-model="checked" type="radio" id="two" name="two" value="2" data-cy="radio-two" />
-      <input v-model="checked" type="radio" id="two" name="two" value="2" />
       <label for="two">Two</label>
     </div>

     <div>
+      <a href="https://vuejs.org/" data-cy="alink" target="_blank">vue.js</a>
-      <a href="https://vuejs.org/" target="_blank">vue.js</a>
     </div>

     <Child name="ChildButton" @clickButton="clickButton"/>
   </div>
 </template>
 <template>
+  <button @click="clickHandler" data-cy="button">{{ props.name }}</button>
-  <button @click="clickHandler">{{ props.name }}</button>
 </template>
- テストする要素を
constで定義
テストコードの可読性を保つため、 cy.get() で指定した要素を const で定義します。
  import ParentComponent from '@/components/ParentComponent.vue';
+ const Parent = () => cy.get('[data-cy="parent-component"]');
Parent = () => {
  return cy.get('[data-cy="parent-component"]')
};

+ const radioOne = () => Parent().find('[data-cy="radio-one"]');
+ const radioTwo = () => Parent().find('[data-cy="radio-two"]');
+ const alink = () => Parent().find('[data-cy="alink"]');
  import ChildComponent from '@/components/ChildComponent.vue';
+ const button = () => cy.get('[data-cy="button"]')
※ アンチパターンについて
Best Practices - Assigning Return Values の項には cy.get() の実行結果を const や let を用いるのは Anti Pattern として説明されています。
この記事の例では、 data-cy 属性を指定して要素を取得している点、関数呼び出しのために const を使用している点で、 docs で説明されている Anti Pattern とは異なることを補足しておきます。
const Parent = () => cy.get('[data-cy="parent-component"]');
// instead pattern
const Parent = () => {
  return cy.get('[data-cy="parent-component"]')
};
テストケース
describe には一つの条件を、it には条件に対する一つの期待結果を書きます。
条件がネストされる場合は、可読性のために context を用いても良いですがそこはお好みで。
  describe('テストの条件', () => {
    it('テストの期待結果', () => {
      // テストコード
    });
  });
- テストケース: ラジオボタン
要素が表示されていることやチェックが正しく入ることをテストするため、アサーションには .should() を使用します。
ラジオボタンを選択したときのテストは、 beforeEach などのフックを用いて事前に選択する動作を設定しておくことでテストケースから分離することが出来ます。
describe('ParentComponent', () => {
  describe('ラジオボタン', () => {

    it('ラジオボタンが表示される', () => {
      radioOne().should('be.visible');
      radioTwo().should('be.visible');
    });

    describe('Two を選択したとき', () => {
      beforeEach(() => radioTwo().check());

      it('Two がチェックされている', () => {
        radioTwo().should('be.checked');
      });
    });

  });
});
- テストケース: リンク
正しいURLが設定されていることをテストします。
また設定したURLがリンク切れになっていないこともテストすることで、テスト失敗によってデッドリンクを検知出来るようになります。
describe('ParentComponent', () => {
  describe('テキストリンク', () => {

    it('テキストリンクが表示される', () => {
      alink().should('be.visible');
    });

    it('リンクがセットされている', () => {
      alink().should('have.attr', 'href', 'https://vuejs.org/');
    });

    it('リンク先が有効である', () => {
      alink().invoke('attr', 'href')
        .then((url) => cy.request(url!).its('status').should('equal', 200));
    });

  });
});
- テストケース: ボタン
emit の発火を Cypress 側で spy するため props に追加。
ボタン押下時に emit が発火することをテストします。
 import ChildComponent from '@/components/ChildComponent.vue';

 beforeEach(() => {
+  const onClickSpy = cy.spy().as('onClickSpy');
   cy.mount(ChildComponent, {
+    props: {
+      name: 'TestButton',
+      onClickButton: onClickSpy,
+    },
   });
 });

 describe('ChildComponent', () => {
   describe('ボタン', () => {

     describe('ボタンをクリックしたとき', () => {
       beforeEach(() => button().click());

+      it('「click-button」が発火する', () => {
+        cy.get('@onClickSpy').should('have.been.calledOnce');
+      });
     });

  });
 });
これでテストコードが出来ました。 Cypress を起動してテストを実行してみましょう。
テスト実施
Cypress を起動してコンポーネントテストを実施します。
pnpm cypress open --component
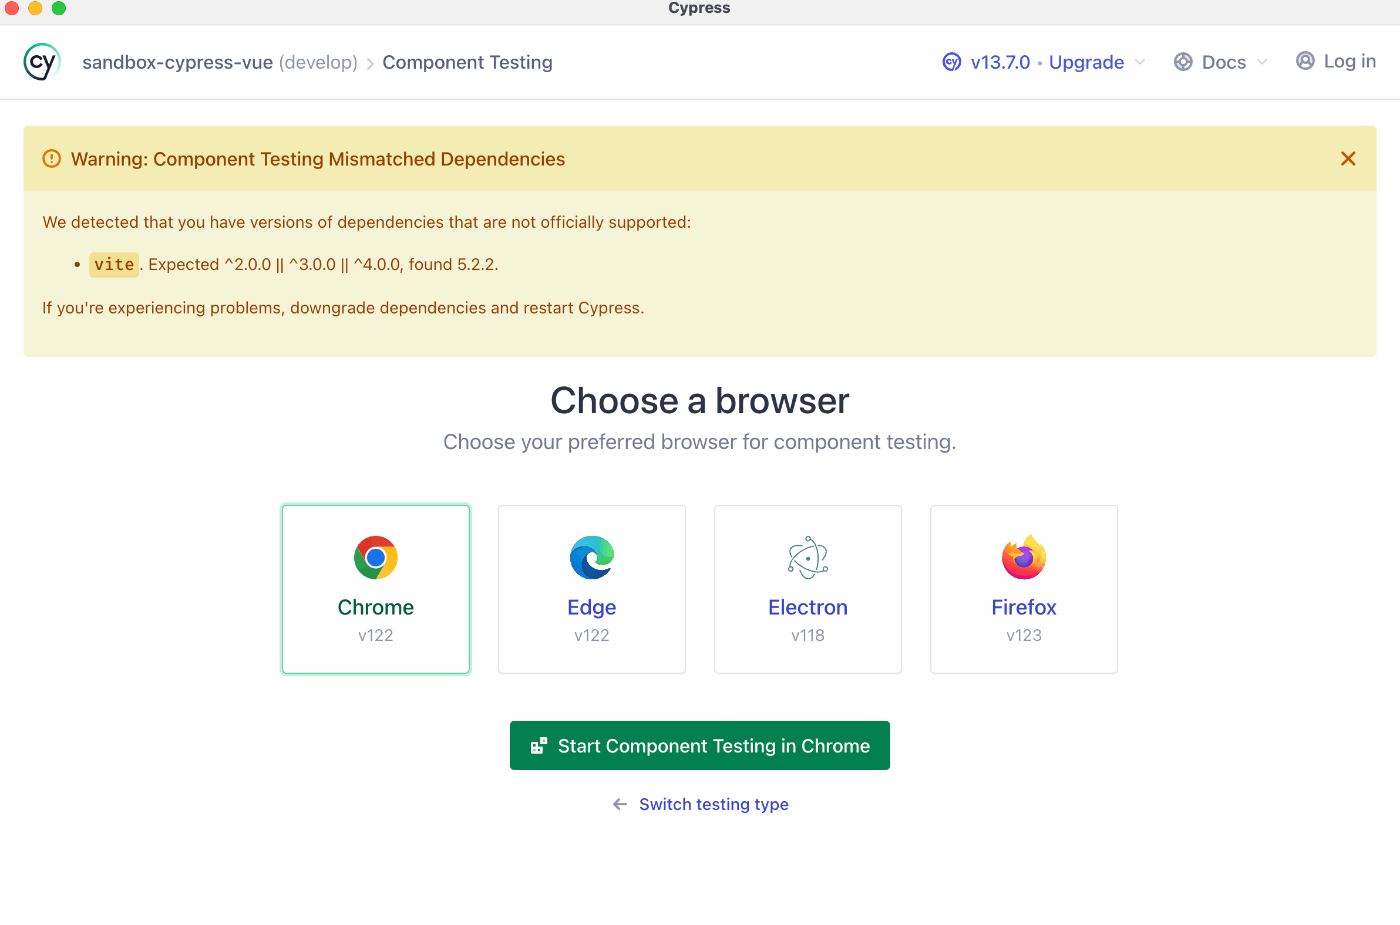
テストするブラウザを選択します。今回は Chrome を選択

- ParentComponent.cy.ts

- ChildComponent.cy.ts
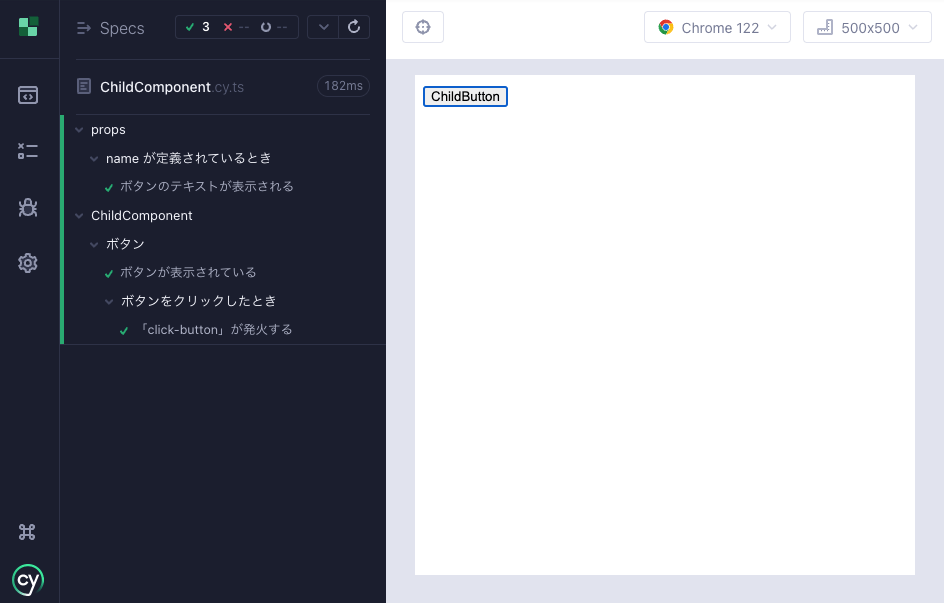
いずれのテストケースも全てテストが pass していますね。
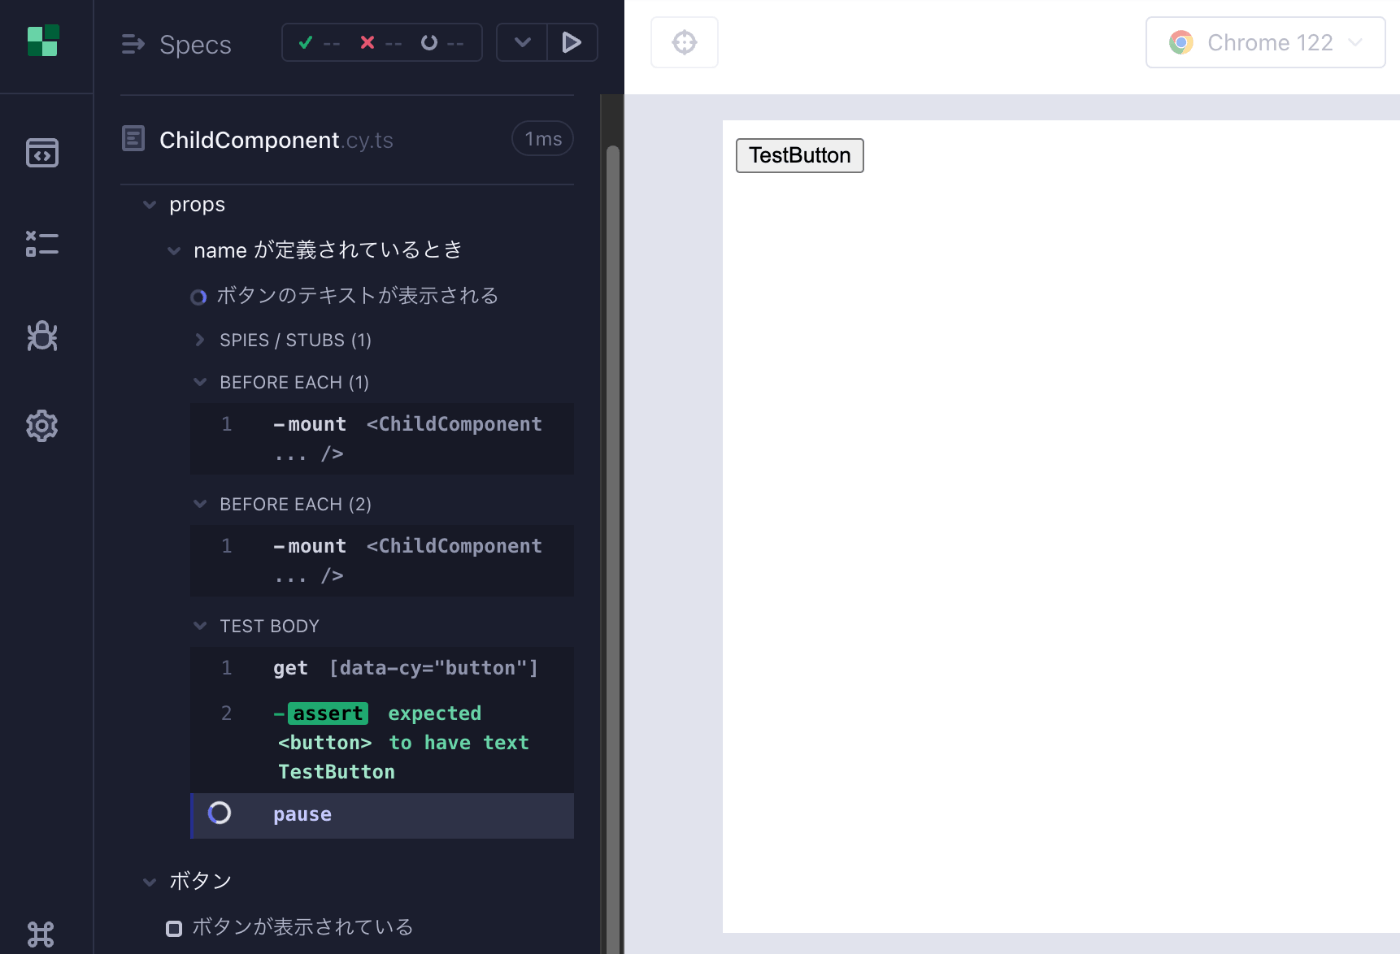
テストの経過を見たい場合は pause() でテストを止めることが出来ます。
再開するときは画面上部の Resume を押すとテストが再開されます。
例えば ChildComponent.cy.ts の props のテストケースで pause() してみます。
pause() すると props に定義していた name の値でボタン表示が TestButton に変わっていますね。
以上で hands-on は終わりです。おつかれさまでした。
おわりに
機能実装時に並行してテストを追加するほか、新規で追加になるコンポーネント実装の際は、コンポーネントの仕様や責務を整理するために先にテストケースから書くこともあります。
日常的にコンポーネントテストを書くようになったことでテストコードも増えてましたが、同時にテストの実行時間も長くなってきたため、どこまで厳密にテストするかの議論も増えてきました。
またフロントエンドだけでなくバックエンドでもテストコードを書いているので、最近はほぼ毎日テストを書いているかもしれません。
最近は別のテスト手法の本を読み始めたので、チームで活用できそうなら試してみたいと考えています。まだまだテストの世界は奥が深いですね。

Discussion