はじめに
本記事では、Terraform で Cloud Run の「インテグレーションを追加する」と同じリソース設定を行います。
例では、Google Cloud Load Balancing (リージョン外部 HTTP(S) ロードバランサ)を使用して以下の図のような Cloud Run のルーティングを設定します。

Cloud Run の「インテグレーションを追加」とは
ロードバランサの設定はやることが多く、ルーティングのために色々な作業が必要になります。
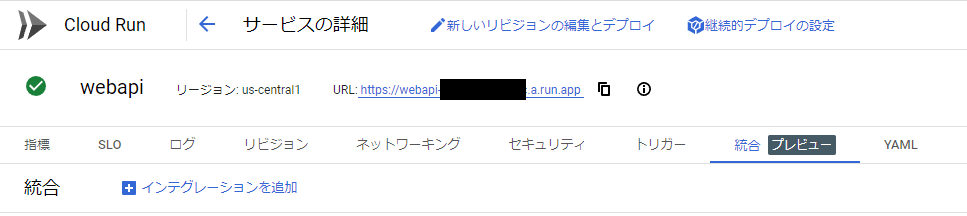
記事作成時点では、リージョン: us-central1 のみ以下のようにコンソールから Google Cloud Load Balancing を使用した Cloud Run のルーティング設定を行えるようになっています。そのほか、ロードバランサによるドメインの構成や Redis キャッシュへの接続が、ワンクリックと同様の簡単さで行えます。
- 対象の CloudRun サービスより、
「統合」-「インテグレーションを追加」-「カスタム ドメイン - Google Cloud Load Balancing」と選択します。
- 必要なAPIを有効化し、ドメインとサービスに繋げたいパスを入力して実行するだけでその後は必要なリソースを自動的に作成してくれます。

次項より、上の図と同じ順にTerraformにてリソースを作成します。
例では、前提として 必要なAPIが有効になっていること、ドメインを取得済であること(例ではsample.com)とします。
また、Cloud Run サービス「webapi1」と「webapi2」の作成も省略します。
Routes
Domain:Cloud Run サービスに構成するドメイン(例ではsample.com)です。これは DNS を構成できるドメインである必要があります。
Path と Service は、後述の URL マップ にて設定します。
Compute Global Address
静的 IP アドレス を取得します。
resource "google_compute_global_address" "lb-ip" {
  address_type = "EXTERNAL"
  ip_version   = "IPV4"
  name         = "lb-ip"
  project      = "myproject"
}
DNS(Cloud DNS を使用)
静的 IP アドレス と ドメインを紐づけます。
// ------------------------------------
// Cloud DNSの設定
// ------------------------------------
resource "google_dns_managed_zone" "sample-com" {
  name        = "sample-com"
  dns_name    = "sample.com."
  description = "DNS zone (sample.com)"
  dnssec_config {
    state = "on"
  }
}
// ------------------------------------
// 静的 IP アドレス と ドメインを紐づけ
// ------------------------------------
resource "google_dns_record_set" "lb-dns" {
  managed_zone = google_dns_managed_zone.sample-com..name
  name         = "lb.sample.com."
  type         = "A"
  ttl          = 300
  rrdatas      = [
    google_compute_global_address.lb-ip.address
  ]
}
URL マップ
リクエストを正しいバックエンド サービスにルーティングします。
ここの設定では、path_matcher を変更してバックエンドサービスに対する重み付けを行っています。この例では、backend-webapi2 のみにリクエストが届くようになります。
resource "google_compute_url_map" "url-map" {
  default_url_redirect {
    redirect_response_code = "MOVED_PERMANENTLY_DEFAULT"
    strip_query            = true
  }

  host_rule {
    hosts        = ["sample.com"]
    path_matcher = "path-matcher"
  }

  path_matcher {
    default_service = google_compute_backend_service.backend-webapi2.id
    name            = "path-matcher"

    route_rules {
      match_rules {
        prefix_match = "/"
      }

      priority = 100

      route_action {
        weighted_backend_services {
          backend_service = google_compute_backend_service.backend-webapi1.id
          weight          = 0
        }

        weighted_backend_services {
          backend_service = google_compute_backend_service.backend-webapi2.id
          weight          = 100
        }
      }
    }
  }

  name            = "url-map"
  project         = "myproject"
}
SSL 証明書
マネージド SSL 証明書 を取得します。
resource "google_compute_managed_ssl_certificate" "ssl-certificate" {
  name    = "ssl-certificate"
  project = "myproject"
  provider = google-beta
  managed {
    domains = [google_dns_managed_zone.sample-com.dns_name]
  }
}
ターゲット HTTPS プロキシ
受信リクエストを正しい URL マップにルーティングします。SSL証明書も設定します。
resource "google_compute_target_https_proxy" "https-target-proxy" {
  name             = "https-target-proxy"
  project          = "myproject"
  quic_override    = "NONE"
  ssl_certificates = [google_compute_managed_ssl_certificate.ssl-certificate.id]
  url_map          = google_compute_url_map.url-map.id
}
グローバル転送ルール
IP アドレスとフロントエンドの構成を指定します。
resource "google_compute_global_forwarding_rule" "forwarding-rule" {
  ip_address            = google_compute_global_address.lb-ip.address
  ip_protocol           = "TCP"
  load_balancing_scheme = "EXTERNAL_MANAGED"
  name                  = "forwarding-rule"
  port_range            = "443-443"
  project               = "myproject"
  target                = google_compute_target_https_proxy.https-target-proxy.id
}
サーバーレス ネットワーク エンドポイント グループ
サーバーレス サービスに解決されるネットワーク エンドポイントです。
今回はエンドポイントを「webapi1」は東京リージョンに、「webapi2」を大阪リージョンに設定します。
resource "google_compute_region_network_endpoint_group" "webapi1" {
  provider              = google-beta
  name                  = "webapi1"
  network_endpoint_type = "SERVERLESS"
  region                = "asia-northeast1"
  cloud_run {
    service = google_cloud_run_service.webapi1.name
  }
}
resource "google_compute_region_network_endpoint_group" "webapi2" {
  provider              = google-beta
  name                  = "webapi2"
  network_endpoint_type = "SERVERLESS"
  region                = "asia-northeast2"
  cloud_run {
    service = google_cloud_run_service.webapi2.name
  }
}
バックエンド サービス
トラフィックの分散方法を定義します。
今回は、「webapi1」と「webapi2」のバックエンドを設定します。
resource "google_compute_backend_service" "backend-webapi1" {
  cdn_policy {
    cache_key_policy {
      include_host         = true
      include_protocol     = true
      include_query_string = true
    }
    cache_mode                   = "CACHE_ALL_STATIC"
    client_ttl                   = 3600
    default_ttl                  = 3600
    max_ttl                      = 86400
    signed_url_cache_max_age_sec = 0
  }
  connection_draining_timeout_sec = 0
  enable_cdn                      = true
  load_balancing_scheme           = "EXTERNAL_MANAGED"
  locality_lb_policy              = "ROUND_ROBIN"
  name                            = "backend-webapi1"
  port_name                       = "http"
  project                         = "myproject"
  protocol                        = "HTTPS"
  session_affinity                = "NONE"
  timeout_sec                     = 30
  backend {
    group           = google_compute_region_network_endpoint_group.webapi1.id
  }
}
resource "google_compute_backend_service" "backend-webapi2" {
  cdn_policy {
    cache_key_policy {
      include_host         = true
      include_protocol     = true
      include_query_string = true
    }
    cache_mode                   = "CACHE_ALL_STATIC"
    client_ttl                   = 3600
    default_ttl                  = 3600
    max_ttl                      = 86400
    signed_url_cache_max_age_sec = 0
  }
  connection_draining_timeout_sec = 0
  enable_cdn                      = true
  load_balancing_scheme           = "EXTERNAL_MANAGED"
  locality_lb_policy              = "ROUND_ROBIN"
  name                            = "backend-webapi2"
  port_name                       = "http"
  project                         = "myproject"
  protocol                        = "HTTPS"
  session_affinity                = "NONE"
  timeout_sec                     = 30
  backend {
    group           = google_compute_region_network_endpoint_group.webapi2.id
  }
}
さいごに
ロードバランサの設定はやることが多く、ルーティングのために色々な作業が必要になったので整理するために記事にしました。
tfファイルは以下の記事にある方法を用いてCloudRun の「インテグレーションを追加」機能で作成したリソースからエクスポートし、必要な個所に修正を加えています。
特にネットワーク周りの初学者には、ゼロからTerraformを書こうとすると結構大変な作業となります。しかし自動生成機能を利用し、エクスポートと組み合わせることで必要なリソースを含むtfファイルを作ることができます。参考になれば幸いです。
参考

Discussion