Redash を AWS Copilot CLI で構築する
はじめに
こんにちは。レンティオの小島です。
レンティオでは BI ツールとして Redash を利用しています。
Redash は OSS であり、マネージドサービスがないため自前でホスティングする必要があります。
もともと AWS に構築していましたが、数年経ち当時構築したメンバーがいないこともあってメンテナンスに課題がありました。そこで今回社内でも馴染みのある[1] AWS Copilot CLI を使ってリプレイスしたため、その紹介をしたいと思います。
ちなみに Redash by AWS Copilot CLI には先駆者がおり、たいへん参考にさせていただきました。
AWS Copilot CLI とは
Amazon ECS (Fargate) で稼働するアプリケーションを簡単に構築できるツールです。
独自の YAML 形式の設定ファイルと CLI 操作で基本的には完結します。
Application, Environment, Service という階層構造の概念があり、順に作成・デプロイしていくとリソースができあがります。
-
Application (name: redash)-
Environment (name: production)
VPC, ALB, ECS クラスター など-
Service (name: server, scheduler, ...)
ECS サービス, ロググループ など
-
-
Application
以下で作成します。作業ディレクトリ内に copilot/ というディレクトリが作られます。
copilot app init redash
Environment
以下で作成します。copilot/ 内に Manifest ファイルが作られます。
copilot env init --name production
Manifest ファイルをドキュメントに倣って適宜編集します。
今回は以下の要件があるとします。
- Route 53 の example.com というホストゾーンを使いたい
- 社内の IP アドレスからのみアクセスできるようにしたい
Manifest ファイル
name: production
type: Environment

network:
  vpc:
    cidr: 'xxx.xxx.xxx.xxx/16'
    subnets:
      public:
        - cidr: 'xxx.xxx.xxx.xxx/24'
        - cidr: 'xxx.xxx.xxx.xxx/24'
      private:
        - cidr: 'xxx.xxx.xxx.xxx/24'
        - cidr: 'xxx.xxx.xxx.xxx/24'

http:
  public:
    certificates:
      - arn:aws:acm:ap-northeast-1:xxxxxxxx # example.com の証明書 ARN
    ingress:
      source_ips:
        - 'xxx.xxx.xxx.xxx/32' # 社内 IP 1
        - 'xxx.xxx.xxx.xxx/32' # 社内 IP 2
編集できたら以下でデプロイします。CloudFormation で VPC 等のリソースが作成されるのを確認できます。
copilot env deploy --name production
Service
Service にはいくつか種類があり、今回は以下の2種類を利用します。
- Load Balanced Web Service
- ALB 経由でリクエストを受けられるサービス
- Backend Service
- インターネットに露出しないサービス
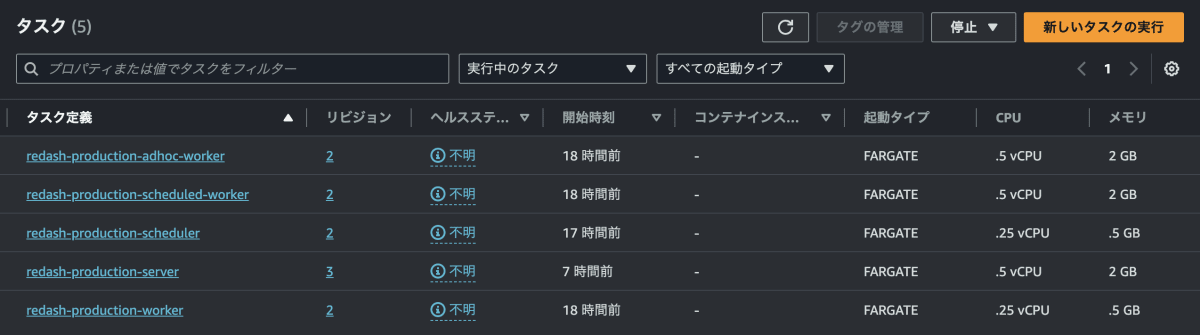
Redash の最新バージョンである v10 を動かすには以下のサービスが必要となります。
(公式ドキュメントには明記されてない気がするのですが、リリースノートが参考になります)
| name | type | command | QUEUES | 説明 |
|---|---|---|---|---|
| server | Load Balanced Web Service | server | ブラウザからのリクエストを受ける Web サーバー | |
| scheduler | Backend Service | scheduler | 定期実行クエリをキューに入れる | |
| scheduled-worker | Backend Service | worker | scheduled_queries,schemas | 定期実行クエリのキューを処理する |
| adhoc-worker | Backend Service | worker | queries | ブラウザ実行クエリのキューを処理する |
| worker | Backend Service | worker | periodic emails default | そのほかのキューを処理する |
それぞれ以下で作成します。対話で種類を聞かれます。
copilot svc init --name xxxx
Manifest ファイルを編集します。
server の Manifest ファイル
name: server
type: Load Balanced Web Service

http:
  path: '/'
  healthcheck: '/ping'
  alias: redash.example.com # ALB を指す A レコードが作られます
  hosted_zone: xxxxxxxx     # example.com のホストゾーン ID

image:
  location: redash/redash:10.1.0.b50633
  port: 5000

cpu: 512
memory: 2048
count: 1
exec: true
command: 'server'

variables:
  REDASH_WEB_WORKERS: 4

# 後で説明します
secrets:
  REDASH_DATABASE_URL: /copilot/redash/production/secrets/redash_database_url
  REDASH_REDIS_URL: /copilot/redash/production/secrets/redash_redis_url
scheduler の Manifest ファイル
name: scheduler
type: Backend Service

image:
  location: redash/redash:10.1.0.b50633

cpu: 256
memory: 512
count: 1
exec: true
command: 'scheduler'

# 後で説明します
secrets:
  REDASH_DATABASE_URL: /copilot/redash/production/secrets/redash_database_url
  REDASH_REDIS_URL: /copilot/redash/production/secrets/redash_redis_url
scheduled-worker の Manifest ファイル
name: scheduled-worker
type: Backend Service

image:
  location: redash/redash:10.1.0.b50633

cpu: 512
memory: 2048
count: 1
exec: true
command: 'worker'

variables:
  QUEUES: 'scheduled_queries,schemas'
  WORKERS_COUNT: 2

# 後で説明します
secrets:
  REDASH_DATABASE_URL: /copilot/redash/production/secrets/redash_database_url
  REDASH_REDIS_URL: /copilot/redash/production/secrets/redash_redis_url
adhoc-worker の Manifest ファイル
name: adhoc-worker
type: Backend Service

image:
  location: redash/redash:10.1.0.b50633

cpu: 512
memory: 2048
count: 1
exec: true
command: 'worker'

variables:
  QUEUES: 'queries'
  WORKERS_COUNT: 4

# 後で説明します
secrets:
  REDASH_DATABASE_URL: /copilot/redash/production/secrets/redash_database_url
  REDASH_REDIS_URL: /copilot/redash/production/secrets/redash_redis_url
worker の Manifest ファイル
name: worker
type: Backend Service

image:
  location: redash/redash:10.1.0.b50633

cpu: 256
memory: 512
count: 1
exec: true
command: 'worker'

variables:
  QUEUES: 'periodic emails default'
  WORKERS_COUNT: 1

# 後で説明します
secrets:
  REDASH_DATABASE_URL: /copilot/redash/production/secrets/redash_database_url
  REDASH_REDIS_URL: /copilot/redash/production/secrets/redash_redis_url
Secret
Redash の稼働には PostgreSQL と Redis が必要です。
Service の Manifest ファイルには REDASH_DATABASE_URL, REDASH_REDIS_URL を指定する必要がありました。
# ファイルに直書きしたくない機密情報は secret として、パラメータストアから取得する
secrets:
  REDASH_DATABASE_URL: /copilot/redash/production/secrets/redash_database_url
  REDASH_REDIS_URL: /copilot/redash/production/secrets/redash_redis_url
もしすでに存在する PostgreSQL と Redis を利用するのであれば、以下でその URL をパラメータストアに登録できます。
copilot secret init --name redash_database_url
# => 対話で入力した値が /copilot/redash/production/secrets/redash_database_url に登録される
copilot secret init --name redash_redis_url
# => 対話で入力した値が /copilot/redash/production/secrets/redash_redis_url に登録される
しかし、PostgreSQL と Redis さえも AWS Copilot CLI で作成できる Addon というしくみがあり、まとめて管理できて便利なので次で紹介します。
Addon
これまで紹介した Manifest ファイルとは別で、普通の CloudFormation テンプレートを配置することで任意の AWS リソースを作成できます。
Environment の Addon と Service の Addon が存在しますが、今回は後者を採用します。
PostgreSQL や Redis は特定の Service の持ち物ではないので前者の方が適しているように思えますが、Environment が作成した VPC などの情報は後者でしか参照できないためです。
今回は代表して server の Addon として定義します。
PostgreSQL (RDS) のテンプレート
Parameters:
  App:
    Type: String
  Env:
    Type: String
  Name:
    Type: String

Resources:
  DBSubnetGroup:
    Type: AWS::RDS::DBSubnetGroup
    Properties:
      DBSubnetGroupDescription: !Sub '${App}-${Env}'
      DBSubnetGroupName: !Sub '${App}-${Env}'
      SubnetIds: !Split [ ',', { Fn::ImportValue: !Sub '${App}-${Env}-PrivateSubnets' } ]

  DBSecurityGroup:
    Type: AWS::EC2::SecurityGroup
    Properties:
      GroupDescription: !Sub '${App}-${Env}-postgres'
      GroupName: !Sub '${App}-${Env}-postgres'
      VpcId: { Fn::ImportValue: !Sub '${App}-${Env}-VpcId' }
      SecurityGroupIngress:
        - IpProtocol: tcp
          FromPort: 5432
          ToPort: 5432
          SourceSecurityGroupId: { Fn::ImportValue: !Sub '${App}-${Env}-EnvironmentSecurityGroup' }

  DBInstance:
    Type: AWS::RDS::DBInstance
    DeletionPolicy: Snapshot
    UpdateReplacePolicy: Snapshot
    Properties:
      AllocatedStorage: 50
      AllowMajorVersionUpgrade: true
      AutoMinorVersionUpgrade: true
      BackupRetentionPeriod: 30
      DBInstanceClass: db.t3.micro
      DBInstanceIdentifier: !Sub '${App}-${Env}'
      DBName: redash
      DBSubnetGroupName: !Ref DBSubnetGroup
      Engine: postgres
      EngineVersion: 14.6
      MasterUsername: redash
      # パスワードは事前にパラメータストアに置いておきます
      MasterUserPassword: !Sub '{{resolve:ssm:/copilot/${App}/${Env}/secrets/redash_database_password}}'
      MultiAZ: false
      PreferredBackupWindow: '18:00-19:00'
      PreferredMaintenanceWindow: 'Sun:19:00-Sun:20:00'
      StorageType: gp2
      StorageEncrypted: false
      VPCSecurityGroups:
        - !Ref DBSecurityGroup

  DBUrlParameter:
    Type: AWS::SSM::Parameter
    Properties:
      Name: !Sub '/copilot/${App}/${Env}/secrets/redash_database_url'
      Type: String
      Value: !Sub 'postgresql://redash:{{resolve:ssm:/copilot/${App}/${Env}/secrets/redash_database_password}}@${DBInstance.Endpoint.Address}:${DBInstance.Endpoint.Port}/redash'
Redis (ElastiCache) のテンプレート
Parameters:
  App:
    Type: String
  Env:
    Type: String
  Name:
    Type: String

Resources:
  RedisSubnetGroup:
    Type: AWS::ElastiCache::SubnetGroup
    Properties:
      CacheSubnetGroupName: !Sub '${App}-${Env}'
      Description: !Sub '${App}-${Env}'
      SubnetIds: !Split [ ',', { Fn::ImportValue: !Sub '${App}-${Env}-PrivateSubnets' } ]

  RedisSecurityGroup:
    Type: AWS::EC2::SecurityGroup
    Properties:
      GroupDescription: !Sub '${App}-${Env}-redis'
      GroupName: !Sub '${App}-${Env}-redis'
      VpcId: { Fn::ImportValue: !Sub '${App}-${Env}-VpcId' }
      SecurityGroupIngress:
        - IpProtocol: tcp
          FromPort: 6379
          ToPort: 6379
          SourceSecurityGroupId: { Fn::ImportValue: !Sub '${App}-${Env}-EnvironmentSecurityGroup' }

  RedisCluster:
    Type: AWS::ElastiCache::CacheCluster
    Properties:
      AutoMinorVersionUpgrade: true
      ClusterName: !Sub '${App}-${Env}'
      Engine: redis
      EngineVersion: 7.0
      CacheNodeType: cache.t4g.micro
      CacheSubnetGroupName: !Ref RedisSubnetGroup
      NumCacheNodes: 1
      SnapshotRetentionLimit: 14
      SnapshotWindow: '17:00-21:00'
      VpcSecurityGroupIds:
        - !Ref RedisSecurityGroup

  RedisUrlParameter:
    Type: AWS::SSM::Parameter
    Properties:
      Name: !Sub '/copilot/${App}/${Env}/secrets/redash_redis_url'
      Type: String
      Value: !Sub 'redis://${RedisCluster.RedisEndpoint.Address}:${RedisCluster.RedisEndpoint.Port}/0'
以下がポイントとなります。
-
Fn::ImportValueを使って Environment のスタックが出力した値を参照しつつリソースを作成する - 最後にその URL をパラメータストアに登録する
- これによって Service は
REDASH_DATABASE_URL,REDASH_REDIS_URLを知ることができる
また、AWS に構築しているということはデータソースとしたいほかの RDS への接続をしたいことがよくあると思います。そのための VPC ピアリングの設定も Addon で書くとよいでしょう。
VPC ピアリングのテンプレート
Parameters:
  App:
    Type: String
  Env:
    Type: String
  Name:
    Type: String

Mappings:
  Redash:
    production:
      CidrBlock: xxx.xxx.xxx.xxx/16

  OtherDB:
    production:
      CidrBlock: xxx.xxx.xxx.xxx/16
      RouteTableId: rtb-xxxxxxxx
      SecurityGroupId: sg-xxxxxxxx
      VpcId: vpc-xxxxxxxx

Resources:
  VPCPeeringFromRedashToOtherDB:
    Type: AWS::EC2::VPCPeeringConnection
    Properties:
      VpcId: { Fn::ImportValue: !Sub '${App}-${Env}-VpcId' }
      PeerVpcId: !FindInMap [ OtherDB, !Ref Env, VpcId ]
      Tags:
        - Key: Name
          Value: !Sub '${App}-${Env}-rds-${Env}'

  RouteFromRedashToOtherDB:
    Type: AWS::EC2::Route
    Properties:
      RouteTableId: { Fn::ImportValue: !Sub '${App}-${Env}-PublicRouteTableID' }
      DestinationCidrBlock: !FindInMap [ OtherDB, !Ref Env, CidrBlock ]
      VpcPeeringConnectionId: !Ref VPCPeeringFromRedashToOtherDB

  RouteFromOtherDBToRedash:
    Type: AWS::EC2::Route
    Properties:
      RouteTableId: !FindInMap [ OtherDB, !Ref Env, RouteTableId ]
      DestinationCidrBlock: !FindInMap [ Redash, !Ref Env, CidrBlock ]
      VpcPeeringConnectionId: !Ref VPCPeeringFromRedashToOtherDB

  IngressFromRedashToOtherDB:
    Type: AWS::EC2::SecurityGroupIngress
    Properties:
      GroupId: !FindInMap [ OtherDB, !Ref Env, SecurityGroupId ]
      IpProtocol: tcp
      FromPort: 5432
      ToPort: 5432
      SourceSecurityGroupId: { Fn::ImportValue: !Sub '${App}-${Env}-EnvironmentSecurityGroup' }
準備が整ったので以下でデプロイします。
copilot svc deploy -e production -n server # Addon も作られる
copilot svc deploy -e production -n scheduler
copilot svc deploy -e production -n scheduled-worker
copilot svc deploy -e production -n adhoc-worker
copilot svc deploy -e production -n worker
初回のみ、データベースの初期化 (テーブル作成) をします。
copilot svc exec -e production -n server -c 'bin/docker-entrypoint create_db'
おわりに
以上で AWS Copilot CLI で管理していける Redash を構築できました。
ちなみに各 Service の cpu, memory は実際にレンティオで設定している値をそのまま載せました。Redash の CPU 消費は少なめですが、結果が大きいクエリを扱うにはある程度のメモリが必要なのでこの値に行き着いています。
ホスティングの情報があまりない Redash ですが、本記事がその手助けになれば幸いです。
おまけ: PostgreSQL のデータ移行
今回は新規構築ではなくリプレイスをしたため、旧 Redash が使っていた PostgreSQL のデータを移行する必要がありました。おまけとしてその手順も載せておきます。
- 旧 DB のスナップショットを作成
- スナップショットから DB インスタンスを立ち上げる
- 新 DB と同じサブネットグループに配置する
- データ移行
-
copilot svc exec -e production -n serverして以下を実行 - 一時的に server の
storage.ephemeralを DB 容量の数倍にしておくことを推奨します
# postgresql-client をインストール # See: https://www.postgresql.org/download/linux/ubuntu/ apt update apt install lsb-release echo "deb http://apt.postgresql.org/pub/repos/apt $(lsb_release -cs)-pgdg main" > /etc/apt/sources.list.d/pgdg.list wget --quiet -O - https://www.postgresql.org/media/keys/ACCC4CF8.asc | apt-key add - apt update apt install postgresql-client-<YOUR_POSTGRES_VERSION> # 旧 DB からダンプ pg_dump -h <OLD_DB_HOST> -U redash -d redash -f /tmp/redash.dump # 新 DB にリストア psql -h <NEW_DB_HOST> -U redash -d redash -f /tmp/redash.dump -
採用情報
レンティオではエンジニアを募集しています。もし興味をお持ちいただけたらこちらもお目通しいただけると幸いです。
Discussion
参考になる記事をありがとうございます。
typoと思われる箇所がありましたので、コメントさせていただきました。
誤:
copilot env init --name xxxx正:
copilot svc init --name xxxxコメントありがとうございます!修正させていただきました🙇♂️