🔥
Hono+SSGなWebサイトをCloudflare Pagesでデプロイするまでのメモ
honoもCloudflare Pagesもbunも何もわからない状態からHello Worldするまでの備忘録
参考にしたもの
Bunのインストール
brew install oven-sh/bun/bun
プロジェクトの作成
bunx create-hono my-app
templateを聞かれるので、cloudflare-pagesを選択
SSGの実装
pluginのインストール
bun add vite @hono/vite-ssg
/vite.config.tsを書き換える
import ssg from '@hono/vite-ssg'
import { defineConfig } from 'vite'

const entry = 'src/index.tsx'

export default defineConfig({
  plugins: [ssg({ entry })]
})
src/index.tsxを書き換える
import { Hono } from 'hono'

// index.tsx
const app = new Hono()

app.get('/', (c) => c.html('Hello, World!'))
app.use('/about', async (c, next) => {
  c.setRenderer((content, head) => {
    return c.html(
      <html>
        <head>
          <title>{head.title ?? ''}</title>
        </head>
        <body>
          <p>{content}</p>
        </body>
      </html>
    )
  })
  await next()
})
app.get('/about', (c) => {
  return c.render('Hello!', { title: 'Hono SSG Page' })
})

export default app
./package.jsonのscripts部分を書き換える
"scripts": {
    "dev": "vite",
    "build": "vite build",
    "preview": "wrangler pages dev ./dist",
    "deploy": "$npm_execpath run build && wrangler pages deploy ./dist --commit-dirty=true"
}
Cloudflareの設定
左側のペインの"Workers & Pages"→"Overview"からダッシュボードを開く

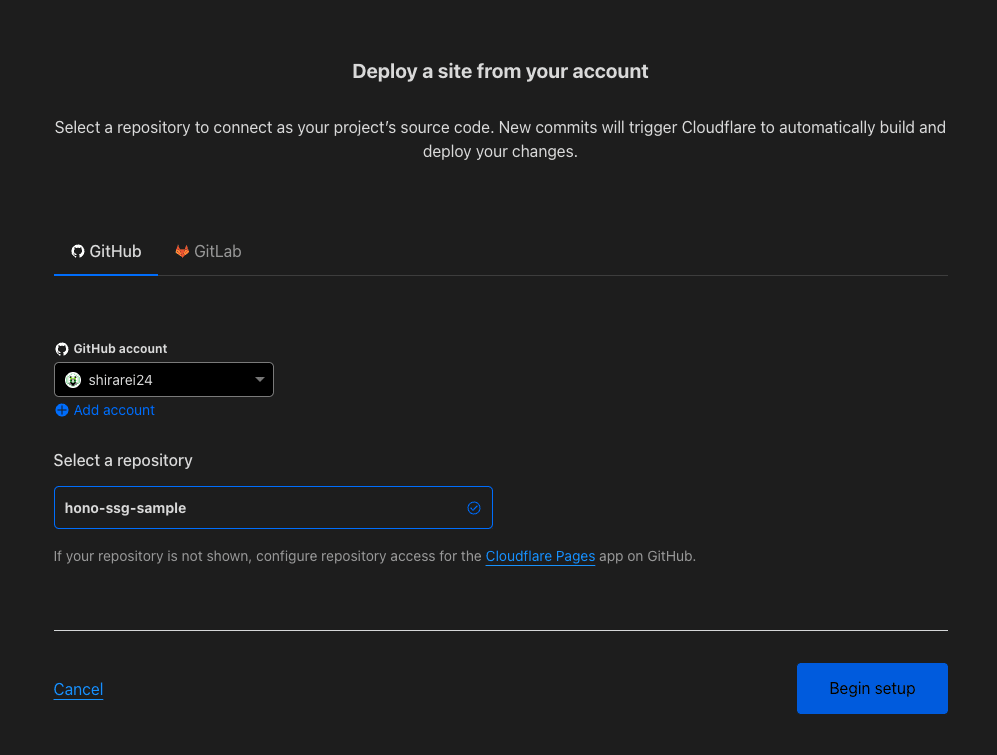
Create application

先ほどpushしたリポジトリと接続


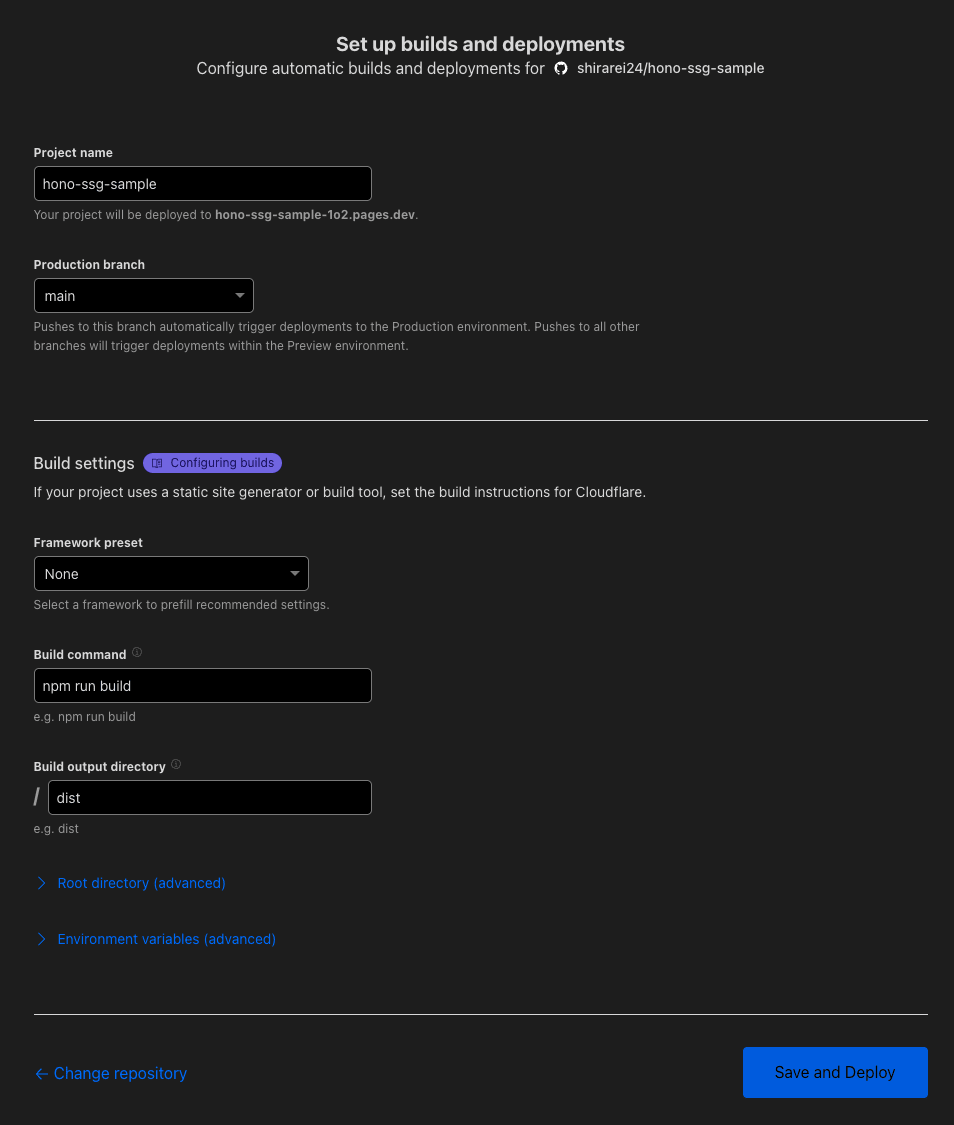
Build設定

これでデプロイ完了。Hello Worldが表示されていることを確認できる。
以降は、GitHubにpushすると自動的にデプロイされる。
mainブランチへpushすると、Production、それ以外のブランチへpushすると、Preview環境へデプロイ。
手動デプロイ
ローカルからもdeployコマンドでデプロイできる。
bun run deploy
GitHubからのデプロイと同様に、チェックアウトしているブランチによって、デプロイ先の環境が変わる。


Discussion