Closed9
カレンダー機能を実装するスレ
優秀そうなパッケージ
ドキュメント
データソースから予定を読み込む処理に使う
SQFLiteから普通にFutureBuilderで読み込むのね
増減、変更のサンプル
カレンダー上のスケジュールはAppointment classで表現しており、管理はCalendarDataSourceを継承したクラスのインスタンス(例: _event)で管理する。つまり、_event.appointmentsからList形式のAppointment classくんを操作し、カレンダー上の予定をカスタマイズする。
スケジュール追加
_event.appointments?.add(data);
_event.notifyListeners(CalendarDataSourceAction.addResource, List<Appointment>.from(_event.appointments));
スケジュール更新
_event.appointments?.clear();
_event.appointments?.addAll(data);
_event.notifyListeners(CalendarDataSourceAction.reset, data);
- スケジュール登録できるか
- タイムライン表示
- マンスリー表示
- ウィークリー表示
- 予定だけ表示可能
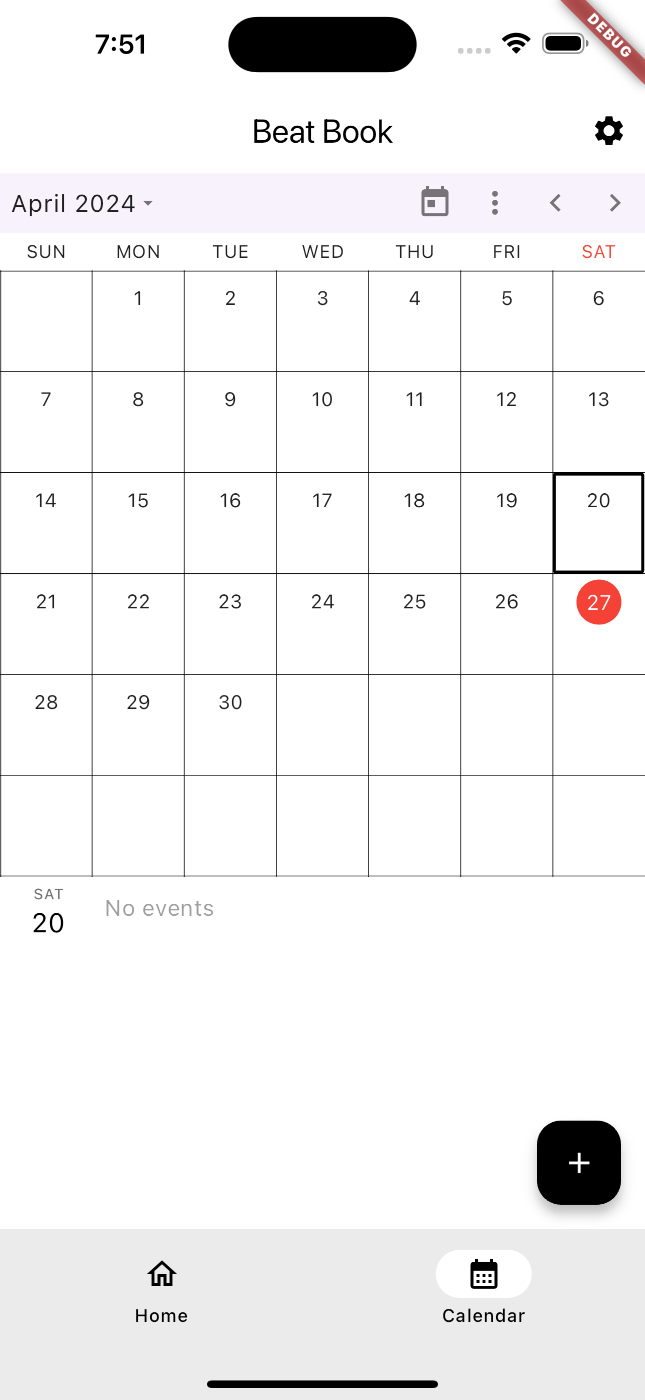
マンスリー表示
  SfCalendar(
            view: CalendarView.month,
            showNavigationArrow: true,
            todayHighlightColor: Colors.red,
            allowAppointmentResize: true,
            showDatePickerButton: true,
            showTodayButton: true,
            allowViewNavigation: true,
            allowedViews: const <CalendarView>[
              CalendarView.day,
              CalendarView.week,
              CalendarView.workWeek,
              CalendarView.month,
              CalendarView.schedule
            ],
            monthViewSettings: const MonthViewSettings(
              showAgenda: true,
              showTrailingAndLeadingDates: false,
              dayFormat: 'EEE',
            ),
          )
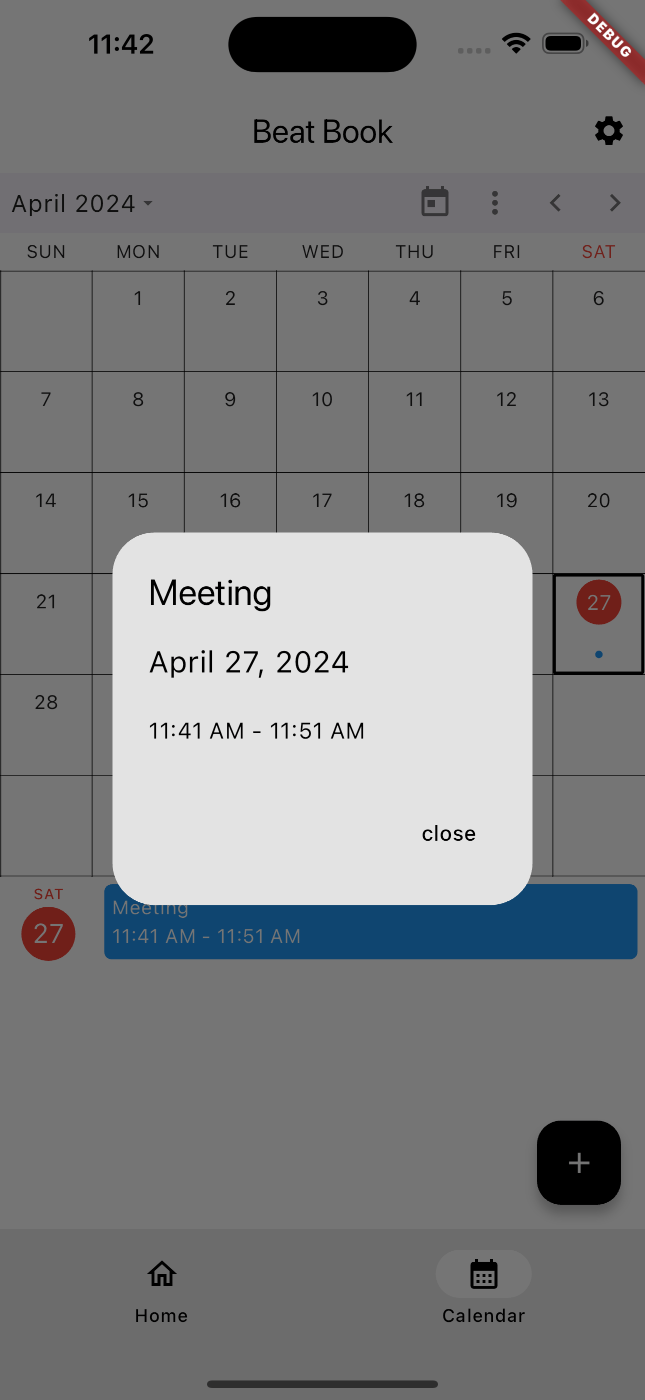
void calendarTapped(CalendarTapDetails details) {
    var timeDetails = '';
    if (details.targetElement == CalendarElement.appointment ||
        details.targetElement == CalendarElement.agenda) {
      final Appointment appointmentDetails = details.appointments![0];
      final subjectText = appointmentDetails.subject;
      final dateText = DateFormat('MMMM dd, yyyy').format(appointmentDetails.startTime).toString();
      final startTimeText = DateFormat('hh:mm a').format(appointmentDetails.startTime).toString();
      final endTimeText = DateFormat('hh:mm a').format(appointmentDetails.endTime).toString();
      if (appointmentDetails.isAllDay) {
        timeDetails = 'All day';
      } else {
        timeDetails = '$startTimeText - $endTimeText';
      }
      showDialog(
        context: context,
        builder: (BuildContext context) {
          return AlertDialog(
            title: Container(child: Text(subjectText)),
            content: SizedBox(
              height: 80,
              child: Column(
                children: <Widget>[
                  Row(
                    children: <Widget>[
                      Text(
                        dateText,
                        style: const TextStyle(
                          fontWeight: FontWeight.w400,
                          fontSize: 20,
                        ),
                      ),
                    ],
                  ),
                  const Row(
                    children: <Widget>[
                      Text(''),
                    ],
                  ),
                  Row(
                    children: <Widget>[
                      Text(timeDetails,
                          style: const TextStyle(fontWeight: FontWeight.w400, fontSize: 15)),
                    ],
                  )
                ],
              ),
            ),
            actions: <Widget>[
              TextButton(
                  onPressed: () {
                    Navigator.of(context).pop();
                  },
                  child: const Text('close'))
            ],
          );
        },
      );
    }
  }
https://support.syncfusion.com/kb/article/9615/how-to-get-appointment-details-from-the-ontap-event-of-the-flutter-calendar?_gl=11uknnzf_gaMzMyOTg0NDc3LjE3MTM0NDMxMzg._ga_41J4HFMX1J*MTcxNDE4NDY2My43LjEuMTcxNDE4NTczNy4wLjAuMA..
このスクラップは2025/02/10にクローズされました