🚪
【Auth0 + Nuxt.js】ブログにログイン機能を作ってみる
※この記事は2019年12月25日に公開された記事の移植及びリライト記事です。
アドベントカレンダーの一環にもなってました。
前回書いたAuth0のサンプルを元に ブログにログイン認証機能を追加してみます。
Auth0(赤)とNuxt.js(緑)はクリスマスカラーなので、時期的にもちょうど良いですね()
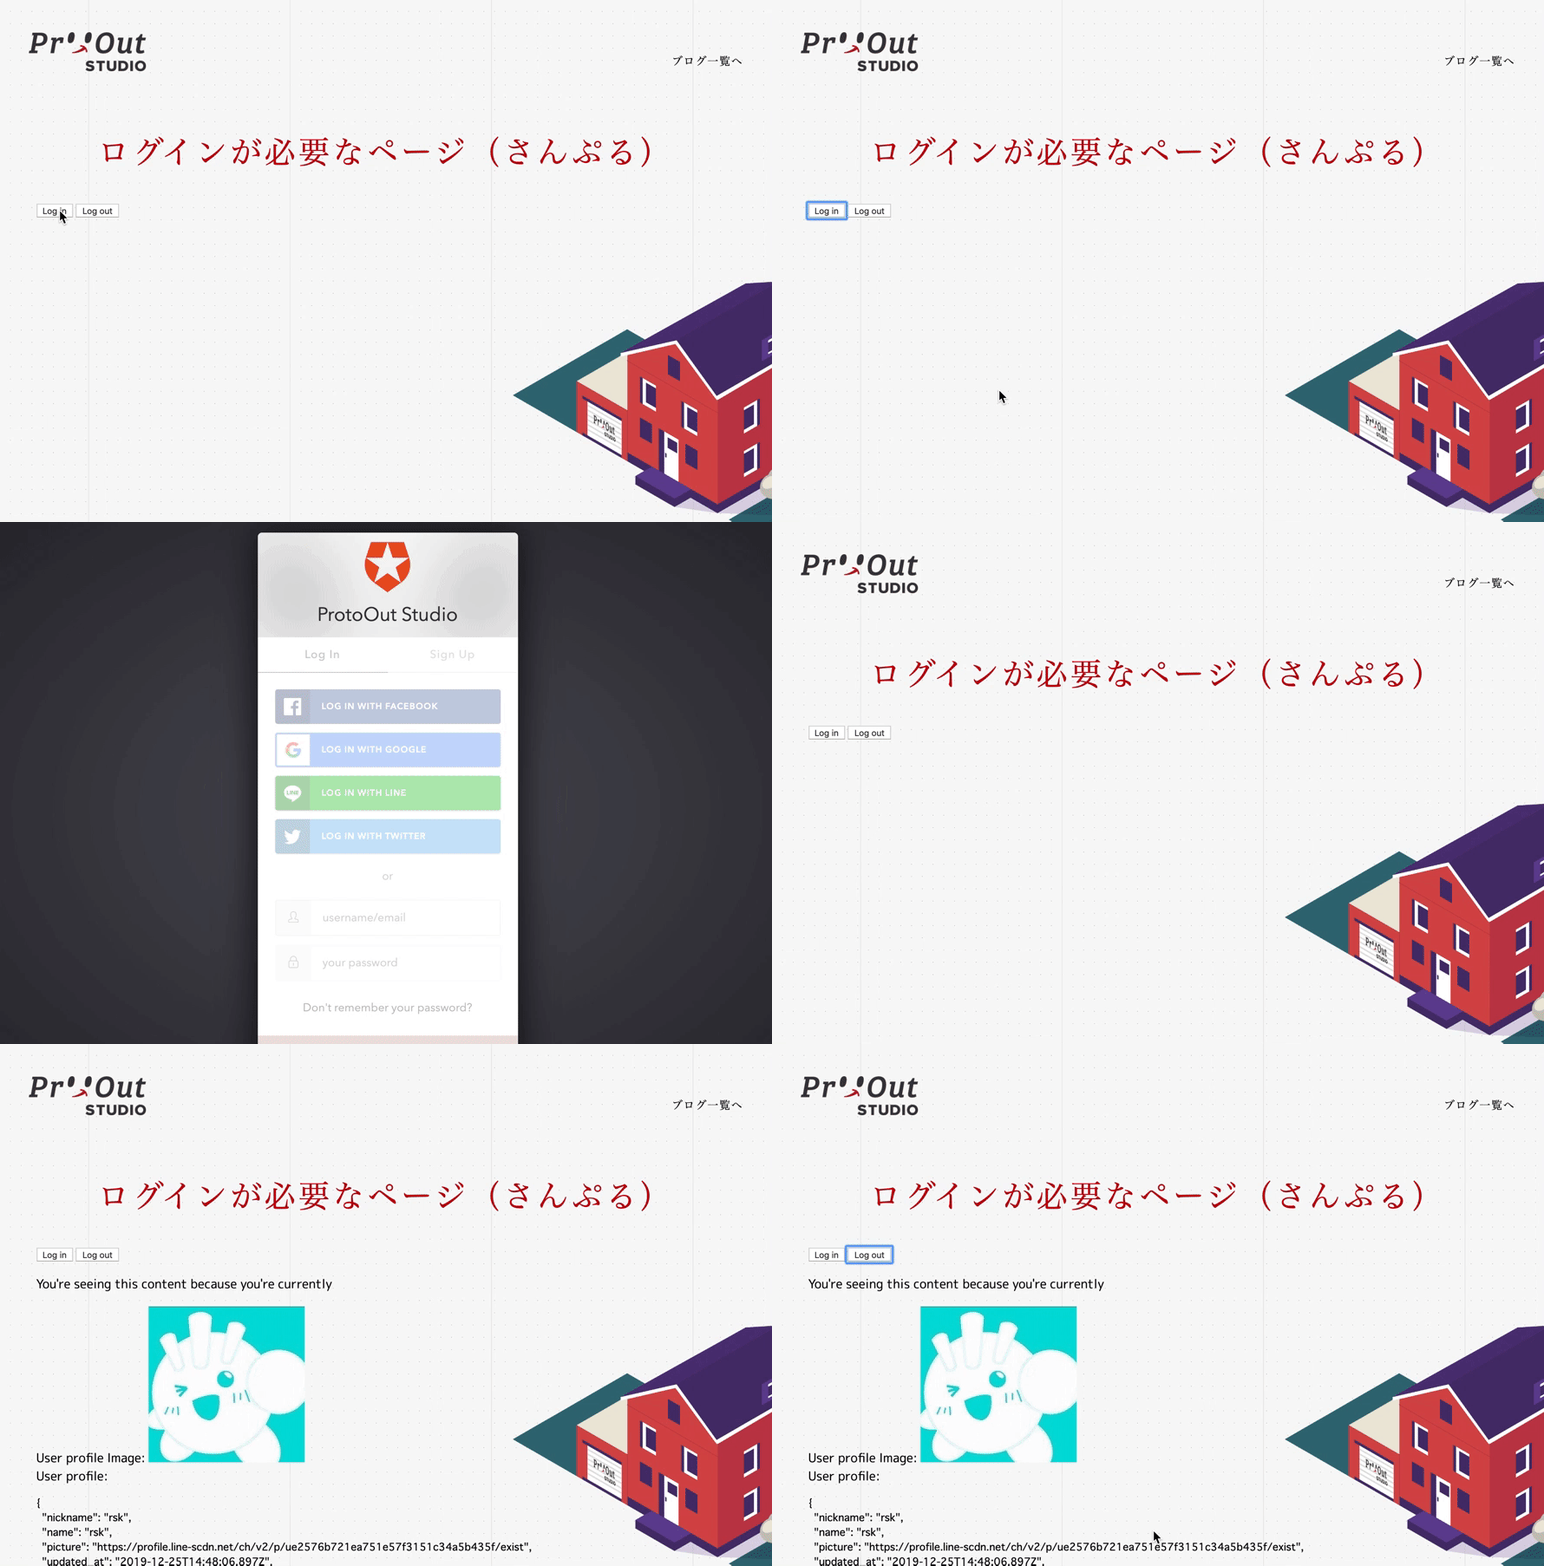
まだ実装途中ですがこんなイメージでNuxt.jsでも追加出来ました。
手順紹介というかメモに近いです。
Nuxt.jsでAuth0の機能を追加していくメモ
大元になるサンプルはこちらです。
Auth0の読み込み
今回は取り急ぎ、表側の実装だけで試してみました。
ページコンポーネントのhead()の箇所にscriptを追加します。
省略

<script>
  //省略

  head() {
    return {
      title: 'ログイン付きページ',
      meta: [
        {name:'robots', content:'noindex'},
        { hid: 'description', name: 'description', content: 'プロトアウトスタジオの記事などです' }
      ],

      //↓ココ
      script: [
        { src: 'https://cdn.auth0.com/js/auth0-spa-js/1.2/auth0-spa-js.production.js' }
      ]
    }
  }

  //省略
</script>
省略
HTML部分
こんな雰囲気で、ログイン/ログアウトボタンとログイン後に情報が表示される領域を作ります。
<template>
  <main>
    <h2>ログインが必要なページ(さんぷる)</h2>

    <button id="btn-login" v-on:click="auth0login()">Log in</button>
    <button id="btn-logout" v-on:click="auth0logout()">Log out</button>

    <div v-if="login" id="gated-content">
      <p>
        You're seeing this content because you're currently
      </p>
      <label>
          User profile Image:
          <img :src="userData.picture" id="ipt-user-profile-image" width="200px">
          <br />
      </label>
      <label>
        User profile:
        <pre id="ipt-user-profile">{{userData}}</pre>
      </label>

      <label>
        Access token:
        <pre id="ipt-access-token">{{userData.token}}</pre>
      </label>
    </div>

  </main>
</template>
せっかくのNuxt.jsなのでCSSではなく、v-ifで表示を隠す形にしています。
JSでの処理
4つのデータを定義しています。
- login: ログイン状態を表す
- auth0: Auth0の機能が詰まるオブジェクト
- APP_PATH: ログイン時やログイン後にリダイレクトされるパスの設定 (例: http://hoge.com/APP_PATH)
- userData: ログイン後にユーザーのデータを格納する
<script>
//省略

data() {
    return {
      login: false,
      auth0: {},
      APP_PATH: '/yourapppath',
      userData: {},
    }
  },

</script>
また、以下の4つのメソッドを定義しています。
-
configureClient: Auth0オブジェクトを生成 -
updateUI: ログインされてるか確認し、ユーザー情報の表示を行う -
auth0login: ログイン処理 -
auth0logout: ログアウト処理
<script>
//省略

  methods: {
    async configureClient(){
        const config = {
            "domain": "xxxxxxxxxxxxxx.auth0.com", //Auth0の管理画面より
            "clientId": "xxxxxxxxxxxxxxx" //Auth0の管理画面より
        };
        //Auth0オブジェクト生成
        this.auth0 = await createAuth0Client({
            domain: config.domain,
            client_id: config.clientId
        });
    },

    async updateUI(){
        const isAuthenticated = await this.auth0.isAuthenticated();
        if (isAuthenticated) {
            this.login = true; //ログイン後の情報が表示
            this.userData = await this.auth0.getUser();
            this.userData.token = await this.auth0.getTokenSilently();
        }
    },

    async auth0login(){
        await this.auth0.loginWithRedirect({
            redirect_uri: window.location.origin + this.APP_PATH
        });
    },

    auth0logout(){
        this.auth0.logout({
            returnTo: window.location.origin + this.APP_PATH
        });
    }
  },

//省略
</script>
ロード時の処理 (mounted)は以下のように書いています。
ロード時にconfigureClientやupdateUIを呼び出してAuth0オブジェクトを生成したり、ログイン状態をチェックしたり。表示を変えたりします。
<script>
//省略

  //マウント時
  async mounted() {
    await this.configureClient();
    this.updateUI();
    const isAuthenticated = await this.auth0.isAuthenticated();
    if (isAuthenticated) {
        return;
    }

    // NEW - check for the code and state parameters
    const query = window.location.search;
    if (query.includes("code=") && query.includes("state=")) {

        // Process the login state
        await this.auth0.handleRedirectCallback();

        this.updateUI();

        // Use replaceState to redirect the user away and remove the querystring parameters
        window.history.replaceState({}, document.title, this.APP_PATH);
    }
  },

//省略
</script>
これで完成です。
所感と活用方法
思ったより簡単に移植できました。
終わってみると簡単に移植できましたが、Nuxt.j向けのAuth0モジュールなどもあるみたいなので、本来はこちらを使った方が良いとも思います。(次回チャレンジ)
今後ですが、このブログにログイン機能をつけて、 特定の人しか見れない記事とかそういうのに活用していきたいなと思ったりしています。
年の瀬なので、年末年始の時間でやってみたいですねぇ〜
皆さんも年末年始で何か作っていきましょ。
ではでは、良いお年を!

Discussion