Adding authentication for web service access - s5/7
日本語記事準備中-シリーズ前後記事リンク追加予定
first post: Cheap Home LAN Playground Using Docker
This post is the fifth post in the series to show how I play with different services on my LAN using Docker. I am introducing two-factor authentication service in this post which I can use together with Nginx reverse proxy to enable two-factore authentication to access different services hosted behind it.
Authelia and Nginx
Authelia is the one I'd use to add two-factor authentication service.
If you go read the documentation, you can see that the configuration template is available on authelia GitHub repository. Let me download the configuration template. I am planning to add authelia to the existing rp container, so I am creating a directory there, $HOME/mylan/rp/authelia.
https://www.authelia.com/configuration/prologue/introduction/
https://github.com/authelia/authelia/blob/master/config.template.yml
cd $HOME/mylan/rp
mkdir authelia
cd authelia
# download the configuration template
curl https://raw.githubusercontent.com/authelia/authelia/master/internal/configuration/config.template.yml -O
Let me quickly run configuration validation cli on the downloaded config file, authelia validate-config --config {configuration file}. I can see from the output below, there are still many things I need to specify.
$ docker run --rm --mount type=bind,source="$(pwd)"/config.template.yml,target=/config/config.yml authelia/authelia:4.36.9 authelia validate-config --config /config/config.yml

Configuration parsed and loaded with errors:

	 - authentication_backend: you must ensure either the 'file' or 'ldap' authentication backend is configured
	 - access control: 'default_policy' option 'deny' is invalid: when no rules are specified it must be 'two_factor' or 'one_factor'
	 - storage: configuration for a 'local', 'mysql' or 'postgres' database must be provided
	 - storage: option 'encryption_key' is required
	 - notifier: you must ensure either the 'smtp' or 'filesystem' notifier is configured
Authelia config.yml
Let me make the copy as config.yml and then edit this file. Once I'm finished with the file, I run config check again to confirm that there is no error. The configuration output without lines commented out is also shown below.
Things I want to take note are:
- authelia server port is 9091
- user authentication provider is set to the file
/config/users_database.yml - in the access control section, 2fa is set for
jupyter.mylan.local - and bypass policy set for
login.mylan.localwhich is the domain I am planning to the authelia authentication portal - session cookie domain is configured to match the domain,
mylan.local - local storage path is changed to
/var/lib/authelia/db.sqlite3 - notifier is set to
/config/notification.txtso when authelia needs to send user an email, the email message is generated there instead of actually sending one out using smtp server
$ cp config.template.yml config.yml

### Edit config.yml file
### and then test the config.yml file again

$ docker run --rm --mount type=bind,source="$(pwd)"/config.yml,target=/config/config.yml authelia/authelia:4.36.9 authelia validate-config --config /config/config.yml
Configuration parsed and loaded successfully without errors.

### Here is the resulting file, omitting comment lines
$ grep -v "[[:space:]]*#" config.yml | sed '/^$/d'
---
theme: light
jwt_secret: a_very_important_secret
default_2fa_method: ""
server:
  host: 0.0.0.0
  port: 9091
  path: ""
  enable_pprof: false
  enable_expvars: false
  disable_healthcheck: false
  tls:
    key: ""
    certificate: ""
    client_certificates: []
  headers:
    csp_template: ""
log:
  level: debug
telemetry:
  metrics:
    enabled: false
    address: tcp://0.0.0.0:9959
totp:
  disable: false
  issuer: authelia.com
  algorithm: sha1
  digits: 6
  period: 30
  skew: 1
  secret_size: 32
webauthn:
  disable: false
  timeout: 60s
  display_name: Authelia
  attestation_conveyance_preference: indirect
  user_verification: preferred
ntp:
  address: "time.cloudflare.com:123"
  version: 4
  max_desync: 3s
  disable_startup_check: false
  disable_failure: false
authentication_backend:
  password_reset:
    disable: false
    custom_url: ""
  refresh_interval: 5m
  file:
    path: /config/users_database.yml
    password:
      algorithm: argon2id
      iterations: 1
      memory: 1024
      parallelism: 8
      key_length: 32
      salt_length: 16
password_policy:
  standard:
    enabled: false
    min_length: 8
    max_length: 0
    require_uppercase: true
    require_lowercase: true
    require_number: true
    require_special: true
  zxcvbn:
    enabled: false
    min_score: 3
access_control:
  default_policy: deny
  rules:
    - domain: login.mylan.local
      policy: bypass
    - domain: jupyter.mylan.local
      policy: two_factor
session:
  name: authelia_session
  domain: mylan.local
  same_site: lax
  secret: insecure_session_secret
  expiration: 1h
  inactivity: 5m
  remember_me_duration: 1M
regulation:
  max_retries: 3
  find_time: 2m
  ban_time: 5m
storage:
  encryption_key: you_must_generate_a_random_string_of_more_than_twenty_chars_and_configure_this
  local:
    path: /var/lib/authelia/db.sqlite3
notifier:
  disable_startup_check: true
  filesystem:
    filename: /config/notification.txt
...
Authelia users_database.yml
As specified in the config.yml file, users_database.yml file needs to be prepared to authenticate user.
https://www.authelia.com/reference/guides/passwords/#user--password-file
Let me copy this user john from the example in the document above, and add another user ghost in the users_database.yml file. You can of course choose to use any username and password. I will explain how to generate the password string shortly.
$ cat users_database.yml
users:
  john:
    displayname: "John Doe"
    password: "$argon2id$v=19$m=65536,t=3,p=2$BpLnfgDsc2WD8F2q$o/vzA4myCqZZ36bUGsDY//8mKUYNZZaR0t4MFFSs+iM"
    email: john.doe@authelia.com
    disabled: false
  ghost:
    displayname: "ghost"
    password: "$argon2id$v=19$m=1048576,t=1,p=8$bEV6SXZpQ3VMREVzR1NqOQ$TDaho5v+u3AV/ajq93wSgW4RUx5xRqNruYYyou2MpZ4"
    email: ghost@mylan.local
    disabled: false
The same document above shows you how to generate the hashed password string. Now, when I checked the document, it's using authelia crypto hash generate argon2 --password 'password'. I am using the authelia image 4.36.9, and it did not have authelia crypt hash command.
Eventually I found out that there is authelia hash-password command I can use. I make sure to have it use config.yml file for the password algorithm and parameters, and let it generate hash from the password "ghost" for user "ghost". As you can see in above users_database.yml file, the generated hash is set for user ghost password.
# command "authelia crypt hash" not available

$ docker run authelia/authelia:4.36.9 authelia crypto hash generate argon2 --password 'ghost'
Error: unknown flag: --password
Usage:
  authelia crypto [command]

Examples:
authelia crypto --help

Available Commands:
  certificate Perform certificate cryptographic operations
  pair        Perform key pair cryptographic operations

Flags:
  -h, --help   help for crypto

Use "authelia crypto [command] --help" for more information about a command.
# run command "authelia hash-password" to generate the password hash
# the password is "ghost"

$ docker run --rm --mount type=bind,source="$(pwd)"/config.yml,target=/config/config.yml authelia/authelia:4.36.9 authelia hash-password -c /config/config.yml -- 'ghost'
Password hash: $argon2id$v=19$m=1048576,t=1,p=8$bEV6SXZpQ3VMREVzR1NqOQ$TDaho5v+u3AV/ajq93wSgW4RUx5xRqNruYYyou2MpZ4
Updating Nginx configuration
There is a very detailed documention on how to setup Nginx to get it work together with authelia. I am going to show the working configuration files as I have been doing so far in the rest of the section anyways, but please go ahead and check out the official documentation.
Here is the conf.d/jupyter.conf file update. I think it is a fairly simple change here, just including three authelia related files.
$ cat conf.d/jupyter.conf
server {
    listen 443 ssl http2;
    server_name jupyter.mylan.local;

    # docker resolver
    resolver 127.0.0.11 valid=30s;

    # tls
    include /etc/nginx/tls/tls.conf;

    # authelia
    include /etc/nginx/authelia/authelia-portal.conf;

    location / {
        set $upstream 192.168.1.56:8888;
        proxy_pass http://$upstream;
        include /etc/nginx/authelia/auth.conf;
        include /etc/nginx/authelia/authelia-proxy.conf;
        proxy_set_header Upgrade $http_upgrade;
        proxy_set_header Connection "upgrade";
        proxy_set_header Host $host;
    }
}
And here is the new conf file for the login portal, conf.d/authelia-ve.conf. This looks very similar to the original jupyter.conf file where I was just specifying listen port, server name, add tls required to handle https, and proxy upstream. You can see this login portal is proxy to the authelia docker container listening on port 9091.
I did not yet add this login.mylan.local on DNS so let me get to that later.
$ cat conf.d/authelia-ve.conf
server {
    listen 443 ssl http2;
    server_name login.mylan.local;

    # tls
    include /etc/nginx/tls/tls.conf;

    # authelia
    include /etc/nginx/authelia/authelia-portal.conf;

    # auth portal
    location / {
        resolver 127.0.0.11 ipv6=off;
        set $upstream_authelia http://authelia:9091;
        proxy_pass $upstream_authelia;
        include /etc/nginx/authelia/authelia-proxy.conf;
    }
}
Now let me prepare a separate directory authelia_nginx. I need more files to have authelia working.
As you have seen in the updated conf.d/jupyter.conf file, it is now trying to include more files related with authelia.
The first file is /etc/nginx/authelia/authelia-portal.conf. This is the portal file. When I am adding this to the existing jupyter.mylan.local Nginx server configuration file, I am actually adding https://jupyter.mylan.local/authelia service point. Note that if I still had ghost docker container running and blog.conf, I could include this same authelia-portal.conf file to have https://blog.mylan.local/authelia available.
# authelia-portal.conf

#Virtual endpoint created by nginx to forward auth requests.
location /authelia {
    internal;
    resolver 127.0.0.11 ipv6=off;
    set $upstream_authelia http://authelia:9091/api/verify;
    proxy_pass_request_body off;
    proxy_pass $upstream_authelia;
    proxy_set_header Content-Length "";

    # Timeout if the real server is dead
    proxy_next_upstream error timeout invalid_header http_500 http_502 http_503;

    # [REQUIRED] Needed by Authelia to check authorizations of the resource.
    # Provide either X-Original-URL and X-Forwarded-Proto or
    # X-Forwarded-Proto, X-Forwarded-Host and X-Forwarded-Uri or both.
    # Those headers will be used by Authelia to deduce the target url of the user.
    # Basic Proxy Config
    client_body_buffer_size 128k;
    proxy_set_header Host $host;
    proxy_set_header X-Original-URL $scheme://$http_host$request_uri;
    proxy_set_header X-Real-IP $remote_addr;
    proxy_set_header X-Forwarded-For $remote_addr;
    proxy_set_header X-Forwarded-Proto $scheme;
    proxy_set_header X-Forwarded-Host $http_host;
    proxy_set_header X-Forwarded-Uri $request_uri;
    proxy_set_header X-Forwarded-Ssl on;
    proxy_redirect  http://  $scheme://;
    proxy_http_version 1.1;
    proxy_set_header Connection "";
    proxy_cache_bypass $cookie_session;
    proxy_no_cache $cookie_session;
    proxy_buffers 4 32k;

    # Advanced Proxy Config
    send_timeout 5m;
    proxy_read_timeout 240;
    proxy_send_timeout 240;
    proxy_connect_timeout 240;
}
Another file I am including in conf.d/jupyter.conf is /etc/nginx/authelia/auth.conf. This adds the trigger to have user request to first go through the authentication. Here I am specifying the login portal URL to go to when unauthorized, https://login.mylan.local, which is the additional server I am adding on Nginx in conf.d/authelia-ve.conf.
# auth.conf

# Basic Authelia Config
# Send a subsequent request to Authelia to verify if the user is authenticated
# and has the right permissions to access the resource.
auth_request /authelia;
# Set the `target_url` variable based on the request. It will be used to build the portal
# URL with the correct redirection parameter.
auth_request_set $target_url $scheme://$http_host$request_uri;
# Set the X-Forwarded-User and X-Forwarded-Groups with the headers
# returned by Authelia for the backends which can consume them.
# This is not safe, as the backend must make sure that they come from the
# proxy. In the future, it's gonna be safe to just use OAuth.
auth_request_set $user $upstream_http_remote_user;
auth_request_set $groups $upstream_http_remote_groups;
proxy_set_header Remote-User $user;
proxy_set_header Remote-Groups $groups;
# If Authelia returns 401, then nginx redirects the user to the login portal.
# If it returns 200, then the request pass through to the backend.
# For other type of errors, nginx will handle them as usual.
error_page 401 =302 https://login.mylan.local/?rd=$target_url;
Lastly, the third file I am including in conf.d/jupyter.conf is /etc/nginx/authelia/authelia-proxy.conf. This adds things needed to proxy request traffic with authelia service.
# authelia-proxy.conf

client_body_buffer_size 128k;

#Timeout if the real server is dead
proxy_next_upstream error timeout invalid_header http_500 http_502 http_503;

# Advanced Proxy Config
send_timeout 5m;
proxy_read_timeout 360;
proxy_send_timeout 360;
proxy_connect_timeout 360;

# Basic Proxy Config
proxy_set_header Host $host;
proxy_set_header X-Real-IP $remote_addr;
proxy_set_header X-Forwarded-For $proxy_add_x_forwarded_for;
proxy_set_header X-Forwarded-Proto $scheme;
proxy_set_header X-Forwarded-Host $http_host;
proxy_set_header X-Forwarded-Uri $request_uri;
proxy_set_header X-Forwarded-Ssl on;
proxy_redirect  http://  $scheme://;
proxy_http_version 1.1;
proxy_set_header Connection "";
proxy_cache_bypass $cookie_session;
proxy_no_cache $cookie_session;
proxy_buffers 64 256k;

# If behind reverse proxy, forwards the correct IP
set_real_ip_from 10.0.0.0/8;
set_real_ip_from 172.0.0.0/8;
set_real_ip_from 192.168.0.0/16;
set_real_ip_from fc00::/7;
real_ip_header X-Forwarded-For;
real_ip_recursive on;
Add DNS record for Authelia login portal
Let me add DNS record for login.mylan.local. I will just update the existing config file and restart docker there.
# Edit a-records.conf file so that the DNS server can resolve login.mylan.local

$ cat $HOME/mylan/dns/config/a-records.conf
# A Record
     #local-data: "somecomputer.local. A 192.168.1.1"
     local-data: "jupyter.mylan.local. A 192.168.1.56"
     local-data: "login.mylan.local. A 192.168.1.56"

# PTR Record
     #local-data-ptr: "192.168.1.1 somecomputer.local."
     local-data-ptr: "192.168.1.56 jupyter.mylan.local."

# Go to the dns directory and restart docker compose
cd $HOME/mylan/dns
docker compose restart
Starting authelia service
Now I think I am ready to start the authelia service. I will add the service to the existing docker-compose.yml file. I am binding the two yml files I created above, and creating docker volume to have persisting data and mount it on /var/lib/authelia as the local storage path is set to /var/lib/authelia/db.sqlite3 in the configuration file /config/configuration.yml.
services:

  rp:
    container_name: rp
    image: nginx:1.23.2
    ports:
      - "443:443"
    volumes:
      - ./conf.d:/etc/nginx/conf.d
      - ./authelia_nginx:/etc/nginx/authelia
      - ./tls:/etc/nginx/tls

  authelia:
    image: authelia/authelia:4.36.9
    expose:
      - 9091
    environment:
      - TZ=UTC
    volumes:
      - authelia_db_volume:/var/lib/authelia
      - type: bind
        source: ./authelia/config.yml
        target: /config/configuration.yml
        read_only: true
      - type: bind
        source: ./authelia/users_database.yml
        target: /config/users_database.yml

volumes:
  authelia_db_volume: {}
As seen in the other examples, now two services are running in one docker compose up -d.
$ docker compose up -d
[+] Running 3/3
 ⠿ Network rp_default       Created                                                                                        0.2s
 ⠿ Container rp-authelia-1  Started                                                                                        0.8s
 ⠿ Container rp             Started                                                                                        0.8s

$ docker compose ps
NAME                COMMAND                  SERVICE             STATUS              PORTS
rp                  "/docker-entrypoint.…"   rp                  running             80/tcp, 0.0.0.0:443->443/tcp, :::443->443/tcp
rp-authelia-1       "/app/entrypoint.sh …"   authelia            running (healthy)   9091/tcp
Accessing Authelia
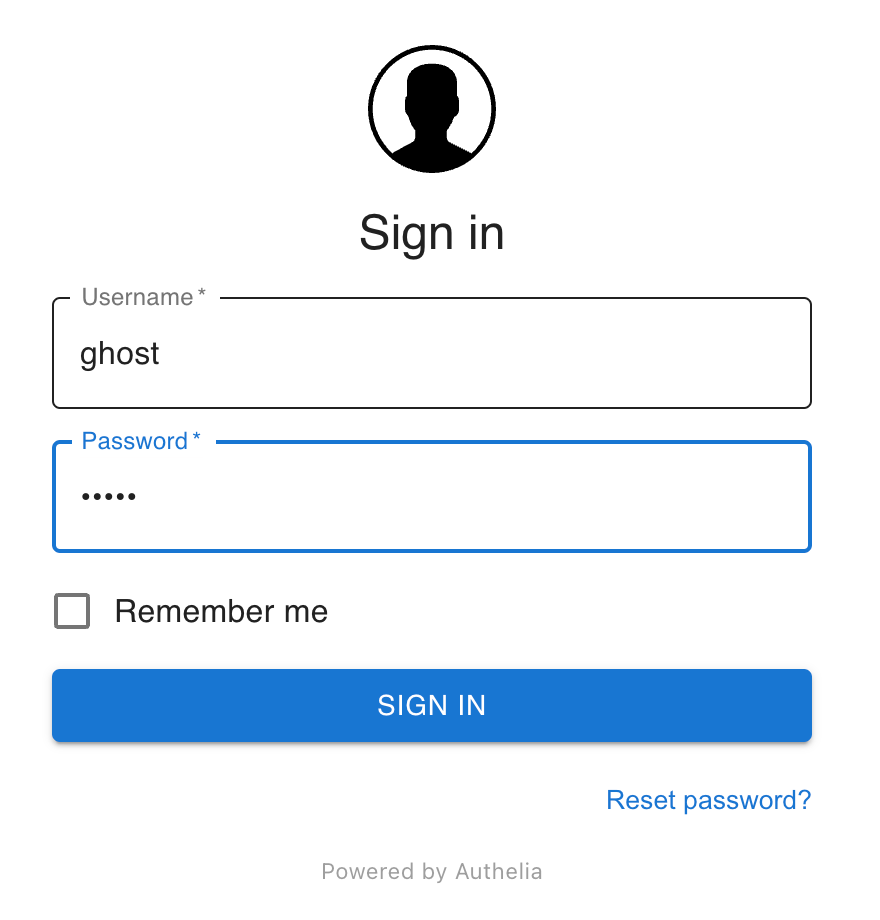
Let me access https://jupyter.mylan.local on my browser. This time, I do not see Jupyter Notebook, instead I was redirected to the other server, login.mylan.local, showing Authelia login portal.

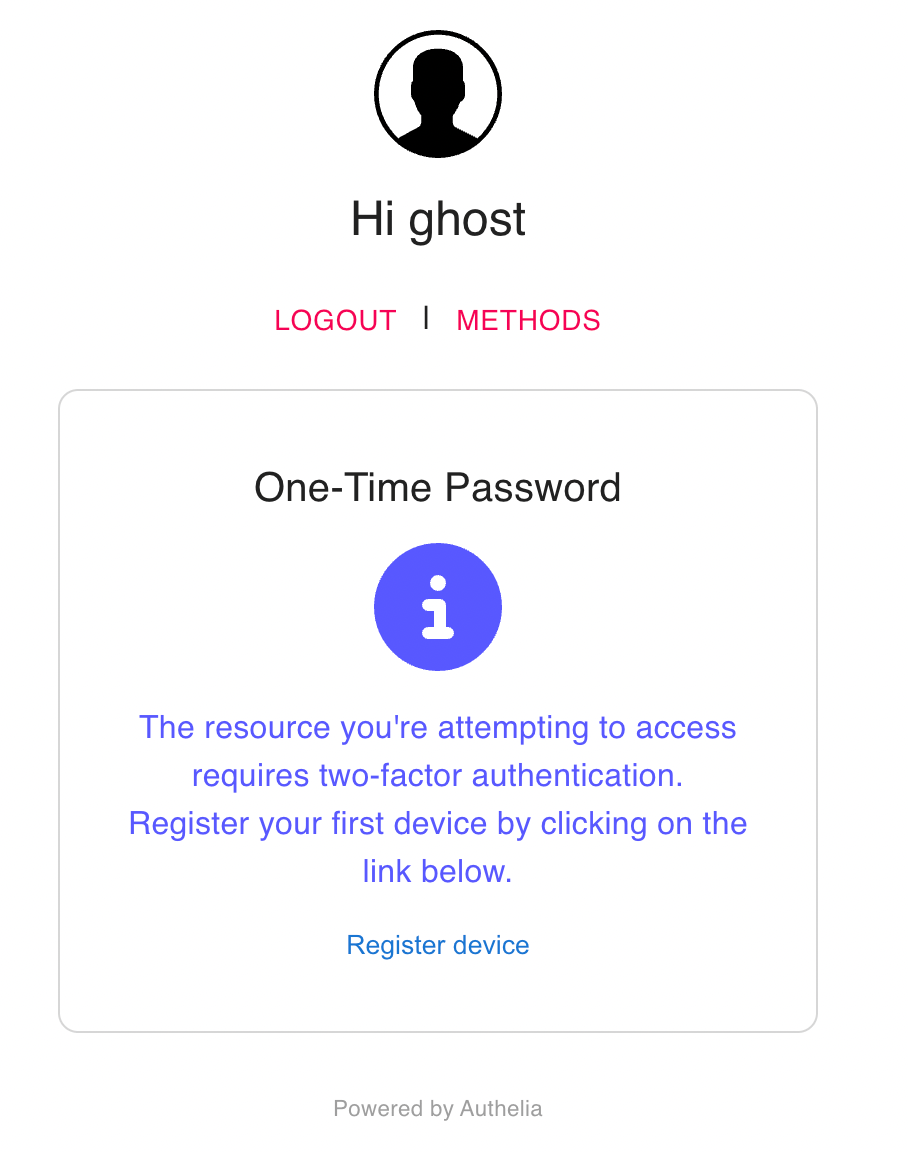
The users available in Authelia users_database.yml are "john" and "ghost". I have added "ghost" myself, generating password hash string from the original password string "ghost". Since it is my first login, it asks to a device for two factor authentication.

I click this "Register device" link, and the portal instantly shows a message saying the instruction email has been sent.
If I had configured smtp as notifier, Authelia should have used the configured smtp server and sent email to ghost@mylan.local. instead, below is what I had in the configuration file, so let us go see this file inside the Authelia docker container.
notifier:
  disable_startup_check: true
  filesystem:
    filename: /config/notification.txt
I did not specify the container name in the docker-compose.yml file, so the Authelia container is named a little bit different, rp-authelia-1. I have docker execute cat /config/notification.txt on rp-authelia-1 container.
$ docker exec rp-authelia-1 cat /config/notification.txt
Date: 2022-10-23 01:30:03.062953314 +0000 UTC m=+44.509739457
Recipient: { ghost@mylan.local}
Subject: Register your mobile
Body: This email has been sent to you in order to validate your identity.

If you did not initiate the process your credentials might have been compromised and you should reset your password and contact an administrator.

To setup your 2FA please visit the following URL: https://login.mylan.local/one-time-password/register?token=eyJhbGciOiJIUzI1NiIsInR5cCI6IkpXVCJ9.eyJpc3MiOiJBdXRoZWxpYSIsImV4cCI6MTY2NjQ4ODkwMywiaWF0IjoxNjY2NDg4NjAzLCJqdGkiOiI4MjE1ZjUxZi0xNWEyLTRhMTItYTcxZC0yMmZlNWE2ZjczNDIiLCJhY3Rpb24iOiJSZWdpc3RlclRPVFBEZXZpY2UiLCJ1c2VybmFtZSI6Imdob3N0In0.7_gqBza6fO4h24E2xOJeqJ8jPIEeLgVXKUZg3KeYae

This email was generated by a user with the IP 192.168.1.x.

Please contact an administrator if you did not initiate this process.
Now I have the instruction message saying go visit this link to setup 2FA, https://login.mylan.local/one-time-password/register. Copy the entire link and access it on your web browser to proceed to setup 2FA. I have installed Google Authenticator and scanned the registration QR code shown in the registration process.
I have not changed the issuer in the Authelia configuration file, so on my Google Authenticator app it says "authelia.com" as the issue and is for user "ghost". The app also shows the time-based one time password, 6-digit numbers.
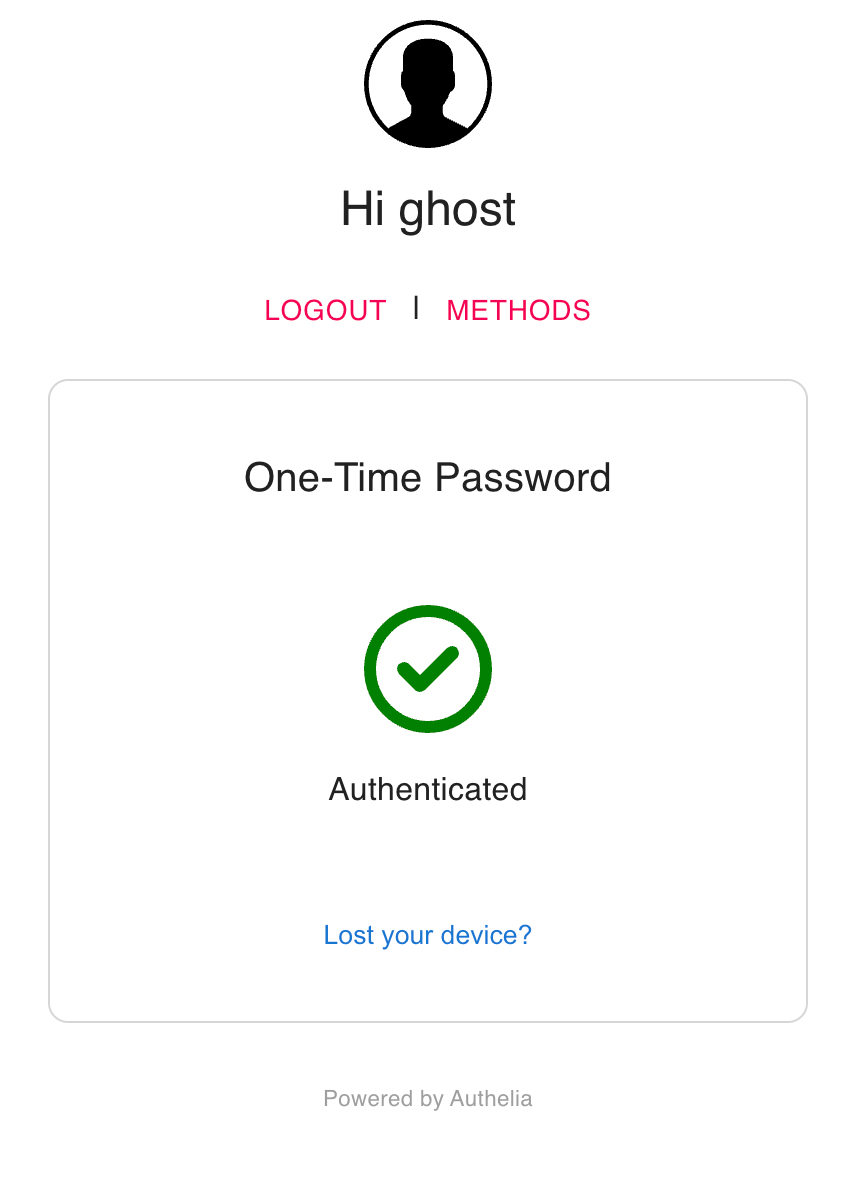
I try to access jupyter.mylan.local again and this time on Authelia login portal, it asks for the password instead of 2fa device registration. I pass this second factor check and finally get redirected back to https://jupyter.mylan.local.

Files added or updated in this post
Let me list the files newly added or updated under rp and dns with a brief comment below.
 |-rp
 | |-authelia_nginx  # directory mounted on /etc/nginx/authelia inside the Nginx container
 | | |-authelia-portal.conf  # portal service
 | | |-authelia-proxy.conf  # to properly proxy traffic
 | | |-auth.conf  # general configuration required for authelia
 | |-docker-compose.yml  # added authelia service and a volume for authelia's database, /var/lib/authelia/db.sqlite3
 | |-authelia  # directory for authelia configuration files
 | | |-users_database.yml  # user database authelia uses
 | | |-config.template.yml  # authelia configuration template downloaded
 | | |-config.yml  # edited config actually used by the authelia container
 | |-conf.d
 | | |-jupyter.conf  # updated to include authelia components
 | | |-authelia-ve.conf  # newly added login.mylan.local authelia portal server
 | |-tls
 | | |-tls.conf
 | | |-dhparam.pem
 | | |-tls.key
 | | |-tls.crt
 |-dns
 | |-docker-compose.yml
 | |-config
 | | |-a-records.conf  # added login.mylan.local record
Discussion