Vue.js習得メモ
こちらのUdemy講座で学習したことをメモしていく。
[2023年決定版] Vue3 x Typescriptによるアプリケーションづくり
v-bindは属性に値を設定するためのもの
以下ではURLをクリックしてもリンク先はhref属性に設定されておらず飛べない。
<a href="{{ url }}">URL</a>
↓
cont url = "https://~";
<a v-bind:href="url">URL</a>
v-onはイベントを指定して関数を設定するもの
const buy = (itemName: string) => {alert('~~~' + itemName)};
<button v-on:click="buy(itemName)">BUY</button>
v-on:inputでinput要素に入力された値を取得する
const input = (event: any) => {
	console.log('event.target.value:', event.target.value);
}
<input v-on:input="input" />
Vueがテンプレートを再度読み込むタイミング
<script>内で定義しているリアクティブに設定した値が変わった時のみ。以下ではnameの値が変わっても再度読み込まれずなので表示は変わらない。
let name = "hoge";
const input = (event: any) => {
	name = event.target.value;
}
このスクリプトの中のこの変数が変わったら、再度テンプレートを読み込んでください、という設定をVueにしなければならない。
リアクティブな値の設定
ref
primitiveな、単一の値のインスタンスへの直接の参照を取得できるrefを使う。
import { ref } from 'vue';
// nameをリアクティブな値として扱う設定
const name = ref<string>('Desk');
// リアクティブ値として設定した変数はオブジェクトになるため.valueで値にアクセスする
const input = (event: any) => {
	name.value = event.target.value;
}
jsはconstで宣言していてもobjectの中身は書き換え可能。
refで宣言した値はオブジェクトになって返ってくる。テンプレート内の場合はオブジェクトはアンラップされるが、それ以外の場合はvalueにアクセスしなければならない。例えば以下の場合だと、
const tweets = ref<Tweet[]>([]);
const input = ref<string>("");

const addTweet = () => {
  console.log(tweets);
  console.log(input.value);
  tweets.value.push({
    id: Math.random(),
    text: input.value,
  });
  console.log(tweets);
  input.value = "";
};
reactive
複数の値をリアクティブに扱いたいとき、オブジェクトのインスタンスへの直接の参照を取得できるreactiveを使う。
const goods = reactive({
  name: "カレーライス",
  price: 1000,
});
const inputName = (e: any) => {
  goods.name = e.target.value;
};
const clear = () => {
  goods.name = "";
};

<input type="text" v-on:input="inputName" v-bind:value="goods.name" />
<button v-on:click="clear">clear</button>
<label>{{ goods.name }}</label>
v-modelによって上記のようなケースをシンプルにかける。
reactiveを使った場合だと、
- inputName関数により、input要素で入力された値をgoods.nameに設定
- goods.nameの値がlabel要素に反映
- clear関数での操作がlabel要素に反映されるように、input要素のvalue属性にgoods.nameを設定
というように、
- input要素への入力があった際のgoods.nameの値変更
- input要素のvalue属性への値の反映を設定する際
をそれぞれ設定する必要があるが、v-modelを使うとinput要素のv-modelディレクティブにgoods.nameを設定するだけで、上記を満たすような実装になり、inputによる入力と値(goods.name)が双方向にバインディングされた状態となる。
const goods = reactive({
  name: "カレーライス",
  price: 1000,
});
// const inputName = (e: any) => {
//   goods.name = e.target.value;
// };
const clear = () => {
  goods.name = "";
};

<input v-model="goods.name" />
<!-- <input type="text" v-on:input="inputName" v-bind:value="goods.name" /> -->
<button v-on:click="clear">clear</button>
computedプロパティ
計算した値によって出力する内容を簡単に変えることができる。
import { computed } from "vue";

const isAffordable = computed(() => {
  if (goods.price < 1000) {
    return "Affordable";
  } else {
    return "Expensive";
  }
});

<label>{{ isAffordable }}</label>
computedを使わず、同じ内容と関数を設定することで同じ動作を実装はできるが、computedを使った方がなんやかんや最適化されていいらしい。
watch
その値が変更すると、その関数を実行する、といったもの。refやreactiveで定義した値はそのまま使えない。
import { watch, toRefs } from "vue";

const goods = reactive({
  name: "カレーライス",
  price: 1000,
});

const refGoods = toRefs(goods);
watch(refGoods.price, () => {
  console.log("price changed");
});
v-for
v-for=”item in items” :key=”item.id”の形で配列の要素を取得できる。
<script setup lang="ts">
const tweets = [
  { id: 1, text: "Hello World" },
  { id: 2, text: "Hello Vue" },
  { id: 3, text: "Hello Tweet" },
];
</script>

<template>
  <h1>Tweeter</h1>
  <div class="container">
    <input type="text" />
    <button>tweet</button>
  </div>
  <div class="tweets">
    <ul>
      <li v-for="tweet in tweets" :key="tweet.id">
        <span>{{ tweet.text }}</span>
      </li>
    </ul>
  </div>
</template>
v-if
条件によって要素の内容を変更できる。
<p v-if="tweets.length <= 0">No tweets yet</p>
    <ul>
      <li v-for="tweet in tweets" :key="tweet.id">
        <span>{{ tweet.text }}</span>
        <button @click="deleteTweet(tweet.id)">delete</button>
      </li>
    </ul>
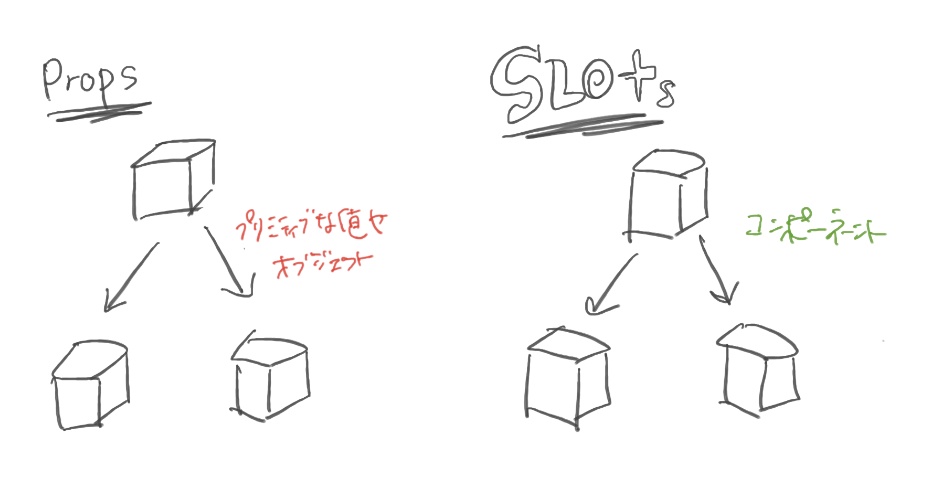
親コンポーネントから子コンポーネントへの値の受け渡し
親側ですること
- 子コンポーネントのインポート
- 子コンポーネントに渡すもの(配列、値、関数など)の定義
- v-bindで渡したいものを設定する
<script setup lang="ts">
// 子コンポーネントのインポート
import Tweet from "./Tweet.vue";
import { TweetType } from "../types";

// 子コンポーネントに渡すもの(配列、値、関数など)の定義
const tweets = ref<TweetType[]>([]);
const deleteTweet = (id: number) => {
  tweets.value = tweets.value.filter((t) => t.id != id);
};
</script>

<template>
    <ul>
			// v-bindで渡したいものを設定する
      <Tweet :tweets="tweets" :delete-tweet="deleteTweet" />
    </ul>
  </div>
</template>
子側ですること
- どのようなものをprops経由で受け取るのか定義する
- 定義変数.受け取るもの、みたいな感じでアクセスして使える
<script setup lang="ts">
import { TweetType } from "../types";

// どのようなものをprops経由で受け取るのか定義する
const props = defineProps<{
  tweets: TweetType[];
  deleteTweet: (id: number) => void;
}>();
</script>

<template>
  <li v-for="tweet in props.tweets" :key="tweet.id">
    <span>{{ tweet.text }}</span>
    <button @click="props.deleteTweet(tweet.id)">delete</button>
  </li>
</template>

<style scoped></style>
子コンポーネントから親コンポーネントへのイベント伝播
親側ですること
- 子コンポーネントのインポート
- イベントの設定
- 子コンポーネントがわでペイロードとして設定した値は、自動的に引数に渡ってくる
<script>
	const addTweet = (val: string) => {
	  tweets.value.push({
	    id: Math.random(),
	    text: val,
	  });
	  input.value = "";
	};
</script>
<template>
	<TweetPost @post-tweet="addTweet" />
</template>
子側ですること
-
defineEmitsでコンポーネントが発行(emit)するイベント名を定義する
- defineEmitsはイベントを発行するためのemit関数を返す
- emitの設定
- 以下のコードだと、
emitを使って"post-tweet"イベントを発行し、inputtingDesciption.value(ユーザーが入力したテキスト)をイベントのペイロードとして渡している。
- 以下のコードだと、
<script setup lang="ts">
import { ref } from "vue";

const inputtingDesciption = ref<string>("");
const emit = defineEmits(["post-tweet"]);
const postTweet = () => {
  emit("post-tweet", inputtingDesciption.value);
};
</script>

<template>
  <input v-model="inputtingDesciption" />
  <button v-on:click="postTweet()">tweet</button>
</template>
コンポーネントに対してキャメルケースのプロップスを渡すときは、ケバブケース(-つなぎ)が一般的
<script setup lang="ts">
const deleteTweet = () => {}
</script>

<template>
	<Tweet :delete-tweet="deleteTweet" />
</template>
Refでref変数の型を定義するとベター
const usersInfo: Ref<User[]> = ref<User[]>([]);
Slots
親コンポーネントから子コンポーネントに特定のコンテンツを挿入する機能。
親コンポーネント。
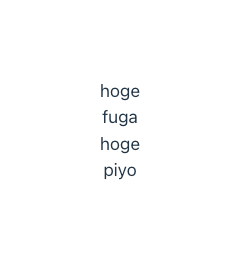
Childコンポーネントのコンテンツが、Childコンポーネント内の<slot></slot>部分に反映される。
<script setup lang="ts">
import Child from "./components/Child.vue";
</script>

<template>
  <Child>fuga</Child>
  <Child>piyo</Child>
</template>
子コンポーネント
<script setup lang="ts"></script>

<template>
  <div>hoge</div>
  <slot></slot> // ここに親要素で指定されたコンテンツが挿入される
</template>
↓
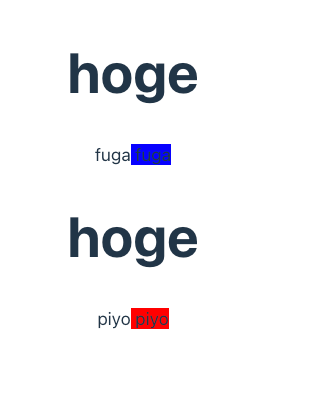
named Slots(名前付きスロット)
より複雑なレイアウトの場合に使う。
名前付きスロットを使用して、複数の異なるコンテンツを特定の場所に挿入する。
親クラス。
親クラス側では小クラスに名前付きスロットとして渡したいものに<template #1>という感じで#を使ってスロット名を定義する。
slot要素自身にはname要素しか設定できないため、cssをつけたい場合はslot要素以外の部分で設定する。
<script setup lang="ts">
import Child from "./components/Child.vue";
</script>

<template>
  <Child>
    <template #1>fuga</template>
    <template #2>
      <span class="blue"> fuga </span>
    </template>
  </Child>
  <Child>
    <template #1>piyo</template>
    <template #2>
      <span class="red"> piyo </span>
    </template>
  </Child>
</template>

<style scoped>
.blue {
  background-color: blue;
}
.red {
  background-color: red;
}
</style>
小クラス。
子クラスでは<slot name="スロット名">という感じで受け取る。
<script setup lang="ts"></script>

<template>
  <div class="wrapper">
    <h1>hoge</h1>
    <slot name="1"></slot>
    <slot name="2"></slot>
  </div>
</template>

<style scoped></style>
↓
バケツリレー問題を解決するProvide/Inject
親側でprovideする変数を定義。
<script setup lang="ts">
import Child from "./components/Child.vue";
import { ref, provide } from "vue";

const input = ref("");
provide("input", input);
</script>

<template>
  <input v-model="input" />
  <Child />
</template>
それを使う子、孫コンポーネントではinjectで受け取る。
<script setup lang="ts">
import { inject } from "vue";

const input = inject("input");
</script>

<template>
  <div class="wrapper">
    <h2>Child2</h2>
    <div>{{ input }}</div>
  </div>
</template>
型をつけるといはInjectkey
import { provide, inject } from 'vue'
import type { InjectionKey } from 'vue'

const key = Symbol() as InjectionKey<string>

provide(key, 'foo') // string 型以外の値を渡すとエラーになる

const foo = inject(key) // foo: string | undefined の型
カスタムディレクティブ
<script setup>
// テンプレート内で v-focus が有効になります
const vFocus = {
  mounted: (el) => el.focus()
}
</script>

<template>
  <input v-focus />
</template>
モディファイア
 const onSubmit = (e:any) => {
 e.preventDefault();
}
⬇️ onSubmit内でpreventDefault()しなくても以下のモディファイアで同じ挙動を表現できる。
@click.prevent="onSubmit"
v-modelとか他のやつにもある。
カスタムディレクティブにも設定可能。