Next.jsでお問い合わせフォーム作成
Next.jsでポートフォリオを作成し、その中でお問い合わせのページを作成しました。
ポートフォリオお問い合わせページ
※必須項目入れて送信すると本当にメールが送られるので、問い合わせ内容がない方は送らないでください。
実装内容について簡単に説明するので、お問い合わせフォームを作りたい人の参考になれば幸いです。
主な使用技術
- Next.js
- Vercel
- TypeScript
- MUI
- react-hook-form
- SendGrid
UIはMUI、バリデーションにreact-hook-form、メール配信サービスにSendGridを用いているって感じのNext.jsアプリになります。
以下にソースコードを記載します(コードはポートフォリオの他の機能部分も入っています)。
ソースコード
SendGrid用いた理由(不要であれば飛ばしてください)
初めはshinさんのyoutubeを参考にnodemailerとGmailを用いて実装していました。非常にわかりやすい動画で、ローカルでは問題なくお問い合わせフォームを実装することができました。しかし、Vercelにデプロイすると、なぜか本番環境でメール送信が正常に実行できませんでした。
メールが送れない可能性を色々調べて、最も可能性の高い内容が以下のnodemailer公式リンクに書かれていました。
Nodemailer Using Gmail
どうやらGmailを用いて本番環境でメールを送る時サーバーが地理的に別の場所にあるなどの問題により、メールがブロックされる可能性があるとのことです。本当にこれが原因なのかはわかりませんが、nodemailerとGmailを用いる方法を諦め、SendGridを用いる方法を採用したという経緯になります。
SendGridについて
メール配信サービスです。詳しくは以下HPを見てもらえればと思います。
SendGridのHP
月12000通までは無料で利用することができるので、私のような個人のお問い合わせフォームであれば、余裕で無料で使えます。
そして以下リンクのように公式が、Next.js、Vercelを用いたアプリとの連携方法をわかりやすく教えてくれています。正直この記事を見れば使い方ってのは大体わかります。
Next.jsとVercelで作ったフォームからSendGridでメール送信する方法
メールの送信方法は色々あるようですが、この記事の通りwebAPIとして送信する方法を私も採用しました。公式の説明がわかりやすいので図を拝借して以下に表示します。クライアントからあった問い合わせ内容をNextのAPIを用いて、さらに情報をリクエストとしてSendGridに投げることで、SendGridにメールを送ってもらうって感じになります。

SendGridにリクエストを投げるAPI作成
公式で紹介している内容と大きな違いはありませんがほんの少しだけ解説をします。
import { NextApiRequest, NextApiResponse } from "next";

export default function handler(req: NextApiRequest, res: NextApiResponse) {
  if(req.method === 'POST') {
    const sgMail = require('@sendgrid/mail');
    sgMail.setApiKey(process.env.SENDGRID_KEY); //SendGridのAPIキー

    const msgToManager = {
      to: 'peishim18works@gmail.com',
      from: 'peishim18works@gmail.com',
      subject: 'ポートフォリオサイトからの問い合わせ',
      text: req.body.name +'様からお問合せがありました。' + 'メッセージ:' + req.body.message + 'アドレス:' + req.body.email,
      html: `
        <p>【名前】</p>
        <p>${req.body.name}</p>
        <p>【メールアドレス】</p>
        <p>${req.body.email}</p>
        <p>【メッセージ内容】</p>
        <p>${req.body.message}</p>
      `,
    };

    const msgToUser = {
      to: req.body.email,
      from: 'peishim18works@gmail.com',
      subject: 'お問合せありがとうございました。',
      text: 'お問合せを受け付けました。回答をお待ちください。' + req.body.message,
      html: `
        <p>${req.body.name}様</p>
        <p>お問合せを受け付けました。回答をお待ちください。</p><br/>

        <p>【問い合わせ内容】</p>
        <p>${req.body.message}</p>
      `,
    };

    (async () => {
      try {
        await sgMail.send(msgToManager);
        await sgMail.send(msgToUser);
        res.status(200).json(msgToUser);
      } catch (error: any) {
        console.error(error);
        res.status(500).json(error);
      }
    })();
  }
}
問い合わせフォームということで問い合わせ内容を自分に届けることは当然のこと、問い合わせ完了しましたよってことを相手に伝えるために1回のリクエストでメールを2つ送るような実装にしています。msgToManagerが自分に届くメール、msgToUserが問い合わせをした方に届くメールの宛先や本文等の情報になります。あとはその情報をsgMail.send(msgToManager)って感じで関数に渡してあげれば、SendGridにこの情報でメール送ってねと伝えることができます。
当然ながらSendGridのライブラリをインストールすることと、SendGridのAPIキーを取得して設定することが必要です。この辺りは公式さんの記事を読んでいただければと思います。
問い合わせフォームのフロント部分実装
あとは先ほど作成したAPIを叩くためのフロント部分を実装すれば問い合わせフォームは完成です。
以下が問い合わせフォームの全体像です。
import { Box, Button, Container, FormControl, Stack, TextField, Typography } from "@mui/material"
import React from "react";
import { SubmitHandler, useForm } from "react-hook-form";
import { Footer } from "../components/layouts/Footer"
import Header from "../components/layouts/Header"
import { HeadTag } from "../components/layouts/HeadTag"
import * as yup from 'yup'
import { yupResolver } from '@hookform/resolvers/yup'
import {useRouter} from "next/router";
import { PageTitle } from "../components/PageTitle";
// フォームの型
type ContactForm = {
name: string
email: string
message: string
};
// バリーデーションルール
const schema = yup.object({
name: yup.string().required('必須項目です'),
email: yup
.string()
.required('必須項目です')
.email('正しいメールアドレス入力してください'),
message: yup
.string().required('必須項目です'),
})
function Contact() {
const router = useRouter();
const { register, handleSubmit, formState: {errors}, } = useForm<ContactForm>({
resolver: yupResolver(schema),
});
// フォーム送信時の処理(バリデーションOKな時に実行される)
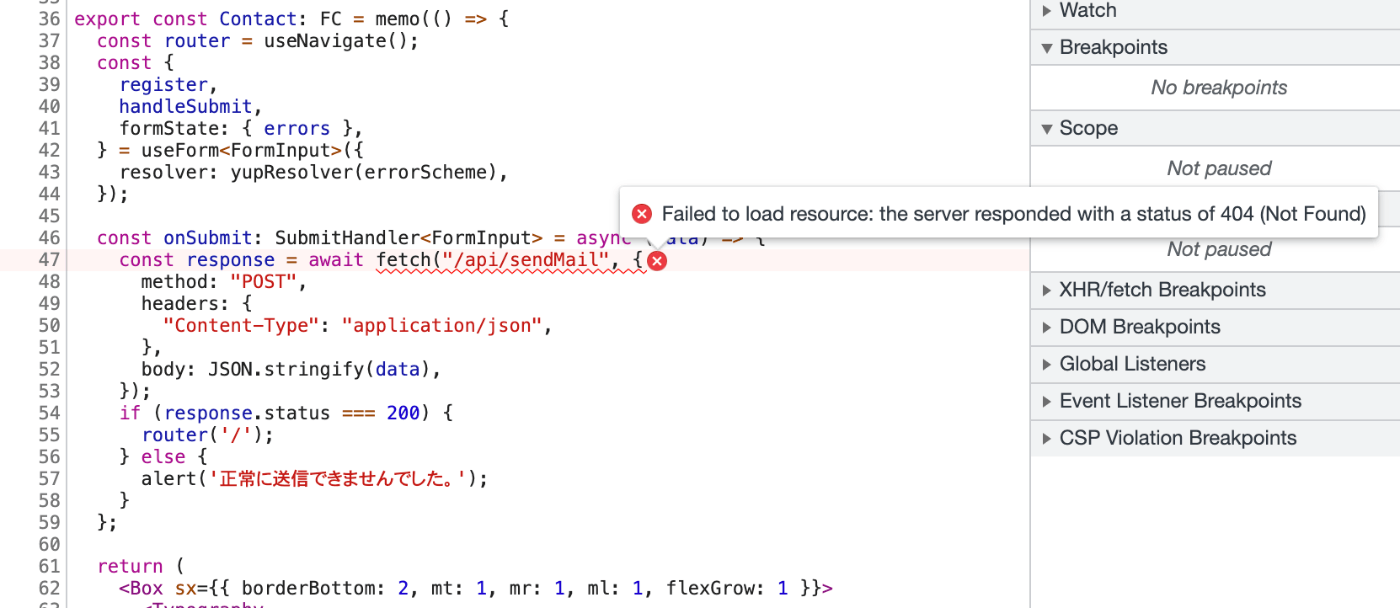
const onSubmit: SubmitHandler<ContactForm> = async (data) => {
const response = await fetch("api/sendMail", {
method: "POST",
headers: {
"Content-Type": "application/json",
},
body: JSON.stringify(data),
});
if (response.status === 200) {
router.push("/thanks");
} else {
alert("正常に送信できませんでした");
};
}
return (
<>
<HeadTag />
<main>
<Header />
<Container maxWidth='md'>
<Box mb={6}>
<PageTitle title="Contact." />
<Typography align='center'>
このページはお問い合わせページです。<br/>
</Typography>
</Box>
<Box>
<FormControl fullWidth>
<Stack spacing={3} direction='column' >
<TextField variant="outlined" required label="お名前" {...register('name')} error={'name' in errors} helperText={errors.name?.message} />
<TextField variant="outlined" required label="メールアドレス" type="email" {...register('email')} error={'email' in errors} helperText={errors.email?.message} />
<TextField variant="outlined" required label="問い合わせ内容" multiline rows={6} {...register('message')} error={'message' in errors} helperText={errors.message?.message} />
</Stack>
<Stack alignItems='center' mt={3} >
<Button color="primary" variant="contained" size="large" sx={{width: '200px'}} onClick={handleSubmit(onSubmit)}>
送信
</Button>
</Stack>
</FormControl>
</Box>
<Box height="20vh"></Box>
</Container>
<Footer />
</main>
</>
)
};
export default Contact
MUIとreact-hook-formを使用するということで、同じ技術を使用していた以下リンクがとても参考になりました。
MUI v5とReact Hook Form v7でサクッとフォームバリデーションを作る
自分でもフォームバリデーションについては今後まとめたいと思いますが、今回の使い方としては上記リンクの記事とほとんど同じような内容となっているため、細かい説明は割愛します。
バリデーションとしては必須項目の入力や、アドレスはアドレスっぽい文字列になっていなかったら、送信できずエラー文が表示されるようになっています。
今回メールを送る上で必要な部分はonSubmit関数の部分です。onSubmit関数を抜き出して以下に表示します。
  // フォーム送信時の処理(バリデーションOKな時に実行される)
  const onSubmit: SubmitHandler<ContactForm> = async (data) => {
    const response = await fetch("api/sendMail", {
      method: "POST",
      headers: {
        "Content-Type": "application/json",
      },
      body: JSON.stringify(data),
    });
    if (response.status === 200) {
      router.push("/thanks");
    } else {
      alert("正常に送信できませんでした");
    };
  }
この関数で実行されることは先ほど作成したapi/sendMailというNextjsのAPIに必要なデータを渡して、メールを送信するようにお願いするということです。react-hook-formに関する記述があるので少しわかりづらいかもしれませんが、大事なところはfetchでAPIを叩いて、そのレスポンスが定数responseに入るといったところです。作成者によってコードが変わるポイントは、メール送信APIファイルの場所(今回はapi/sendMailという場所に作成)とbodyに入れるメール内容の2点くらいです。
bodyにはメールを送るのに必要なデータをJSON文字列で記述します。
今回の私のdataという変数には以下のようなオブジェクトが入ります。
data -> {name: "peishim", email: "peishim@com", message: "こんにちは"}
これがJSON.stringfyによってJSON文字列に変換されます。
JSON.stringify(data) -> '{"name":"peishim","email":"peishim@com","message":"こんにちは"}'
このようにbodyを設定してAPIを叩くことで、api/sendMail.tsに記述のreq.body.nameのようにnameの値を取り出すことができるようになります。なので、この内容は作りたいフォームによって適宜変える必要がありますね。
最後に
説明としてはざっくりとしたものになってしまいましたが、Next.jsとsendGridを使用したメールフォーム作成の参考になれば幸いです。
Discussion
こちらの記事を参考にさせていただきました。
ありがとうございます。
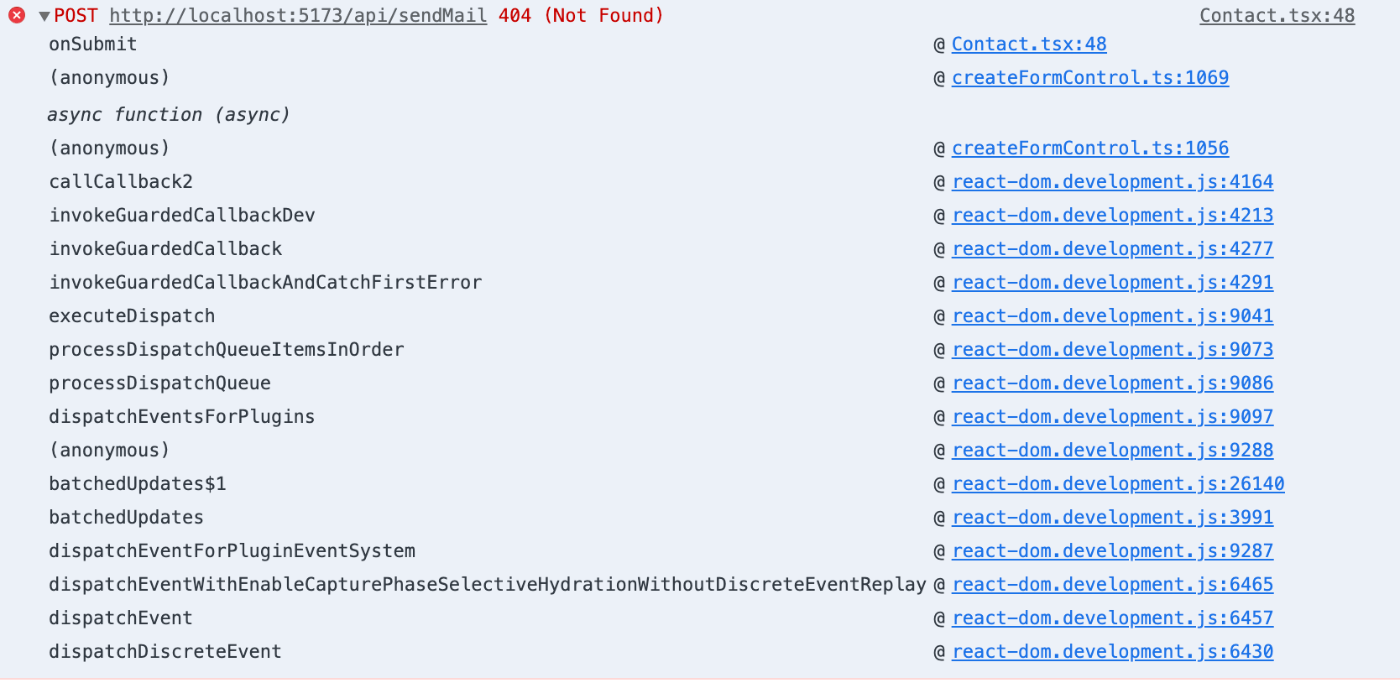
そこで一つ質問なんですが、私のcontactページのonSubmit関数のfetchの所で404コードのエラーが発生してしまいます。
使用技術
こちらを使用しました。
404コードのエラーがなぜ発生しているのか分からないので、できればご回答お願いします。
参考としてこちらを載せておきます。
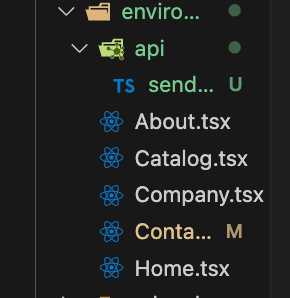
自分のだとpages/api/contact.tsに配置しているので/api/contactというpathでリクエストを投げていますが、Tomoさんのディレクトリ構造とは違うようですね。
404エラーなので、リクエストのパスが間違っていてファイルが見つからないというのが濃厚そうな気がします。
僕もそこまで詳しくないですが、パスを見返したり、ディレクトリ構成を変えてみるとかでうまくいくかもと思いました。
参考:Nextドキュメント