fastAPIについてのメモ
Tutorial等をやったまとめ
tags: python
Fast APIの特徴
- ASGI
- websocketのサポート
- GraphQLのサポート
- バックグラウンドプロセスが扱いやすい
- python type hintによる自動ドキュメント生成 (Swagger UI)
- pydanticをベースとしたdata validation
[FastAPI] Python製のASGI Web フレームワーク FastAPIに入門する
1. Setup
インストール
pip install fastapi uvicorn
サーバの起動
uvicorn main:app --reload
Note
- main: the file main.py (the Python "module").
- app: the object created inside of main.py with the line app = FastAPI().
その他に起動のオプションとしてhostやportがある。
uvicorn main:app --host 0.0.0.0 --port 80 --reload
結果の確認
-
http://127.0.0.1:8000
API(Web)サーバ -
http://127.0.0.1:8000/docs
API Documentation(Swagger UI) -
http://127.0.0.1:8000/redoc
API Documentation(ReDoc)
OpenAPI
- OpenAPIがAPI schemaの構造の定義している。
- 共通規格のschemaを活用してSwaggerやReDocが成り立っている
- fastAPIでは以下のエンドポイントでSchemaの定義を出力できる
http://127.0.0.1:8000/openapi.json
{"openapi":"3.0.2","info":{"title":"FastAPI","version":"0.1.0"},"paths":{"/":{"get":{"summary":"Root","operationId":"root__get","responses":{"200":{"description":"Successful Response","content":{"application/json":{"schema":{}}}}}}}}}
Path Operation
Pathで関心事を分け、operationでアクションの内容を定義する
While building an API, the "path" is the main way to separate "concerns" and "resources".
- @app.post()
- @app.put()
- @app.delete()
async or not
返り値
returnで以下の内容を返せる
- dict, list, singular values as str, int, etc.
- Pydantic models
2. Path Parameters & Query Parameters
引数の受け取り方
- Endpointに宣言したparameter名はpath parameter
- それ以外はquery parameterを指す
以下の例だとitem_idはEndpointに宣言したのでpath parameter、qはそれ以外なので、query parameterになる
@app.get("/items/{item_id}")
async def read_item(
        item_id: int,
        q: Optional[str] = None):
    return {"item_id": item_id, "q": q}

型ヒント
引数には型ヒント(標準のPython type annotations)をつけることができる。

Path Parameterのitem_id(int)にstringを渡した時のエラーメッセージ。
自動でパラーメータの型をチェックして、エラーメッセージを生成してくれる。
{
    "detail": [
        {
            "loc": [
                "path",
                "item_id"
            ],
            "msg": "value is not a valid integer",
            "type": "type_error.integer"
        }
    ]
}
FastAPIにおいてこれらの型チェックは Pydanticを使って行われている。
パスの順番
パスは上から順番に読み込まれ当てはまるものが適用される。
そのため、以下のような2つのエンドポイントがあったとしたら順番を逆にすると片方しか使われなくなる。
@app.get("/users/me")
async def read_user_me():
    return {"user_id": "the current user"}


@app.get("/users/{user_id}")
async def read_user(user_id: str):
    return {"user_id": user_id}
Path Parameters
Predefined values
path parameterとして指定可能な値を定義したい時にはPythonのEnumを使う。
- strを継承することで引数の型を指定(これにより適切にrenderできるらしい)
- 自動で引数のチェックをしてくれる
- ドキュメントにも自動で反映
- Enumを使って定義をした値はenumeration memberになるので、以下のどちらかの方法で判定ができる
- enumeration member
- enumeration value
from enum import Enum

class ModelName(str, Enum):
    alexnet = 'alexnet'
    resnet = 'resnet'
    lenet = 'lenet'

@app.get("/model/{model_name}")
async def get_model(model_name: ModelName):
    if model_name == ModelName.alexnet:
        return {"model_name": model_name, "message": "Deep Learning FTW!"}

    if model_name.value == 'lenet':
        return {"model_name": model_name, "message": "LeCNN all the images"}

    return {"model_name": model_name, "message": "Have some residuals"}
以下の通り定義していない値がPath Parameterに指定されると自動でエラーを返してくれる
$ curl http://127.0.0.1:8000/model/sample
{
    "detail": [
        {
            "ctx": {
                "enum_values": [
                    "alexnet",
                    "resnet",
                    "lenet"
                ]
            },
            "loc": [
                "path",
                "model_name"
            ],
            "msg": "value is not a valid enumeration member; permitted: 'alexnet', 'resnet', 'lenet'",
            "type": "type_error.enum"
        }
    ]
}
Path parameters containing paths
file_path:pathの指定をすることでパスをパスパラメータとして受け取れる(FastAPIが利用しているStarletteの機能)
# Path parameters containing paths
@app.get('/files/{file_path:path}')
async def read_file(file_path: str):
    return {'file_path': file_path}
$ curl http://127.0.0.1:8000/files/aaa/bbb/ccc.txt
{"file_path":"aaa/bbb/ccc.txt"}
Query Parameters
Path Parameterと同様に以下のサポート機能が備わっている
- Editor support (obviously)
- Data "parsing"
- Data validation
- Automatic documentation
- EnumによるPredefined Values
前述の通りパスパラメータで指定していない変数は全てクエリパラメータとして解釈される。
そして、Type Annotationsをつけることで、指定した型に自動で変換を行うことができる。
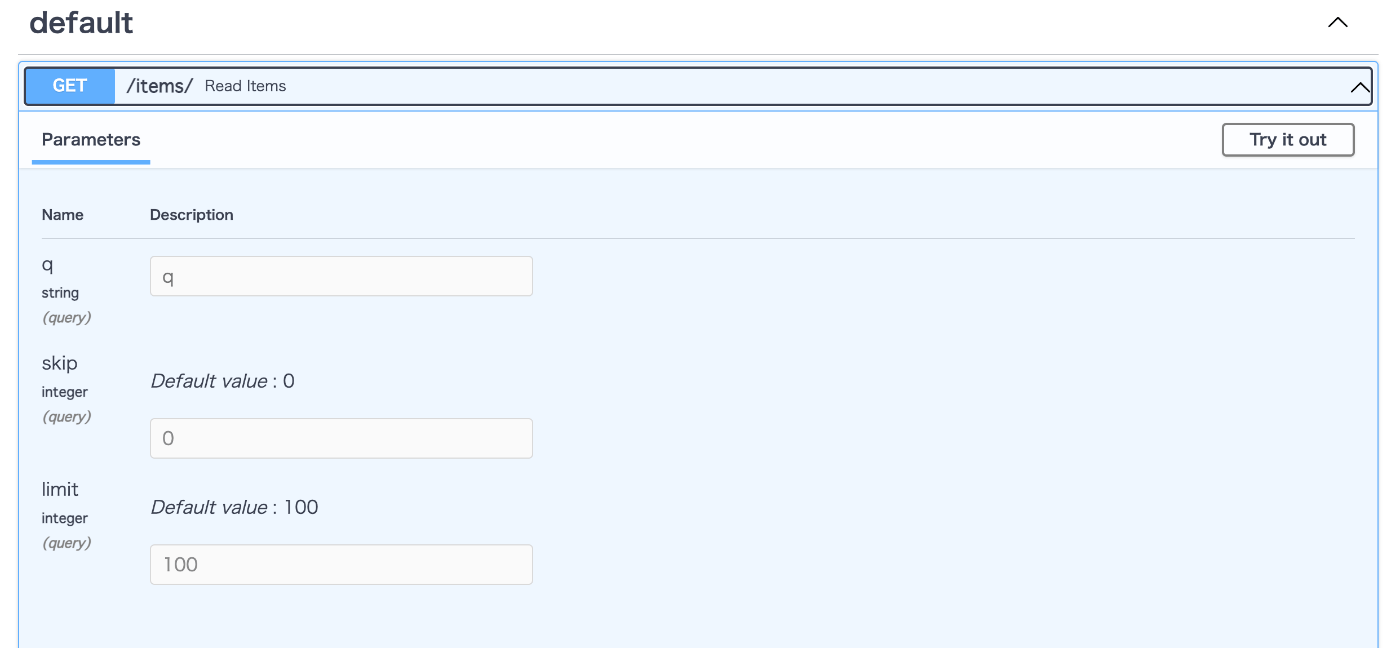
@app.get("/items/")
async def read_item(skip: int = 0, limit: int = 10):
    return fake_items_db[skip : skip + limit]
QueryParameterはPath Parameterと異なり設定内容によってOptionalかRequiredかが変わる。
- デフォルト値を設定すればOptional
- デフォルト値を設定しなければRequired
Default Value
Type annotationの後に=でデフォルト値を設定できる。
@app.get('/items/')
async def read_items(skip: int = 0, limit: int = 10):
    return fake_items_db[skip: skip + limit]
Optional Parameters
デフォルトをNoneにすることで、対象のQuery ParameterがOptionalであることを示せる。
@app.get("/items/{item_id}")
async def read_item(
        item_id: str, q: Optional[str] = None):
    """サンプル"""
    if q:
        return {"item_id": item_id, "q": q}
    return {"item_id": item_id}
Noneを指定することでドキュメントにも必須とオプショナルの区分けがつく。
Type Conversion
boolを設定することもでき、boolの値はデフォルトで自動変換される
async def read_item(
        item_id: str, q: Optional[str] = None, short: bool = False):
このとき、以下のどの値が来てもパラメーターとして受け取る値はTrueに変換される
/items/foo?short=1
/items/foo?short=True
/items/foo?short=true
/items/foo?short=on
/items/foo?short=yes
Queryの活用
Queryを活用することでQuery ParametersにValidationを追加できる。
例えばqというQueryStringの最大文字数を50に設定する場合には以下のように書けばいい
from typing import Optional

from fastapi import FastAPI, Query

app = FastAPI()


@app.get("/items/")
async def read_items(q: Optional[str] = Query(None, max_length=50)):
その他のプロパティ
- max_length
- min_length
- regular_expressions
async def read_items(
    q: Optional[str] = Query(None, min_length=3, max_length=50, regex="^fixedquery$")
):
Required or Optional
Queryを使う場合、デフォルトバリューの値によって必須 or オプショナルの判定が変わる
- 必須
-
...を指定
-
- オプショナル
-
Noneを指定
-
# オプショナル
async def read_items(q: Optional[str] = Query(None, max_length=50)):

# 必須
async def read_items2(q: Optional[str] = Query(..., max_length=50)):
情報を付与する
-
title
- description
- Descriptionに表示されるパラメータの内容説明
- deprecated
- 将来的に使えなくなる項目であることを明示する
@app.get("/items/")
async def read_items(
    q: Optional[str] = Query(
        None,
        title="Query string",
        description="Query string for the items to search in the database that have a good match",
        deprecated=True,
        min_length=3)
):
    results = {"items": [{"item_id": "Foo"}, {"item_id": "Bar"}]}
    if q:
        results.update({"q": q})
    return results
Validation
すべてのData ValidationはPydanticによって行われる。
Response
Data Conversion
以下のケースで文字列の'3'ではなく'3'が返ってくるように、自動でレスポンスの値を型変換してくれる。
(Code)
@app.get("/items/{item_id}")
async def read_item(
        item_id: int):
    """サンプル"""
    return {"item_id": item_id}
(Response)
{"item_id":3}
Documentation
以下を記載しておけば、自動でドキュメント化してくれる
- docstring
- Python type annotations
Docker
Docker + Uvicorn + Gunicorn
専用のイメージが提供されているので、それを使えば基本的にOK
FROM tiangolo/uvicorn-gunicorn-fastapi:python3.7

COPY ./app /app
dockerfileの記載をして、あとは以下のコマンドで起動する。
% docker build -t myimage .
% docker run -d --name mycontainer -p 80:80 myimage
Deploy
プロダクションでの稼働用に、パフォーマンスがチューニングされたイメージがリリースされているので、これを利用するのも1つの手
tiangolo/uvicorn-gunicorn-fastapi-docker
Request Body
FastAPIでRequest Bodyを定義するにはPydanticを使う。
- 具体的にはpydanticの
BaseModelを継承したclassを作る- QueryParametersと同様にデフォルトバリューを設定するとOptional、設定なければ必須になる
- その他pydanticを使って定義することで以下のメリットが得られる
- Documentで自動でSchemeを作成
- エディターのサポート
- Validation(形式がおかしければ自動でエラーを返す)
from typing import Optional
from pydantic import BaseModel

from fastapi import FastAPI

class Item(BaseModel):
    name: str
    description: Optional[str] = None
    price: float
    tax: Optional[float] = None

app = FastAPI()

@app.post('/items/')
async def create_item(item: Item):
    return item
APIリクエストを送ると以下の結果が返ってくる。
POST http://127.0.0.1:8000/items/

{
    "name": "aaaa",
    "price": 10.44
}
>>>
{
  "name": "aaaa",
  "description": null,
  "price": 10.44,
  "tax": null
}
Request Bodyへのアクセス
.dict()でRequest Bodyとして受け取った値をDictionaryに変換できる。
@app.post("/items/")
async def create_item(item: Item):
    item_dict = item.dict()
    if item.tax:
        price_with_tax = item.price + item.tax
        item_dict.update({"price_with_tax": price_with_tax})
    return item_dict
Request Body + Path Parameter
Request BodyとPath Parameterを同時に定義することもできる。
@app.put("/items/{item_id}")
async def create_item_with_path(item_id: int, item: Item):
    return {"item_id": item_id, **item.dict()}
% curl -X PUT -H "Content-Type: application/json" -d '{"name":"test", "price":"10.84", "tax":"2.04"}' localhost:8000/items/15
{"item_id":15,"name":"test","description":null,"price":10.84,"tax":2.04}
Request Body + Path Parameter + Query Parameter
@app.put("/items/{item_id}")
async def create_item_with_path_and_query(item_id: int, item: Item, q: Optional[str] = None):
    result = {"item_id": item_id, **item.dict()}
    if q:
        result.update({"q": q})
    return result
公式ドキュメントにある通り、以下の条件でそれぞれが何に当たるのかを判定している。
- パラメータがパスで宣言されている場合は、優先的にパスパラメータとして扱われます。
- パラメータが単数型 (int、float、str、bool など)の場合はクエリパラメータとして解釈されます。
- パラメータが Pydantic モデル型で宣言された場合、リクエストボディとして解釈されます。
Dependencies
Dependency Injection
各エンドポイントで共通の処理がある時に、共有処理を定義してそれを各エンドポイントの処理に適用してくれる仕組み(”inject” the denepdency)がFastAPIにはある。
以下のようなユースケースで活用できる。
- 共通ロジックがある
- データベースコネクションを共有したい
- セキュリティ、認証や権限設定を強制したい
- その他諸々
仕組み
from typing import Optional
from fastapi import Depends, FastAPI

app = FastAPI()

async def common_parameters(q: Optional[str] = None, skip: int = 0, limit: int = 100):
    return {"q": q, "skip": skip, "limit": limit}

@app.get("/items/")
async def read_items(commons: dict = Depends(common_parameters)):
    return commons

@app.get("/users/")
async def read_users(commons: dict = Depends(common_parameters)):
    return commons
DependsでFunctionを指定することで
- Dependency Functionを渡されたパラメータで呼ぶ
- Dependency Functionの結果を受け取る
- 結果を定義した変数に設定する(上記の例だと
dict)
Document
上述の通りDependsで定義したものは適用先の各エンドポイントに適用されるが、ドキュメントに関しても同様。
SQL(Relational) Databases
ディレクトリ構成
.
├── __init__.py
├── crud.py
├── database.py
├── main.py
├── models.py
└── schemas.py
databaseとの接続部分
-
SessionLocalから実際のセッションを作成する
from sqlalchemy import create_engine
from sqlalchemy.ext.declarative import declarative_base
from sqlalchemy.orm import sessionmaker

SQLALCHEMY_DATABASE_URL = "sqlite:///./sql_app.db"
# SQLALCHEMY_DATABASE_URL = "postgresql://user:password@postgresserver/db"

engine = create_engine(SQLALCHEMY_DATABASE_URL, connect_args={"check_same_thread": False})
SessionLocal = sessionmaker(autocommit=False, autoflush=False, bind=engine)

Base = declarative_base()
モデルの作成
ORMはLazy loading
SQLAlchemy and many others are by default "lazy loading".
That means, for example, that they don't fetch the data for relationships from the database unless you try to access the attribute that would contain that data.
For example, accessing the attribute items:
current_user.items
would make SQLAlchemy go to the items table and get the items for this user, but not before.Without orm_mode, if you returned a SQLAlchemy model from your path operation, it wouldn't include the relationship data.
Even if you declared those relationships in your Pydantic models.
But with ORM mode, as Pydantic itself will try to access the data it needs from attributes (instead of assuming a dict), you can declare the specific data you want to return and it will be able to go and get it, even from ORMs.
main.py
SessionLocal()で作成したセッションオブジェクトをDIを使ってリクエストハンドラに渡す。
# Dependency
def get_db():
    db = SessionLocal()
    try:
        yield db
    finally:
        db.close()


@app.post("/users/", response_model=schemas.User)
def create_user(user: schemas.UserCreate, db: Session = Depends(get_db)):
    db_user = crud.get_user_by_email(db, email=user.email)
    if db_user:
        raise HTTPException(status_code=400, detail="Email already registered")
    return crud.create_user(db=db, user=user)
Migrations
SQLAlchemyを使っている場合、MigrationにはAlembicを使うのがデファクト?
(SQLAlchemyのファイルを別で定義しておけば、FastAPIやpydantic等、APIを動かすのに必要なツールをインストールしなくてもMigrationが行える)
また、Modelを別で定義することでFastAPIに関係しないバックグラウンドプロセス等別の処理でもモデル定義を使える。
例えば、Celery - Distributed Task Queue — Celery 5.2.1 documentation、RQ: Simple job queues for Python、arq — arq v0.22 documentation など。
参考資料
Testing
上記の公式ドキュメントで記載されているように、fastAPIのTestClientを使うことで、pytestで呼び出せる。
(requestsが必要なので、別途インストールする必要あり)
基本形
TestClientにアプリケーションを渡して起動する。
後はrequestsを使う時と同じようにAPIへのリクエストが行える。
同じファイルにテストコードを書く場合
from fastapi import FastAPI
from fastapi.testclient import TestClient

app = FastAPI()

@app.get("/")
async def read_main():
    return {"msg": "Hello World"}

client = TestClient(app)

def test_read_main():
    response = client.get("/")
    assert response.status_code == 200
    assert response.json() == {"msg": "Hello World"}
テストコードを分けた場合
from fastapi.testclient import TestClient

from .main import app

client = TestClient(app)

def test_read_main():
    response = client.get("/")
    assert response.status_code == 200
    assert response.json() == {"msg": "Hello World"}
※TestClientはStarletteのものをfastAPIから使えるようにしているだけなので、starlette.testclient import TestClientの形でも呼び出せる。
環境の準備
DBを実際に使ったテストについて、テストケースごとにロールバックする。
fixtureを使うパターン
- fixtureでSQLAlchemyのセッションオブジェクトを渡す
- 各テストケースで渡されたセッションオブジェクトを利用してDBへのデータ追加などを行う
- セッションオブジェクトの作成にあたって以下の考慮を行う
- DBの永続化は必要ないのでSessionクラスのサブクラスである
TestingSessionを用意し、commit呼び出し時に永続化を行わないよう設定(session.commit() を session.flush(), session.expire_all() に置き換える)
- DBの永続化は必要ないのでSessionクラスのサブクラスである
テストデータの管理
テストデータの定義を効率化する方法について、大きく以下の3つに分けられる。
- ベタ書き
- fixtureを使う
- FactoryBoyを使う
FactoryBoy
factory_boy — Factory Boy latest documentation の例からわかるように、テストデータの重複をなくしつつ柔軟性を持たせてくれるのがメリット。
class FooTests(unittest.TestCase):

    def test_with_factory_boy(self):
        # We need a 200€, paid order, shipping to australia, for a VIP customer
        order = OrderFactory(
            amount=200,
            status='PAID',
            customer__is_vip=True,
            address__country='AU',
        )
        # Run the tests here

    def test_without_factory_boy(self):
        address = Address(
            street="42 fubar street",
            zipcode="42Z42",
            city="Sydney",
            country="AU",
        )
        customer = Customer(
            first_name="John",
            last_name="Doe",
            phone="+1234",
            email="john.doe@example.org",
            active=True,
            is_vip=True,
            address=address,
        )
        # etc.