Pythonのテストについてまとめる
Getting Started with Software Testing
it becomes evident that the most important part of software development is detecting defects and ensuring it achieves the expected goals. Those two things are usually mostly done by having tests and a fitness function that can verify the software does what we really mean it to – founding pieces of the whole Software Quality Control discipline
Software TestingとQuality Controlについて
ソフトウェアの開発工程は製造業に影響を受けており、早い段階からテストと品質コントロール(Quality Control)がプロダクト開発のライフサイクルに組み込まれている。
Quality Controlのプロセスは通常はテスト計画の実行を通じて成果物が想定通りの動作をすることを検証し、それを持って製品の完成(ユーザに届けられる状態になったこと)を判断していた。
テスト計画
テスト計画は複数のテストケースで構成され、各テストケースは以下の条件を持つ。
- 前提条件(Preconditions)
- 手順(Steps)
- 想定結果(Postonditions)
壊れたプロダクト(バグがあってユーザに価値が提供できないもの)を避け、ユーザの期待に沿った品質のプロダクトを頻繁にリリースするにはどうすればいいのか。
答えはテストの自動化にあり、人手でやっていたテストを自動化することで長い目で見て頑強なソフトウェアを作ることができる。
自動テストとテストスート
Test Runner
実行対象のテストケースを集めて(discovery phase)、すべてを実行する役割(run phase)が必要であり、それを担うのがTest Runner。
Pythonではunittest、pytestともにdiscovery phaseとrun phaseの機能を持っている。
class TestMyTestCase:
    def test_one(self):
        pass
% pytest ch1
=============================================== test session starts ===============================================
platform darwin -- Python 3.9.1, pytest-6.2.4, py-1.10.0, pluggy-0.13.1
rootdir: /Users/panyoriokome/Workspaces/git/crafting_test_driven_software_with_python
collected 1 item

ch1/test_automatictests.py .                                                                                [100%]

================================================ 1 passed in 0.00s ================================================
pytestではtestから始まる関数もしくはメソッドがテストケースとして判断されるため、その条件に合致しないものを定義しても実行対象とはならない。
この仕組みによって、テスト実行時に必要となるヘルパー関数やユーティリティメソッドを自由に定義することが可能になる。
実例として以下のようにHelper Functionを追加しても、実行対象とはならない。
class TestMyTestCase:
    def test_one(self):
        pass

    # Helper Function
    def helper_one(self):
        pass
複数のテストケース
TDD(Test-driven development)の実践
要求事項をテスト
Writing tests and writing code should interleave continuously. If you find yourself spending all your time on one or the other, you are probably moving away from the benefits that TDD can give you, as the two phases are meant to support each other
まず失敗するテストケースを作る
class TestAddition():
    def test_main(self):
        result = addition(3, 2)
        assert result == 5
==================================== FAILURES =====================================
_____________________________ TestAddition.test_main ______________________________

self = <test_tdd.TestAddition object at 0x7f9936e41c10>

    def test_main(self):
>       result = addition(3, 2)
E       NameError: name 'addition' is not defined

ch1/test_tdd.py:3: NameError
============================= short test summary info =============================
FAILED ch1/test_tdd.py::TestAddition::test_main - NameError: name 'addition' is ...
================================ 1 failed in 0.02s ================================
次にテストに通過するコードを書いていく。
def addition(arg1, arg2):
    return arg1 + arg2
実際にテストコードを通過することを確認する。
$ pytest ch1/test_tdd.py
================================ test session starts ================================
platform linux -- Python 3.9.6, pytest-6.2.4, py-1.10.0, pluggy-0.13.1
rootdir: /home/deepstation/Documents/workspace/git/crafting_test_driven_software_with_python
collected 1 item

ch1/test_tdd.py .                                                             [100%]

================================= 1 passed in 0.00s =================================
これで要求事項を満たしていることが確認できたので、リファクタリングなど内部処理の改善に取り組める。
コードを変更してもテストコードがパスしていることで提供している機能が変わっていないことを保証できる。
例えば以下のように引数をまとめて受け取ってunpackする実装方法に変えたとしても、テストが通過することでソフトウェアとしての振る舞いが変わっていないことを保証できる。
def addition(*args):
    a1, a2 = args
    return a1 + a2
要求事項の追加
n TDD we don't have the expectation to be able to write all tests first. Nor is it generally a good idea in the context of extreme programming practices, because you still don't know what the resulting interface that you want to test will be.
class TestAddition():
    ...
    def test_threeargs(self):
        result = addition(3, 2, 1)
        assert result == 6

    def test_noargs(self):
        result = addition()
        assert result == 0
追加した2つのテストケースがどちらも落ちることを確認する
Test Units
In practice, a unit is the smallest testable entity that participates in your software.
sociable unitとsolitary unit
def multiply(num1, num2):
    total = 0
    for _ in range(num2):
        total = addition(total, num1)
    return total

def addition(*args):
    total = 0
    for a in args:
        total += a
    return total
上記2つの関数があるとき、additionはそれ単体で動作するが(独立してテストすることが可能だが)、multiplyはadditionが存在しないと機能しない(独立してテストすることが出来ない)。
- sociable unit(component)
- 他のunitを必要とする
- solitary unit
- 他のunitを必要としない
sociable unitsはより完全な(より幅広い機能の?)テストを行うことができるが、テストの実行に時間がかかり、また準備(Arrange)も大変になる。
また、sociable unitsは独立しておらず(つまり、前述の例だとadditionの変更によってmultiplyの結果も変わる可能性がある)、テストが失敗した時にどこに問題があるのか特定を難しくなるというデメリットもある。
Unit Testは開発者が意図した通りに振る舞うことは保証できるが、ユーザが期待する通りに動くことは保証できない。
そうした観点ではIntegration TestとFunctional Testが効果的。
Integration and Functional Tests
Integration Tests
Unit Testは個別のComponentごとの動作は検証できるが、それらが組み上がった時の動作は検証できない。
これは現実世界の例で言うと、エンジン、ギア、ホイールなど、車を構成する各部品を個別に検証しただけで最終的な成果物としての車が動くことを期待するようなもの。
ソフトウェアの世界でそうした個別の要素を組み合わせた観点でのテストとして、Integration Testがある。
Integration Testのスコープは曖昧。
二つのモジュールを組み合わせるだけのこともあれば、10個を組み合わせることもある。
組み合わせ方には様々なパターンが考えられるが、すべてのパターンを検証することは労力に見合う価値は得られない。
Unit TestとIntegration Testの分離
- それぞれで独立して実行できるようにしておいた方がいい
- 観点と実行するタイミングが異なるため。Unit Testは開発中常に実行する。それに対してIntegration TestはUninTestにすべて通過し、ある程度のポイントにたどり着いたときに実行する。
Functional Test
Integration Testは目的に応じていくつもの分類に分けることができ、その中で最も有名なのがFunctional Test
- Functional Test
- 機能にフォーカスしたテスト。ユーザに対して意図した通りの機能を提供できているか
- End-to-End Test
- Vertical integrationが特徴。DBなど特定のレイヤーではなく特定の機能を提供するために必要なシステムのコンポーネント全てをテスト対象とする。
- System Test
- 一つの機能をテストするのではなく、システムにおけるユーザの一連の動作を検証する
- Acceptance Test
繰り返しになるが色々な種類のテストがあるのはそれぞれのテストの観点(目指しているゴール)が違うから。
重要なのはソフトウェアの振る舞いを適切な種類のテスト適切な配分でカバーすることであり、それによって信頼性の高いソフトウェアを提供できるようになる。
この目的のためにTesting Pyramidの概念が重要になる。
Testing Pyramid
各テストのメリット、デメリット
-
E2E
- ユーザの実際の体験をテストできる
- そのため、プラットフォーム(ブラウザなど)での不具合やシステム全体での動作を検証できる。
- その一方でテストが失敗したときにどこで問題が起きたか分かりづらい
- テストの実行は遅く、ソフトウェアに関係しない要素(ネットワークなど)によってテストが失敗してしまうことがある
-
Integration
- 内部実装の変更に強く、リファクタリングを行なってもテストコードが失敗しづらい
- 外部依存(DB, HTTPなど)が多い場合には実行に時間がかかる
-
Unit
- テストの実行は早い
- どこに問題があるのかピンポイントで分かる(教えてくれる)
- ソフトウェア全体としての動作を保証してくれない。
- リファクタリング等の内部実装の変更によってテストが壊れてしまう可能性が高い
Testing Pyramid
The testing pyramid originates from Mike Cohn's Succeeding with Agile book, where the two rules of thumb are "Write test with different granularities" (so you should have unit, integration, E2E, and so on...) and "the more you get high level, the less you should test" (so you should have tons of unit tests, and a few E2E tests).
Testing Pyramidの特徴は名前にもなっているようにその形であり、下に行くほど幅が広く(つまりたくさんのテストが必要に)なっている。
Unit Testは実行速度が速く、問題点をピンポイントで教えてくれるので、これを厚くすることで、実行速度が遅く、原因箇所の把握も難しい上のレイヤーのテストを減らせると言うのがTesting Pyramidの考え方。
Testing Trophy
The testing trophy originates from a phrase by Guillermo Rauch, the author of Socket.io and many other famous JavaScript-based technologies. Guillermo stated that developers should "Write tests. Not too many. Mostly integration."
基本的な考えとして、テストはソフトウェア開発の基礎となるものだが、収穫逓減するもの(一定のラインを超えると効果が少なくなっていくもの)でもあるので、最も高い費用対効果が得られるポイント(スウィートスポット)を探すことが重要。
そして、そのスウィートスポットはIntegration Testにある。
また、もうひとつの特徴として、static testsというものに重きを置く。
static testsはLinterやタイプチェッカーなどの静的解析ツールを利用したテストのことを指し、これらは適用および実行のコストが非常に低いため、費用対効果が非常に高い。
Testing Distribution and Coverage
テストをどこまで実施するか。
テストは前述の通り収穫逓減するものであるので、費用対効果を見極めないといけない。
単純なgetterやsetterをテストしても効果は非常に薄い。
コードカバレッジのスウィートスポットは80%程度だと言われているが、使用する言語やプロジェクトにもよる。
例えば、Python2から3に移行するプロジェクトならコードが正しく動作することを保証するには100%のカバレッジを実現するしか無い。
Test Doubles
Test Doublesとは
まだ書いていないソフトウェアに対するテストをどのように実現すればいいか。
答えは Test Doublesにある。
A test double is an object that takes the place of another object, faking that it is actually able to do the same things as the other object, while in reality, it does nothing.
Test Doublesの存在も様々なレイヤーのテストが必要な理由になっており、基本的に上位のレイヤーに行くほどTest Doublesの数は減らしていく。E2EテストではTest Doublesは使わずにすべて実際のコードで動かす。
So when are we expected to replace those test doubles with real objects?
That's where Test-Driven Development by Example by Kent Beck suggests relying on a TODO list. As you write your code, you should write down anything that you think you need to improve/support/replace. And before moving forward to writing the next acceptance test, the TODO list should be completed.
Test Doublesは開発の中で徐々に実際のオブジェクトに作り変えていく。
Test Doubles: Chat Applicationでの実例
ポイント
- 要件を満たすケース(Acceptance Test)を書いた後は、テストケースの失敗が次に何をするべきかを指し示してくれる(開発中に迷わなくて済む。また、開発にリズムが生まれる)
- 要件を満たすために一つづつ最小限の実装をしていくので、
- Mockとして以下の種類がある
- Dummy
- 何もせずにただテストをパスさせるためだけに使う。まだ存在しない関数などの代わりに使える
-
unittest.mock.Mock()を使う
- Stub
- 関数などが呼ばれたときに特定の値を指定して返すようにできる。
-
unittest.mock.patch.objectを使う。これ自体はDummyの用途でも使えるがreturn_valueを設定することで、特定の値を返すようにできる。
- Spy
- 特定の関数などがどうやって呼ばれたかをテストできる(呼ばれた回数、呼ばれた時の引数など)
-
unittest.mock.MagicMock()を使う
- Dummy
Mockは外部の依存性(DBやサーバだけでなく、まだ完成していない関数なども含む)に頼らずにテストを行う手段を提供してくれる。
Mockを活用することで外部の依存性に頼らなくなるので、高速でテストが実行可能になる。
GoogleのSMLテストの分類(Googleが提唱するTestSizeとJava,MavenによるTestSizeの実現方法について)で考えるとわかりやすいが、プルリクエストごとなど開発中にできるだけ短い間隔でテストを実行して開発のフィードバックを得るにはMockの活用が欠かせない。
Start
新しい機能の開発を開始したら、まず要件を確認するAcceptance Testを書く。
Acceptance Testを書くことによって、実現したいこと(要件)を定義する助けにもなる。
class TestChatAcceptance:
    def test_message_exchange(self):
        user1 = ChatClient("山田")
        user2 = chatClient("佐藤")

        user1.send_message("こんにちは")
        messages = user2.fetch_messages()

        assert messages == ["山田: こんにちは"]
もちろん実体となるコードが何もない状態なのでテストは失敗する。
ChatClientの作成
ChatClientを作成し、nicknameを覚えられるようにする。
まず、ChatClientの挙動を確認できるテストを作成する。
class TestChatClient:
    def test_nickname(self):
        client = ChatClient("User 1")

        assert client.nickname == 'User 1'
テストはこの時点では失敗する。
そこで、テストを通過するようにChatClientを作成する。
class ChatClient:
    def __init__(self, nickname):
        self.nickname = nickname
失敗したテストを通過したことを確認する。
$ pytest ch2/test_acceptance.py::TestChatClient
================================= test session starts ==================================
platform linux -- Python 3.9.6, pytest-6.2.4, py-1.10.0, pluggy-0.13.1
rootdir: /home/deepstation/Documents/workspace/git/crafting_test_driven_software_with_python
collected 1 item

ch2/test_acceptance.py .                                                         [100%]

================================== 1 passed in 0.00s ===================================
新しい機能の構築に成功したので、要件の確認を行う。
すると、以下の通り機能が不足していることがわかる。
$ python 01_chat_acceptance.py TestChatAcceptance
E
======================================================================
ERROR: test_message_exchange (__main__.TestChatAcceptance)
----------------------------------------------------------------------
Traceback (most recent call last):
  File "01_chat_acceptance.py", line 8, in test_message_exchange
    user1.send_message("Hello World")
AttributeError: ChatClient instance has no attribute 'send_message'

----------------------------------------------------------------------
Ran 1 test in 0.000s
そこで、新しい機能のコードを書くのではなく、新しい機能をテストするコードを先に書く。
class TestChatClient(unittest.TestCase):
    ...
    def test_send_message(self):
        client = ChatClient("User 1")
        sent_message = client.send_message("Hello World")

        assert sent_message == "User 1: Hello World"
これで開発する機能がどのような仕様を満たしていれば良いのかわかったので、
実際に開発に入る。
このように以下の流れで開発を進めていく。
- 要件の確認のためのテスト(Acceptance Test)を書く(この時点では失敗)
- 要件を実現するための機能のテストケースを書く(この段階では失敗する)
- 機能を実現するためのコードを書く(成功する)
- 要件の確認のためのテスト(Acceptance Test)が変化したこと(要件の実現に近づいたこと)を確認する
Dummy Object
Dummy Objectとはその名の通り何もしないオブジェクトであり、単にテストケースを通過させるためだけに使われる。
ここではテストを通過させるためにまだ作っていない機能の確認をするためにMockを作る。
自分で定義
以下のようにオリジナルのClassを定義することでMockをする。
class TestChatClient:
    ...
    def test_send_message(self):
        client = ChatClient("User 1")
        client.connection = _DummyConnection()
        sent_message = client.send_message("Hello World")

        assert sent_message == "User 1: Hello World"

class ChatClient:
    def __init__(self, nickname):
        self.nickname = nickname

    def send_message(self, message):
        sent_message = "{}: {}".format(self.nickname, message)
        self.connection.broadcast(message)
        return sent_message

class _DummyConnection:
    def broadcast(*args, **kwargs):
        pass
unittest.mock
自分でいちいち定義しなくてもunittest.mockを使うこともできる。
+import unittest.mock
...
class TestChatClient:
    ...
    def test_send_message(self):
        client = ChatClient("User 1")
+       client.connection = unittest.mock.Mock()
        sent_message = client.send_message("Hello World")

        assert sent_message == "User 1: Hello World"
これでテストはパスさせることができるようになったが、Acceptance Testを通過させるためには実際にサーバにメッセージを送信しないといけない。
ここで登場するのがStub
Stub
class Connection(SyncManager):
def __init__(self, address):
self.register("get_messages")
super().__init__(address=address, authkey=b'mychatsecret')
self.connect()
def broadcast(self, message):
messages = self.get_messages()
messages.append(message)
class TestConnection:
def test_broadcast(self):
"""コネクションを確立させてメッセージの送信ができることを確認する
"""
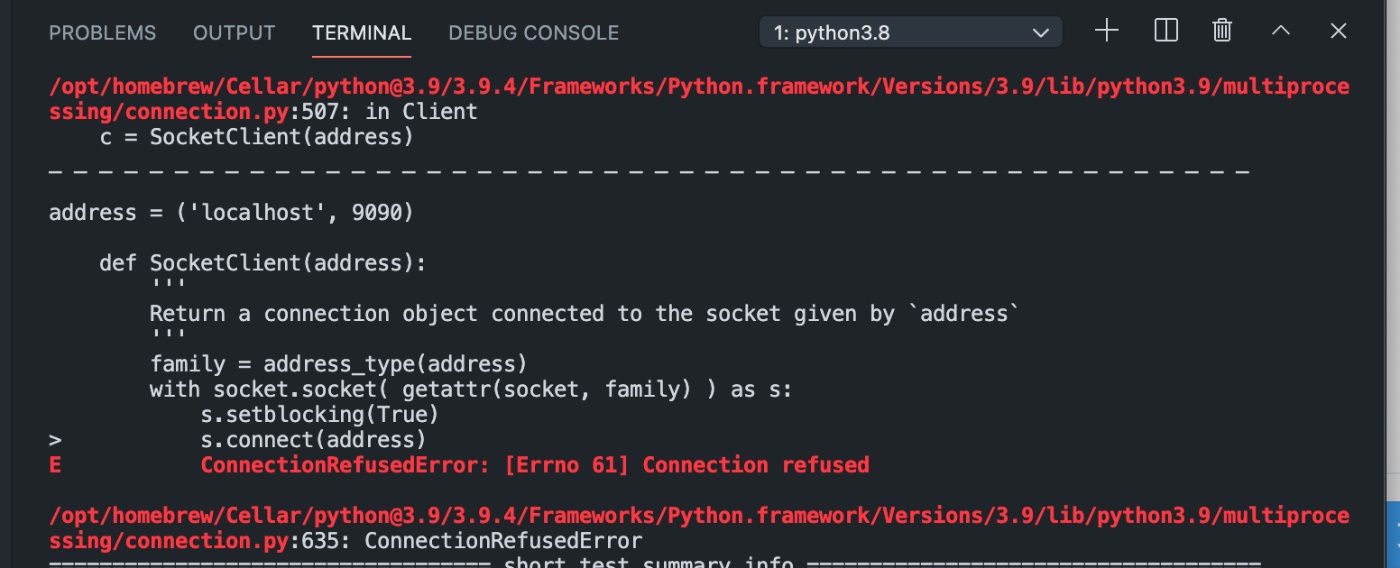
c = Connection(('localhost', 9090))
c.broadcast("some message")
assert c.get_message()[-1] == "some message"
サーバが存在しないのでエラーが出る。
以下のようにpatchを当ててみても実際のサーバが起動していないのでエラーが出る。
class TestConnection:
    def test_broadcast(self):
        """コネクションを確立させてメッセージの送信ができることを確認する
        """
        # unittest.mock.patch.objectを使ってConnectionにパッチを当てる
        with unittest.mock.patch.object(Connection, "connect"):
            c = Connection(('localhost', 9090))
        c.broadcast("some message")
        assert c.get_message()[-1] == "some message"
ここで登場するのがStub。
unittest.mock.patch.objectで返り値を含めて指定ができるので、これを利用する。
class TestConnection:
    def test_broadcast(self):
        """コネクションを確立させてメッセージの送信ができることを確認する
        """
        # unittest.mock.patch.objectを使ってConnectionにパッチを当てる
        with unittest.mock.patch.object(Connection, "connect"):
            c = Connection(('localhost', 9090))

        with unittest.mock.patch.object(c, "get_messages", return_value=[]):
            c.broadcast("some message")
            assert c.get_messages()[-1] == "some message"
Spies
Acceptance Testをパスするために、ChatClientを作成したときにConnectionが存在し、実際に使われるかを確かめたい。そのためにSpyを使う。
To verify that ChatClient uses the provided connection, we are going to set up a test with a spy, a kind of dummy object that, instead of doing nothing, actually records how it was called (if it was) and with which arguments.
Spyを使って以下のように特定の処理がどのような引数で呼ばれたか、何回呼ばれたかなどをテストすることができる。
class TestChatClient:
    ...

    def test_client_connection(self):
        client = ChatClient("User 1")

        connection_spy = unittest.mock.MagicMock()
        with unittest.mock.patch.object(client, "_get_connection",
                                        return_value=connection_spy):
            client.send_message("Hello World")
        # spyが期待通りの値を設定されて呼ばれているかテストする
        connection_spy.broadcast.assert_called_with(("User 1: Hello World"))
Mocks
dummy objects, stubs, spiesといったこれまでに使ってきたものはすべてunittest.mockモジュールのものを使っていた。
unittest.mock.Mock()
unittest.mock.patch.object()
unittest.mock.MagicMock()
Mockは使い方によってはdummy objects, stubs, spiesそれぞれの機能も使える。
from unittest.mock import Mock

# ファイルの代わりにMockを使う
def read_file(f):
    print("READING ALL FILE")
    return f.read()

m = Mock()
read_file(m)
>>> READING ALL FILE

# Stubみたいにして使う
m.read.return_value = "Hello World"
print(read_file(m))
>>> READING ALL FILE
        Hello World

# spyのように使う
m.read.call_count
>>> 2
Mockはソフトウェアの振る舞いをテストするために使われる。
例えば以下の例ではMockが意図したとおりの引数(この場合には引数なし)で呼ばれたことをテストできる。
# 正常系
m.read.assert_called_with()

# エラーが発生
m.read.assert_called_with("some argument")
>>> AssertionError: Expected call: read('some argument')
Actual call: read()
Fakeの活用
Chat ServerをFakeで代用する。
classFakeServerを作って、それをテストで使うようにして、サーバとの疎通ができるかをテストする。
class TestConnection:
    ...
    def test_exchange_with_server(self):
        with unittest.mock.patch(
            "multiprocessing.managers.listener_client",
            new={"pickle": (None, FakeServer())}
        ):
            c1 = Connection(("localhost", 9090))
            c2 = Connection(("localhost", 9090))

            c1.broadcast("connected message")

            assert c2.get_messages()[-1] == "connected message"

class FakeServer:
    def __init__(self):
        self.last_command = None
        self.last_args = None
        self.messages = []

    def __call__(self, *args, **kwargs):
        return self

    def send(self, data):
        # Track any command that was sent to the server.
        callid, command, args, kwargs = data
        self.last_command = command
        self.last_args = args

    def recv(self, *args, **kwargs):
        if self.last_command == "dummy":
            return "#RETURN", None
        elif self.last_command == "create":
            return "#RETURN", ("fakeid", tuple())
        elif self.last_command == "append":
            self.messages.append(self.last_args[0])
            return "#RETURN", None
        elif self.last_command == "__getitem__":
            return "#RETURN", self.messages[self.last_args[0]]
        elif self.last_command in ("incref", "decref",
                                   "accept_connection"):
            return "#RETURN", None
        else:
            return "#ERROR", ValueError("%s - %r" % (
                self.last_command,self.last_args)
            )

    def close(self):
        pass
これでテストはパスするが、上記のFakeクラスを作るにはかなりの労力が必要になる(リバースエンジニアリングのようなものが必要になる)
(MySQLやMongoDBなどメジャーなものはライブラリとしてFakeが利用可能だが...)
This is a problem caused by the fact that our Connection object, being based on SyncManager, doesn't provide proper support for dependency injection, which would have allowed us to inject our own communication channel in a proper way instead of having to patch the "pickle" based one.
この問題の根源にあるのはSync ManagerがDependency Injectionに対応していないから。
ただし、Dependency Injectionについてみる前にAcceptance Testをパスさせる
Acceptance Test
Acceptance tests are meant to verify that the software really does what we wanted once it's in the hands of our users. For this reason, it's usually a good idea to limit the usage of test doubles in the context of acceptance tests. They should work as much as possible by reproducing the real usage of the software.
Acceptance Testの目的はユーザ目線での機能を確認することである。そのため、Test Doublesの使用をやめてできる限り実際と同じ条件でテストをできるようにするべき。
mockやstub, spyをAcceptance Testで使うことはほぼない。Fakeを使うことは稀にあるが、その場合には別途実際の環境を使ったSystem Testを行うべき。
But our ChatClient tests have fairly complex code that has to rely on mock.patch to replace pieces of it and we even had to implement a property setter for the connection for the sole purpose of making it possible to replace it with a testing double.
Even though we achieved our goal, there should be a better way to enable test doubles in code than spreading mock.patch everywhere.
Replacing components of a system on demand is what dependency injection was made for, so let's see if it can help us to switch between using fakes and real services in our test suite.
Dependency Injection
ChatClientについて、setterと_get_connectionを削除してconnection_providerを持つようにする。
class ChatClient:
    def __init__(self, nickname, connection_provider):
        self.nickname = nickname
        self._connection = None
        self._connection_provider = connection_provider
        self._last_msg_idx = 0

    def send_message(self, message):
        sent_message = "{}: {}".format(self.nickname, message)
        self.connection.broadcast(sent_message)
        return sent_message

    def fetch_messages(self):
        messages = list(self.connection.get_messages())
        new_messages = messages[self._last_msg_idx:]
        self._last_msg_idx = len(messages)
        return new_messages

    @property
    def connection(self):
        if self._connection is None:
            self._connection = self._connection_provider(("localhost",
                                                          9090))
        return self._connection

    # @connection.setter
    # def connection(self, value):
    #     if self._connection is not None:
    #         self._connection.close()
    #     self._connection = value

    # def _get_connection(self):
    #     return Connection(("localhost", 9090))
上記の変更を加えることでpatchなどに頼らずにテストを簡単に書けるようになる。
# Before
    def test_client_connection(self):
        client = ChatClient("User 1")

        connection_spy = unittest.mock.MagicMock()
        with unittest.mock.patch.object(client, "_get_connection",
                                        return_value=connection_spy):
            client.send_message("Hello World")
        # spyが期待通りの値を設定されて呼ばれているかテストする
        connection_spy.broadcast.assert_called_with(("User 1: Hello World"))

# After
    def test_client_connection(self):
        connection_spy = unittest.mock.MagicMock()

        client = ChatClient("User 1", connection_provider=lambda *args:connection_spy)
        client.send_message("Hello World")
        connection_spy.broadcast.assert_called_with(("User 1: Hello World"))
So dependency injection can make your life easier when testing, but actually also makes your implementation far more flexible.
Suppose that we want to have our chat app working on something different than SyncManagers; now it's a matter of just passing a different kind of connection_provider to our clients.
Whenever your classes depend on other objects that they are going to build themselves, it's usually a good idea to question whether that's a place for dependency injection and whether those services could be injected from outside instead of being built within the class itself.
Dependency Injection Tool
Frameworkを使えば自動でDependencyを見つけてくれる。
メジャーなものにgoogle/pinject: A pythonic dependency injection library. がある。
Pytest
pytest概要
pytestのルール
pytestは以下のルールを守っている限りpytestコマンドで自動でテスト対象を探してくれる。
ルールを変更することも可能だが、どうしてもそうする必要がない限り守っておいた方がいい。
- テストを格納するディレクトリ名は
testsにする - ファイル名は
test_*.pyの形式 - classの名前は
Testで始める。(exclass TestSimple) - functionとmethodの名前は
testから始める(exdef test_simple())
テストの実行
テスト対象の指定方法
pytestコマンドでテストを実行できる。
テスト対象の指定方法には以下の2つがある
-
pytestコマンドのみ
ファイルやディレクトリを何も指定しないと、カレントディレクトリより下にあるテスト対象のファイル(test_*.py)を探して、全て実行する。 -
ディレクトリ、ファイル、関数等を指定
以下が代表的な指定方法
# ディレクトリを指定
pytest tests/core tests/contrib

# ファイルを指定
pytest test_player_mechanics.py`

# ディレクトリ指定とファイル指定の組み合わせ
pytest tests/core tests/contrib/test_text_plugin.py
オプションの指定
テストの実行時にオプションを指定することで
-v
テスト結果について、デフォルトよりも詳しい情報を出力してくれる
-s/--capture=method
--lf/--last-failed
実行対象の指定
以下のようにファイル名の後に::をつけることでテスト対象としての特定のClassやFunctionを指定できる。
pytest ch2/test_acceptance.py::TestChatClient
テストコードのAAA(Arrange、Act、Assert)を理解する
- 概要
- テストコードをArrange、Act、Assert(準備、実行、検証)のブロックに分けることで以下のメリットがある
- テストコード全体の見通しが良くなる
- 何をテストしているのかが明確になる
- テストコードをArrange、Act、Assert(準備、実行、検証)のブロックに分けることで以下のメリットがある
- それぞれの役割
- Arrange
- テストのための事前準備(データの定義等)を行う部分
- Act
- テスト対象の振る舞い(Action)を実行する部分
- Assert
- Actの実行結果の検証を行う部分
- 最初にテスト結果を検証する
- 次に副作用を検証する
- Arrange
実例
def test_reverse():
    """
    list.reverse inverts the order of items in a list, in place
    """
    # Arange
    greek = ['alpha', 'beta', 'gamma', 'delta']

    # Act
    result = greek.reverse()

    # Assert
    assert result is None
    assert greek == ['delta', 'gamma', 'beta', 'alpha']
参考資料
最初のUnit Test

Python Continuous Integration and Delivery: A Concise Guide with Examples
by Moritz Lenz
Published by Apress, 2018
binary-searchを通じてテストを学ぶ
- ソート済みのlist(haystack)を受け取って
- 指定された数字(needle)を検索する
- 数字が存在すればindexを返し、存在しなければValue Errorを返す
GitHubリポジトリ
Testing happy path
検索対象が見つかり、エラーが発生しないケースをまずは書いてみる。
- 通常のケースのテスト
- エッジケースのテスト(以下の例では2つめと3つめのテストが該当)
edge cases, with empty lists or strings as inputs, numbers being zero, accessing the first and last element of lists
def search(needle, haystack):
    left = 0
    right = len(haystack) - 1
    while left <= right:
        middle = left + (right - left) // 2
        middle_element = haystack[middle]
        if middle_element == needle:
            return middle
        elif middle_element < needle:
            left = middle + 1
        else:
            right = middle - 1
    raise ValueError("Value not in haystack")


def test_search():
    assert search(2, [1, 2, 3, 4]) == 1, \
        'found needle somewhere in the haystack'

def test_search_first_element():
    assert search(1, [1, 2, 3, 4]) == 0, \
        'search first element'

def test_search_last_element():
    assert search(4, [1, 2, 3, 4]) == 3, \
        'search last element'
Testing the unhappy path
Exceptionのケースをテストする
- pytestのraisesを使うことで想定通りにExceptionを返すことをテストできる。
def test_exception_not_found():
    from pytest import raises

    with raises(ValueError):
        search(-1, [1, 2, 3, 4])

    with raises(ValueError):
        search(5, [1, 2, 3, 4])

    with raises(ValueError):
        search(2, [1, 3, 4])
Dealing with Dependencies
外部ライブラリやデータベース、API等、外部の依存性が存在する場合
Unit Testでは外部へのアクションを以下の理由により避けた方がいい
-
The actions might have unwanted side effects, such as sending e-mails to customers or colleagues and confusing them or even causing harm.
-
You typically do not have control over external services, which means you do not have control over consistent responses, which makes writing reliable tests much harder.
-
Performing external actions, such as writing or deleting files, leaves the environment in a different state, which potentially leads to test results that cannot be reproduced.
-
Performance suffers, which negatively impacts the development feedback cycle.
-
Often, external services, such as databases or APIs, require credentials, which are a hassle to manage and pose a serious barrier to setting up a development environment and running tests.
-
外部の依存性をロジックから分離する
requestsライブラリを使ってPythonの公式ページから最も頻繁に使われている言葉をprintする処理。
ここでの外部の依存性はrequestsライブラリ
import requests
def most_common_word_in_web_page(words, url):
    """
    finds the most common word from a list of words
    in a web page, identified by its URL
    """
    response = requests.get(url)
    text = response.text
    word_frequency = {w: text.count(w) for w in words}
    return sorted(words, key=word_frequency.get)[-1]

if __name__ == '__main__':
    most_common = most_common_word_in_web_page(
        ['python', 'Python', 'programming'],
        'https://python.org/',
    )
    print(most_common)
依存部分を分割
コードを分割して、依存性を持った処理とそうでない処理に分ける。
これによってロジックが見やすくなるだけでなく、関心事を分ける事でそれぞれの関数の凝縮性を高くすることができる
import requests

# 依存性を持った箇所
def most_common_word_in_web_page(words, url):
    """
    finds the most common word from a list of words
    in a web page, identified by its URL
    """
    response = requests.get(url)
    return most_common_word(words, response.text)

# 依存性を持っていない箇所
def most_common_word(words, text):
    """
    finds the most common word from a list of words
    in a piece of text
    """
    word_frequency = {w: text.count(w) for w in words}
    return sorted(words, key=word_frequency.get)[-1]

if __name__ == '__main__':
    most_common = most_common_word_in_web_page(
        ['python', 'Python', 'programming'],
        'https://python.org/',
    )
    print(most_common)
most_common_wordはこのときpure function(渡された引数にのみ依存し、それ以外の外の世界に一切依存しない)になり、テストがしやすくなる。
most_common_wordに対するテストコードを以下の通り書いてみる
(tests/test_common_word.py)
import pytest
import sys, os
current_path = os.path.dirname(os.path.abspath(__file__))
sys.path.insert(0, current_path + '/../')

from dependency.common_word import most_common_word

def test_most_common_word():
    assert most_common_word(['a', 'b', 'c'], 'abbbcc') \
            == 'b', 'most_common_word with unique answer'

def test_most_common_word_empty_candidate():
    from pytest import raises
    with raises(Exception):
        most_common_word([], 'abc')

def test_most_common_ambiguous_result():
    assert most_common_word(['a', 'b', 'c'], 'ab') \
        in ('a', 'b'), "there might be a tie"

実際にテストコードを書いてみると、関数のソースコードを読むだけではわからないことを知ることできた。
- most_common_wordは単語の境界を一切気にしない
- 空の配列を渡すとexceptionを返す
- 2つ以上の単語が同じ順位ならどっちの順番で返すかは気にしない?
これらをドキュメントとして残しておくこともできる。
依存性の注入(Dependency injection for testing)
requestを行う関数most_common_word_in_web_pagesのテストを行う
ここで一つの考え方として、requestsライブラリを別のクラスで置き換えられたらテストがしやすくなると考えてみる。
具体的には以下のようにリクエストを実行する箇所を引数で受け取ったclassを使用するように置き換える
def most_common_word_in_web_page(words, url, user_agent=requests):
    """
    finds the most common word from a list of words
    in a web page, identified by its URL
    """
    response = user_agent.get(url)
    return most_common_word(words, response.text)
デフォルトではrequestsが使われるので結果は変わらない。
$ python common_word.py
Python
オリジナルのクラスを作成して置き換え
最もシンプルなdependency injectionの例。
Callerがテスト対象のfunctionが依存するものを選択する。
requetstの機能を代替するclassを作成して、それをuser_agentに渡すことで単体でのテストが可能になった。
def test_with_test_double():
    class TestResponse():
        text = 'aa bbb c'
    class TestUserAgent():
        def get(self, url):
            return TestResponse()
    result = most_common_word_in_web_page(
        ['a', 'b', 'c'],
        'https://python.org/',
        user_agent=TestUserAgent()
    )
    assert result == 'b', \
        'most_common_word_in_web_page tested with test double'

このテクニックはDependency Injectionと呼ばれているもので、対象の処理を呼ぶ側(Caller)が対象の処理が依存する内容をコントロールできる。
Dependency Injectionの考え方はテストだけでなく、機能開発でも役に立つ
Mock Objectsの活用
Test用のclassを作成する方法はテスト点が増える度に新しいclassを作成しないといけないので、スケールしない。
pythonのunittestにあるMock Objectを使用することで上記と同様の動きがもっとシンプルに実現できる。
Mock objectはreturn valueを設定するだけでなく、何回functionが呼ばれたかもテストすることができる。
(以下の例だとmock_requests.get.call_count == 1で1回だけ呼ばれたことを確認している)
def test_with_test_mock():
    from unittest.mock import Mock
    mock_requests = Mock()
    mock_requests.get.return_value.text = 'aa bbb c'
    result = most_common_word_in_web_page(
        ['a', 'b', 'c'],
        'https://python.org/',
        user_agent=mock_requests
    )
    assert result == 'b', \
        'most_common_word_in_web_page tested with test double'
    assert mock_requests.get.call_count == 1
    assert mock_requests.get.call_args[0][0] \
            == 'https://python.org/', 'called with right URL'
Mockオブジェクトのより詳細な使い方は以下参照
Patchの活用
Dependency Injectionが現実的でない時やコード自体を変えたくない時はpatchによって一時的にsymbol(requestsなどのライブラリ等)を置き換えることができる。
(これまでの例だとrequests)
(テスト対象のFunction)
def most_common_word_in_web_page_no_args(words, url):
    """
    finds the most common word from a list of words
    in a web page, identified by its URL
    """
    response = requests.get(url)
    return most_common_word(words, response.text)
(テストコード)
from unittest.mock import Mock, patch

def test_with_patch():
    mock_requests = Mock()
    mock_requests.get.return_value.text = 'aa bbb c'
    # 実際にpatchする箇所(この場合requests)と置き換え先のオブジェクト(Mock)を指定
    with patch('dependency.common_word.requests', mock_requests):
        result = most_common_word_in_web_page_no_args(
            ['a', 'b', 'c'],
            'https://python.org/',
        )
    assert result == 'b', \
        'most_common_word_in_web_page tested with test double'
    assert mock_requests.get.call_count == 1
    assert mock_requests.get.call_args[0][0] \
            == 'https://python.org/', 'called with right URL'
-
上記のwith patchの使い方の通り、importしたものをpatchする時は、importしたnamespaceで指定する必要がある
-
Libraryを切り離してコードを独立してできることが利点だが、そのためライブラリの使い方が正しいのかはテストできないので、よりスコープの広いテスト(Integration Test等)で動作を確認する必要がある。
pytestのmonkeypatchを活用
pytest
1. 特徴、unittestとの違い
unittestを使う場合
フィボナッチ数を返す関数fibonacciがあり、それをunittestでテストするとする。テストケースの書き方は以下のようになる。
import unittest
from fibo import fibonacci

class Test(unittest.TestCase):

    def test_fibo(self):
        result = fibonacci(4)
        self.assertEqual(result, 3)

if __name__ == '__main__':
    unittest.main()
テストを実行するには以下のように
# テストを通過したとき
$ python test_fibo.py
.
----------------------------------------------------------------------
Ran 1 test in 0.000s

# 失敗したとき
$ python test_fibo.py
.
======================================================================
FAIL: test_fibo (__main__.Test)
----------------------------------------------------------------------
Traceback (most recent call last):
  File "test_fibo.py", line 8, in test_fibo
    self.assertEqual(result, 3)
AssertionError: 5 != 3

----------------------------------------------------------------------
Ran 1 test in 0.000s

FAILED (failures=1)
unittestと比較したpytestのメリット
assert一つですむ
unittestの場合、テスト対象の値、データ形式ごとに異なるassertメソッドを使わなければならない。
以下がunittestで使用できるassertの一覧。
self.assertEqual(a, b)
self.assertNotEqual(a, b)
self.assertTrue(x)
self.assertFalse(x)
self.assertIs(a, b)
self.assertIsNot(a, b)
self.assertIsNone(x)
self.assertIsNotNone(x)
self.assertIn(a, b)
self.assertNotIn(a, b)
self.assertIsInstance(a, b)
self.assertNotIsInstance(a, b)
self.assertRaises(exc, fun, *args, **kwds)
self.assertRaisesRegex(exc, r, fun, *args, **kwds)
self.assertWarns(warn, fun, *args, **kwds)
self.assertWarnsRegex(warn, r, fun, *args, **kwds)
self.assertLogs(logger, level)
self.assertMultiLineEqual(a, b)
self.assertSequenceEqual(a, b)
self.assertListEqual(a, b)
self.assertTupleEqual(a, b)
self.assertSetEqual(a, b)
self.assertDictEqual(a, b)
self.assertAlmostEqual(a, b)
self.assertNotAlmostEqual(a, b)
self.assertGreater(a, b)
self.assertGreaterEqual(a, b)
self.assertLess(a, b)
self.assertLessEqual(a, b)
self.assertRegex(s, r)
self.assertNotRegex(s, r)
self.assertCountEqual(a, b)
一方pytestはunittestのようにいくつものassert methodを覚える必要がなく、assertだけを使えばいい。
pytestのassertは自動で比較対象のオブジェクトの型を読み取って値の比較を行い、エラーが発生する場合にはその内容を分かりやすく教えてくれる。(詳細は次の項で説明)
テストが失敗した内容がわかりやすく表示される
pytestではテストケースが失敗した時、失敗した箇所だけでなく、具体的にどの要素が異なったため失敗したのか、詳細な内容を表示してくれる。
エラー内容を把握する時間がかなり短縮できる。
# pythonでassertを実行した際
>>> assert "using assert for errors" == "using asert for errors"
Traceback (most recent call last):
  File "<stdin>", line 1, in <module>
AssertionError

# pytestで実行した際
$ pytest test_long_lines.py -q
F                                                                                    [100%]
========================================= FAILURES =========================================
_____________________________________ test_long_lines ______________________________________

    def test_long_lines():
>       assert "using assert for errors" == "using asert for errors"
E       AssertionError: assert 'using assert for errors' == 'using asert for errors'
E         - using assert for errors
E         ?        -
E         + using asert for errors

test_long_lines.py:2: AssertionError
1 failed in 0.03s
以下はlistの出力内容をテストする場合のエラー出力内容。
どの要素に差異があるのか一目瞭然
$ pytest test_long_lines.py::test_long_list -q
F                                                                                    [100%]
========================================= FAILURES =========================================
______________________________________ test_long_list ______________________________________

    def test_long_list():
>       assert ['a', 'very', 'long', 'list', 'of', 'items'] == [
                'a', 'very', 'long', 'list', 'items']
E       AssertionError: assert ['a', 'very',...'of', 'items'] == ['a', 'very',...ist', 'items']
E         At index 4 diff: 'of' != 'items'
E         Left contains one more item: 'items'
E         Full diff:
E         - ['a', 'very', 'long', 'list', 'of', 'items']
E         ?                              ------
E         + ['a', 'very', 'long', 'list', 'items']

test_long_lines.py:5: AssertionError
1 failed in 0.04s
効率的にテストケースを作成するための機能が豊富
共通的に使う値を再利用できるfixtureや実行するテストケースを細かく分類できるmark、テストデータが異なるケースを簡潔に記載できるParametrizeなど、効率的にテストを書くための機能が豊富。
fixture
-
同じリソース(DBのコネクション、ファイル等)を複数のテストケースで使いたい場などの解決策として、pytestではfixtureが利用できる
-
定義したfixtureには関数、メソッドの引数に設定することでテストケースの中でアクセスできる
-
動作の仕組みとしては以下の通り
- pytestはtest functionの実行前に引数の設定を見る
- 引数があれば、同じ名前のfixtureを探し、実行する
- fixtureの実行結果がパラメータとして渡され、test functionが実行される
以下の例が示すように複数のテストケースで同じデータを使いたい場合がある。
このとき、同じデータをコピーすると保守性が損なわれる(例えばデータの形式が変わった時、すべてのコードを修正する必要がある)
def test_highest_rated():
    series = [
        ("The Office", 2005, 8.8),
        ...,
    ]
    assert highest_rated(series) == "Seinfeld"

def test_oldest():
    series = [
        ("The Office", 2005, 8.8),
        ...,
    ]
    assert oldest(series) == "Seinfeld"
fixturesを使えば、関数の引数としてfixtureの名前を設定するだけで、fixtureの実行結果?をパラメータとして受け取ることができる。
@pytest.fixture
def comedy_series():
    return [
        ("The Office", 2005, 8.8),
        ("Scrubs", 2001, 8.4),
        ("IT Crowd", 2006, 8.5),
        ("Parks and Recreation", 2009, 8.6),
        ("Seinfeld", 1989, 8.9),
    ]

def test_highest_rated(comedy_series):
    assert highest_rated(comedy_series) == "Seinfeld"

def test_oldest(comedy_series):
    assert oldest(comedy_series) == "Seinfeld"
関数だけでなくメソッドにもfixtureを定義することができるが、メソッドが属するclassからしか呼び出すことはできない。
Mark
Markとは
- テストにmarkをつけて実行の有無を指定できる
- パラメータを渡せる
具体的には以下のようにしてmarkをつける(functionだけでなくclassにもつけられる)
# mark
@pytest.mark.slow
def test_long_computation():

@pytest.mark.timeout(10, method="thread")
def test_topology_sort():
pytestの実行時に-mオプションをつけることで、markの有無によって実行するテストを変更できる
# slowがついたものだけ実行
pytest -m slow

# slowがついていて、serialがついていないもののみ実行
pytest -m "slow and not serial"
これが具体的にどんなケースで役立つかというと、主にCIでのテスト実行などで、
環境や依存性の問題などでテストケース全体として失敗してしまう場合に、
最初から最後までのテストを毎回実施するのではなく、一部のテストだけを実施したい場合などに使える。
例えば以下のように、テストにレイヤーを設けてその順番で実行すれば環境に依存せずすぐに実行してフィードバックがもらえるテストケースのみを最初に実行することで、開発のスピードを早くすることができる。
$ pytest -m "smoke"
...
$ pytest -m "unittest"
...
$ pytest -m "integration"
...
$ pytest -m "not smoke and not unittest and not integration"
markに伴う問題と解決策
以下のようにmarkによってレイヤーごとにテストを実施する場合typo等によって意図しないmarkがついた場合、
最後までtypoしたテストは実行されなくなってしまう。
$ pytest -m "smoke"
...
$ pytest -m "unittest"
...
$ pytest -m "integration"
...
$ pytest -m "not smoke and not unittest and not integration"
こうしたミスを防ぐために以下2点の対策を行うべき。
- pytest.iniにmarkersを定義する
- 設定ファイルにmarkの一覧を定義できる
- 実行時には
--strictのオプションをつける- つけることで、pytest.iniに定義されていないmarkがあるとエラーを出せる
[pytest]
addopts = --strict
markers =
    slow
    serial
    smoke: quick tests that cover a good portion of the code
    unittest: unit tests for basic functionality
    integration: cover to cover functionality testing
Parametrize
同じ関数に対して異なる値でいくつかのパターンを定義したい場合、それぞれにテストケースを書くとかなりテストコードがながくなってしまう。
pytestで提供されているParametrizeの機能を使うと上記のようなケースでも簡潔にテストを記載することができる。
# parameterを使わない場合
from my_module import string_to_bool

class TestStringToBool(object):

    def test_it_detects_lowercase_yes(self):
        assert string_to_bool('yes')

    def test_it_detects_odd_case_yes(self):
        assert string_to_bool('YeS')

    def test_it_detects_uppercase_yes(self):
        assert string_to_bool('YES')

    def test_it_detects_positive_str_integers(self):
        assert string_to_bool('1')

    def test_it_detects_true(self):
        assert string_to_bool('true')

    def test_it_detects_true_with_trailing_spaces(self):
        assert string_to_bool('true ')

    def test_it_detects_true_with_leading_spaces(self):
        assert string_to_bool(' true')


# Parametrizeを利用した場合
import pytest
from my_module import string_to_bool

true_values = ['yes', '1', 'Yes', 'TRUE', 'TruE', 'True', 'true']

class TestStrToBool(object):

    @pytest.mark.parametrize('value', true_values)
    def test_it_detects_truish_strings(self, value)
        assert string_to_bool(value)
以下のように変数として値を渡すことができるし、異なるデータタイプを渡すこともできる。
import pytest
import sys, os

current_path = os.path.dirname(os.path.abspath(__file__))
sys.path.append(current_path + '/.../')

from _lambda import prod_api_screening

datas = [
    (100, {"divide": 10,  "scale": 1}, '10.0')
]

@pytest.mark.parametrize("decimals, unit_item, expect", datas)
def test_edit_decimal(decimals, unit_item, expect):
    screening = prod_api_screening.ScreeningPageClass()

    result = screening._edit_decimal(decimals, unit_item)

    assert result == expect
Testを書くときのこつ、プラクティス
浮動小数点の比較にはpytest.approxを使う
floatを扱う場合、現実世界での理解と異なる動作をすることがあり、単純な==の比較ではダメなケースがある。
>>> 0.1 + 0.2 == 0.3
False
こうしたケースで無理やり演算を追加して比較するのではなく、pytst.approxを使えば一発で解決する
def test_approx_simple():
    assert 0.1 + 0.2 == approx(0.3)
変数の外だしおよびコマンドライン引数による切り替え
conftest.pyでの読み込み
- 以下のように変数をファイルに保存し、それをconftest.pyで読み込めば、テスト実行時には
os.getenv()でアクセスできる - また、
pytest_addoptionを定義することでpytestコマンドに渡せる引数が設定できるので、これを活用して環境ごとに異なるインプットファイルを読みこませることができる
(variables.json)
{
  "BASE_URL": "https://xxxxxxxxxx.execute-api.ap-northeast-1.amazonaws.com/api/",
  "API_KEY": "xxxxxxxxxxxxxxxxx"
}
(conftest.py)
def pytest_addoption(parser):
    """Add pytest command options."""
    parser.addoption(
        "--dev",
        action="store_true",
        default=False,
        help="set local endpoint"
    )

@pytest.fixture(scope='session', autouse=True)
def cmdopt(request):
    """Get options value."""

    # ENV
    os.environ['ENV'] = request.config.getoption("--env")

    # load file
    if(request.config.getoption("--local")):
        set_environment_variable('./variable.dev.json')
    else:
        print(os.getcwd())
        set_environment_variable('./tests/system/variables.json')


def set_environment_variable(json_filepath):
    """Jsonを読み込み環境変数にセットする."""
    with open(json_filepath) as filedata:
        for key, value in json.load(filedata).items():
            os.environ[key] = value
上記の設定を行った上でプログラム側で以下のように環境変数を読みこめば、インプットファイルで定義した変数の値を各処理で共有でき、テストファイルごとに定義する必要がなくなる。
def test_foo():
    BASE_URL = os.getenv('BASE_URL')
# 開発環境のテスト
$ pytest tests --dev

# 本番環境のテスト
$ pytest tests
[Python] pytestのコマンド引数で環境変数を切り替えてみる
Python + pytestにて、pytestに独自のコマンドラインオプションを追加する
fixtureの活用
前項のケースでは環境変数にアクセスしていたが、conftest.pyで使用したい値(URL, API KEY等)をfixtureに追加で設定することで、テストケースの方では引数にfixtureを設定するだけでそのまま値を使用することができる
(conftest.py)
...
@pytest.fixture(scope='session')
def base_url(cmdopt):
    return os.getenv('BASE_URL')
(test_xxxx.py)
def test_foo(base_url):
    url =  os.path.join(base_url, 'foo/bar')
コマンドライン引数のテスト
- コマンドライン引数は
sys.argv.append('test_program')で追加できる - 引数は追加されていくので
del sys.argv[:]で毎回消したほうが良い
pythonのunittestでコマンドライン引数をテストする方法と注意点
テストレポートの作成
HTML形式のレポート
pytest-htmlをインストールした上で以下のコマンドを実行することでHTML形式のレポートを出力できる。
pytest --cov=functions/ tests/unit --html=index.html
参考資料:pytest-htmlでテスト関数のdocstringをレポートに出力する
また、以下の記事のように出力内容をアレンジすることもできる
XML形式(JUnitフォーマット)のレポート
実行時のオプションに--junitxml=foo.xmlとつけることでJunit形式のxmlを出力できる。
GitLab等のCIサービスで利用する際に便利(結果を読み取ってケース数の差分等を表示してくれる)
pytest --cov=functions/ tests/unit --junitxml=report.xml
カバレッジの計測
pytest-covというライブラリをインストールすることで、テストのカバレッジを出力することができる。
インストール自体は通常のライブラリと同様pipから行えばOK
pip install pytest-cov
後はpytestの実行時にカバレッジの取得対象となるソースコード、テストコードの順で指定を行えばカバレッジが取得される
pytest -v --cov=src tests
カバレッジは以下のような内容でコンソールに表示される。
-------------------- coverage: ... ---------------------
Name                 Stmts   Miss  Cover
----------------------------------------
myproj/__init__          2      0   100%
myproj/myproj          257     13    94%
myproj/feature4286      94      7    92%
----------------------------------------
TOTAL                  353     20    94%
HTML形式での出力
cov-reportを引数として設定することでHTML形式のレポートが出力できる。(出力先としてhtmlcovというディレクトリが生成される)
pytest --cov=functions/ tests/unit --cov-report=html
注意点として、cov-reportで形式を指定するとコンソールへの出力は行われなる。GitLab等のCIサービスでコンソールへの出力結果からカバレッジ率を取得したい場合には、上記の設定だけだと取得出来なくなってしまう。
複数の形式で同時に出力
解決策としては、pytest-cov - Reportingに記載の通りcov-reportは複数指定可能なので、コンソールへの出力を意味する--cov-report termを追加すればOK
以下のイメージでコンソールでの出力とHTMLへの出力が同時に行われる
$ pytest --cov-report term --cov-report=html
----------- coverage: platform linux, python 3.7.8-final-0 -----------
Name                                                                            Stmts   Miss  Cover
---------------------------------------------------------------------------------------------------
path/to/your/file/test.py     112      8    93%
---------------------------------------------------------------------------------------------------
TOTAL                                                                             112      8    93%
Coverage HTML written to dir htmlcov
Test-Driven Development while Creating a Todo List
テストを書くことでコードが何をすればいいのか考えることを強制する。
そして何を実現したいか仕様を考えることがソフトウェアにつながる。
問題なのは急いでいる時に一番最初に飛ばされるのはテストであること。しかしテストはエラーやバグを防ぐためにあるものなので、テストを飛ばすことで逆にエラーやバグが増え、より時間がなくなるという悪循環に陥ってしまう。
TDDはこういった事態に陥らないために開発された手法
Starting Projects with TDD
まずはAcceptance
- シェル上でコマンドを受け付けて、結果をシェル上に表示したい
上記の要件をテストするためのコードを書く。
class TestTODOAcceptance:
    def test_main(self):
        app = TODOApp(io=(self.fake_input, self.fake_output))
- インタラクティブなやりとりを実現したい
上記を実現するため、ユーザからのコマンドを常に受け付けられるようにする
class TestTODOAcceptance:
    def test_main(self):
        app = TODOApp(io=(self.fake_input, self.fake_output))

+        app_thread = threading.Thread(target=app.run, daemon=True)
+        app_thread.start()
- ユーザ側でアプリを終了できるようにする
        self.send_input("quit")
        app_thread.join(timeout=1)
        assert self.get_output() == "bye!\n"
- ユーザにコマンドを受け付けていることを示すためプロンプトを表示する
テスト実行の準備
setup.pyを作成する。
.
├── src
│   ├── setup.py
│   ├── todo
└── tests
    ├── __init__.py
    └── test_acceptance.py
from setuptools import setup

setup(name='todo', packages=['todo'])
pipでアプリケーションをインストールする。
pip install -e src/
これでテストを実行するときにライブラリを参照できるようになった。
インプットとアウトプットの値の設定
テストの際に非同期で利用できるまで待ったり、スレッドを超えて共有したいという要件から、インプットとアウトプットの値はqueueで表現することにする。
テストケースの実行前にqueueを生成したいが、pytestを使っているのでfixtureで実現する。
class TestTODOAcceptance:
    @pytest.fixture
    def fake_inputs(self):
        self.inputs = queue.Queue()
        self.outputs = queue.Queue()

        self.fake_output = lambda txt: self.outputs.put(txt)
        self.fake_input = lambda: self.inputs.get()

        self.get_output = lambda: self.outputs.get(timeout=1)
        self.send_input = lambda cmd: self.inputs.put(cmd)


    def test_main(self, fake_inputs):
詳細は以下参照。
End-to-End Testing with the Robot Framework
To guarantee that our applications behave properly, it is a good idea to have a few tests that verify at least the more important areas of the application using a real browser.
The Robot Framework is an automation framework mostly used to create acceptance tests in the Acceptance Test Driven Development (ATDD) and Behavior Driven Development (BDD) styles.
Robot FrameworkはBDD等を実現するためのライブラリ。
pytest-bddとは異なるPyTestをベースにはしておらず、WebとモバイルのE2Eテストを書くために使われている。
robotコマンドで以下の通りテストの実行ができる。
 robot hellotest.robot
==============================================================================
Hellotest
==============================================================================
Hello World                                                           | PASS |
------------------------------------------------------------------------------
Hellotest                                                             | PASS |
1 test, 1 passed, 0 failed
==============================================================================
テストの実行結果はlog.htmlに保存され、Robot Frameworkで実行された全てのコマンドが保存される。
テストケースなども確認できる。
Web Browserを使ったテスト
以下のライブラリが入っていればブラウザを使ったテストができる。
robotframeworkrobotframework-seleniumlibrary
また、webdrivermanagerを使うことでテストに使用するブラウザをインストールできる。
$ webdrivermanager firefox chrome
Pytestでエラーケースのテスト
pytestで例外を扱う場合に以下のようね例を見ることがあるが、現在mnessageという引数は使えなくなっている。("message" parameter of pytest.raises)
It is a common mistake to think this parameter will match the exception message, while in fact it only serves to provide a custom message in case the pytest.raises check fails. To prevent users from making this mistake, and because it is believed to be little used, pytest is deprecating it without providing an alternative for the moment.
from pytest import raises

with raises(Exception, message="empty word raises"):
    ...
pytest.failを使って以下のように記載する。
    from pytest import raises
    with raises(Exception):
        most_common_word([], 'abc')
        pytest.fail("empty word raises")
Pytestの基本的な使い方
テストの選択
テストファイルの指定
以下のようにファイルを直接指定して実行ができる。
% pytest test_fixture.py
テストケースの指定
def test_something():
    a = 5
    b = 10
    assert a + b == 11

class TestMultiple:
    def test_first(self):
        assert 5 == 5

    def test_second(self):
        assert 10 == 10
-kオプションでテストするケースを指定できる。
% pytest -k first
====================== test session starts =======================
platform darwin -- Python 3.9.4, pytest-6.2.4, py-1.10.0, pluggy-0.13.1
...
collected 3 items / 2 deselected / 1 selected

test_sample.py .                                           [100%]

================ 1 passed, 2 deselected in 0.00s =================
notをつけることで指定したテストケース以外を実行することもできる。
% pytest -k "not something"
================================== test session starts ===================================
platform darwin -- Python 3.9.4, pytest-6.2.4, py-1.10.0, pluggy-0.13.1
...
collected 3 items / 1 deselected / 2 selected

test_sample.py ..                                                                  [100%]

============================ 2 passed, 1 deselected in 0.00s =============================
標準出力の表示
-sオプションをつけることで、printなど標準出力への出力結果を表示できる。(デフォルトではテストが失敗しない限り表示されない)
pytest tests -s
PytestのFixture
unittestのsetUpやtearDownなどはpytestでもそのまま使えるが、pytestではfixtureによってその機能をさらに拡張している。(テストケースとfixtureを疎結合にしている)
-
@pytest.fixtureでfixtureの定義 -
@pytest.mark.usefixturesで定義したfixtureの適用 - fixtureの中身でyieldの前に実行されるコードはunittestの
setUpの代替になりテストケースの前に実行され、yieldの後に書いたコードはtearDownに相当し、テストケースの後に実行される
import pytest

@pytest.fixture
def greetings():
    print("HELLO!")
    yield
    print("GOODBYE")

class TestMultiple:
    def test_first(self):
        assert 5 == 5

    @pytest.mark.usefixtures("greetings")
    def test_second(self):
        assert 10 == 10
% pytest test_fixture.py -s
============================================ test session starts =============================================
platform darwin -- Python 3.9.4, pytest-6.2.4, py-1.10.0, pluggy-0.13.1
...
collected 2 items

test_fixture.py .HELLO!
.GOODBYE
Classへの適用
functionだけでなくclassにも適用できる。
fixtureの定義時にscopeで適用範囲が指定できるため、classを指定すればOK(他にもfunction, module, package, sessionの指定ができる。)
@pytest.fixture(scope="class")
def provide_current_time(request):
    import datetime
    request.cls.now = datetime.datetime.utcnow()

    print("ENTER CLS")
    yield
    print("EXIT CLS")

@pytest.mark.usefixtures("provide_current_time")
class TestMultiple:
    def test_first(self):
        print("RUNNING AT", self.now)
        assert 5 == 5

    @pytest.mark.usefixtures("greetings")
    def test_second(self):
        assert 10 == 10
test_firstでself.nowにアクセスしているように、fixtureを通じて渡された値(変数)にテストケースからアクセスすることができる。
The request argument to fixtures represents a request for that fixture from a test. It provides some convenient attributes, such as the class that requested the fixture (cls), the instance of that class that is being used to run the test, the module where the test is contained, the tests run session, and many more, allowing us not only to know the context of where our fixture is being used but also to modify those entities.
Fixtureの定義場所
fixtureは以下のどちらかに記載できる。
- テストケースと同じモジュール内
- conftest.pyの中
conftest.pyはテストケースにおける__init__.pyのようなもので、テストケースの実行前に必ず読み込まれるので、ディレクトリごとにfixtureを上書きするなどしてテストの挙動を変えることができる。
ただし、実際にfixtureを使う場所と定義している場所が離れすぎると明らかにテストコードの内容が理解しづらくなる。基本的には使われている場所のできる限り近くに定義する。
全テストケースに適用する
conftest.pyを利用して、全テストケースに共通して適用する処理を作る。
- scopeは
sessionを指定する -
autouse=Trueを指定してテストケース側で設定を変更しなくても自動で適用されるようにする。
import pytest

@pytest.fixture(scope="session", autouse=True)
def setupsuite():
    print("STARTING TESTS")
    yield
    print("FINISHED TESTS")
すると同じコマンドを実行したときに上記で指定したfixtureが実行されることがわかる。
% pytest test_fixture.py -s -v
...
test_fixture.py::TestMultiple::test_first STARTING TESTS
ENTER CLS
RUNNING AT 2021-10-13 02:22:08.606573
PASSED
test_fixture.py::TestMultiple::test_second HELLO!
PASSEDGOODBYE
EXIT CLS
FINISHED TESTS


=========================== 2 passed in 0.00s ===========================
Fixtureを利用したDependency Injection
外部サーバにアクセスしてランダムに返される値にテスト対象のコードが依存しているとする。
@pytest.fixture
def random_number_generator():
    import random
    def _number_provider():
        return random.choice(range(10))
    yield _number_provider
テストコードが以下。
ポイントは引数にfixtureの名前を指定しているところで、引数に名前が渡されていれば自動で同じ名前のfixtureを探し、実行してその結果をテストケースに渡してくれる。
If a test has an argument, pytest will automatically consider that dependency injection and will invoke the fixture with the same name of the argument to provide the object that should satisfy that dependency.
def test_something(random_number_generator):
    a = random_number_generator()
    print(a)
    b = 10
    assert a + b >= 10
fixtureの上書き
テストケースの中で常に返される値を1にするという要件が出た場合、fixtureは上書きすることができるので、以下のようにテストケースの中でconftest.pyで定義したものと同じ名前で定義をしなおせばいい。
import pytest

def test_something(random_number_generator):
    a = random_number_generator()
    b = 10
    assert a + b == 11


@pytest.fixture
def random_number_generator():
    """常に1が返される"""
    def _number_provider():
        return 1
    yield _number_provider
Toxを利用したテスト環境の構築
自走プログラマー より
1つのテストメソッドでは1つの項目のみ確認する
1つのテストメソッドや関数に確認観点を詰め込み過ぎると何をテストしているのかが分かりにくくなる。
また、テストを実行してエラーが発生した際も具体的にどういうケースでエラーが発生したのかがわからないので、対応に時間がかかる。
def validate(text):
    return 0 < len(text) <= 100

class TestValidate:
    def test_validate(self):
        assert validate("a")
        assert validate("a" * 50)
        assert validate("a" * 100)
        assert not validate("")
        assert not validate("a" * 101)
以下のように1つのテストメソッドや関数では1つの観点でのみ確認を行うようにすると、テスト観点がすぐに理解できるようになり、可読性が上がるだけでなく、レビュー時やコードを読む際に観点の抜け漏れがないか確認しやすくなる。
この際、テストメソッドの名前を何をテストしているか明確にすると、名前からテスト内容が読み取れるようになりさらに可読性が上がる。
class TestValidate:
    def test_valid(self):
        """検証が正しい場合
        """
        assert validate("a")
        assert validate("a" * 50)
        assert validate("a" * 100)

    def test_invalid_too_short(self):
        """検証が正しくない: 文字が短すぎる場合
        """
        assert not validate("")

    def test_invalid_too_long(self):
        """検証が正しくない: 文字が長すぎる場合
        """
        assert not validate("a" * 101)
また、pytestを使っている場合にはparametrizeの機能を使うと複数のデータをすっきりと分けることができる。
class TestValidate:
    @pytest.mark.parametrize("text", ["a", "a" * 50, "a" * 100])
     def test_valid(self, text):
        """検証が正しい場合
        """
        assert validate(text)

    @pytest.mark.parametrize("text", ["", "a" * 101])
    def test_invalid_too_short(self, text):
        """検証が正しくない場合
        """
        assert not validate(text)
テストの実行順序に依存しないテストを書く
各テストメソッドが他のテストメソッドに依存していると、実行の順序が変わったタイミングでテストが失敗するようになる。
以下のテストは各テストメソッドが他メソッドに依存している。
self.dataの中身を変更し続けているので、上から順番にテストが実行されないと成功しない。
import pytest

class TestSum:
    def setup(self):
        self.data = [0, 1, 2, 3]

    def test_sum(self):
        self.data.append(4)
        actual = sum(self.data)
        assert actual == 10

    def test_negative(self):
        self.data.append(-5)
        actual = sum(self.data)
        assert actual == 5

    def test_type_error(self):
        self.data.append(None)
        with pytest.raises(TypeError):
            sum(self.data)
こういった他のテストメソッドに依存しているケースの問題は、1つのテストメソッドとしてどのような結果を持って正しさを保証しているかが曖昧になること。
他のテストに依存しているとテストを分離したり、移動したり、足したり、消したりしたときにテストが壊れてしまう。
このケースであれば、テストメソッドごとにテストデータを定義することで、各テストメソッドを独立させ、それぞれのテストケースの検証内容を明確にしている。
import pytest

class TestSum:

    def test_sum(self):
        assert sum([0, 1, 2, 3, 4]) == 10

    def test_negative(self):
        assert sum([0, 1, 2, 3, 4, -5]) == 5

    def test_type_error(self):
        with pytest.raises(TypeError):
            sum([1, None])
ユニットテストにおける独立性の重要さについては以下の記事に詳しくまとめられている。
あるテストの内容が他のテストの結果に作用するとき、それらのテストには依存関係があります。しかし、良いユニットテストはテスト間に依存関係を持ってはならず、互いに独立(Independent)していなければなりません。
テスト間が static 領域やグローバル変数、外部ファイルやデータベース、 Singleton 等を介してつながってしまっているテストは Independent ではありません。
Independent でないユニットテストは、特定の順番でないと通らないテストや、テスト群をまとめて動かすと通るのに、一つだけではなぜか通らない(またはその逆)テストのような、Erratic Test (不安定なテスト)を生み出します。特にテストが裏で繋がって作用しあってしまうことを、Interacting Testsといいます。
また、 Independent でないユニットテストは、並列実行できないという弱点を抱えることにもなります。実行順に依存関係があるテストたちは、直列に実行しなければならないからです。
現在時刻が関わるユニットテストから、テスト容易性設計を学ぶ - t-wadaのブログ
fixtureの定義方法
import pytest

@pytest.fixture(scope="function")
def test_db():
    print('Setup')

    yield 1

    print("TearDown")
このときfixutureの定義方法として以下2つがある。
パターン1
@pytest.mark.usefixtures("test_db")
def test_read_users_empty():
    response = client.get("/users/")
    assert response.status_code == 200
    assert response.json() == []
パターン2
def test_read_users_empty(test_db):
    response = client.get("/users/")
    assert response.status_code == 200
    assert response.json() == []