Supabase サードパーティ認証を試してみる 【Supabase + Amazon Cognito】
はじめに
こんにちは!
「愛犬との毎日を楽しく便利にするアプリ オトとりっぷ」でエンジニアしています、足立です!
この記事では、先日の Supabase Launch Week で発表されたサードパーティ認証(Amazon Cognito)を試してみたいと思います。
Supabase + Amazon Cognito の使用感の参考になれば幸いです。
準備作業
公式のドキュメントは以下の通りです。
Cognito とフロントエンドからそれを利用するための基礎的な環境を構築します。
Cognito のセットアップ
セットアップの諸々が楽という理由で Amplify Gen2 を利用してパパッと終わらせましょう。
# next.jsのセットアップ
$ npm create next-app@14 -- next-amplify-gen2 --typescript --eslint --app --no-src-dir --no-tailwind --import-alias '@/*'
$ cd next-amplify-gen2

# amplify gen2のセットアップ
$ npm create amplify@latest
> ? Where should we create your project? (.) # press enter

# 必要なライブラリのインストール
$ npm install @aws-amplify/ui-react @aws-amplify/ui-react-storage

# amplify sandboxの起動
$ npx ampx sandbox
Amplify Gen2 を利用しての作業はこれだけなので、sandbox は削除せずにそのまま置いておきます。
フロントエンドのセットアップ
Cognito 認証のために、Amplify JS ライブラリを利用します。
以下の通り修正すると、サインイン / サインアップ 画面が出てきて、認証を追加することができるようになります。
app/page.tsx
'use client';

import { withAuthenticator } from '@aws-amplify/ui-react';
import '@aws-amplify/ui-react/styles.css';

function App({ signOut }: { signOut: any }) {
  return (
    <>
      <h1>Hello, Amplify 👋</h1>
      <button onClick={signOut}>Sign out</button>
    </>
  );
}

export default withAuthenticator(App);
components/ConfigureAmplify
'use client';

import config from '@/amplify_outputs.json';
import { Amplify } from 'aws-amplify';

Amplify.configure(config, { ssr: true });

export function ConfigureAmplifyClientSide() {
  return null;
}
app/layout.tsx
import { ConfigureAmplifyClientSide } from '@/components/ConfigureAmplify';
import type { Metadata } from 'next';
import { Inter } from 'next/font/google';

const inter = Inter({ subsets: ['latin'] });

export const metadata: Metadata = {
  title: 'Create Next App',
  description: 'Generated by create next app',
};

export default function RootLayout({
  children,
}: {
  children: React.ReactNode;
}) {
  return (
    <html lang='en'>
      <body className={inter.className}>
        <ConfigureAmplifyClientSide />
        {children}
      </body>
    </html>
  );
}
これで、Cognito 認証を利用するための下準備が終わりました。
Supabase のセットアップ
次に Supabase の下準備をします。
(Supabase の細かな説明は少々省かせていただきますので、ご了承ください。)
まず、サードパーティ認証を利用するためには、Pro プラン以上が必要です。
無料プランの方は、この記事で満足するか お金にものを言わせましょう。
次に、テーブルを作成します。
サイドバーのSQL Editorを選択し、以下の SQL を実行します。
-- 1. Create table
create table if not exists public.users (
  identity_id text primary key,
  sub text not null
);

-- 2. Enable RLS
alter table public.users enable row level security;

-- 3. Create Policy
create policy "users can all"
on public.users
to authenticated
using (auth.jwt() ->> 'sub' = sub)
with check (auth.jwt() ->> 'sub' = sub);
users テーブルを作成し、row level security(RLS)を 有効 にして、RLS 用のポリシーをアタッチしました。RLS を有効にすることで、ポリシーの条件をクリアしたクエリのみが許可されるようになります。
次に、プロジェクトにサードパーティ認証を追加します。
- サイドバーの
Project Setting→Authenticationと移動し、プロジェクトの認証設定に移動する - 一番下までスクロールし、
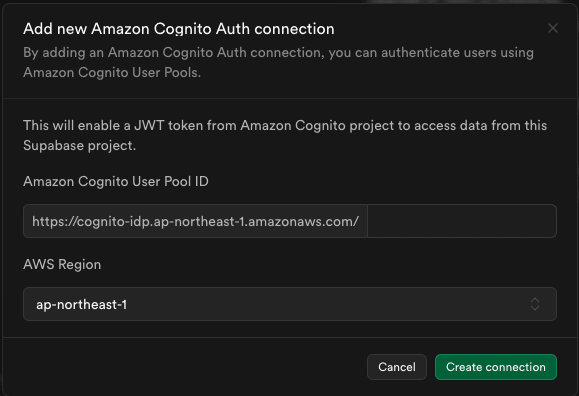
Third Party Authという項目があるので、Add providerで Amazon Cognito を選択する - 以下のような入力画面が表示されるので、必要事項を入力する

User Pool ID が分からない場合は、以下の json ファイルに記載があります。
{
  "auth": {
    "user_pool_id": "<このID>",
    "aws_region": "ap-northeast-1",
    ...
これで Supabase 側の準備が終わりました。
Supabase + Cognito 認証追加作業
Cognito トリガー追加
Cognito のトークン生成前 Lambda トリガーを追加し、トークン情報にrole: 'authenticated'属性を付与します。これが無いと、JWT 認証結果がanonとなってしまい、正常に認証されないので注意が必要です。
- AWS マネージメントコンソールから、Amazon Cognito > ユーザープール > amplifyAuthUserPool...、と対象の CognitoUserPool に移動する
- 高度なセキュリティタブを選択し、
高度なセキュリティを On にする - ユーザープールのプロパティタブを選択し、
Lambda トリガーを追加する - トリガータイプに認証を選択し、認証内容にトークン生成前 トリガーを選択する
-
Lambda関数を作成を選択し、その結果をトリガーに割り当てる
export const handler = async (event) => {
  event.response = {
    claimsAndScopeOverrideDetails: {
      accessTokenGeneration: {
        claimsToAddOrOverride:{
          role: 'authenticated',
        }
      }
    },
  }

  return event
}
これで、Cognito トリガー追加作業は完了です。
フロントエンドから Supabase に接続する
まずは、必要なライブラリを追加します。
$ npm install @supabase/supabase-js
次に、フロントエンドを書き換えて、supabase クライアントライブラリをセットします。
'use client';

import { withAuthenticator } from '@aws-amplify/ui-react';
import '@aws-amplify/ui-react/styles.css';
import { createClient } from '@supabase/supabase-js';
import { fetchAuthSession } from 'aws-amplify/auth';
import { useState } from 'react';

const supabase = createClient('https://<supabase-project>.supabase.co', 'SUPABASE_ANON_KEY', {
    accessToken: async () => {
      const tokens = await fetchAuthSession();
      return tokens?.tokens?.accessToken.toString() || '';
    },
  }
);

function App({ signOut }: { signOut: () => void }) {
  const [users, setUsers] = useState<string[]>([]);

  const getUsers = async () => {
    const { data, error } = await supabase.from('users').select('*');
    if (error) throw error;
    console.log(data);
    const identityIds = data?.map((user: any) => user.identityId as string);
    setUsers(identityIds);
  };

  const createUser = async () => {
    const tokens = await fetchAuthSession();
    const { data, error } = await supabase
      .from('users')
      .insert([{ identity_id: tokens.identityId, sub: tokens?.userSub }]);
    if (error) throw error;
    console.log(data);
  };

  return (
    <main>
      <h1>Hello, Amplify 👋</h1>

      <section>
        <h2>User</h2>
        <button onClick={getUsers}>Get users</button>
        <button onClick={createUser}>Create user</button>
        <ul>
          {users.map((id) => (
            <li key={id}>{id}</li>
          ))}
        </ul>
      </section>

      <section>
        <h2>Auth</h2>
        <button onClick={signOut}>Sign out</button>
      </section>
    </main>
  );
}

export default withAuthenticator(App);
試してみた
実際に動かしてみましょう!
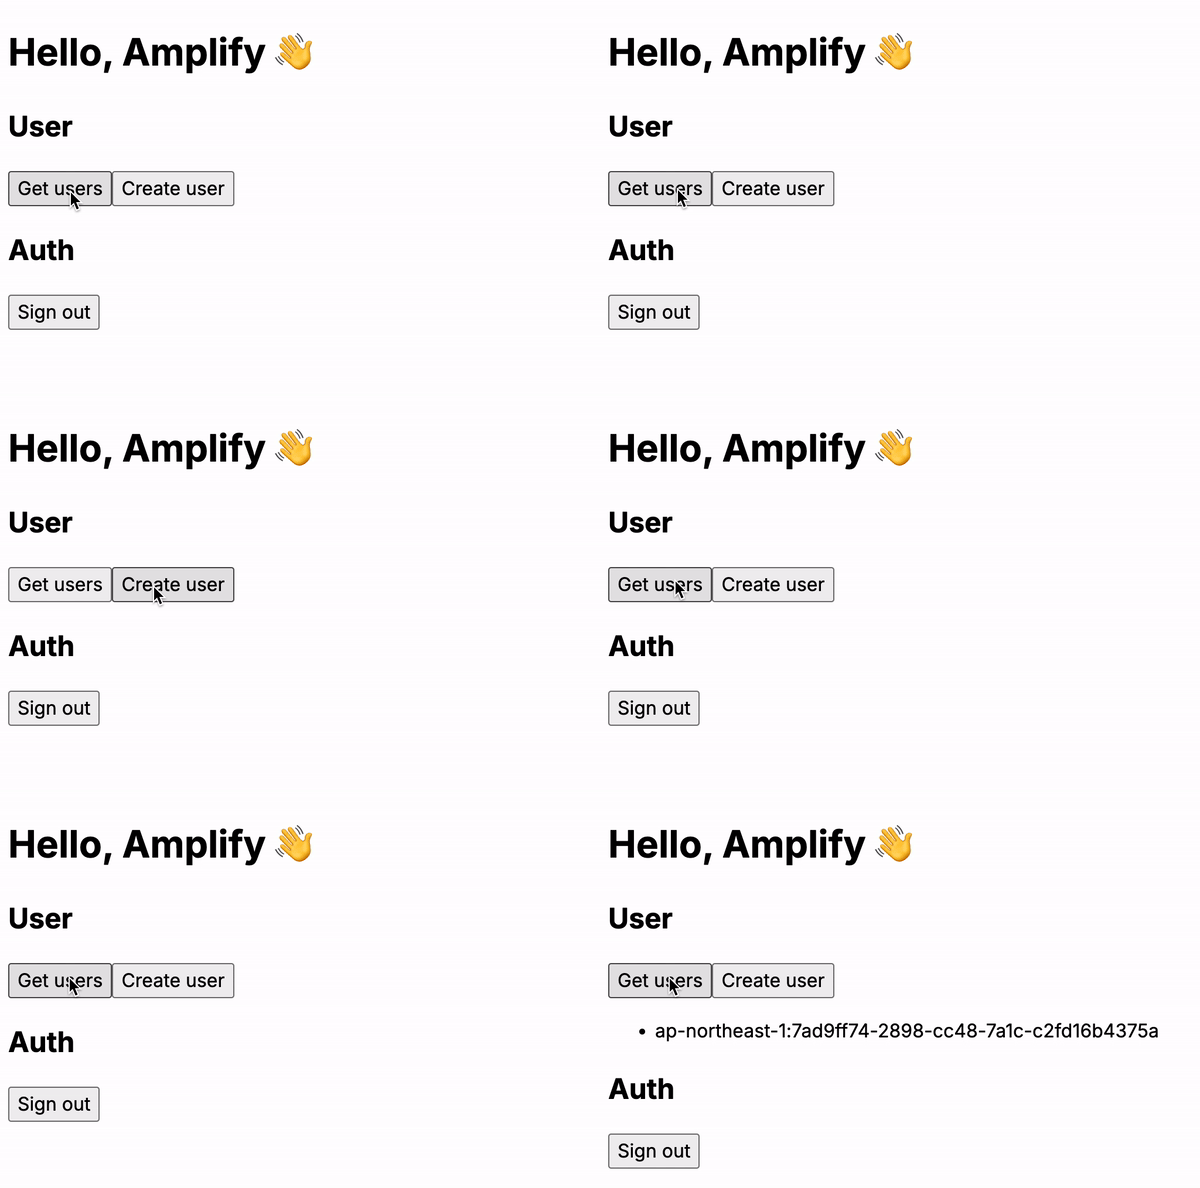
サインアップした直後はユーザー情報を取得できませんが、Create Userした後ではユーザー情報にアクセスできるようになっています。

Supabase 上にも追加されているのが確認できます。

さて、ここからが本領発揮です。
RLS 有効なので、このユーザーは sub が一致する情報しかフェッチできないはずです。

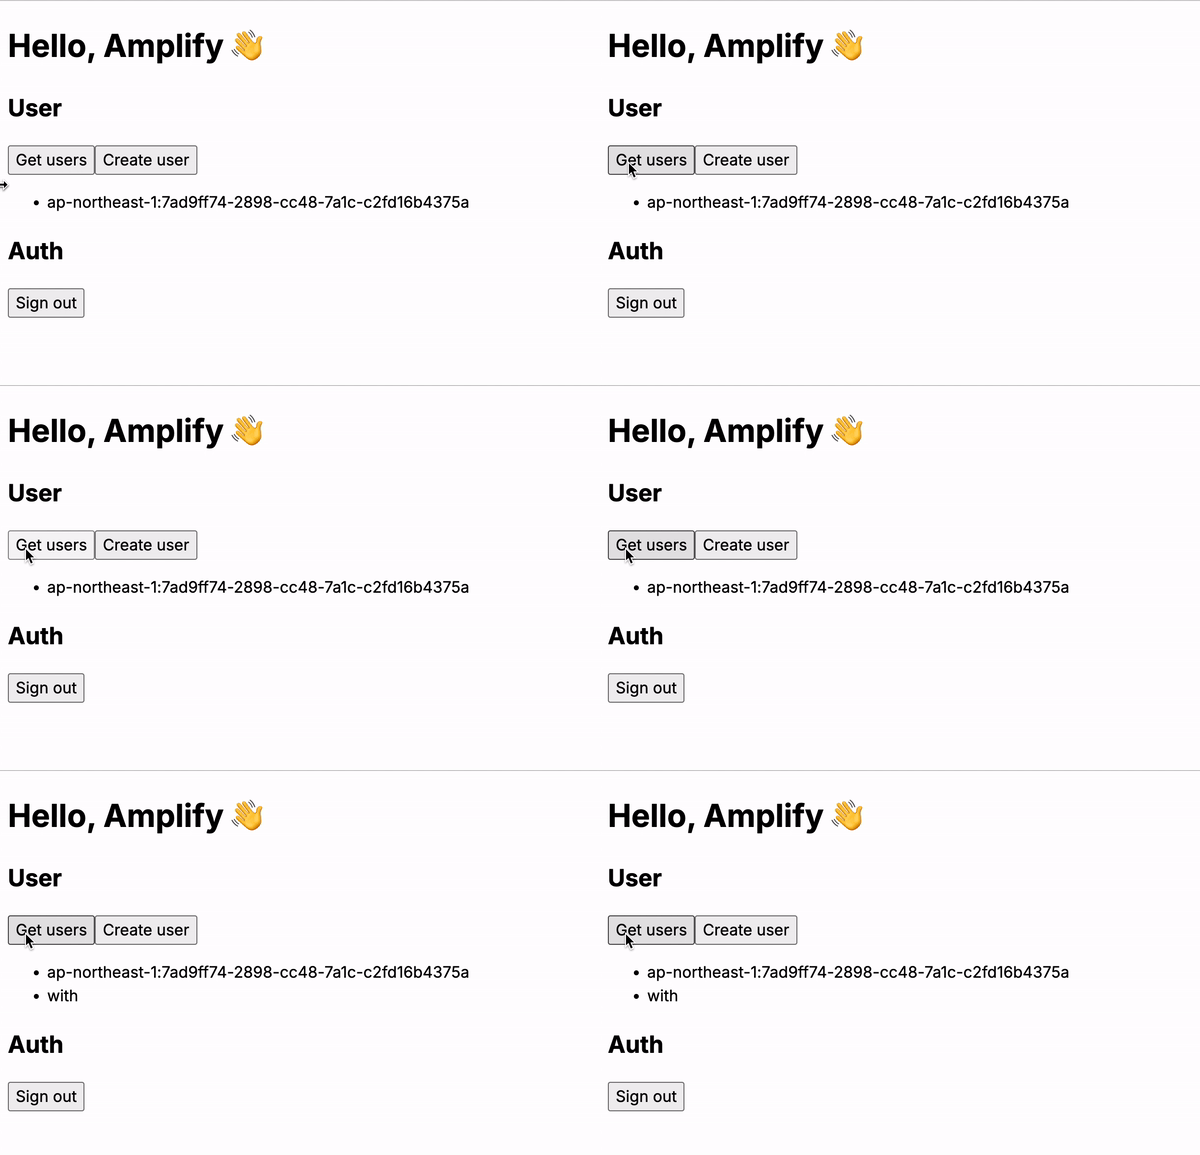
sub が一致しているwithと一致していないwithoutを追加してみて、どれがデータフェッチできるか確認してみましょう。

想定通り、元々追加した Item とwithのみが取得できました!
認証の結果によって取得できるデータが異なる RLS を実現することができました。
最後に
ここまで読んでいただきありがとうございました。
バックエンドの基盤が AWS にあるが、一部 Supabase も利用したいケースが捗りそうですね!ちなみに、サードパーティ認証料金は、先述の Pro プラン + $0.00325 per MAUです。(お安いのかな?)
もし犬専用の音楽アプリに興味を持っていただけたら、ぜひダウンロードしてみてください!
Discussion